Målade hushyllor –
Painted house shaped shelves

Målade hushyllor från Craft & Creativity

Husformade hyllor ser man just nu lite överallt i inredningstidningar, på mässor och i butiker. Istället för att köpa färdigmålade kan det vara roligare att göra dem precis som man vill ha dem. Måla hela hyllan, bara utsidan, insidan eller endast bakstycket som vi gjorde med våra hyllor. Jag och min kollega Annika valde att använda färg från Martha Stewart Crafts och Plus Color men du kan även välja kalkfärg, tavelfärg eller metallicfärg.
————
House-shaped shelves are really popular right now and you can see them everywhere – in interior magazines, at fairs and in stores. Instead of buying pre-painted, it can be more fun to paint them just the way you want them. Paint the entire shelf, just the outside, the inside or only the back like we did. My colleague Annika and I chose to paint these shelves with paint from Martha Stewart Crafts and Plus Color, but you could also choose chalk paint, blackboard paint or metallic paint. 

Målade hushyllor från Craft & Creativity

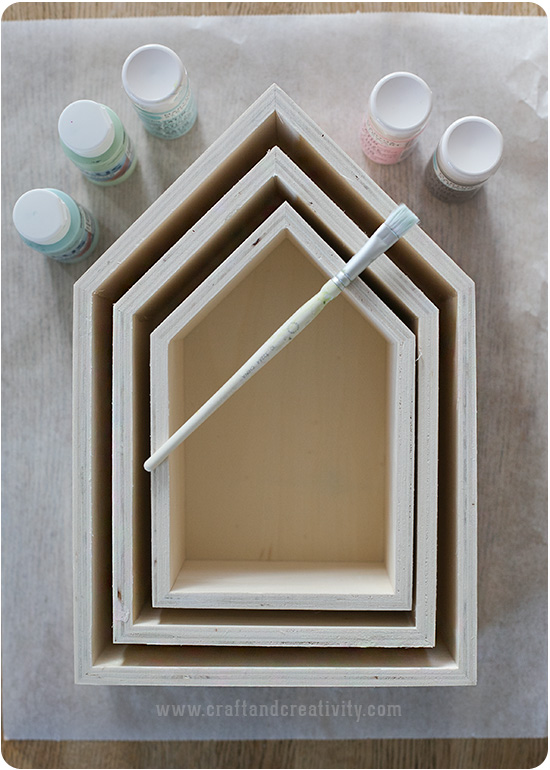
Du behöver: Hushyllor (dessa såldes i 3-pack), färg (t ex Plus Color eller Martha Stewart Crafts färger), pensel och något underlag när du målar, t ex bakplåtspapper eller en tidning.
Gör så här: Måla 1-2 lager färg på de områden du vill ha i färg. Tejpa med maskeringstejp om du vill. Vi målade på fri hand. Färgen vi använde torkar på ca 30 min och du behöver inte grundmåla innan.
———–
You will need: House shaped shelves (these were sold in packs of three), paint (eg Plus Color or Martha Stewart Crafts), a paint brush, and some kind of protection for your table top, like baking paper or a magazine.
Do like this: Paint 1-2 coats of paint on the areas that you want to color. Use masking tape if you like. We painted freehand. The paints we used dries in about 30 minutes and you don’t have to use primer.

Målade hushyllor från Craft & Creativity

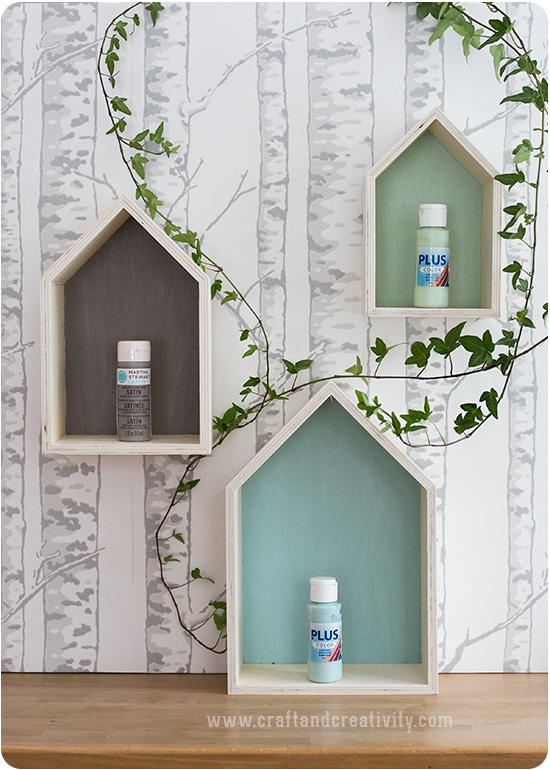
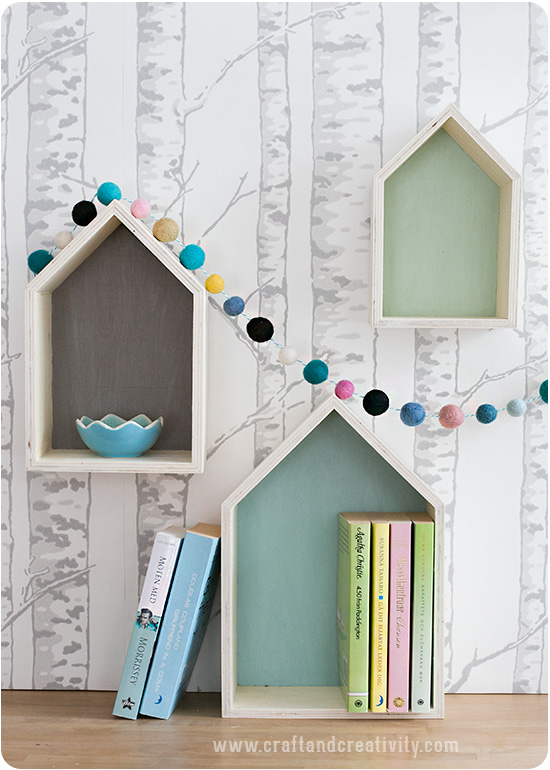
Vi valde följande nyanser: Grey Wolf (Martha Stewart Crafts), Spring green (Plus Color) och Ice blue (Plus Color). Den björkmönstrade tapeten kommer från Duro och heter Karelia.
———–
We chose the following color tones: Grey Wolf (Martha Stewart Crafts), Spring green (Plus Color) and Ice blue (Plus Color). The wallpaper comes from Duro and is called Karelia.

Målade hushyllor från Craft & Creativity

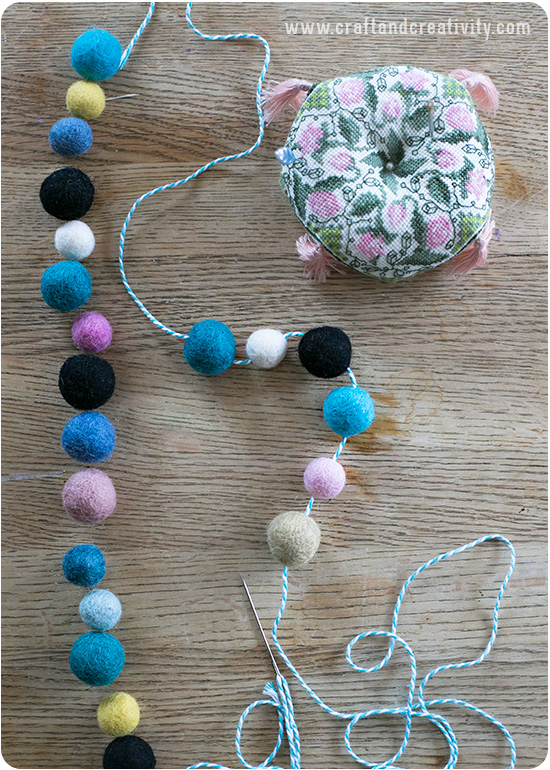
En girlang med ullpärlor blir en fin dekoration tillsammans med hushyllorna och den går extremt snabbt att göra. Stick en nål trädd med t ex tvinnat bomullssnöre genom ullpärlorna och kombinera färger och storlekar efter eget tycke.
———–
A wool bead garland makes a pretty decoration together with the shelves and you can make one in just a few minutes. Stick a needle threaded with twine through the wool beads and combine colors and sizes any way you want. 

Dinosauriepyssel – Dino crafts

Dinosauriepyssel från Craft & Creativity

Det här är ett kul pyssel för vuxna och barn att göra tillsammans! Låt kreativiteten flöda fritt och måla plastdinosaurier i olika färger och mönster. Dekorera dem sedan med bollar, kronor och roliga hattar. De blir fina att ha som prydnad och är dessutom roliga att leka med!
————–
This is a fun crafts for grownups and kids to do together! Let your creativity run wild and paint plastic dinosaurs in different colors and patterns. Decorate them with pom-poms, crowns and funny hats. The dinos look great as decoration and are also fun to play with!

Dinosauriepyssel från Craft & Creativity

Du behöver: Plastdinosaurier eller andra plastdjur, hobbyfärg (t ex Plus Color eller Martha Stewart Crafts färger) eller sprayfärg, limpistol och olika dekorationer som t ex plasthattar, kronor, plastögon, pompom-bollar, små påskkycklingar och pärlor.
Gör så här: Måla dina dinosaurier med hobbyfärg eller sprayfärg. Ett lager färg räcker för det mesta men testa dig fram. Färgen kan flagna om man leker mycket med dinosaurierna så lacka dem gärna med decoupagelack eller akryllack om du vill använda dem som annat än prydnad. Låt färgen torka (tar ca 30 min) och dekorera dinosaurierna efter eget huvud. Det är nu det riktigt roliga börjar! Vi limmade fast hattar, pompoms, kronor och ögon med limpistol (akta fingrarna, limmet blir varmt!).
———-
What you need: Plastic dinosaurs or other plastic toy animals, hobby paint (eg Plus Color or Martha Stewarts Crafts paint) or spray paint, a glue gun and various decorations such as plastic hats, crowns, plastic eyes, pom-poms, tiny Easter chicks and beads. 
Do like this: Paint your dinosaurs with acrylic paint or spray paint. One coat of paint is usually enough, depending on the paint you use. The paint can rub off if you play a lot with the dinos so add a layer of decoupage lacquer or acrylic varnish if you want to use them for more than pure decoration. Let the paint dry (takes about 30 min) and decorate the dinosaurs any way you want. This is when the real fun begins! We glued on hats, pom-poms, crowns and eyes with a glue gun (mind your fingers, the glue becomes very hot!).

Dinosauriepyssel från Craft & Creativity

Dinosauriepyssel från Craft & Creativity

Dinosauriepyssel från Craft & Creativity

Dinosauriepyssel från Craft & Creativity

Dinosauriepyssel från Craft & Creativity

Dinosauriepyssel från Craft & Creativity

Dinosauriepyssel från Craft & Creativity

Dinosauriepyssel från Craft & Creativity

Våra dinosaurier diggar Beatles som ni kanske har noterat… För mer dinosaurie-inspiration ta en titt hos Karin & Freja på Pysselbolaget som har skapat fantastiska party-dinos!
————
Our dinosaurs are huge Beatles fans as you may have notices… For more dino-inspired visit Karin & Freja’s craft blog Pysselbolaget and take a look a their party animals!