
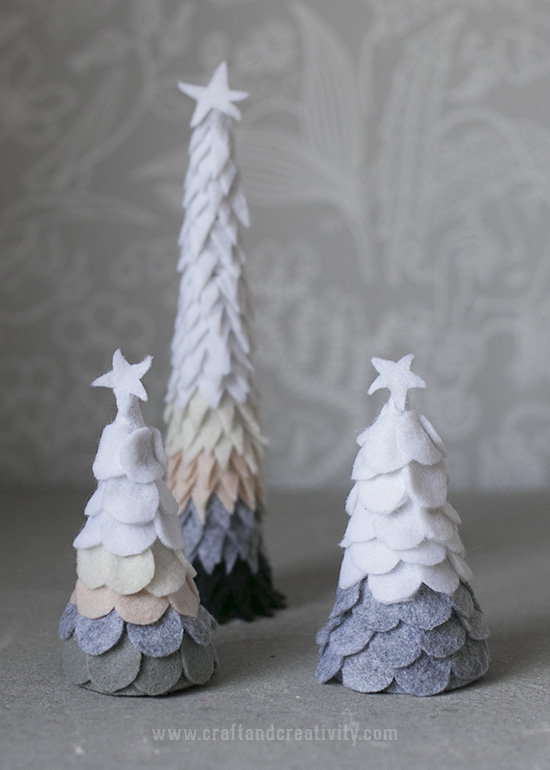
Hobbyfilt är ett roligt material att jobba med eftersom den är enkel att klippa i och repar inte upp sig. Här har jag gjort snötäckta granar med pappstrutar som bas. Läs vidare för min steg-för-steg beskrivning.
———
Craft felt is a fun material to work with because it’s easy to cut and it doesn’t fray. Here I’ve made three snow-covered fir trees with papier maché cones as base. Continue reading for my full tutorial.
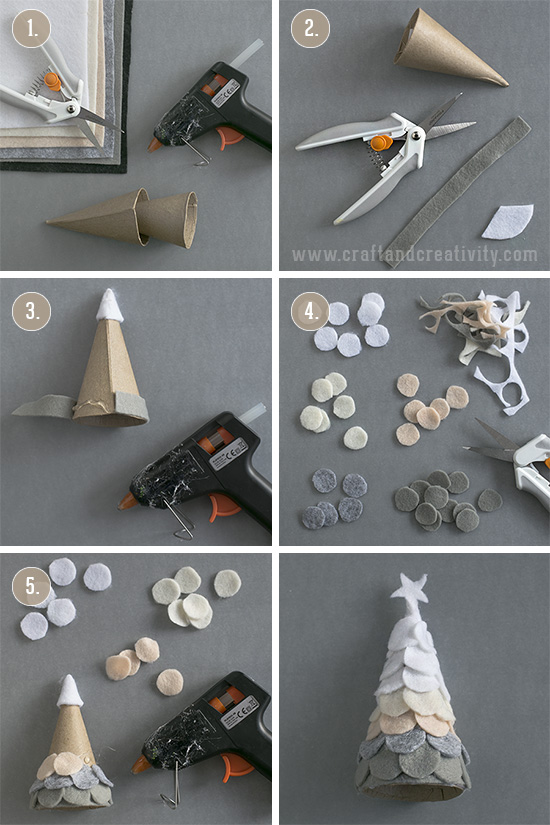
- Du behöver: Hobbyfilt i olika nyanser, en sax, en limpistol och pappstrutar. Jag använde hobbyfilt i en mixad förpackning med julfärger där både vitt, grått, beige och svart ingick.
- Gör så här: Klipp till en remsa filt som ska täcka botten av julgranen och en bit som ska täcka toppen.
- Värm din limpistol och limma remsan längst foten av granen och den andra biten runt toppen.
- Klipp till en rund bit hobbyfilt och använd den som mall för att klippa till resten av cirklarna. Till mina granar som är 11 cm höga använde jag ca 50 st cirklar och de är 2 cm i diameter.
- Limma fast cirklarna på pappstruten. Låt dem överlappa lite och gör ett varv i taget. Börja längst ner och jobba dig uppåt, mot toppen.
- Jag avslutade med att klippa till små stjärnor av filt och limmade dem på toppen av julgranarna.
- You will need: Craft felt in different colors, a pair of scissors, a glue gun and papier maché cones.
- Do like this: Cut a strip of craft felt to cover the foot of the Christmas tree and a piece to cover the top.
- Preheat your glue gun and glue the felt strip around the foot of the tree and the other piece of felt around the top.
- Cut a round piece of craft felt and use it as a template to cut the rest of the circles. For my 11 cm high fir trees I used about 50 circles and they are 2 cm in diameter.
- Glue the circles to the papier maché cone. Let them overlap a little bit and do one row at a time. Start at the bottom and work your way to the top.
- I finished off by cutting out small felt stars and glued them to the top of the Christmas trees.
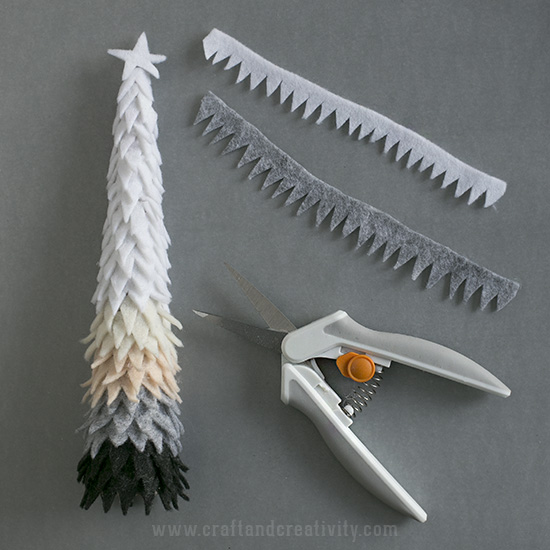
Du kan göra en annan variant genom att, istället för cirklar, klippa taggiga remsor av hobbyfilten och limma dem på pappstruten, ett varv i taget. Även här bör du börja längst ner och avsluta vid toppen.
———-
You can very the look of the tree by cutting jagged stripes of the craft felt instead of circles and glue them to the papier maché cones, one row at a time. Again, you should start at the bottom and work your way up.
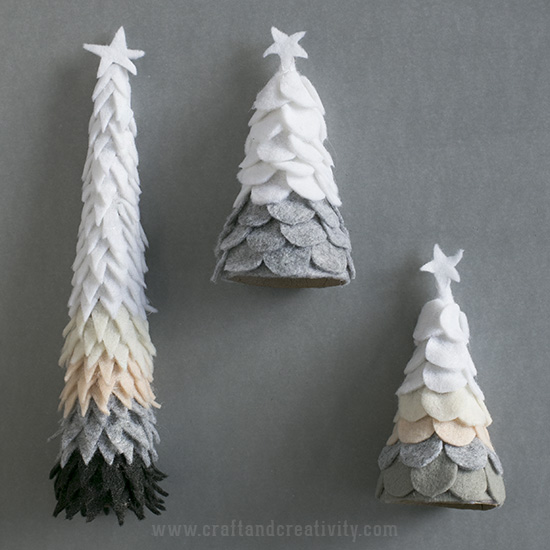
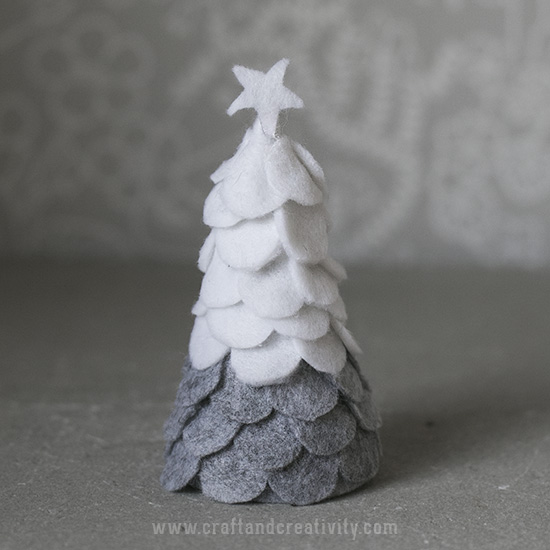
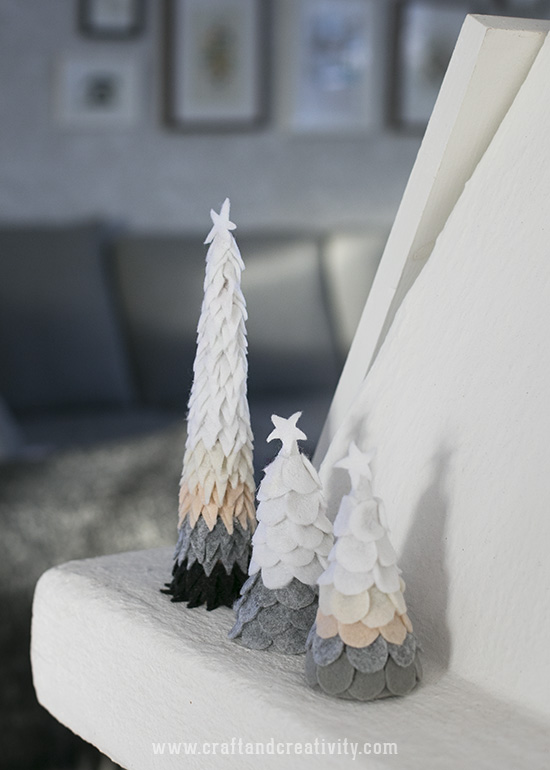
Så här ser granarna ut när de är klara. /
And this is what the trees look like when they are done.
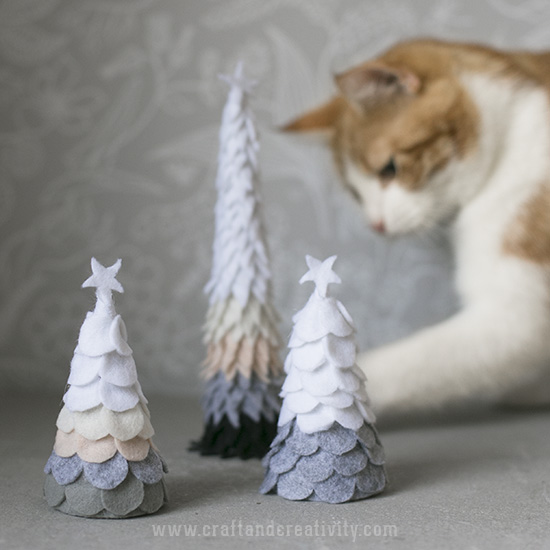
Och som vanligt hade jag en liten medhjälpare när jag skulle fota det färdiga resultatet. Freddie tycker förstås att granarna passar mycket bättre som kattleksaker än som julpynt.
———–
And as usual I hade a little assisistant when taking photos of the finished result. Freddie thinks that the trees are much better suited as cat toys rather then Christmas decorations.
Ha en riktigt fin andra advent! / Have a wonderful 2nd Sunday of Advent!
Vilka fina!! 🙂
Tack Anna! 🙂 /Helena
Så fina! Jag gillar färgkombon 🙂