Wraparmband går att variera i det oändliga, beroende på vilken tjocklek och färg på lädersnören du använder och vilken sorts pärlor du väljer. Gör ett armband som räcker ett, två eller ännu fler varv runt handleden – ett roligt och enkelt pyssel som är lätt att lära sig! Eftersom nylontråden som du binder med är styv behöver du inte ens någon nål. Som lås fungerar det utmärkt med en vanlig knapp!
———–
Wrap bracelets can be varied in so many different ways, depending on the thickness and color of the leather strings and what kind of beads you choose. Make a bracelet that you can wrap once, twice or several times around your wrist – a fun and simple craft that is easy to learn! Since the nylon thread is stiff, you don’t even have to use a needle.
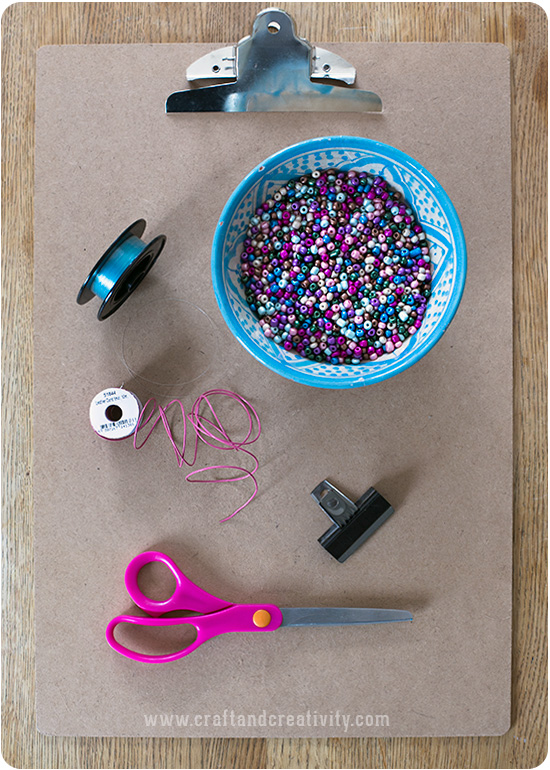
Allt du behöver är: 0,25 mm tjock nylontråd/fiskelina (ej elastisk), pärlor, lädersnöre (1-2 mm tjockt), en knapp och en sax. En knytplatta med extra klämma förenklar arbetet. Till ett dubbelt armband behöver du 1 m lädersnöre och ca 1,3 meter nylontråd. Jag valde det tunnare lädersnöret tillsammans med 5 mm stora rocaipärlor och då gick det åt 65 pärlor.
———–
All you need is: 0.25 mm thick non elastic nylon thread, beads, leather cord (1-2 mm thick), a button and a pair of scissors. A clipboard with an extra clip simplifies your work. For a double bracelet you need 1 m (3 ft) leather cord, about 1.3 m (4 ft) nylon thread and approx 65 beads if you use 5 mm beads.
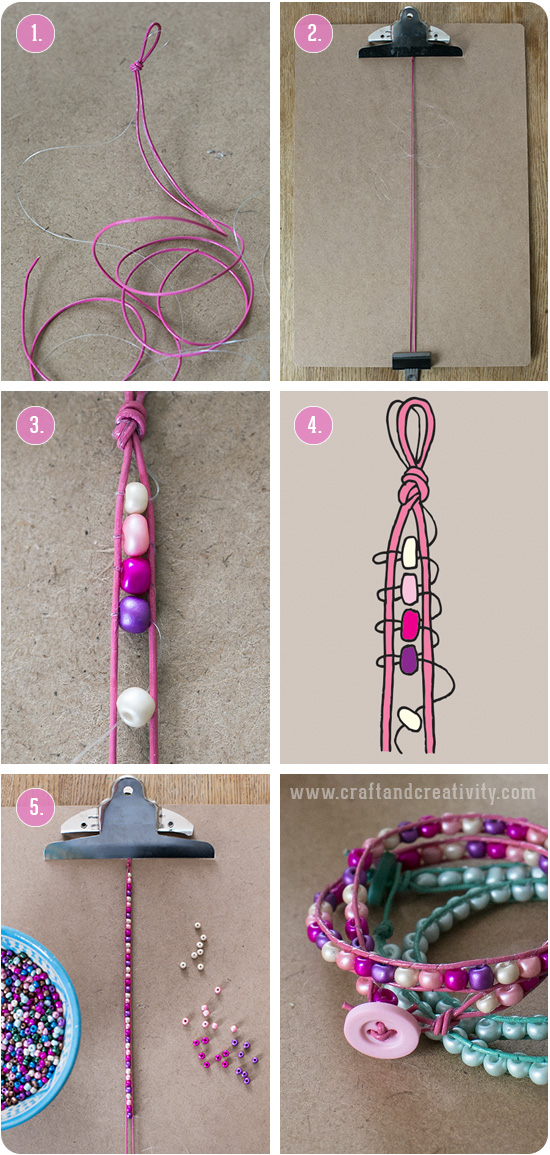
- Gör så här: Vik lädersnöret på hälften och knyt en knut för att bilda en ögla som är lika lång som knappen som du ska låsa med. Tag med ena änden av nylontråden för att fästa den i samma knut.
- Kläm fast öglan överst på knytplattan och kläm fast lädersnörets två ändar längst ner på plattan så att de båda snörena löper parallellt.
- Nu är det dags att börja binda pärlorna i mitten av lädersnörena. Rocaipärlorna jag använde varierar lite i tjocklek så välj gärna pärlor som är ungefär lika tjocka.
- Nylontråden ska runt det högra lädersnöret, genom pärlan, runt det vänstra lädersnöret och igenom samma pärla igen. Upprepa samma procedur för var och en av pärlorna, som jag illustrerat i skissen ovan. Dra åt nylontråden för att få ett jämnt resultat.
- Fortsätt tills armbandet mäter så långt som du vill ha det, beroende på om du vill ha det ett, två eller flera varv runt handleden.
- Du kan även välja att göra helt enfärgade armband. Välj mindre pärlor om du vill eller öka på tjockleken på lädersnöret till 2 mm, beroende på vilken effekt du vill uppnå.
——–
- Do like this: Fold the leather cord in half and tie a knot to form a loop that is as long as your button. Bring one end of the nylon thread into the knot to secure it.
- Use the clip to secure the loop at the top of the clipboard. Secure the two ends at the bottom with a second metal clip, so that the two leather cords runs parallel.
- Choose beads that are similar in size and start weaving.
- Run the nylon thread around the right leather cord, through the bead, around the left leather cord and through the same bead again. Repeat the same procedure for each one of the beads, as illustrated above. Make sure to tighten the nylon thread to get an even result.
- Continue until the bracelet is as long as you want it, depending on whether you want it one, two or more times around your wrist.
- You can also choose to make a solid color bracelet. Use smaller beads if you like, or increase the thickness of the leather cord to 2 mm, depending on what look you want.
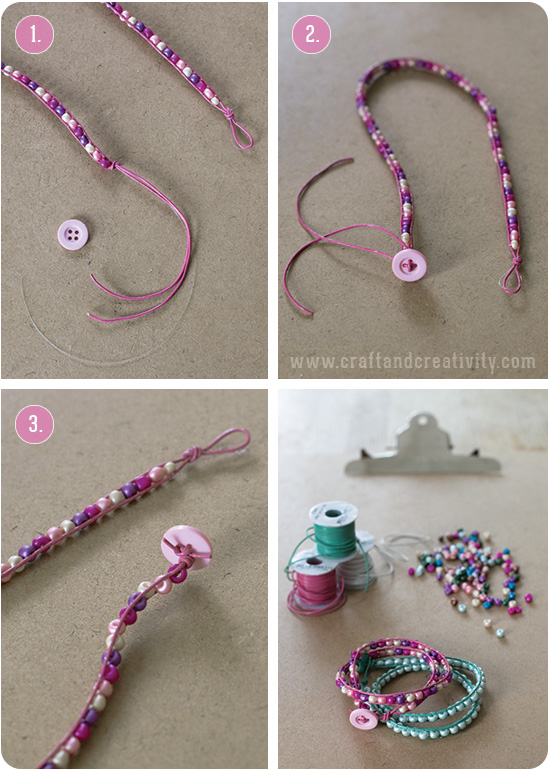
När armbandet mäter rätt längd knyter du ihop de båda ändarna tillsammans med nylontråden. Klipp av nylontråden. Fäst knappen genom att trä de båda ändarna genom var sitt hål och sedan tillbaka igen. Knyt en knut på undersidan och klipp av lädersnöret.
———
When the bracelet measures the right length, tie the two ends together and include the nylon thread in the knot. Cut the nylon thread. Attach the button by threading both ends through the button holes and then back again. Tie a knot on the bottom of the button and cut the leather cord.
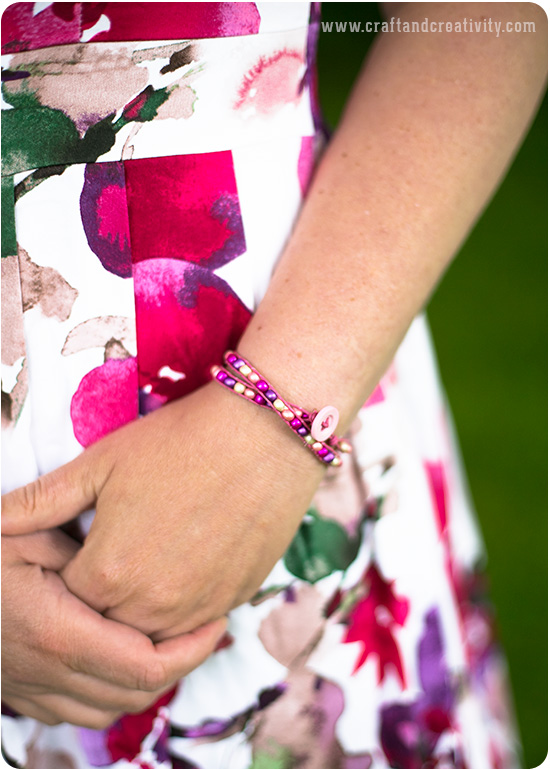
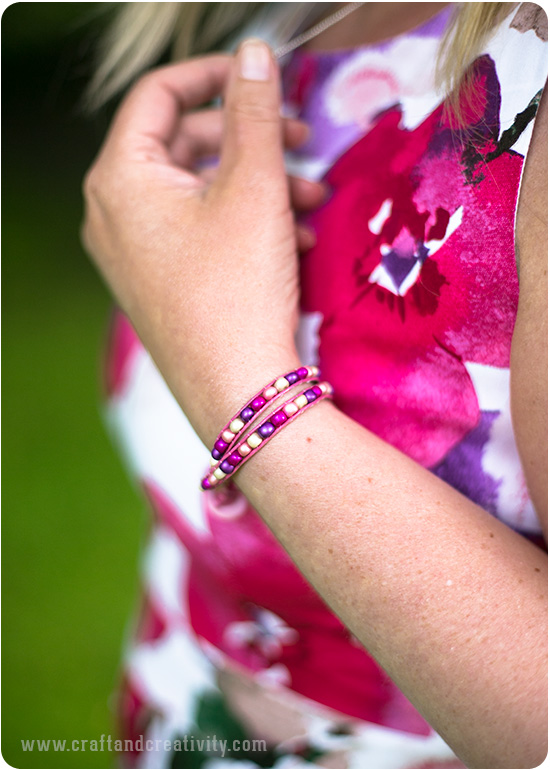
Jag passade på att matcha armbandet med en av mina klänningar.
——–
I took the opportunity to match the bracelet with one of my dresses.

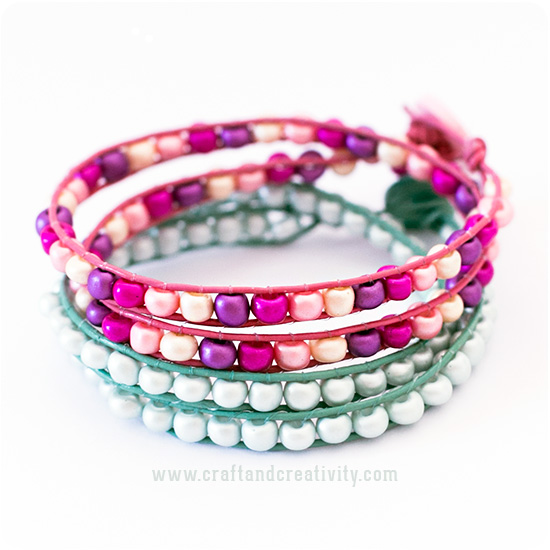
These bracelets are beautiful!
Paige
http://thehappyflammily.com
Vad fina armband!
Nice! I’m going to try this!
Greets, Inge
Very good job! It looks lovely.
great and easy to follow tutorial! I like your blog a lot.
MEN så snyggt! Detta måste jag testa omedelbart!
Oj, vad fint! Jag som letat efter lite nya pärl-idéer inför hösten! Detta var det bästa hittills!!
Pingback: Läderarmband med stenpärlor – Leather bracelet with stone beads | Craft & Creativity – Pyssel & DIY
I have one question. Since you fold up the nylon thread at the top, knotted with the leather knot, do you use the two sides of the nylon thread to go into each bead every time? If not, what happens to the second length of nylon?
Good question! I cut off one of the lengths and use the other one to weave in the pearls. 🙂 All the best, /Helena
Vos bracelets sont bien jolis. Bonne soirée.