
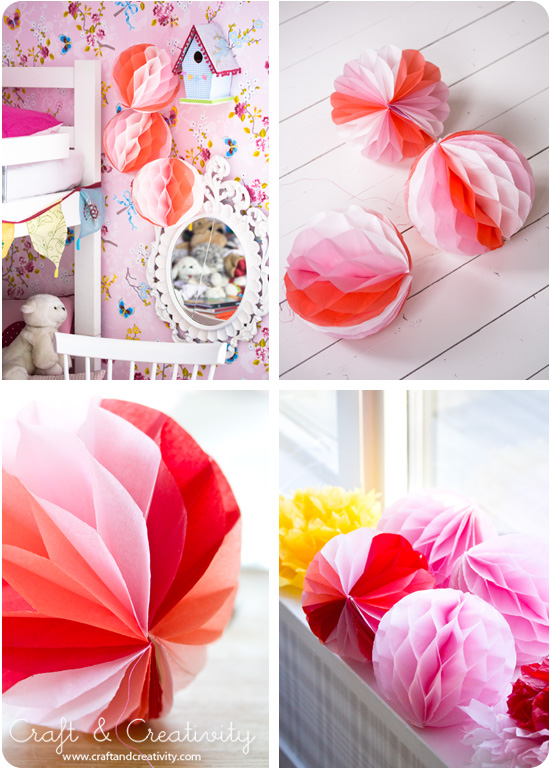
Idag tänkte jag visa hur man gör eget honeycomb-papper (dragspelspapper) och hur man sedan kan göra fina pompom-bollar av papperet. Bollarna är snygga till kalas, bröllop, dop eller bara hängande hemma som en inredningsdetalj. Min beskrivning nedan visar hur man gör ett 25×35 cm stort honeycomb-papper som räcker till tre bollar (18 cm i diameter). Du behöver 9 ark silkespapper och minst en rulle dubbelhäftande tejp för att göra 3 bollar.
Inspirationen kommer från den inspirerande sidan Mr. Printables. Jag har dock gjort om idén lite efter eget huvud. Bland annat använder jag dubbelhäftande tejp eftersom jag märkt att det håller mycket bättre än att limma med limstift.
————
Today I thought I’d show you how to make your own honeycomb paper and how to make pretty pom pom paper balls out of it. These paper balls are great for parties, weddings, christenings or simply use them as an interior detail in your home. My tutorial shows you how to make a 25×35 cm lagre honeycomb paper which is enough for three paper balls (18 cm in diameter).
This craft was inspired by a great tutorial over at Mr. Printables. However, I made mine a bit differently. For example, I used double sided adhesive tape after noticing that it holds better then glue stick.
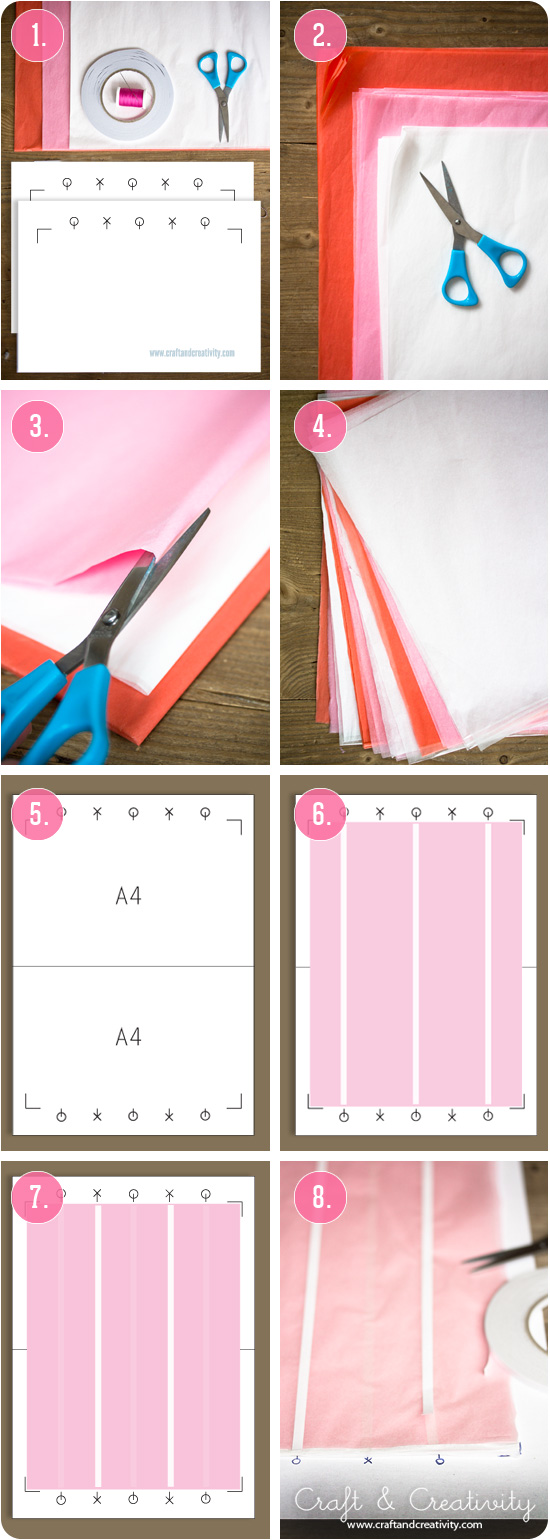
- Du behöver: 9 ark silkespapper 50×70 cm, en stor rulle dubbelhäftande tejp (min är 6 mm bred), vass sax, två ex av min mall (ladda ner här), sytråd, nål och en bit vanlig tejp för at tejpa ihop mallarna.
- Gör så här: Välj färg/färger på ditt silkespapper. Den här gången valde jag tre olika färger, tre ark av varje (vit, rosa & orange/korall). Vik arken på hälften och sedan en gång till = 36 lager silkespapper med måttet 25×35 cm.
- Klipp i viken så du får 36 separata ark.
- Mixa färgerna. Jag valde att växla färg efter 4 ark för att få randiga bollar.
- Nu ska alla ark tejpas. Skriv ut 2 ex av min färdiga mall för att underlätta arbetet. Tejpa ihop de två mallarna som bilden visar ovan. Min mall passar ark som är 25×35 cm. Vill du göra större eller mindre bollar får du göra en anpassad mall med dina egna mått.
- Lägg ditt första ark silkespapper på plats. Tejpa med den dubbelhäftande tejpen mellan varje O. Det blir totalt 3 linjer. Ta bort skyddspapperet från tejpen.
- Lägg nästa ark silkespapper ovanpå det första. Detta ark tejpar du mellan varje X, det blir totalt 2 linjer.
- Fortsätt med alla 36 ark, vartannat ark tejpas mellan X:en och vartannat ark tejpas mellan O:na. Oroa dig inte om silkespapperet hamnar lite på snedden eller om allt inte ser perfekt ut, resultatet kommer bli bra ändå.
—–
- You will need: 9 sheets of 50×70 cm tissue paper, one big roll of double sided adhesive tape (mine is 6 mm wide), sharp scissors, two copies of my template (download here), sewing thread,a needle and a piece of tape to assemble the two templates.
- Do like this: Select the color / colors of your tissue paper. This time, I chose three different colors, three sheets of each (white, pink & coral). Fold the sheet in half and then again = 36 layers tissue paper with the dimension 25×35 cm.
- Cut through all the papers in the fold to get 36 separate sheets.
- Mix the colors. I chose to change color after 4 sheets to get a striped effect.
- Now, time to tape all of the sheets. Print two copies of my template to simplify your work. Tape the two templates together as shown above. My template is adapted for sheets that are 25×35 cm. If you wish to make larger or smaller paper balls, you need to make a custom template with your own measurements.
- Put the first sheet of tissue paper in place. Tape with double sided adhesive tape between each O. There will be a total of three lines. Remove the backing from the tape.
- Place the next sheet of tissue paper on top of the first. This time tape between each X and there will be a total of two lines.
- Continue with all 36 sheets. Every other sheet is to be taped between the X’s and every other sheets is to be taped between Os. Do not worry if the tissue paper ends up a bit crooked or if not everything looks perfect, the result will be fine anyway.
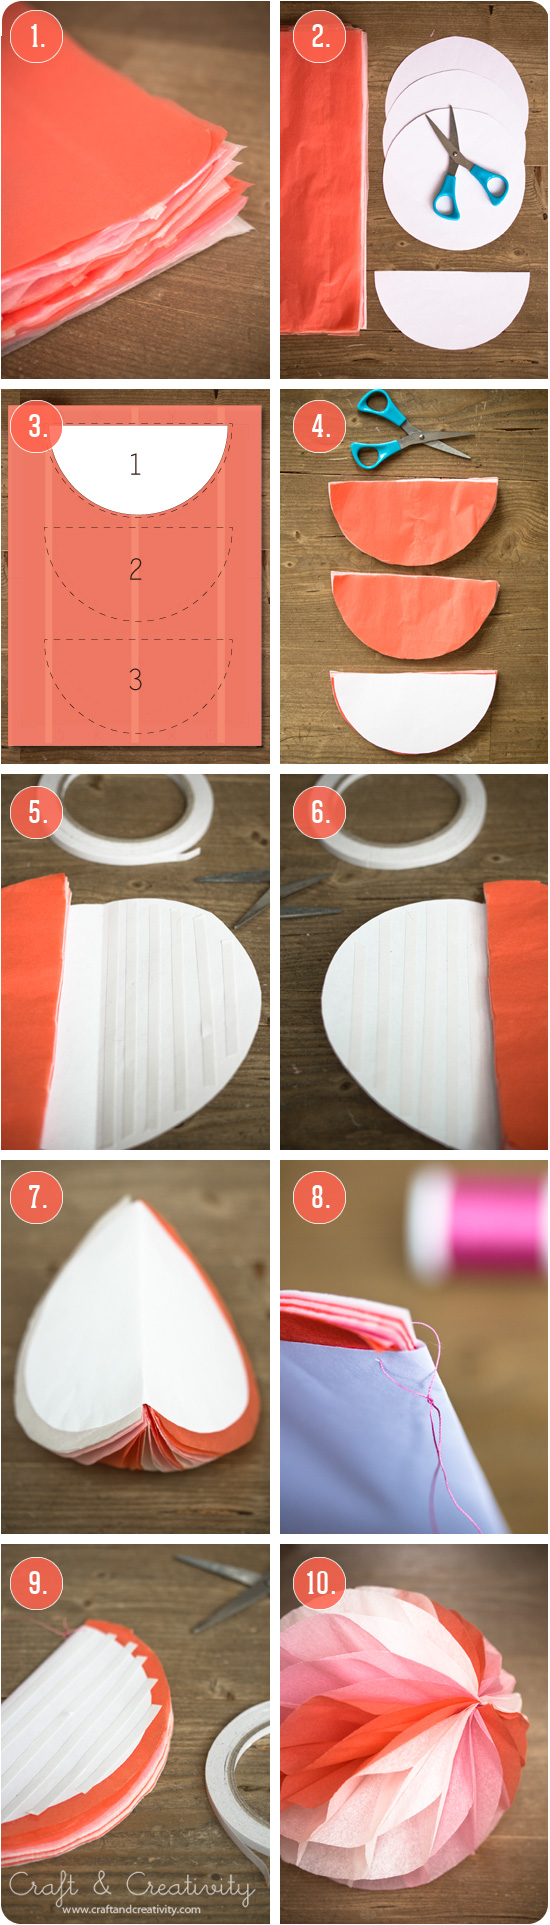
- Nu är ditt honeycomb-papper klart. Det är dags att göra bollarna!
- Skriv ut mina mallar (ladda ner här). Klipp ut 1 ex av halvmånen och 3 ex av den runda. Det fungerar bra med vanligt skrivarpapper.
- Lägg halvmånemallen på honeycomb-papperet och måtta så du får ut tre halvmånar. Notera att mallarna måste ligga åt samma håll som mina ovan.
- Klipp ut dina tre halvmånar.
- Vik det ena runda papperet på mitten. Lägg honeycomb-papperet i mitten av viket. Fäst det insidan av det vita papperet mot silkespapperet med dubbelhäftande tejp (eller limstift), först på den ena sidan…
- … och sedan på den andra sidan.
- Så här ska det se ut när du tejpat klart.
- Trä nålen med sytråd. Stick den genom alla lager papper i ena hörnet av halvmånen. Knyt en knut ca 1 cm ut på tråden, annars går inte bollen att fälla ut. Klipp av tråden. Gör likadant med andra hörnet men klipp inte av tråden utan spara den till upphängning.
- Fäst dubbelhäftande tejp på ena sidan av din halvmåne. Eller limma med limstift. Tag bort skyddspapperet från tejpen. Fäll upp bollen så att de vita utsidorna sidorna möter varandra och tejpen fäster.
- Volià, en boll! Upprepa punkt 5-9 för de andra två pappersbollarna.
———
- Now your honeycomb paper is ready. It’s time to make the honeycomb pom-poms!
- Print my templates (download here). Cut one example of the half circle and three copies of the round. Plain printer paper will work just fine.
- Place the half circle template on top of your honeycomb paper and measure so you get three half circles. Note that the templates must lie in the same direction as mine above.
- Cut out your three half circles.
- Fold one of the round papers in half. Add one of your honeycomb paper half circles in the middle of the fold. Tape the inside of the white paper to the honeycomb paper with adhesive tape (or glue sticks), first on one side …
- … and then on the other side.
- This is how it should look when your done taping.
- Thread the needle. Stick the needle through all the layers of paper in one corner of half circle. Tie a knot about 1 cm out on the thread, otherwise the ball won’t open. Cut the thread. Do the same with the other corner, but don’t cut the thread, save it for hanging.
- Attach double-sided adhesive tape on one side of your half circle. Or glue with glue stick. Remove the backing from the tape. Open up the ball so that the white sides of the paper face each other and the tape sticks.
- Volia, your pom-pom is ready! Repeat steps 5-9 for the other two paper balls.
Jag ska inte sticka under stol med att det är pilligt och tidskrävande att göra honeycomb-papper men för färdiga pompom-bollar kan man få betala ganska mycket pengar, så det kanske kan vara värt det? Att göra dessa tre bollar tog mig drygt en timme. Det hade kanske gått snabbare om jag inte hade haft så mycket hjälp av katten Minus… 😉
——–
I will not deny that making honeycomb paper is a bit tricky and time consuming. But on the other hand buying ready-made ones can be quite expensive and I really think it’s worth it. Making these three pom-poms took me just over an hour. Perhaps it would have gone quicker if I hadn’t had so much help from our cat Minus… 😉


