
När jag flyttade in i mitt nya pysselrum i källaren ville jag bygga mig en håltavla (på engelska kallas det pegboard) att använda dels som förvaring av pysselmaterial och dels som en inspirationsvägg. Jag tänkte mig en mix mellan de håltavlor/pegboards som är så populära framför allt i USA (se exempel 1, 2, 3 och 4) och de rosor i korsstygn som jag sett målade på väggar (t ex hos Eline Pellinkhof och Shabby-Roses-Cottage). Jag hade ingen aning om hur man bygger en håltavla men insåg snabbt att det behövs ett ramverk på baksidan för att få en distans till väggen. Annars skulle det inte gå att hänga krokar i hålen och det var förstås ett av mina önskemål. Ni som följer mig på Instagram har kanske sett några bilder från bygget flimra förbi.
———-
When I moved into my new craft room in the basement, I wanted to build myself a pegboard to use both as a storage for craft supplies and as an inspiration wall. My pegboard is a mix between some of the pegboards I’ve seen (examples 1, 2, 3 and 4) and those pretty cross stitch rose murals that I’ve spotted here and there (eg at Eline Pellinkhof and Shabby-Roses-Cottage). I had no idea how to build a pegboard, but I quickly realized that I needed a framework on the back to get a bit of distance to the wall behind. Otherwise I wouldn’t be able to hang hooks in my pegboard and that certainly was the purpose. Those of you following me on Instagram might have spotted a picture or two from this project.
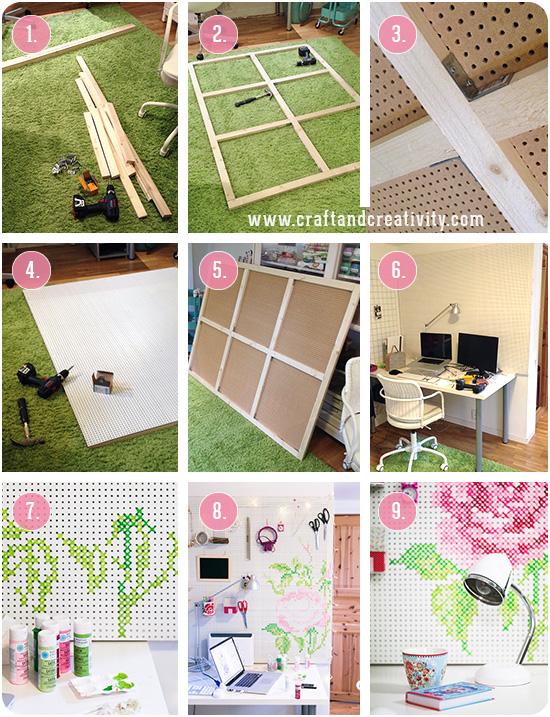
- Så här gjorde jag: Först av allt gjorde jag en ritning som jag tog med mig till ett byggvaruhus där jag lät såga upp alla delar, se skiss nedan.
- Väl hemma igen började jag med ramen och monterade ihop alla delar med hjälp av vinkeljärn som jag skruvade fast med träskruv och en skruvdragare. Ramen blev på så sätt vinkelrät.
- Alla hörn behövde inte vinkeljärn visade det sig, det räckte med hälften av hörnen för att min ram skulle bli tillräckligt stabil.
- När ramen var klar skruvade jag fast den perforerade boarden på ramen. De flesta av skruvarna använde jag runt kanten, och bara några behövdes för att fästa boarden mot mittenpartiet av ramen.
- Så här såg baksidan ut när jag var klar.
- Jag borrade 4 hål, ett i varje hörn av tavlan och monterade tavlan på väggen med hjälp av expanderskruv. När tavlan satt uppe målade jag kortsidan (den enda sidan där den omålade trälisten syntes) vit.
- Dags för korstygnsmålningen. Jag tyckte att det var enklast att måla en färg i taget. Jag måttade ut var mönstret skulle passa bäst och började med den ljusast gröna färgen för att fortsätta med mörkare och mörkare gröna nyanser.
- När alla gröna kryss var målade gick jag över till rosa.
- Allt som allt tog det ungefär två kvällar att måla rosen, 2-3 timmar båda kvällarna. Sedan njöt jag av att det var klart. 😉
———
- Here’s what I did: First of all, I made a drawing and brought it with me to a hardware store. The staff helped me cut the strips of wood and the board into the right dimensions. You can see my drawing below.
- Once back home, I started with the framework and mounted it all together with the help of angle irons, screws and a screwdriver. This helped me keep the frame perpendicular.
- As it turned out, all the corners didn’t need an angle iron, it was enough with half of the corners for my framework to be steady enough.
- When the frame was finished I mounted my perforated board onto the framework. I used most of the screws around the edge and a few screws in the middle.
- Here is what the back looked like when I was done.
- I drilled 4 holes, one in each corner of the board and mounted the pegboard on the wall using anchor bolts. When the board was up on the wall, I painted the short side (where you could see the side of one strip of wood) white.
- Time for my cross stitch painting. I found it easiest to paint one color at a time. I measured out where I wanted my rose to be and started with the lightest green to proceed with darker and darker shades of green.
- When all the green crosses were done, I began with the pink ones.
- All in all, it took me about two evenings to paint the rose, 2-3 hours both evenings. After that I sat down and enjoyed the finished result. 😉

Min ritning ser ut så här. Jag vill passa på att påpeka att jag inte är någon snickare och att min lösning kanske inte är den smartaste eller bästa. Det jag kan säga är att den fungerade för mig och det blev en stabil vägg som fyller mina syften. Min håltavla mäter 162,5×122 cm och är anpassad i storlek efter väggen som den sitter på.
- Materiallista: Trälister med tjocklek 2 cm och bredd 4,5 cm och i längderna som syns på min ritning ovan. Jag bad personalen på butiken såga upp dem åt mig mot en kostnad av ett par tior.
- 1 st vitlackad perforerad board 3 mm tjock och i måtten 162,5×122 cm. Perforerad board finns på Bauhaus i måttet 244×122 cm och även denna fick jag hjälp att såga till i butiken.
- 12 st vinkeljärn som är max 2 cm breda.
- 48 st träskruvar till att fästa vinkeljärnen, max 4 cm långa.
- Träskruv max 2 cm lång till att fästa den hålade boarden på träramen. Ca 60-70 st använde jag.
- 4 st expanderskruvar eller plugg och skruv (beroende på väggunderlag) för att fästa håltavlan i väggen.
- Om du vill måla ett korsstygnsmönster på tavlan behöver du hobbyfärg och en pensel. Jag använde Martha Stewart Crafts® Satin Paint och en vit akrylpensel.
———–
This is what my drawing looks like. I would like to take this opportunity to point out that I am far from a skilled carpenter and that my way of creating this pegboard might not be the smartest nor the best. What I can say is that it worked for me and that it turned out to be a solid pegboard that fulfills all my wishes. My pegboard measures 162,5×122 cm (64×48 inches) and is adapted in size for this particular wall.
- Shopping list: Strips of wood, 2 cm (0.4″) thick and 4,5 cm (1.8″) wide and in the lengths shown in my drawing above. I asked the staff at the store cut them for me and it didn’t cost much extra.
- 1 piece of white perforated board, 3 mm (0.12″) thick and measuring 162,5 x 122 cm (64 x 48″). I found perforated board at the hardware store and got their help to cut it.
- 12 pcs of angle iron up to 2 cm (0.4″) wide.
- 48 pcs of screws, up to 4 cm (1.6″) long, for mounting the angle iron.
- Screws up to 2 mm long for mounting the board onto the framework. I used about 60-70 screws.
- 4 anchor screws or dowels and screws (depending on your type of wall) for mounting the pegboard on the wall.
- If you want to paint a cross stitch pattern on your board you will need acrylic paint and a paintbrush. I used Martha Stewart Crafts® Satin Paint and a white acrylic brush.
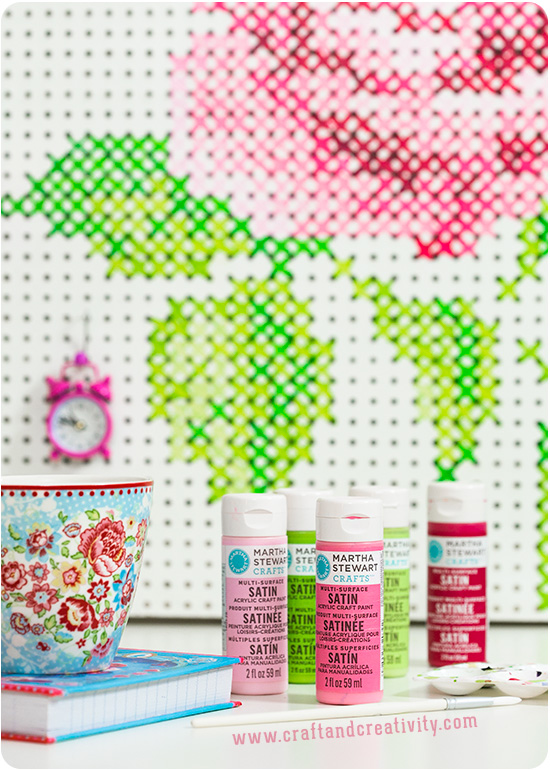
Rosmönstret hittade jag på Pinterest vilket ledde mig till Wild Flower Wallpapers där den går att ladda ner i olika storlekar. Jag har förgäves letat efter upphovsrättkvinnan (eller mannen) till mönstret men gått bet. Är det något som vet så tipsa mig gärna så lägger jag ut information om det här. Det går förstås att använda i princip vilket korsstygnsmönster som helst, huvudsaken antalet rutor i mönstret passar antalet rutor/hål i din tavla. Jag översatte garnfärgerna i broderimönstret till de hobbyfärger jag hade hemma och blandade färgerna sinsemellan för att få fler nyanser. De färger jag använde heter: Pink Carnation, Camellia Pink, Japanese Maple, Scallion, Green Curry och Scottish Highlands och kommer alla från Martha Stewart Crafts.
———–
I found this rose pattern on Pinterest, which led me to Wild Flower Wallpapers where it could be downloaded in different sizes. I have been searching in vain for who has the copyright to the pattern but I have failed. If any of you know, please inform me and I will credit he or she properly. You could use any cross stitch pattern you like, as long as the number of squares in the pattern fit the numbers of squares/holes on your pegboard. I translated the yarn colors from the pattern to the hobby paint I had at home and mixed the colors in between to get more shades. The names of the paint I used are: Pink Carnation, Camellia Pink, Japanese Maple, Scallion, Green Curry and the Scottish Highlands and they are all from Martha Stewart Crafts.
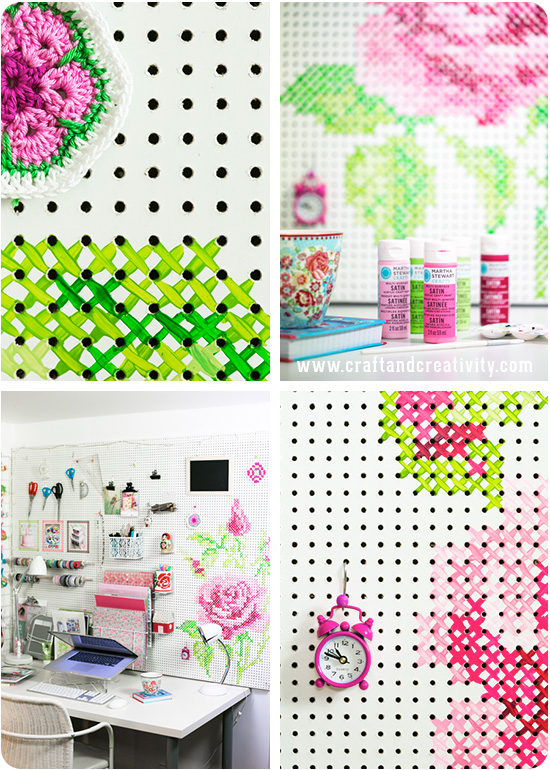
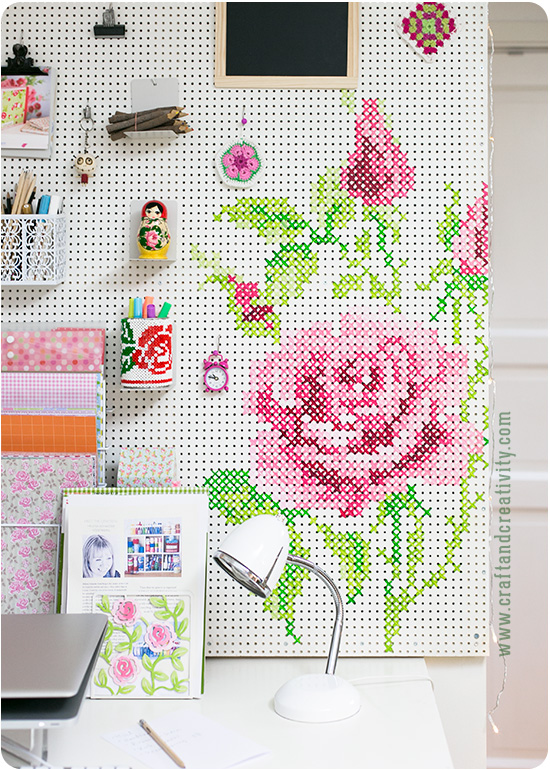
Som ni ser på bilden högst upp till vänster så försökte jag måla kryssen åt samma håll hela tiden, så att det översta penseldraget lutar åt samma håll hela målningen igenom. Ungefär som när man broderar, för att få stygnen åt samma håll. Ni ser också det färdiga resultatet av min håltavla där den hänger över min arbetsplats i nya pysselrummet och jag är faktiskt lite stolt över att jag kunde snickra till den helt själv.
————-
As you see in the image at the top left, I tried to paint the crosses in the same direction all the way through, so that the top brushstroke is leaning in the same direction throughout the painting. Kind of like when you embroider and want to get the stitches in the same direction. You can also see the finished result of my pegboard hanging over my work station in my new craft room and I’m actually a little bit proud that I was able to make this all by myself.
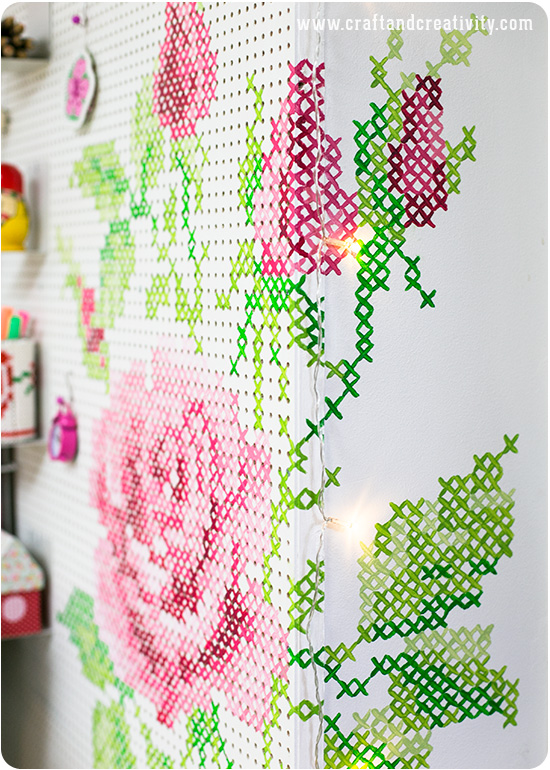
Eftersom håltavlan slutar i ett hörn bestämde jag mig för att fortsätta måla resten av rosen på den släta väggen runt hörnet. Här målade jag på fri hand, vilket ökade svårighetsgraden något… Det går säkert att skissa rutor med blyerts som man suddar bort efter målningen.
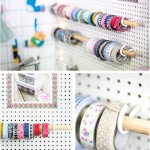
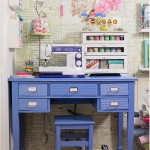
Detta var den första delen pysselinlägg från mitt nya pysselrum. Fler delar kommer framöver, då jag bland annat kommer beskriva hur jag gjorde krokarna till min tavla och skapade en ställning för washitejp & tygtejp. Ni kommer också få se resten av rummet och hur jag valt att inreda det.
————-
Since the pegboard ends into a corner, I decided to continue painting the rest of the rose on the smooth wall around the corner. Here I painted freehand, which wasn’t easy … Another way could have been to draw supporting lines with a pencil and erasing it after painting.
This was the first post of many from my new craft studio. Many more will come and among other things I will show you how I made my own pegboard hooks and the washi tape dispenser I created. You will also have a viewing of the rest of my craft room and see how I chose to decorate it.
Fler inlägg från mitt pysselrum / More posts from my craft room:

Pingback: Creative uses for pegboards that will excite you - Craftionary
Pingback: home: made [ peg boards ] – home:blog
Pingback: Il prend un panneau perforé et le peint en blanc. Un excellent moyen d’optimiser l’espace de rangement!
Pingback: Cross Stitch Is Making Its Mark In Modern Interior Design
Pingback: Förvaring på håltavlan – Pegboard storage | Craft & Creativity – Pyssel & DIY