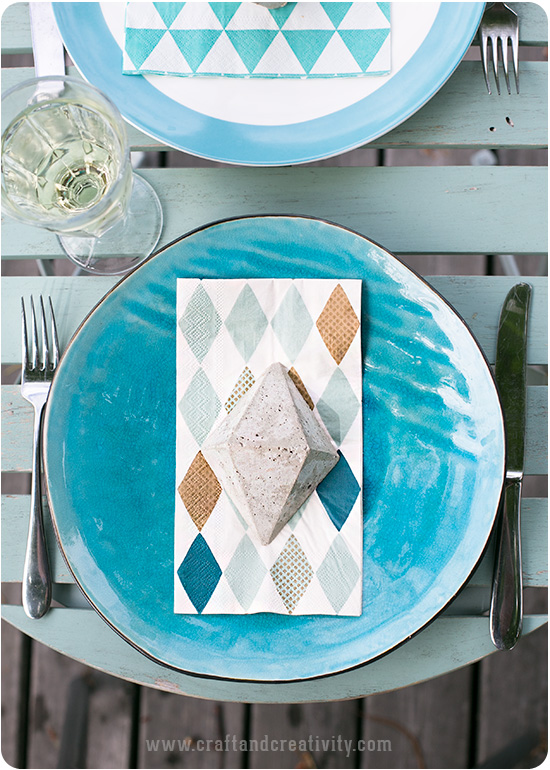
Betongföremål är inte bara snygga utan kan även användas för att hålla ner servetter och fungera som duktyngder när man dukar utomhus. Vi gjöt våra betongdiamanter i formar av papier-maché, precis som med betongbokstaven från tidigare i somras. Följ vår steg-för-steg beskrivning nedan för att se hur vi gick till väga.
———-
Besides from being stylish concrete objects can be used to hold down napkins and table cloths when setting your table outdoors. We used paper mache moulds when making our concrete diamonds, just as with the concrete letter from earlier this summer. Follow our step-by-step tutorial below to learn more.
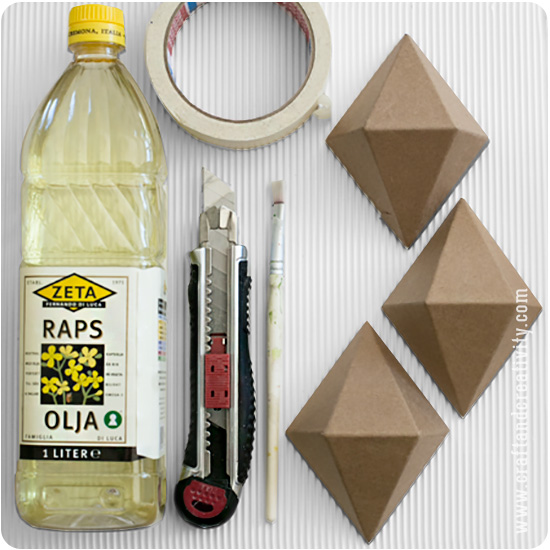
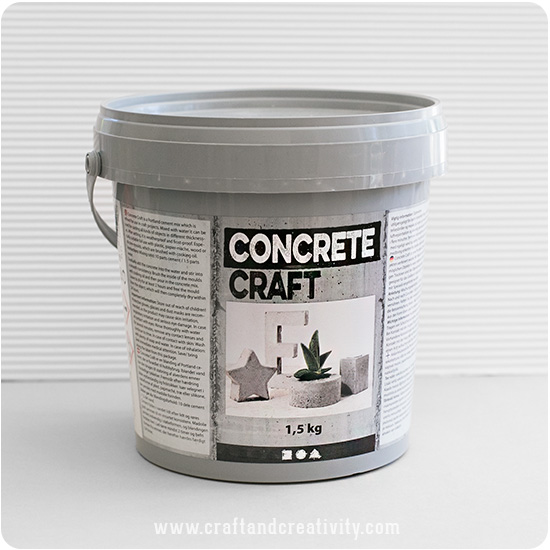
Du behöver: Rapsolja (eller annan vegetabilisk olja), en hobbykniv, en pensel, en rulle maskeringstejp, formar av papier-maché och hobbybetong. När du blandar betongen så kan du t ex använda en tom glassburk av plast och en slev för att röra om betongen med. Använd plasthandskar när du jobbar med betong (vilket vi missade!).
———–
You will need: Vegetable oil, a hobby knife, a brush, a roll of masking tape, papier mache moulds and concrete. When mixing the concrete you need a plastic bowl and a mixing spoon. Use plastic gloves when working with concrete (which we missed).
Vår betong blandas 1,5 del vatten till 10 delar betongpulver, enligt förpackningen. Vi använde lite mer vatten och blandade 5 dl betong med 1 dl vatten. Betongen ska bli mjuk och lätt att forma men inte rinnig. Ju mindre vatten desto snabbare torkar betongen men om betongen är för lös så är den svårare att få loss från pappformen när den torkat. Häll betongpulvret i en plastburk och addera vatten, rör om tills du får en jämn smet. Fyll sedan formarna ganska snabbt så att betongen inte hinner stelna.
———–
The concrete we used is mixed with 1.5 part water and 10 parts concrete. We used a little more water than recommended and mixed 5 dl concrete with 1 dl water (1 dl = 0.42 cups). The less water the quicker the concrete cures, but if the concrete is too loose it’s more difficult to remove the paper maché when the concrete is dry. Pour the concrete in a plastic bucket and add the water, stir until you get a smooth batter. Fill your moulds quickly before the concrete starts curing.
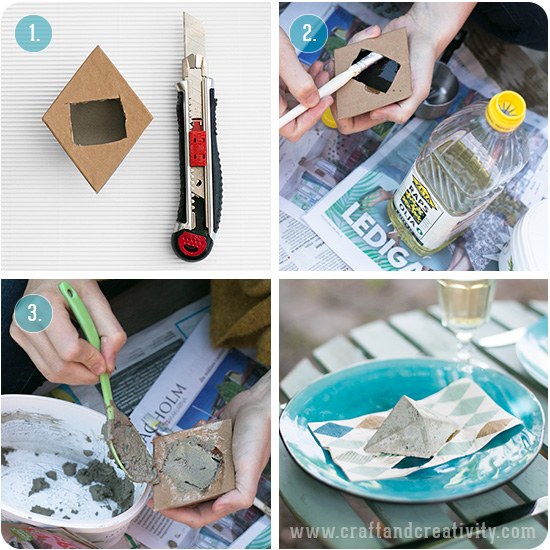
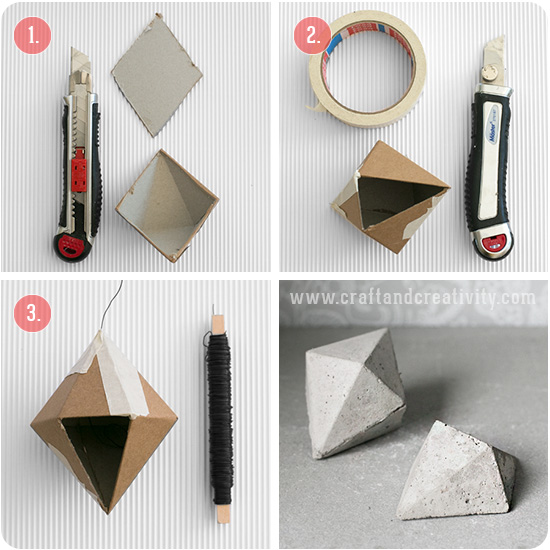
- Gör så här: Skär ett hål i baksidan av pappdiamanten.
- Förflytta dig med fördel utomhus och täck underlaget med tidningspapper. Häll lite olja i pappformen och pensla ut oljan i botten och runt kanterna. Var noga så att du täcker hela insidan av formen.
- Fyll formen med den färdigblandade betongen. Jämna till ytan vid öppningen med en slev. Skaka formen så att alla eventuella luftbubblor försvinner och betongen når alla hörn. Låt torka. Vi väntade till nästa dag innan vi rev bort formen.
——–
- Do like this: Cut a hole in the back of the paper mache diamond.
- Move outdoors and use old newspapers to protect the surface your working on. Pour some oil into the paper mache mould. Spread the oil evenly with a brush and make sure to cover the entire inside of the letter.
- Fill the mould with the mixed concrete. Use the back of your spoon to even out the surface at the opening. Shake the mould to remove any air bubbles and to make sure that the concrete reaches every corner. Allow the concrete to dry. We waited until the next day to remove the paper mould.
Om du vill göra en diamant som är liksidig och inte har en platt undersida så kan du skära bort botten på två formar och tejpa ihop dem med maskeringstejp. Skär bort en av sidorna för att komma åt att fylla formen med betong. Om du vill kunna hänga betongdiamanten så lägger du i en bit ståltråd i mitten och låta änden löpa ut upptill. Fyll formen med betong på samma sätt som den platta diamanten.
———–
If you want a complete diamond instead of a flat bottomed one you can cut away the bottom of two different molds and tape them together with masking tape. Cut and remove one of the sides to able to fill the mould with concrete. If you want to hang your concrete diamond you can add a piece of wire at this stage. Fill the mould with concrete, in the same way as with the flat diamond.
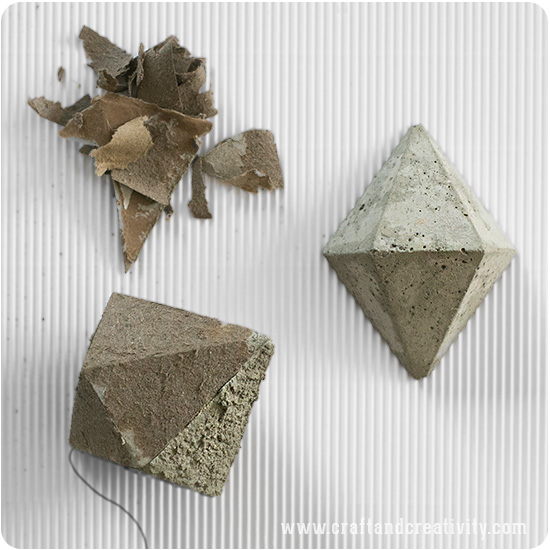
Tips: Pappformen kan vara lite svår att få bort, även om du varit noga med att olja insidan. För att få bort de sista pappersresterna så kan du antingen använda sandpapper och slipa bort resterna eller skölja betongen under vatten och skrapa bort det blöta pappret. Med sandpapper får du en något slätare yta.
————
Tip: The paper mold can be hard to remove, even if you used oil. To get rid of the last paper remnants you can either use sandpaper or rinse the concrete letter under water and scrape away the wet paper. With sandpaper, you get a smoother surface.
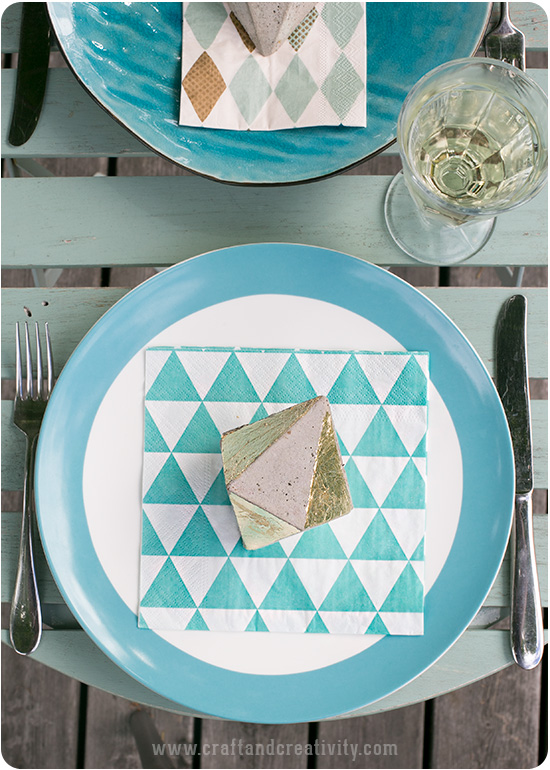
Att sätta bladguld på delar av diamanterna gör dem mer exklusiva. Om du vill veta hur vi gjorde så kan du kika på inlägget om betongbokstäver där vi beskriver även detta moment.
———-
Adding gold foil to parts of the diamonds makes the diamonds more exclusive. If you want to know how to make the foil stick please take a look at our concrete letter blog post.

Pingback: DIYs I Liked This Week | Make&Mess