Gjuta betongdiamanter –
Making concrete diamonds

DIY concrete diamonds - by Craft & Creativity

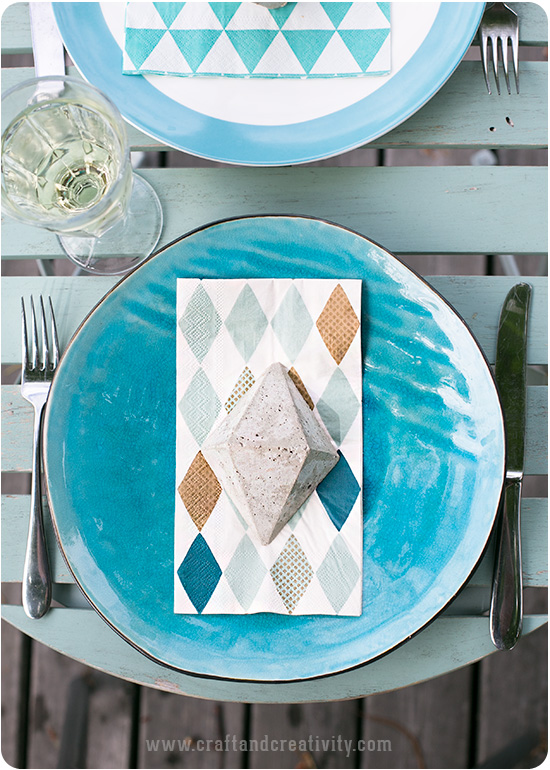
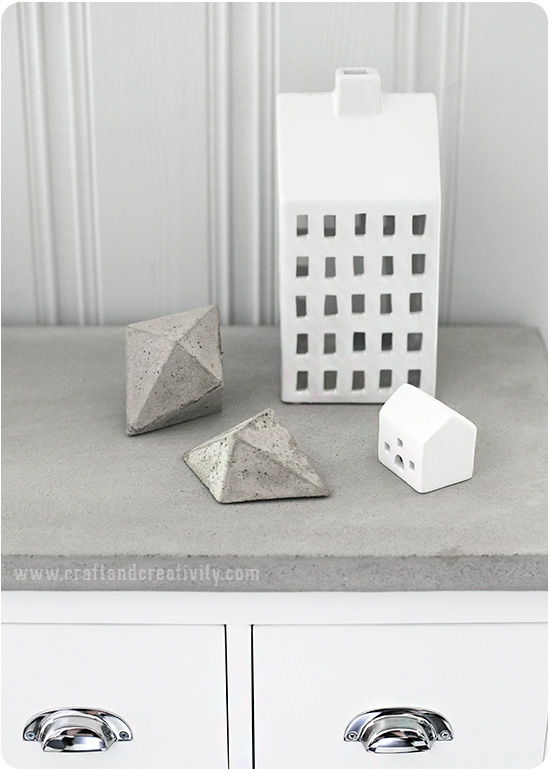
Betongföremål är inte bara snygga utan kan även användas för att hålla ner servetter och fungera som duktyngder när man dukar utomhus. Vi gjöt våra betongdiamanter i formar av papier-maché, precis som med betongbokstaven från tidigare i somras. Följ vår steg-för-steg beskrivning nedan för att se hur vi gick till väga.
———-
Besides from being stylish concrete objects can be used to hold down napkins and table cloths when setting your table outdoors. We used paper mache moulds when making our concrete diamonds, just as with the concrete letter from earlier this summer. Follow our step-by-step tutorial below to learn more.

DIY concrete diamonds - by Craft & Creativity

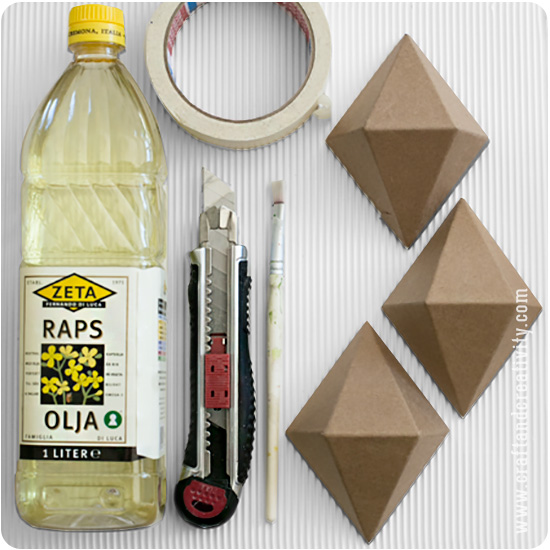
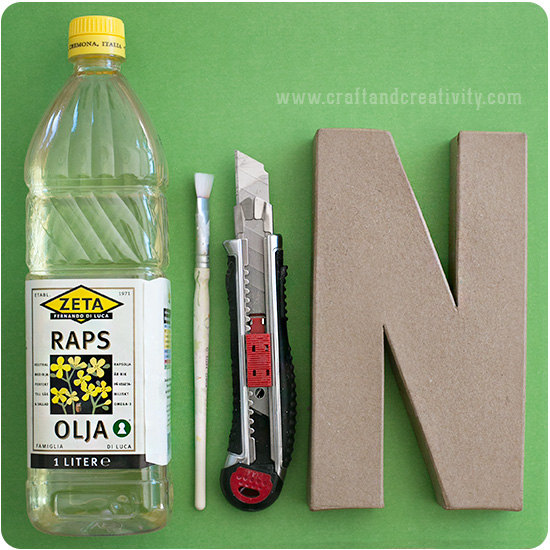
Du behöver: Rapsolja (eller annan vegetabilisk olja), en hobbykniv, en pensel, en rulle maskeringstejp, formar av papier-maché och hobbybetong. När du blandar betongen så kan du t ex använda en tom glassburk av plast och en slev för att röra om betongen med. Använd plasthandskar när du jobbar med betong (vilket vi missade!).
———–
You will need: Vegetable oil, a hobby knife, a brush, a roll of masking tape, papier mache moulds and concrete. When mixing the concrete you need a plastic bowl and a mixing spoon. Use plastic gloves when working with concrete (which we missed).

DIY concrete diamonds - by Craft & Creativity

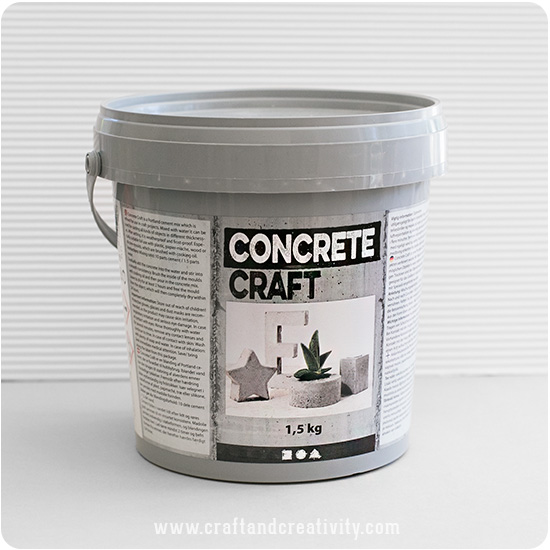
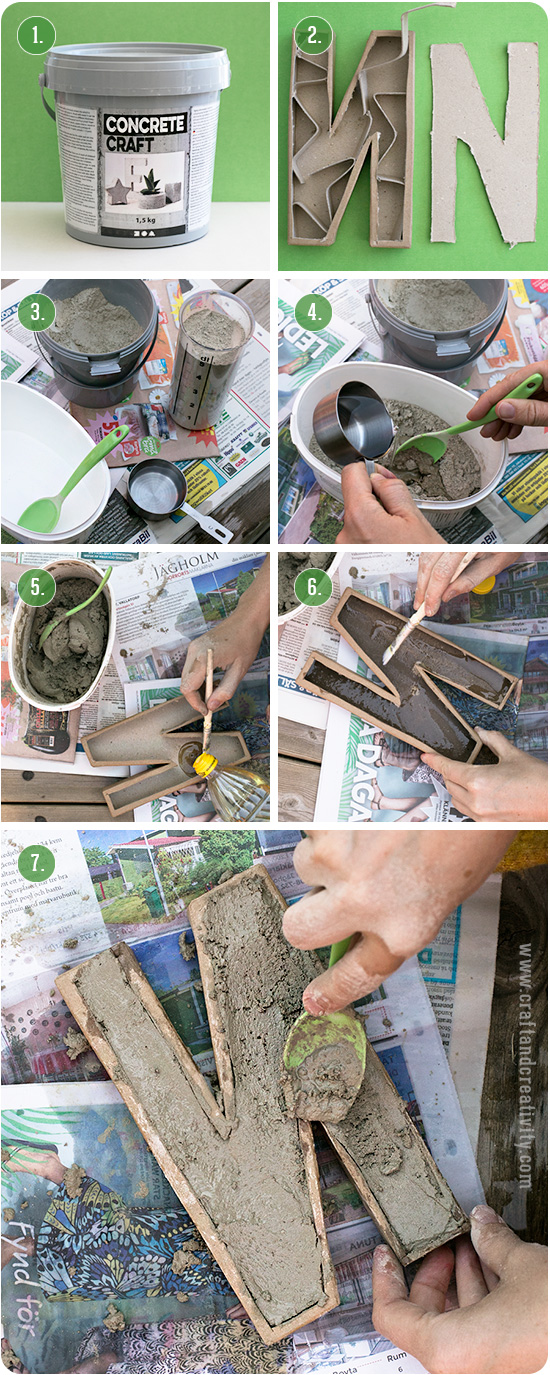
Vår betong blandas 1,5 del vatten till 10 delar betongpulver, enligt förpackningen. Vi använde lite mer vatten och blandade 5 dl betong med 1 dl vatten. Betongen ska bli mjuk och lätt att forma men inte rinnig. Ju mindre vatten desto snabbare torkar betongen men om betongen är för lös så är den svårare att få loss från pappformen när den torkat. Häll betongpulvret i en plastburk och addera vatten, rör om tills du får en jämn smet. Fyll sedan formarna ganska snabbt så att betongen inte hinner stelna.
———–
The concrete we used is mixed with 1.5 part water and 10 parts concrete. We used a little more water than recommended and mixed 5 dl concrete with 1 dl water (1 dl = 0.42 cups). The less water the quicker the concrete cures, but if the concrete is too loose it’s more difficult to remove the paper maché when the concrete is dry. Pour the concrete in a plastic bucket and add the water, stir until you get a smooth batter. Fill your moulds quickly before the concrete starts curing.

DIY concrete diamonds - by Craft & Creativity

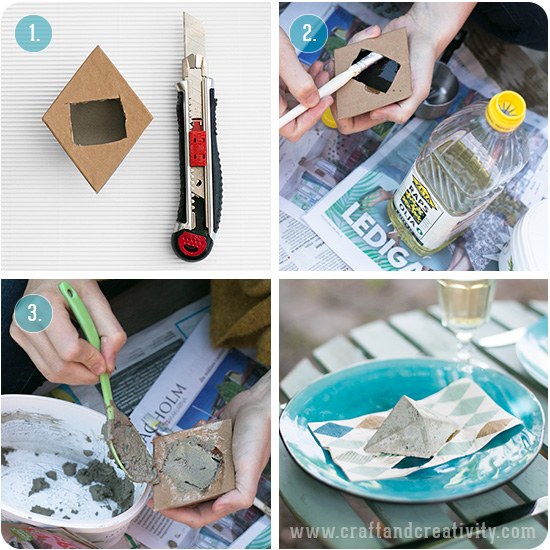
  1. Gör så här: Skär ett hål i baksidan av pappdiamanten.
  2. Förflytta dig med fördel utomhus och täck underlaget med tidningspapper. Häll lite olja i pappformen och pensla ut oljan i botten och runt kanterna. Var noga så att du täcker hela insidan av formen.
  3. Fyll formen med den färdigblandade betongen. Jämna till ytan vid öppningen med en slev. Skaka formen så att alla eventuella luftbubblor försvinner och betongen når alla hörn. Låt torka. Vi väntade till nästa dag innan vi rev bort formen.

——–

  1. Do like this: Cut a hole in the back of the paper mache diamond. 
  2. Move outdoors and use old newspapers to protect the surface your working on. Pour some oil into the paper mache mould. Spread the oil evenly with a brush and make sure to cover the entire inside of the letter. 
  3. Fill the mould with the mixed concrete. Use the back of your spoon to even out the surface at the opening. Shake the mould to remove any air bubbles and to make sure that the concrete reaches every corner. Allow the concrete to dry. We waited until the next day to remove the paper mould.

DIY concrete diamonds - by Craft & Creativity

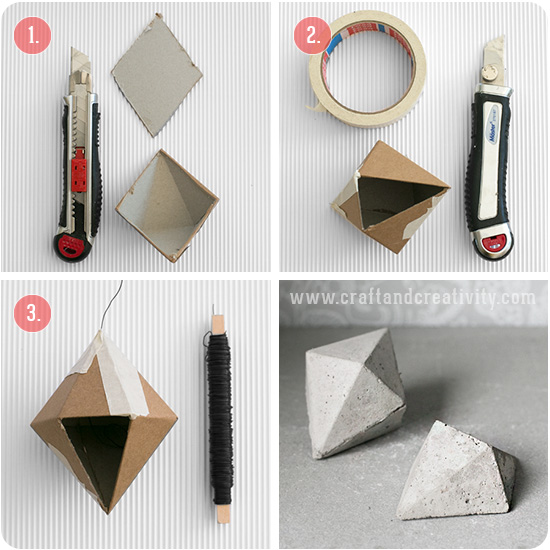
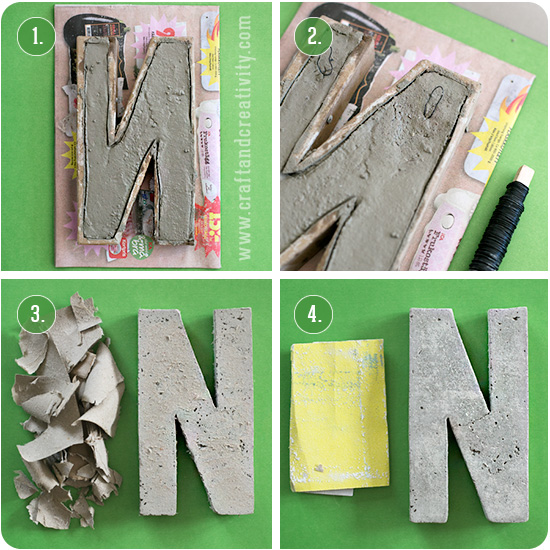
Om du vill göra en diamant som är liksidig och inte har en platt undersida så kan du skära bort botten på två formar och tejpa ihop dem med maskeringstejp. Skär bort en av sidorna för att komma åt att fylla formen med betong. Om du vill kunna hänga betongdiamanten så lägger du i en bit ståltråd i mitten och låta änden löpa ut upptill. Fyll formen med betong på samma sätt som den platta diamanten.
———–
If you want a complete diamond instead of a flat bottomed one you can cut away the bottom of two different molds and tape them together with masking tape. Cut and remove one of the sides to able to fill the mould with concrete. If you want to hang your concrete diamond you can add a piece of wire at this stage. Fill the mould with concrete, in the same way as with the flat diamond.

DIY concrete diamonds - by Craft & Creativity

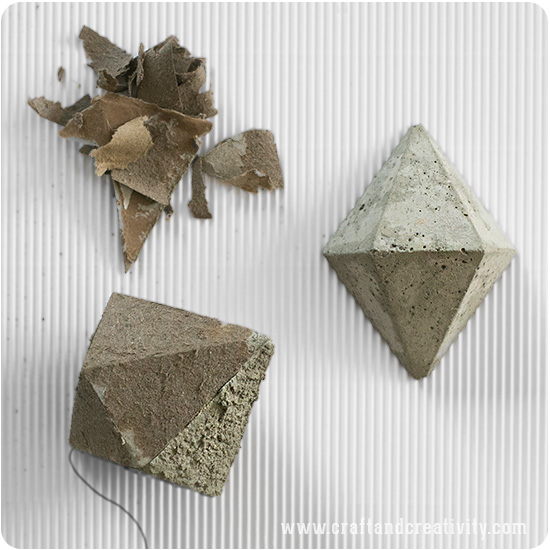
Tips: Pappformen kan vara lite svår att få bort, även om du varit noga med att olja insidan. För att få bort de sista pappersresterna så kan du antingen använda sandpapper och slipa bort resterna eller skölja betongen under vatten och skrapa bort det blöta pappret. Med sandpapper får du en något slätare yta.
————
Tip: The paper mold can be hard to remove, even if you used oil. To get rid of the last paper remnants you can either use sandpaper or rinse the concrete letter under water and scrape away the wet paper. With sandpaper, you get a smoother surface.

DIY concrete diamonds - by Craft & Creativity

DIY concrete diamonds - by Craft & Creativity

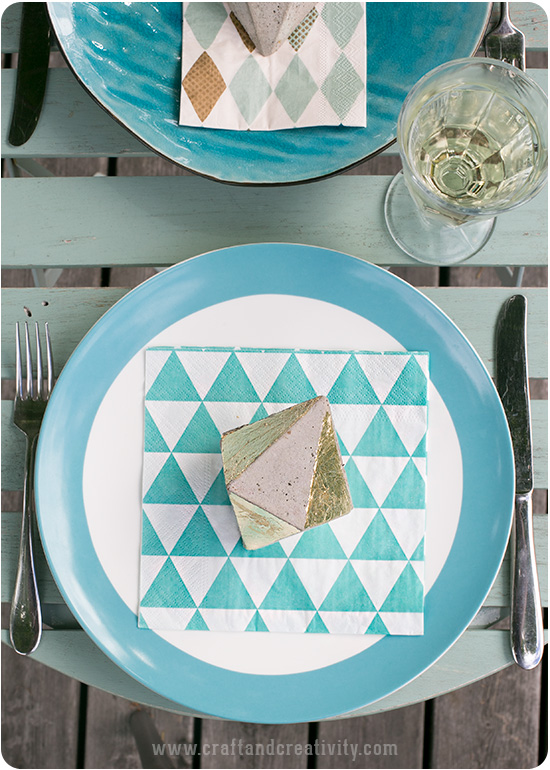
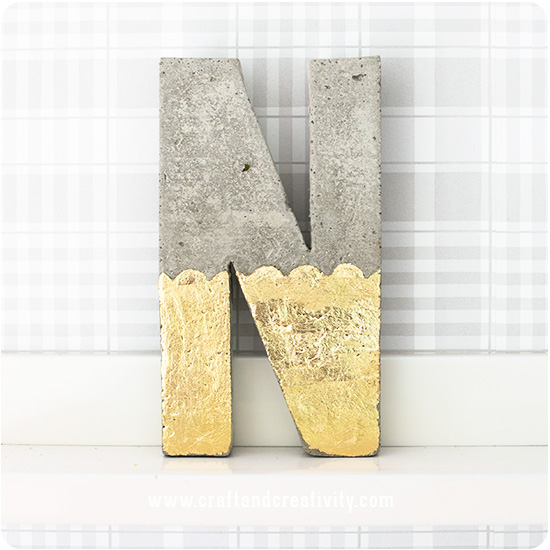
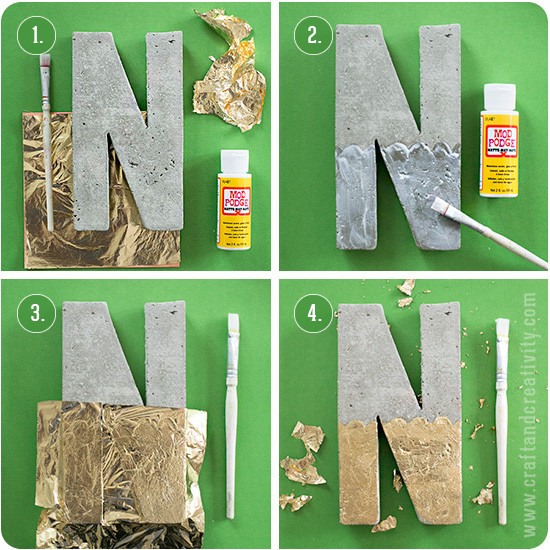
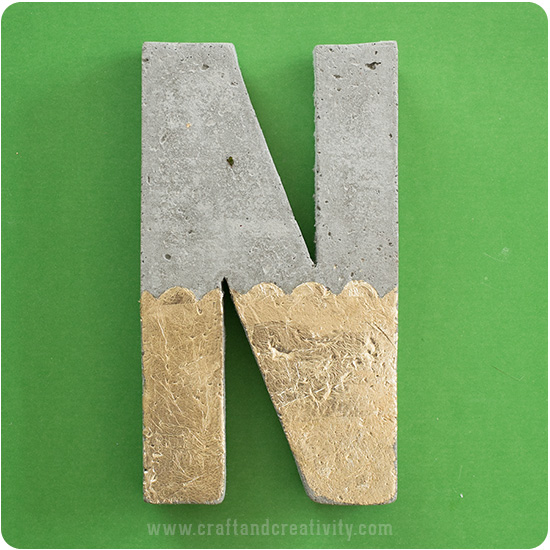
Att sätta bladguld på delar av diamanterna gör dem mer exklusiva. Om du vill veta hur vi gjorde så kan du kika på inlägget om betongbokstäver där vi beskriver även detta moment.
———-
Adding gold foil to parts of the diamonds makes the diamonds more exclusive. If you want to know how to make the foil stick please take a look at our concrete letter blog post.

Gjuta betongbokstäver –
Making concrete letters

Making concrete letters - by Craft & Creativity

Att gjuta i betong är roligt och inte så krångligt som man kan tro (vilket även jag trott hittills). Det underlättar dock om det är sommar om man kan vara ute. Här har vi gjutit bokstaven N och använt en pappbokstav av papier-maché som form. Vi tyckte att det var roligt att sätta lite bladguld på nederdelen av bokstaven för att kombinera den råa kalla betongen med en varm gul och glänsande yta.
————-
Concrete DIY projects are fun and not as complicated as one might think (which at least I thought up till now). It helps, however, to work with concrete when the weather is nice, because then you can take your project outdoors. Here we’ve made a concrete letter by using a paper mache letter as mould. We thought it fun to cover part of the letter with gold foil and combine the cold raw concrete with a worm golden and shiny surface.

Making concrete letters - by Craft & Creativity

Till själva gjutningen behöver du: 1,5 kg hobbybetong, en pappbokstav, en skvätt rapsolja, en plastbytta (t ex en gammal glassburk) eller liten hink, en slev, ett decilitermått, en pensel och en vass hobbykniv. Använd plasthandskar när du jobbar med betong (vilket vi missade)! Det går också bra med någon annan vegetabilisk olja som matolja eller majsolja. Valfria tillbehör: ståltråd, tidningspapper, sandpapper, Mod Podge och bladguld.
———-
You will need: 1.5 kg of concrete, a paper mache letter, some vegetable oil, a plastic bowl or bucket, a spoon, a meauring cup, a brush and a sharp hobby knife. Use plastic gloves when working with concrete (we didn’t but it’s better to use gloves). Optional: wire, sand paper, old news papers, Mod Podge and gold foil.

Making concrete letters - by Craft & Creativity

  1. Gör så här: Tag fram betongen och allt annat du behöver.
  2. Skär bort baksidan av bokstaven och avlägsna fyllningen.
  3. Förflytta dig med fördel utomhus och täck underlaget med tidningspapper. Vår betong blandas enligt förpackningen 1,5 del vatten till 10 delar betongpulver. Vi använde lite mer vatten och blandade 5 dl betong med 1 dl vatten. Betongen ska bli mjuk och lätt att forma men inte rinnig. Ju mindre vatten desto snabbare torkar betongen men om betongen är för lös så är den svårare att få loss från pappformen när den torkat.
  4. Häll betongpulvret i en plastburk och addera vatten, rör om tills du får en jämn smet. Följande moment bör göras ganska snabbt så att betongen inte hinner stelna.
  5. Häll lite olja i pappformen.
  6. Pensla ut oljan i botten och runt kanterna, var noga så att du täcker hela insidan av bokstaven.
  7. Fyll bokstavsformen med den färdigblandade betongen. Blanda till mer betong om du behöver. Jämna till ytan med en slev. Släpp formen i marken ett par gånger från låg höjd så att alla eventuella luftbubblor försvinner och betongen når alla hörn.

———–

  1. Do like this: Take out the concrete and everything else you need.
  2. Cut away the back of the letter and remove the filling.
  3. Move outdoors and use old newspapers to protect the surface your working on. The concrete we used is mixed with 1.5 part water and 10 parts concrete. We used a little more water than recommended and mixed 5 dl concrete with 1 dl water (1 dl = 0.42 cups). the less water the quicker the concrete cures, but if the concrete is too loose it’s more difficult to remove the paper mache when the concrete is dry. 
  4. Pour the concrete in a plastic bucket and add the water, stir until you get a smooth batter. The following steps should be done rapidly before the concrete starts curing.
  5. Pour some oil into the paper mache letter. 
  6. Spread the oil evenly with a brush and make sure to cover the entire inside of the letter. 
  7. Fill the letter with the mixed concrete. Mix more if it’s not enough. Use the back of your spoon to even out the surface. Drop the form to the ground a couple of times (from a low height) to remove any air bubbles and to make sure that the concrete reaches every corner. 

Making concrete letters - by Craft & Creativity

  1. Så här ser bokstaven ut när den är fylld med betong.
  2. Om du vill kunna hänga bokstaven så kan du göra två öglor av ståltråd vars ändar du stoppar ner i betongen innan den torkar. Se till så att ändarna är ganska långa så att de får bra fäste i betongen.
  3. Låt betongen torka. Vi väntade tills nästa dag innan vi tog ur den ur formen. Trots att du penslat insidan med olja så kan pappersrester fastna på ytan. Riv bort så mycket som du kan.
  4. För att få bort de sista pappersresterna så kan du antingen använda sandpapper och slipa bort resterna eller skölja betongen under vatten och skrapa bort det blöta pappret. Med sandpapper får du en slätare yta.

———

  1. This is how the letter when it is filled with concrete.
  2. If you want to be able to hang the letter on the wall you can make two loops of wire and stick the ends well into the concrete before it dries. Make sure that the ends are quite long to get a good enough grip.
  3. Allow the concrete to cure. We waited until the next day before we removed the mould. Even though you used oil in the mould some scraps of paper can be difficult to remove. Tear away as much of the paper mache as you can. 
  4. To get rid of the last paper remnants you can either use sandpaper or rinse the concrete letter under water and scrape away the wet paper. With sandpaper, you get a smoother surface. 

Making concrete letters - by Craft & Creativity

  1. För att få till guldeffekten så behöver du bladmetall (finns som guld, silver och koppar), en pensel och Mod Podge eller Klæber-fix.
  2. Pensla Mod Podge den yta av betongen som du vill täcka med bladguld.
  3. Placera bladguldet över den limmade ytan. Pensla försiktigt ut alla veck med en mjuk pensel. Oroa dig inte om bladguldet råkar spricka eller gå sönder! Det löser du senare.
  4. När limmet har torkat är det dags att borsta bort allt överflödigt bladguld. Här kan det vara bra med en borste som har lite hårdare strån. Lappa eventuella delar som skadats med bitar av nytt bladguld.

————

  1. To add the gold effect, you need gold foil, a brush and Mod Podge or Klæber fix.
  2. Brush a layer of Mod Podge to the parts of the concrete surface that you want to cover with the gold foil.
  3. Place the gold foil over the glued surface. Brush gently over the surface with a soft brush to smooth out any creases. Don’t worry if the gold foil breaks.
  4. Once the glue as dried, it’s time to brush off all the excess gold foil. Patch any parts that are damaged with new pieces of gold foil.

Making concrete letters - by Craft & Creativity

Förutom att använda betongbokstaven som dekoration blir den fin att ha som bokstöd i bokhyllan.
—————
In addition to using the concrete letter as decoration you can use it as a bookend.

Gnuggisar på ägg –
Rub-ons on Easter eggs

Rub-ons on Easter eggs - by Craft & Creativity

Ett sätt att dekorera ägg till påsk kan vara att använda rub-ons (s k gnuggisar /gnuggmotiv). Det är enkelt och blir effektfullt.
————-
One way to decorate Easter eggs is to use rub-on tranfers. It’s easy and looks pretty. 

Rub-ons on Easter eggs - by Craft & Creativity

Börja med att koka äggen. Jag använde ekologiska hönsägg. Låt svalna och se till så att skalet är torrt. Klipp ut önskat motiv, lägg det ovanpå ägget och gnugga fast motivet på ägget med träpinnen som följer med i förpackningen. Idén fick jag från Country Living, via Pinterest.
——-
Start by boiling the eggs. I used organic chicken eggs. Allow the eggs to cool and make sure that they are dry. Cut out the motif of your choice, place it on top of the egg and transfer the motif to the egg by rubbing with a wooden stick (ice cream stick for example). I got this idea from Country Living via Pinterest.

Rub-ons on Easter eggs - by Craft & Creativity

Det känns nästan lite synd att knäcka skalen och äta upp äggen. Men nu är de i alla fall förevigade på bild. 🙂 Vill man använda gnuggisarna på något mer beständigt så kan man gnugga fast dem på småstenar, betonghjärtan eller askar t ex.
———-
It kind of feels likes a pity to crack the shells and eat the eggs. But now at least I have them on photo. 🙂 If you like to use rub-ons on something more durable – you can transfer them to pebbles, concrete hearts or boxes for example.

Gnuggmotiv på askar –
Rub on decorated boxes

Här har jag målat en enkel brun pappersask med vit hobbyfärg och dekorerat med gnuggisar (rub-ons). Jag fyllde asken med praliner och det blev en fin och personlig gå-bort-present.
—-
Here I’ve painted a simple brown paper box with white hobby paint and decorated it with rub-ons. I filled the box with chocolates and used it as a pretty little hostess gift.

Måla asken för sig och locket för sig. När färgen torkat så klipper man ut det motiv man önskar använda från mönsterarket. Lägg motivet på asken och gnugga med träpinnen som följer med tills hela motivet har fäst mot underlaget. Lacka eventuellt asken med decoupagelack när du är klar.
——–
Paint the box and the lid separately. When the paint is dry, cut out the rub-on of your choice from the pattern sheet. Place the image over the box and rub with a wooden stick (ice cream stick for example). If you like you can finish off with a coat of Mod Podge.


Matilda som jobbar för Make & Create (hon som hade pimpat sina hörlurar) visade mig sitt betonghjärta som hon pyntat med gnuggisar. Så kan man alltså också göra och det blir hur fint som helst! Eller för den delen använda gnuggisar på småstenar, som jag gjorde i somras.
———-
Matilda who works for Make & Create (the same Matilda who pimped her earphones) showed me this concrete heart that she had decorated with a rub-on. So that’s another great and decorative way to use rub-ons! Or for that matter, use them on pebbles, like I did last summer.