Stämplad krympplast –
Clear stamps on shrink plastic

Shrink plastic jewelry - by Craft & Creativity

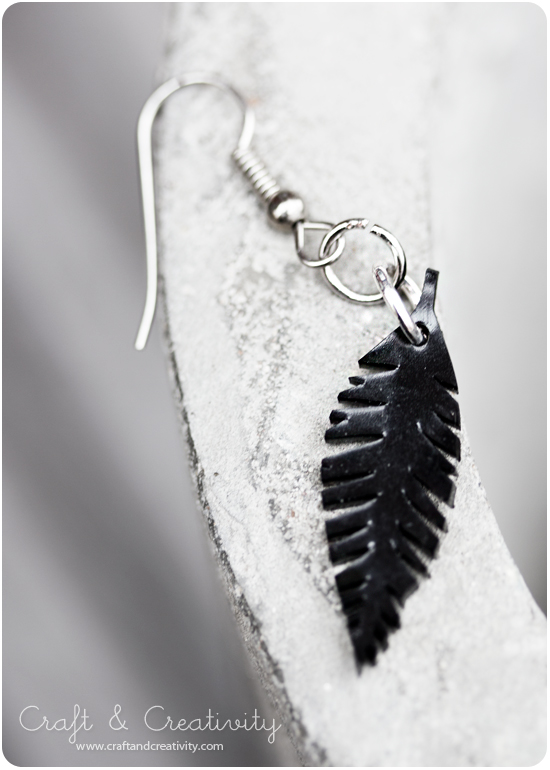
Jag har experimenterat med att använda stämplar på krympplast och det funkade över förväntan. Jag använde silikonstämplar, s k clear stamps som man köper i ark med många olika motiv. Du tar loss just det motiv du vill använda och sätter den på ett genomskinligt akrylblock och sedan är det bara att stämpla på krympplasten (den blanka sidan). Stämpeldynan Memories Dye fungerar bra, bläcket fäster på krympplasten och torkar under krympningen. Var dock försiktig med att peta på bläcket innan du stoppar in ditt stämplade motiv i ugnen. Rosetten är inte stämplad utan den ritade jag för hand med vit permanent tusch på svart krympplast. Fjärilen och fjädern är stämplade och högst upp till höger ser du storleken på själva silikonstämpeln jämfört med det krympta resultatet.
————–
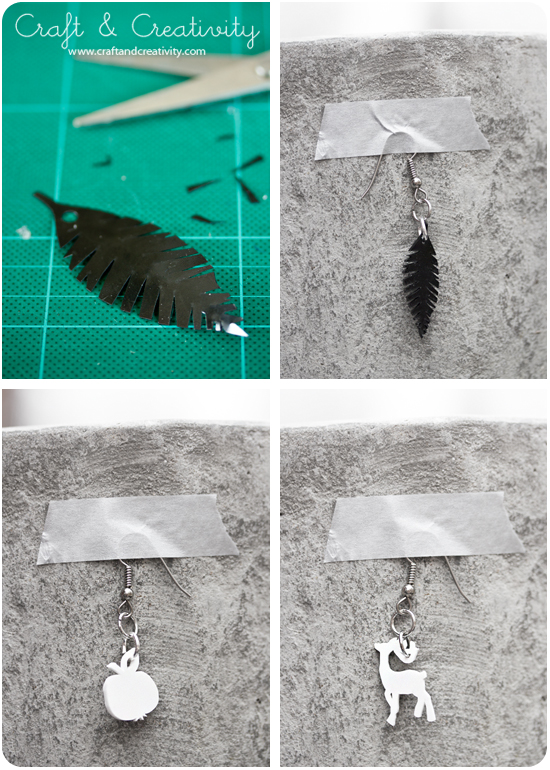
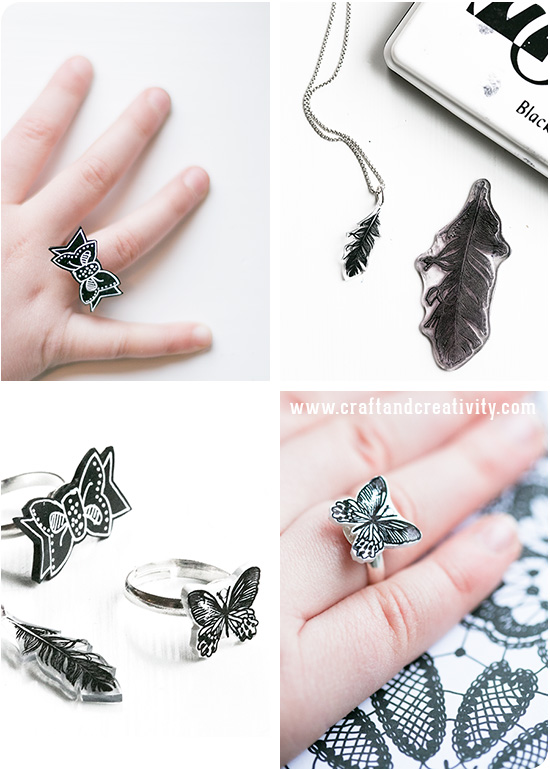
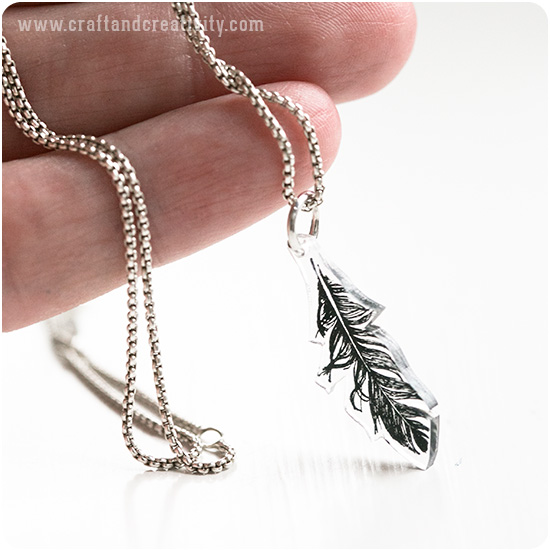
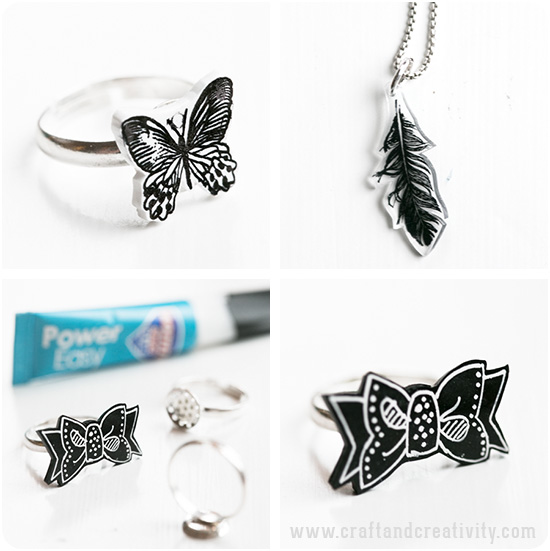
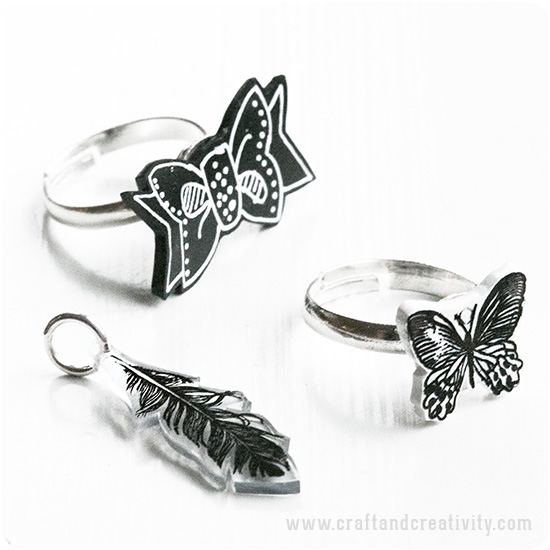
I’ve experimented with using stamps on shrink plastic (shrinky dinks) and it worked beyond my expectations. I used silicone stamps, i e clear stamps that you place on an acrylic block and then start stamping on the shrink plastic (the glossy side). Be sure to use a stamp pad with waterproof ink. The ink will dry while shrinking in the oven. However, be careful not to touch the ink before you put your stamped plastic in the oven. The bow is not stamped, I drew it by hand with a white permanent marker on black shrink plastic. The butterfly and the feather are stamped and on the top right, you can compare the size of the stamp to the shrunken plastic. 

Shrink plastic jewelry - by Craft & Creativity

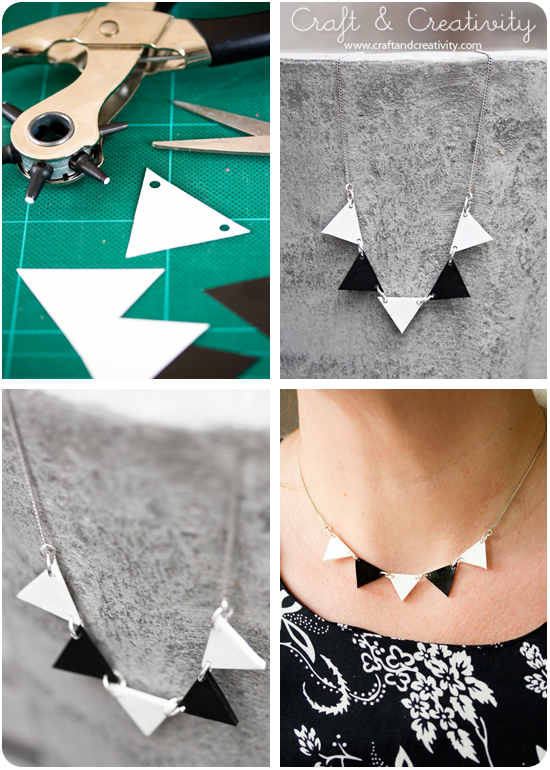
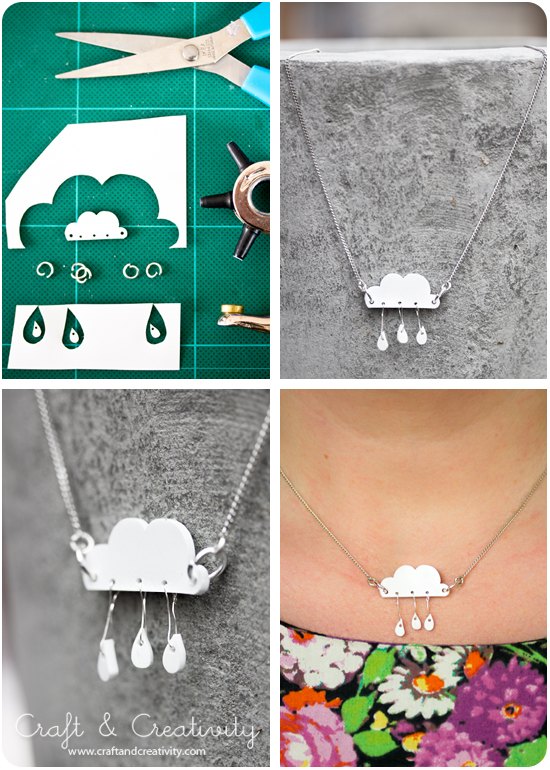
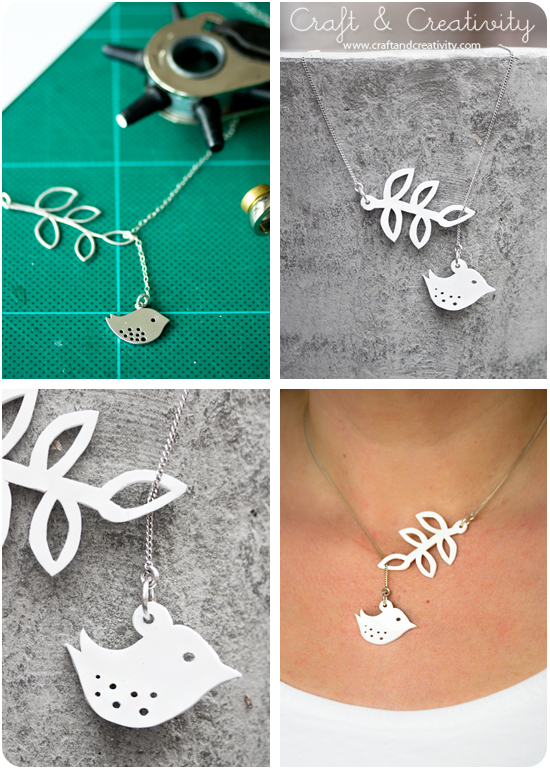
Vill du göra ett berlock så kom ihåg att göra hål i plasten innan du krymper smycket. Hålet krymper också till 1/3 och behöver därför vara ganska stort. Krymp plasten i ugnen (160-170°C), låt svalna, trä en o-ring genom hålet och nyp ihop den med en tång. Nu kan du hänga din berlock i ett halsband, armband eller örhänge.
———-
If you want to make a charm, remember to make holes in the plastic before shrinking. The hole will also shrink to 1/3 and therefore it needs to be quite big. Shrink the plastic in the oven (320°F /160°C), allow to cool, thread a jump ring through the hole and close it with a pair of pliers. Now you can hang your charm in a necklace, a bracelet or earring. 

Shrink plastic jewelry - by Craft & Creativity

Fjärilen och rosetten limmade jag fast på ringar med hjälp av sekundlim. Du behöver bara en liten droppe lim på ringens platta, placera motivet ovanpå och låt torka. Det kan ta en stund om du råkat ta lite för mycket lim men har man bara tålamod så sitter det som berget sedan. Var försiktig så du inte får lim på fingrarna. Dessa ringar är justeringsbara och passar alla fingrar.
—————-
I glued my butterfly and my bow to sieve rings using super glue. You only need a small drop of glue on the plate of the ring. Place the object on top and let dry. It can take a while if you used too much glue, but be patient. Be careful not to get glue on your fingers. These rings are adjustable to fit all fingers.

Shrink plastic jewelry - by Craft & Creativity

I ugnen funkar det så att krympplasten först krullar ihop sig och sedan krymper. Först när plasten blir platt igen är det dags att ta ut den ur ugnen. Är den fortfarande lite böjd kan du vända på den med en pincett eller liknande och pressa försiktigt med t ex undersidan på ett platt glas medan plasten fortfarande är varm. Vill du läsa mer om krympplast så klicka dig till vidare till mina tidigare krympplastprojekt.
———
The shrink plastic will curl in the oven and then shrink and only when the plastic becomes flat again it’s time to take it out of the oven. If it’s still a bit curved, turn it around with a pair of tweezers and squeeze gently with eg the bottom of a flat glass while the plastic is still warm. If you want to read more about shrink plastic, please proceed to my previous shrink plastic crafts.

Krympplast igen – More shrink plastic

Shrink plastic jewelry - by Craft & Creativity

Jag har roat mig med att göra fler smycken i krympplast. Ni som följt mig ett tag har kanske sett att jag tidigare gjort berlocker, halsband och miniporträtt av barnen. Övning ger färdighet brukar man säga och jag tycker jag har fått riktig snits på det här nu. Det viktigaste jag lärt mig är att låta en plåt vara i ugnen medan den blir varm. När ungen uppnått rätt temperatur (160-170°C) så tar jag ut den heta plåten, lägger på ett bakplåtspapper och placerar ut mina krympplast-motiv. Bränn dig inte! In med plåten i ugnen och på mindre än en minut har motiven krympt och de blir mycket plattare och finare än när jag stoppar in dem i ungen på en kall plåt eller form. Att jag inte tänkt på det tidigare!
—————
I’ve made myself some more shrink plastic jewelry. Those of you who have followed me for a while may have seen me making shrinky dink charms, necklaces and miniature portraits of the kids. Practice makes perfect as the saying goes, and I think I got a real hang of it now. The most important thing I learned is to keep the oven tray in the oven while it heats up. When the oven has reached the right temperature (320°F /160°C), I take out the tray, add a baking sheet and place my shrink plastic objects on top. Don’t burn yourself! Place the tray in the oven and in less then a minute the plastic shrinks. They melt quicker and get a lot flatter and prettier then when I put them in the oven on a cold plate or dish. Why didn’t I think of this before?  

Shrink plastic jewelry - by Craft & Creativity

Ovan har jag gjort ett halsband av små vimplar. Efter att ha sett liknande halsband i olika affärer ville jag göra en egen variant och då passade krympplast perfekt som material. Jag klippte ut trianglar och gjorde hål med en håltång i två av hörnen. Hålslag fungerar också men ger lite större hål. Efter att vimplarna krympt och svalnat (tar bara några minuter) trädde jag i o-ringar. Jag fäste de yttersta två ringarna i en kedja med lås och halsbandet var klart! Ett tips för återvinning är att använda kedja & lås från ett halsband man inte längre använder. 🙂
————-
Above you can see I made ​​a necklace of small pennants. Having seen similar necklaces in various shops I wanted to make my own version, and I realized shrink plastic was the perfect material. I cut out triangles and made holes with a hole puncher. After the triangles shrunk and cooled off (it only takes a few minutes), I joined them together using jump rings. I attached a necklace chain with clasp to the two outer jump rings and the necklace was done! A tip is to recycle a chain & clasp from a necklace you no longer use. 🙂

Shrink plastic jewelry - by Craft & Creativity

Molnet och dropparna ritade jag för hand på papper och använde som mall när jag klippte i krympplasten. Jag gjorde tre mindre hål för dropparna och två större för o-ringarna. Dropparna hängde jag i silverfärgad metalltråd (sytråd fungerar säkert också). En annan idé skulle kunna vara att hänga kedjor i molnet, som Passionflower på Etsy gjort. Ovan kan ni för övrigt se ett exempel på hur mycket krympplasten krymper i ugnen, d v s till ca 1/3.
———–
I drew the shape of the cloud and the drops by hand on a piece of paper and used it as a template when I cut the shrink plastic. I made three small holes for the drops, and two larger ones for the jump rings. I hung the drops in silver metallic thread (you could probably use sewing thread as well). Another idea would be to hang chains in the cloud, as Passionflower at Etsy did. Above you can also see an example of how much the plastic actually shrinks, ie to about one third. 

Shrink plastic jewelry - by Craft & Creativity

Fågeln och grenen är en efterapning av ett smycke som jag köpt från Royal Gold Gifts på Etsy och som jag tycker mycket om. Här använde jag sax, håltång och hobbykniv för att få till detaljerna.
———–
The bird and the branch’s is an imitation of a piece of jewelry that I purchased from Royal Gold Gifts at Etsy, and which I’m very fond of. Here I used scissors, a hole punch and an exacto knife to get the details right.

Shrink plastic jewelry - by Craft & Creativity

Till sist några örhängen – en fjäder, ett äpple och en ren. Krympplast finns i vitt, svart, matt transparent och blank transparent. Tycker man det är svårt att komma på motiven själv kan man få mycket inspiration genom att titta på gratis clipart, t ex på Microsoft Clipart. För mer krympplast-inspiration rekommenderar jag Pinterest, där finns hur mycket som helst!
———
Finally, some earrings – a feather, an apple and a reindeer. If you think it’s difficult to come up with ideas for shapes yourself, you can get a lot of inspiration by looking at free clipart, at Microsoft Clipart for example. For additional shrink plastic inspiration, I recommend Pinterest. There you will find tons of shrinky dink crafts!