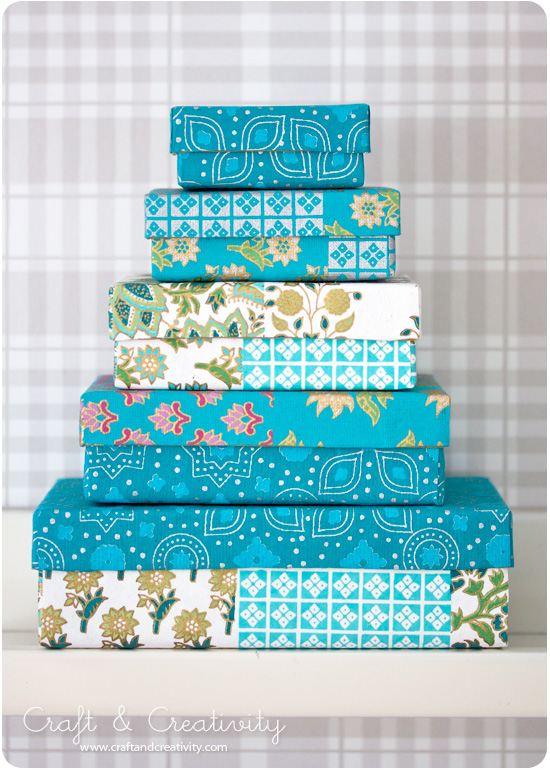
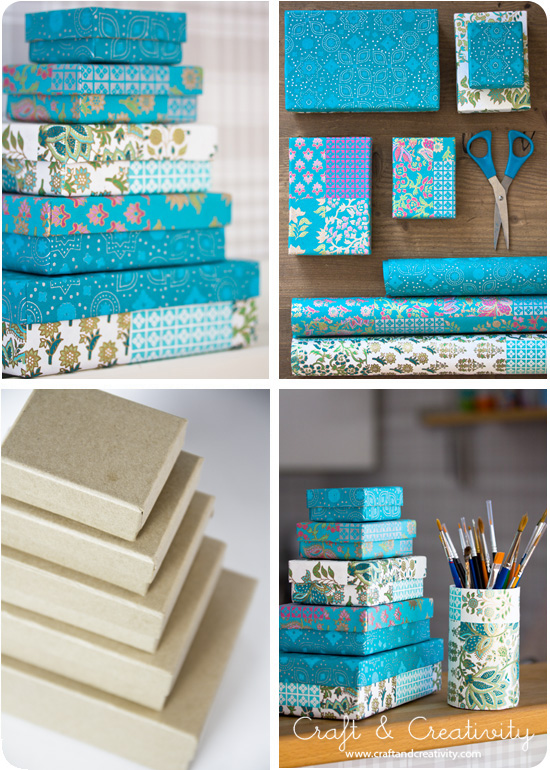
Jag fick ganska mycket turkost papper kvar efter mitt pennburk-projekt och resterna har jag nu använt till att klä in ett gäng askar, 7-17 cm långa. Dessa tänkte jag använda som presentaskar, om jag inte behåller dem själv vill säga. 😉
————
I had a lot of turquoise paper left efter my pen holder project and I used the rest to cover a bunch of small boxes. I thought I’d use them as gift boxes, if I manage to part with them that is. 😉
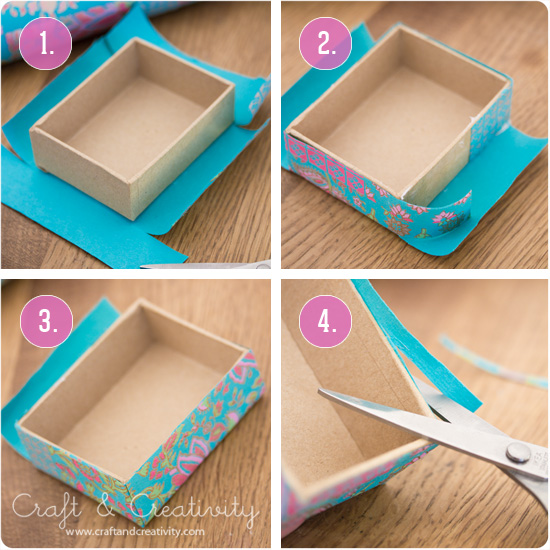
Så här gör jag för att få fina hörn när jag klär in askar och lådor, vare sig det är små askar eller stora skokartonger.
- Placera asken på ditt papper, måtta lite grovt (tänk på att det ska räcka för att täcka sidorna) och klipp ut en lagom bit. Stryk på lim på botten av asken. Jag använde limstift som jag tycker fungerar väldigt bra när papperet är av lite tjockare kvalitet, som detta papper. Klipp fyra jack mot hörnen, som visat ovan.
- Stryk på lim runt ytterkanterna. Vik upp kortsidorna av papperet och vik flikarna runt hörnen och på långsidorna av asken.
- Stryk på lim på långsidorna igen, på ovansidan av flikarna som du precis limmat fast. Vik upp långsidorna av pappet.
- Klipp bort överflödigt papper och du är klar! Gör på samma sätt med locket och låt limmet torka ordentligt innan du sätter locket på asken.
———
This is how I get pretty corners when I cover my boxes, whether it’s small boxes or large shoe boxes.
- Place the box on the paper of your choice. Keep in mind that the paper must be big enough to cover the sides too. Cut the paper approximately the right size. Apply glue to the bottom of the box. I used glue stick since I think it works very well with heavy paper, like this one (or like wallpaper samples for that matter). Cut four slits towards the four corners, as illustrated above.
- Apply glue around the outer edges of the box. Fold the short sides of the paper upwards and fold the tabs around the corners and towards the long sides of the box.
- Apply glue to the sides again, on top of the tabs that you just glued in place. Fold the long sides of the paper upwards.
- Cut away the excess paper and your done! Do the same with the box lid and let the glue dry properly before placing the lid on the box.


