
Mina vindsnurror kan inte snurra utan är mest bara för dekoration. Vill du att de ska vara snurrbara får du fästa dem vid sugröret med en nål istället för tejp. Använd i så fall en tunn nål för annars kommer sugröret kanske läcka när du använder det. 😉
———
My pinwheels can’t spin, they’re merely for decorative purpose. If you want them to be able to spin you can pin them to the straw with a needle instead of tape. In that case, use a thin needle otherwise the straw may leak when you use it. 😉
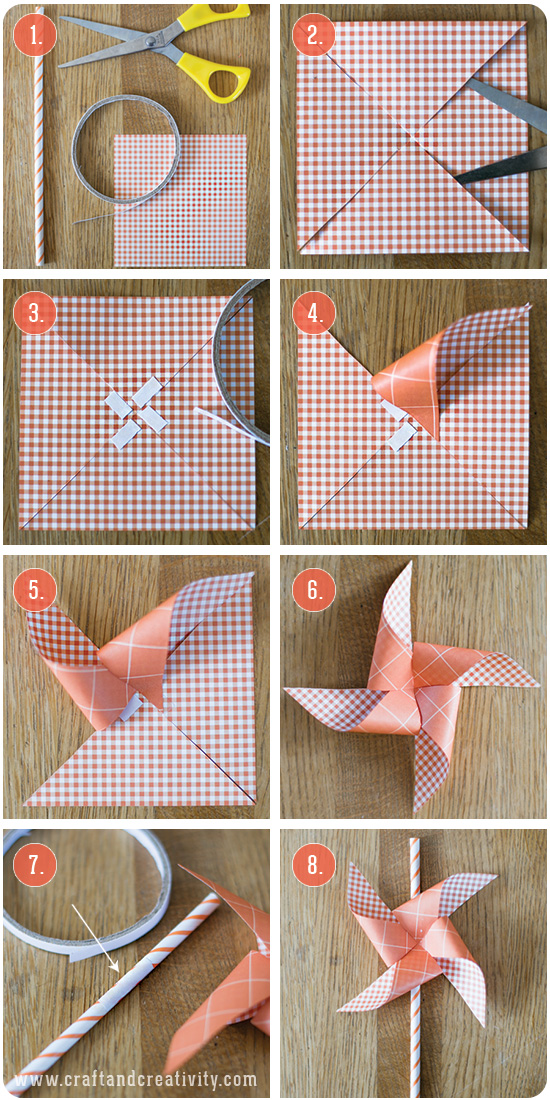
- Du behöver: Papperssugrör, en kvadratisk bit papper (jag valde origamipapper i storleken 10×10 cm), dubbelhäftande tejp, en sax och knappar eller något annat att dekorera mitten med.
- Gör så här: Klipp fyra jack i pappret, från hörnen till mitten. Lämna ca 2 cm i mitten oklippt för att snurran fortfarande ska sitta ihop.
- Jag tycker att det enklaste sättet att göra vindsnurror är att tejpa varje flik till mitten medan jag gör snurran. Jag använder dubbelhäftande tejp i fyra små bitar.
- Böj till den första spetsen, tag bort skyddspapperet på tejpen och fäst spetsen vid mitten som visat på bilden ovan. Spetsen ska överlappa mitten med ca 1 cm.
- Gör nästa spets likadant som den första och fortsätt med spets tre och fyra.
- Vill du få till en snygg mitt så flikar du in den sista spetsen under den första.
- Tejpa eller limma fast vindsnurran på sugröret. Och som sagt – vill du kunna snurra på vindsnurran fäster du den med en tunn nål. Tänk på att i så fall inte låta små barn använda sugrören.
- Dekorera mitten på snurran med en knapp eller liknande om du vill.
———–
- You will need: Paper straws, a square piece of paper (I chose 10×10 cm origami paper), double sided adhesive tape, a pair of scissors and buttons or something else to decorate the center with.
- Here’s how: Cut four diagonal cuts in the paper, from the corners to the middle. Stop aprox 2 cm (1 inch) short of the center.
- I find that the easiest way to make pinwheels is to tape each tab to the middle while making the wheel.
- Fold (but not crease) the first flap, remove the protective paper from the tape and stick the tip of the flap to the middle as shown in the picture above. The tip should overlap the middle by about 1 cm (0.4 inch).
- Fold the next flap in the same way as the first and continue with flap three and four.
- If you want the middle to look extra nice, hide the last tip below the first.
- Tape or glue the pinwheel to the straw. And (again) if would you be able to spin the pinwheel – try attaching it with a thin needle instead. Note that in this case, do not let young children use the straws.
- Decorate the center of the pinwheel with a button or whatever you like.
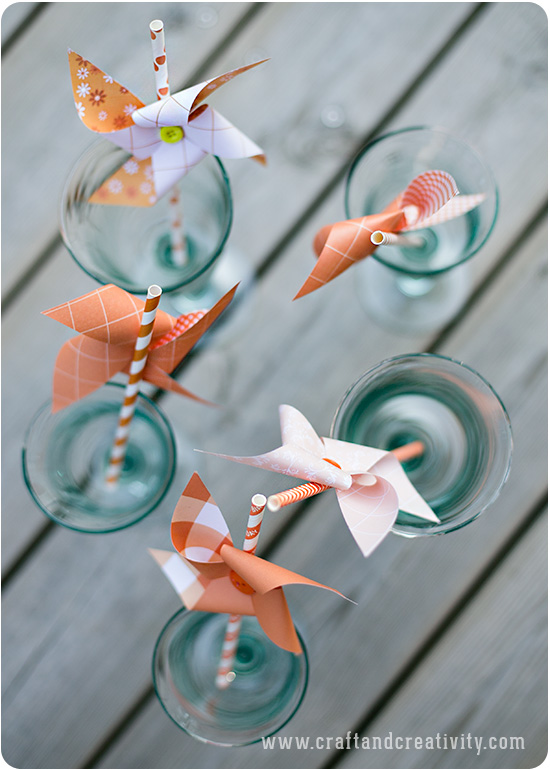
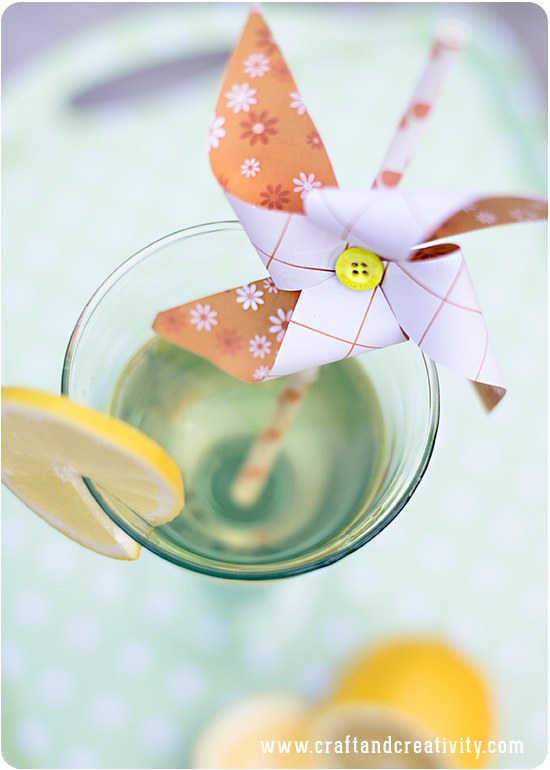
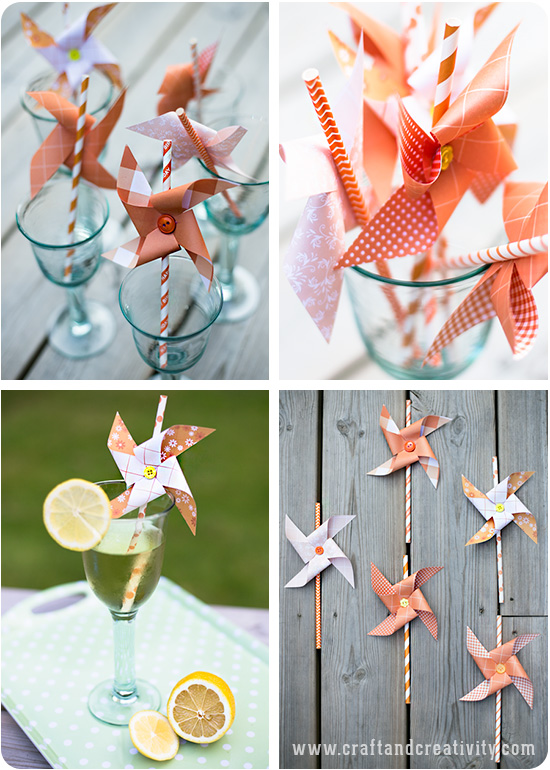
Sugrören blir en fin dekoration i ett glas läskande dryck.
—-
The pinwheel straws add a nice touch to a refreshing summer drink.
Ih, hvor er de fine — sikke en sød idé.
Kh. Bella
Tack Bella! 🙂
Ja visst är det bra när man kan tipsa varandra. Jag kommer def prova lite sugrörspyssel!
Ha det bra.
Verkligen roligt! 🙂 Ha det bra du med.
fint, det blir verkligen en annan personlighet i glaset!
Ja, varför inte piffa till livet lite extra ibland? 🙂
Pingback: DIY | Molinillos de Viento | Nosolobebes | proyectos, vivencias, decoración,… cosas de niños y bebés
Åh, så fina! Fantastiskt festtips=) Kram
Tack Nina! 🙂 Kram!
Pingback: I am truly amazed at what you can do with… | BELLA BARGAINS BLOG
You are featured on my blog today! http://bellabargains.wordpress.com/
Pingback: Craft Tutorials
Pingback: Just for Fun | Paper Gifts for Estefany