Adventsstjärnor i ny skrud –
Advent star makeover

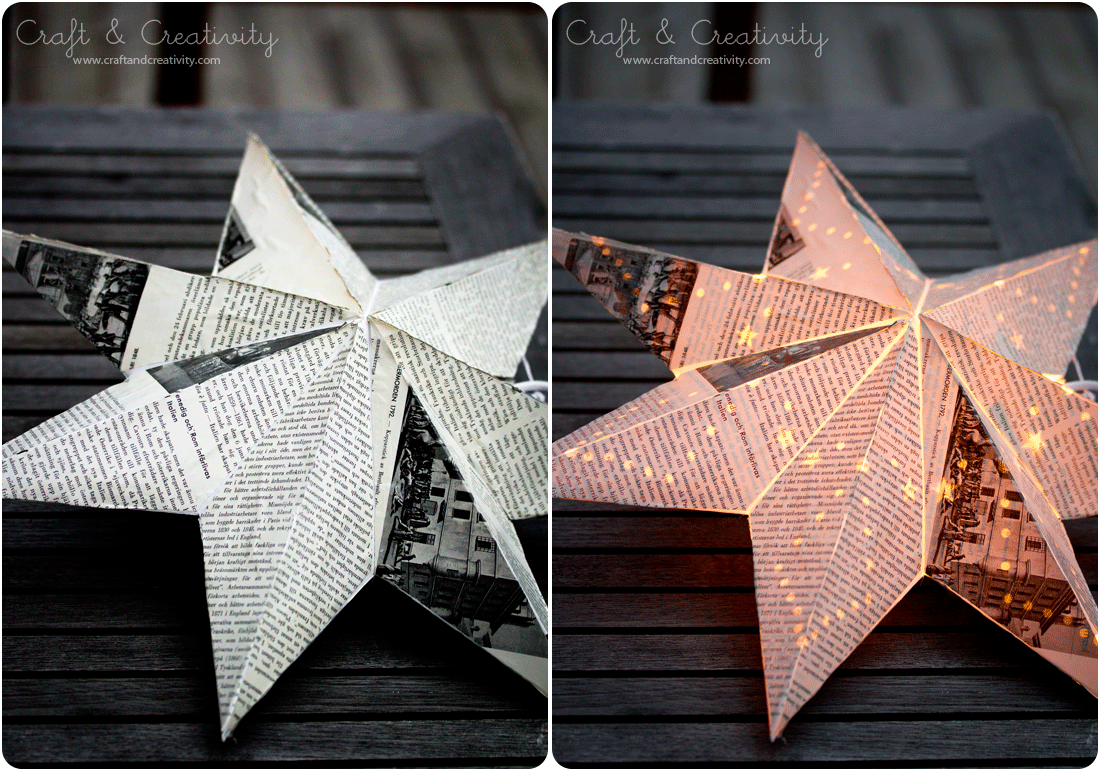
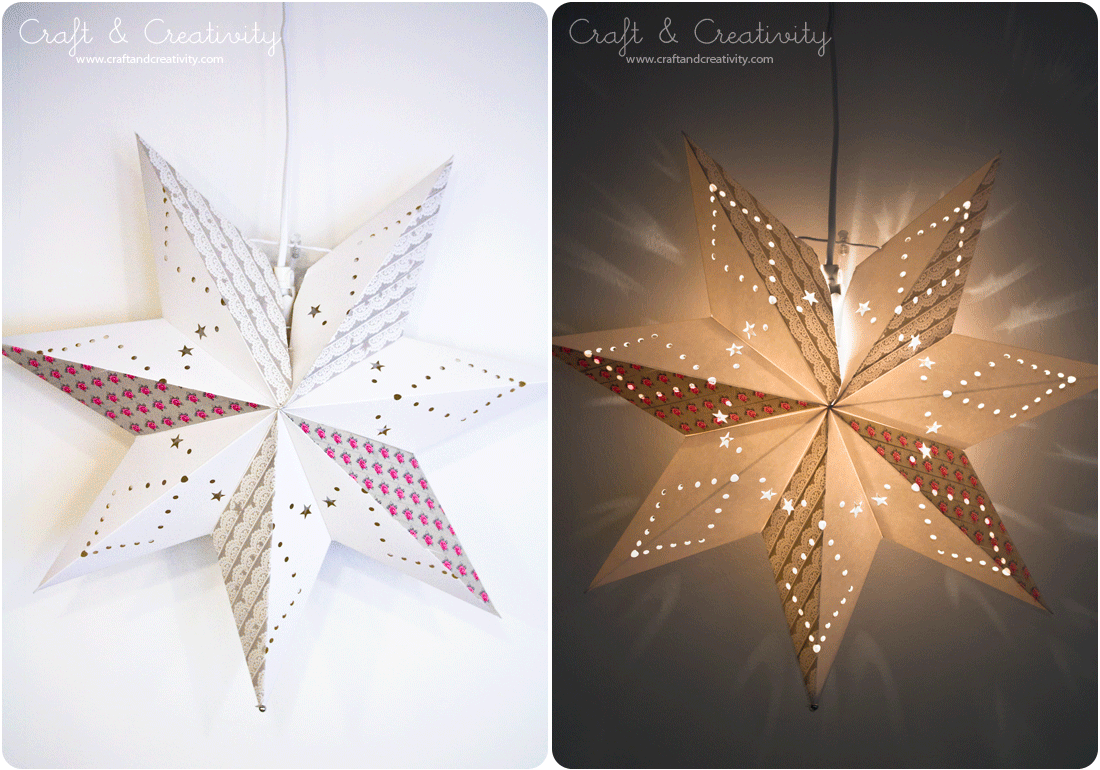
Förra fredagen fick vi fint besök av Karin och hennes dotter Freja från Pysselbolaget. Vi pysslade och bollade idéer tillsammans en hel eftermiddag och kreativiteten sprutade, både bland vuxna & barn. Så roligt! Dessa omgjorda adventsstjärnor är ett av många resultat av denna dag. Idén var att pynta färdiga adventsstjärnor på olika sätt. Antingen köper man nya eller så gör man om gamla som man har hemma.
—–
Last Friday we got a nice visit from Karin and her daughter Freja from Pysselbolaget. We crafted together and exchanged ideas an entire afternoon. There was a flow of creativity in the air, both among us adults and the children. We had so much fun! These pimped Advent stars are one of many result of this day. The idea was to decorate pre-made Advent stars in different ways. You could either buy new ones or use old ones from your stash. 

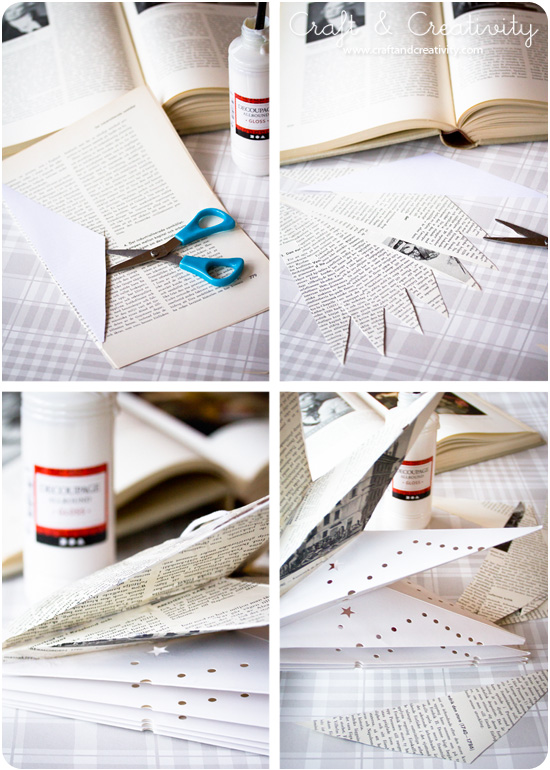
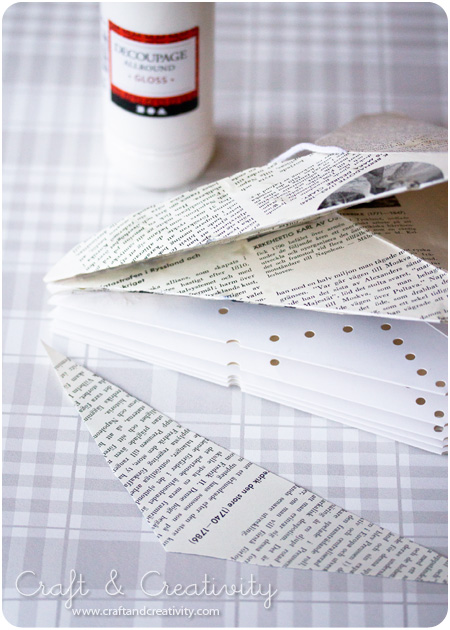
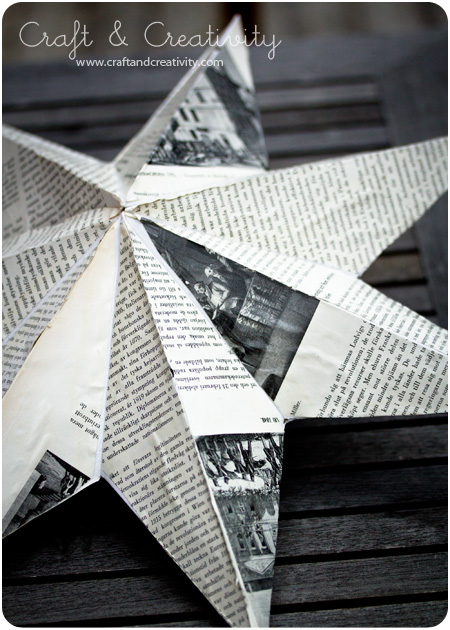
Jag valde att täckte en stjärna med boksidor från en gammal uppslagsbok och limmade och lackade med decoupagelack. Enklast är att börja med att klippa ut en trekantig mall som passar formen av stjärnans udd. Använd sedan mallen för att få rätt form på papperet. Se bilderna ovan. Pensla limmet på stjärnan, lägg papperet på plats och släta ut eventuella ojämnheter med fingrarna. Täck en udd i taget och vänd sedan på stjärnan och ta andra sidan. Blir kanterna ojämna kan du putsa dem med en sax. När stjärnan är helt täckt, lacka ytan med samma decaupagelack som du använde för att limma med. Jag använde blank lack men så här i efterhand hade jag hellre använt den matta varianten. Men det är ju en smaksak.
—–
I chose to cover one star with book pages from an old encyclopedia and used decoupage lacquer (i.e. Mod Podge) for glue and finish. I found that the easiest way is to start by cutting out a triangular template that fit the shape of the points of the star. Then use the template to get the correct shape when cutting the book pages. See the pictures for guidance. Brush decoupage laquer on the star, put the paper in place and smooth out any irregularities with your fingers. Cover one point at a time and then turn the star around and do the other side. If the edges get uneven, you can trim them with a pair of scissors. When the star is completely covered, paint the surface with the same decoupage laquer you used to glue with. I chose the glossy kind, but in retrospect, I would rather have used the matte one. But that’s just a matter of taste. 


A comment for you non-Swedish readers: In Sweden it’s very common to hang these Advent stars in the windows on the first Advent before Christmas. 

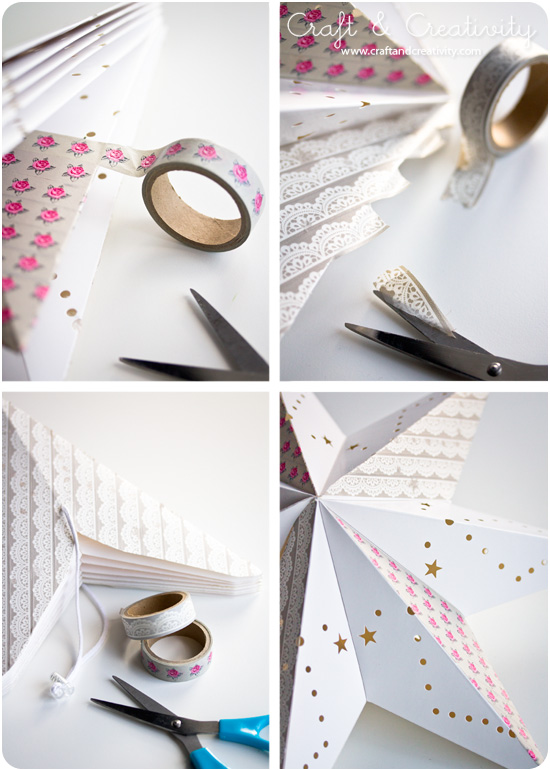
Blinka lilla stjärna. Vår andra stjärna tejpade vi med papperstejp, s k washitejp. Ganska effektfullt det också och mindre kladdigt att jobba med än lim/lack. /
Twinkle twinkle little star. We decorated our second star with paper tape, so called washi tape. Pretty effect-full, and less messy to work with compared to glue/laquer. 

Tejpa hela eller delar av stjärnan. Trimma bort överflödig tejp med en sax och du är klar! Tips: Ta även en titt hos Pysselbolaget och se vad Karin & Freja gjorde med sina stjärnor!
——
Tape the whole or parts of the star. Trim off excess tape with scissors and you’re done! Tip: Take a look at Pysselbolaget and see what Karin & Freya made with their stars!

Idéer för julklappsinslagning –
Christmas gift wrapping ideas

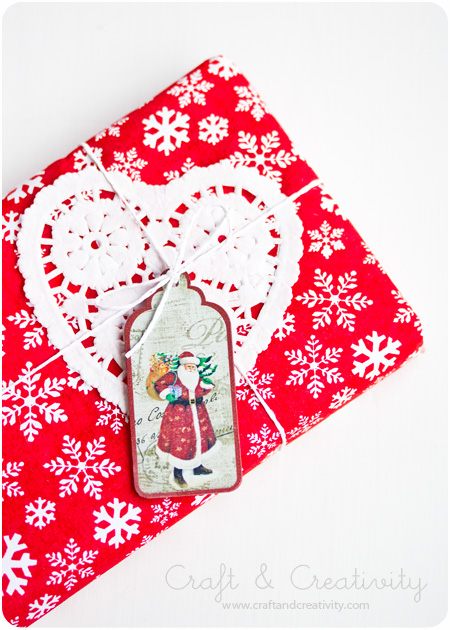
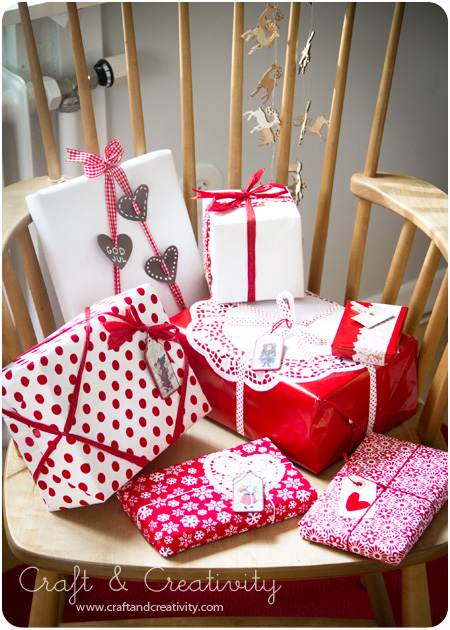
Att slå in julkappar är roligt, om man har lite tid på sig och inte ska slå in alla på samma gång, kvällen innan julafton. Jag tänkte visa er några förslag på inslagningar, i god tid innan jul.

Wrapping Christmas gifts is fun, if you have some time on your hands and don’t have to wrap them all at once the night before Christmas. I thought I would show you some gift wrapping ideas in good time before Christmas. 


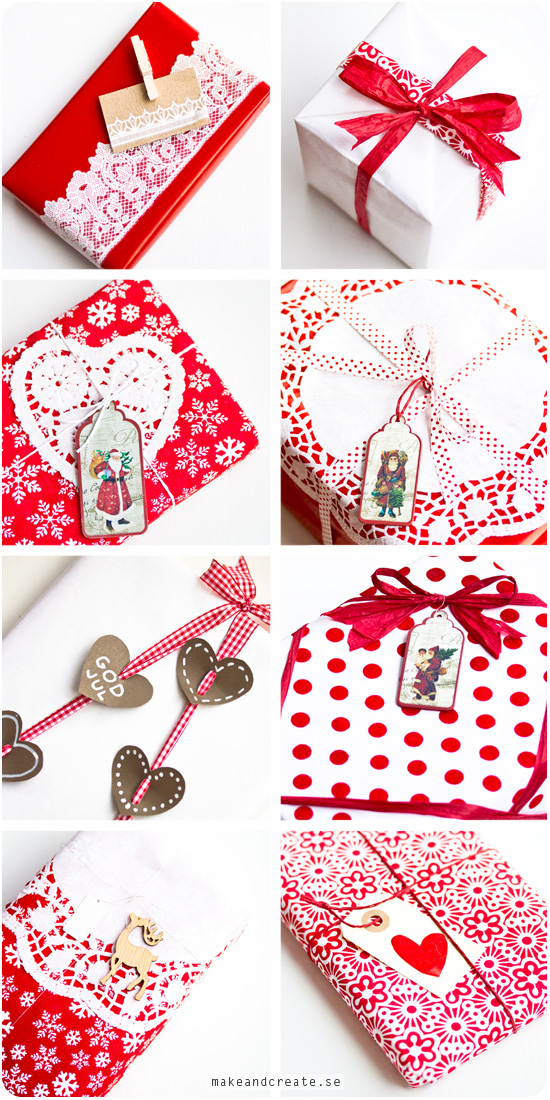
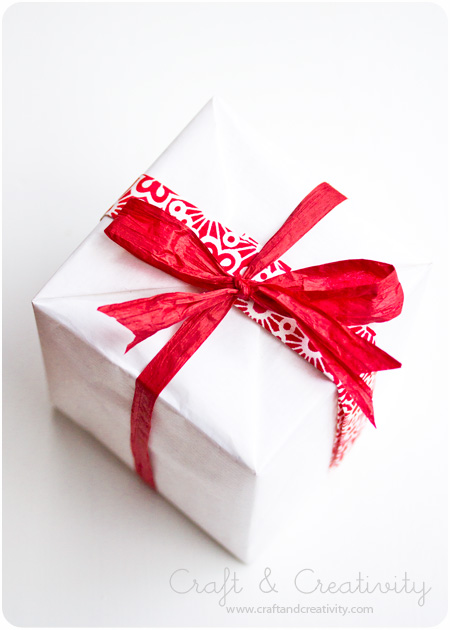
Till vänster ett enkelt rött papper som jag pyntat med en spetsmönstrad gnuggis (rub-on). Kortet är en bit kartong, även den med gnuggmönster på. Jag fäste kortet med en klädnypa med dubbelhäftande tejp under. Det vita paketet till höger har fått en remsa av mönstrat papper som dekoration och ett papperssnöre.
——
To the left, a simple red gift paper decorated with a lace patterned rub-on. The gift tag is a piece of cardboard, also with a piece of rub-on. I attached the card using a clothespin with double sided tape underneath. The the right, I used white paper with a strip of patterned paper and a paper string.


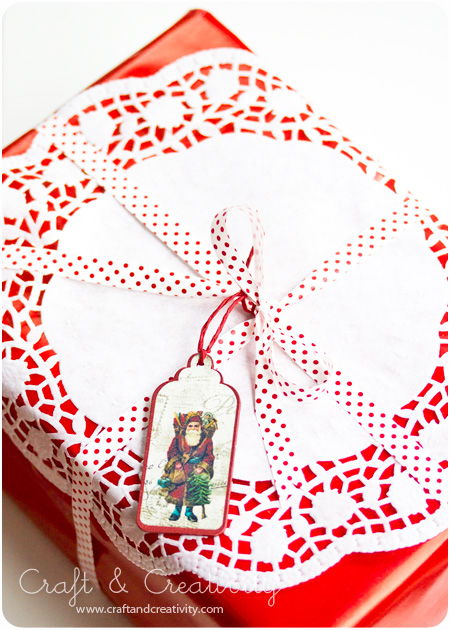
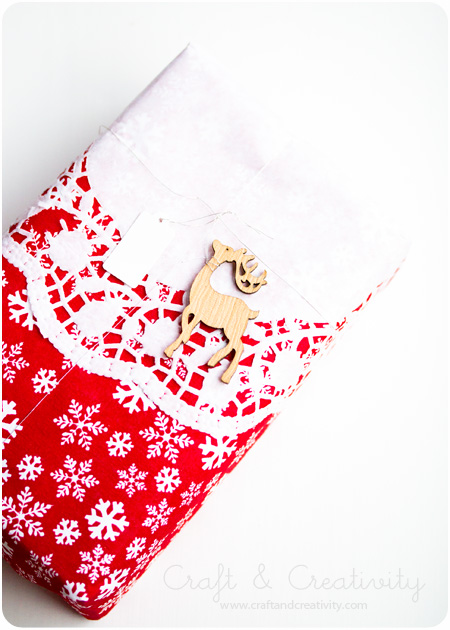
Tårtpapper fungerar väldigt bra på en mörkare bakgrund och min favorit när det gäller julklappsinslagning är den klassiska kombinationen rött och vitt.

Paper doily works very well on a darker colored background and my favorite when it comes to Christmas gift wrapping is the classic combination of red and white.


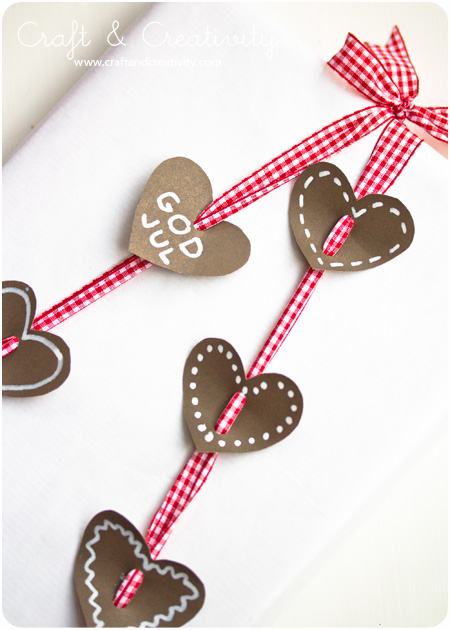
Pepparkakorna är utklippta av brun kartong och som mall använde jag pepparkaksformar. Hålen är gjorda med hålslag och jag har ritat mönster med Hobby Marker som är en vit täckande penna. Jag trädde det rutiga bandet genom hålen och runt paketet. Idén fick jag från ett fotografi taget av Meisi på Flickr. Till höger ett handgjort fint papper med ett enkelt rött band.

The gingerbread cookies are cut from brown cardboard and for template I used a gingerbread cookie cutter. I made holes for the ribbon with a hole punch and drew the icing pattern with a white hobby marker. Finally I threaded the gingham ribbon through the holes and around the package. I got the inspiration from one of Meisi’s pictures on Flickr. To the right a handmade gift wrapping paper with polka dots and a simple red ribbon.


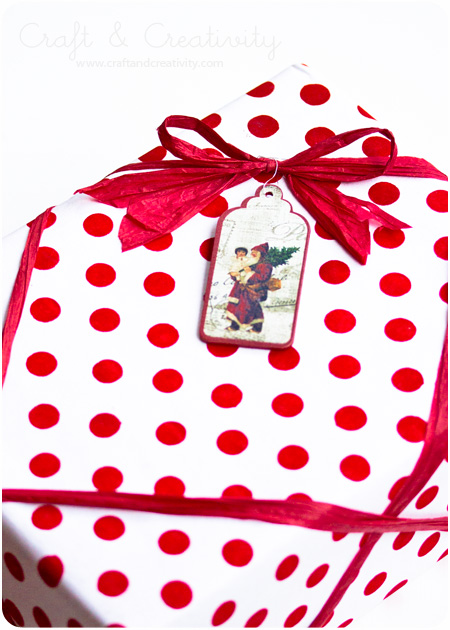
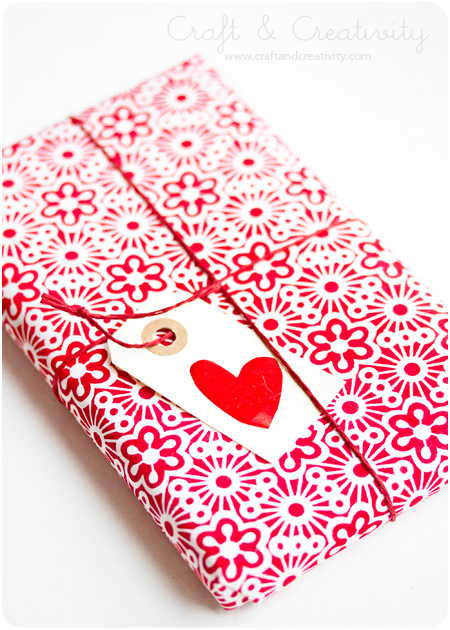
Mer tårtpapper i kombination med röd- och vitmönstrade papper och fina etiketter. Till höger ett manillamärke med ett rött pappershjärta som jag klippt ut och klistrat på.
—-
More paper doily in combination with red and white patterned gift wrapping and pretty tags. I cut and pasted a red paper heart to the manila tag to the right. 

Washitejpad julgran –
Washi taped Christmas tree

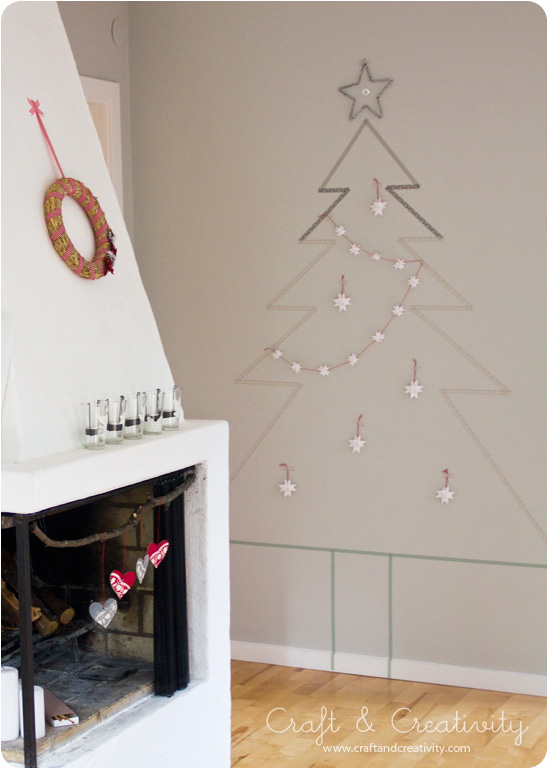
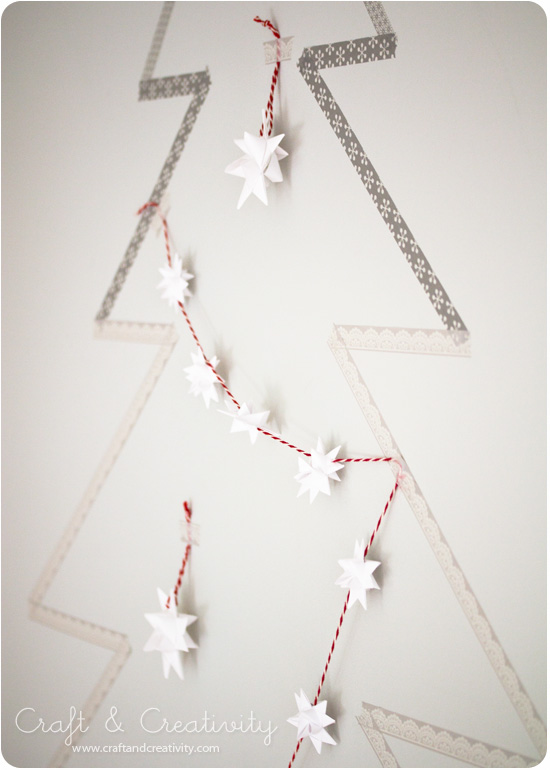
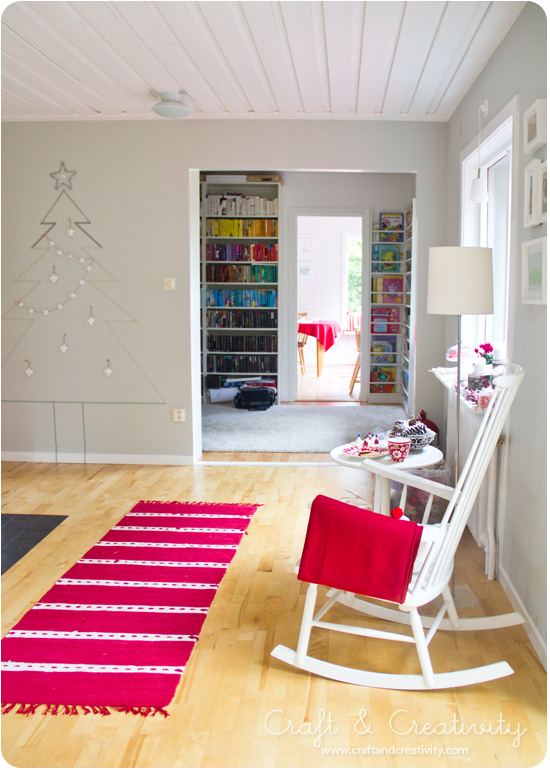
Har man inte plats för en julgran hemma eller helt enkelt vill slippa alla fallande barr så kan man tejpa upp en gran istället. Om inte annat för är det en kul grej. Washitejp (japansk papperstejp) är lätt att ta bort och lämnar inga märken. Svårast var att få granen någorlunda symmetrisk… måttstock är att rekommendera.

If you don’t have room for a real Christmas tree or if your tired of needle-drop, you can tape up a tree instead. if for no other reason, it looks kind of fun. Washi tape (japanese masking tape) is easy to remove doesn’t leave marks. The most difficult thing was to get the tree somewhat symmetrical … I recommend a yardstick.

Jag pyntade min gran med de pappersstjärnor som jag vek ihop förra julen. /
I decorated my tree with those paper stars I folded last Christmas.

Vy från vårt vardagsrum, genom biblioteket och in i köket. /
The view from our living room, through the library and into the kitchen.

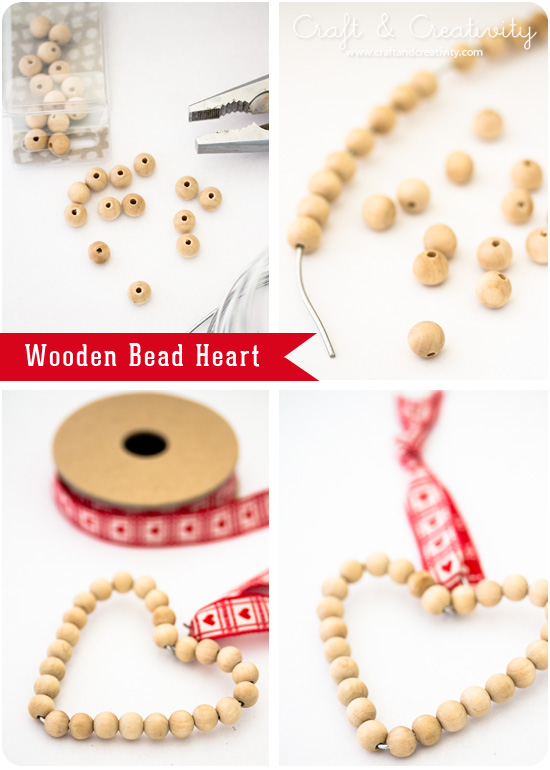
Hjärta av träkulor – Wooden Bead Heart

Nu är det november och då är det legitimt att börja julpyssla, eller hur? 🙂 Jag har gjort dessa enkla hjärtan av ståltråd och träkulor. Jag trädde kulorna på metalltråd, formade den som ett hjärta och gjorde en ögla högst upp. I öglan fäste jag ett “juligt” band. Med annan färg på bandet så funkar det att ha hjärtat framme året om.
—-
It’s November and high time to start Christmas Crafting, right? 🙂 I made these simple hearts out of wire and wooden beads. I threaded the beads on the wire, shaped it like a heart and made a loop at the top. In the loop I attached a Christmas colored ribbon. With another type of ribbon you can leave your heart hanging all year around. 

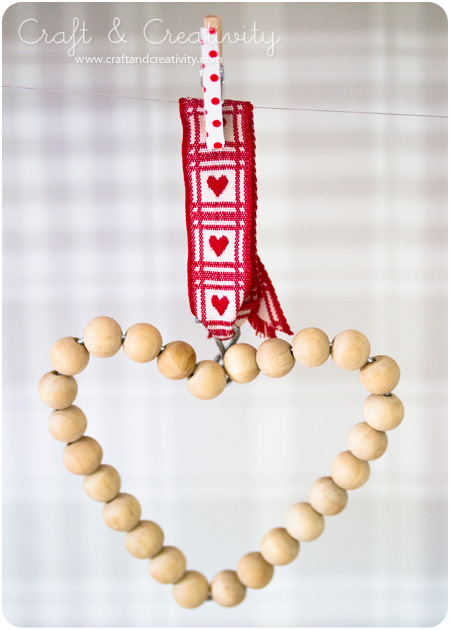
Den lilla klädnypan har jag pimpat med en bit presentsnöre som jag klippt till och fäst med dubbelhäftande tejp. /
I pimped the miniature clothespin with a piece of curling ribbon attached with double-sided adhesive tape.

Washitejpade askar –
Boxes decorated with washi tape

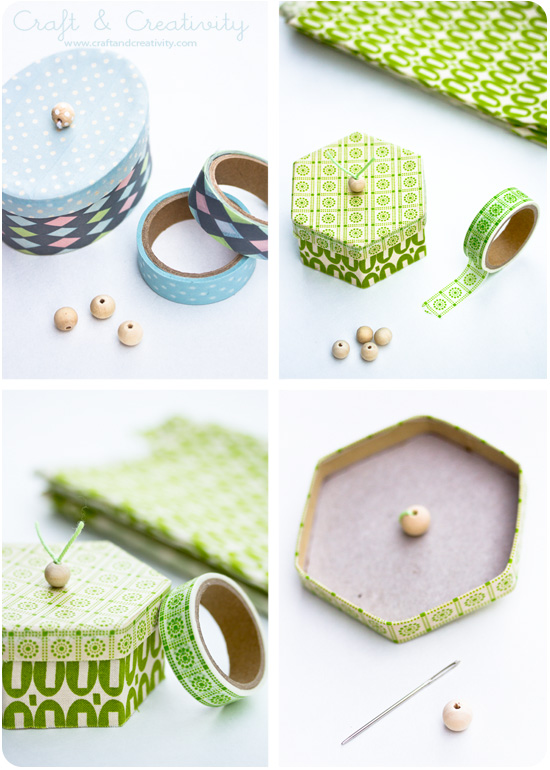
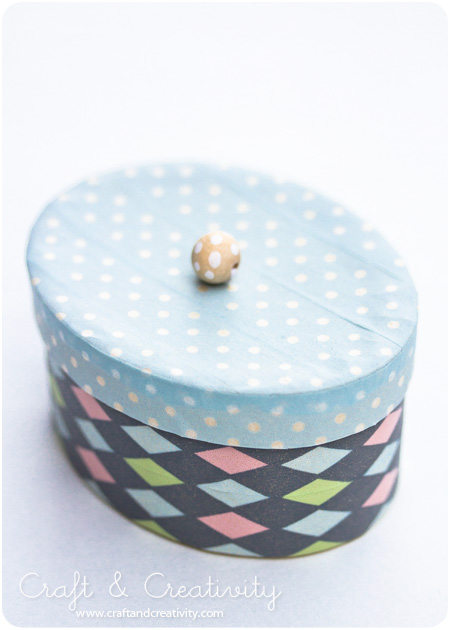
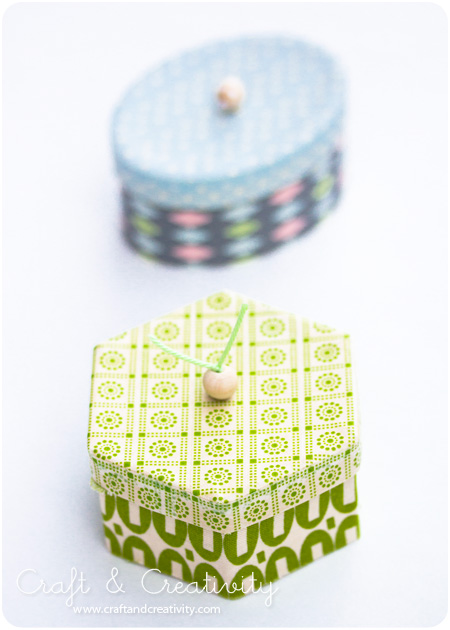
Jag spinner vidare på det här med att göra presentaskar. Snart har jag ett helt lager här hemma för framtida kalas. 🙂 Den här gången har jag täckt mina pappersaskar med mönstrad papperstejp och tyg. Det gick på ett kick och jag gillar resultatet. Mina presentaskar fick små knoppar på locket, inspirerad av Rie Elise Larsens fina boxar.
—-
I keep on making gift boxes. Soon I’m fully stocked for upcoming birthday parties. 🙂 This time I covered my paper boxes with washi tape and fabric. The boxes were quick to make and I like the result. I put small knobs on the lids of my boxes, inspired by Rie Elise Larsen’s beautiful boxes. 

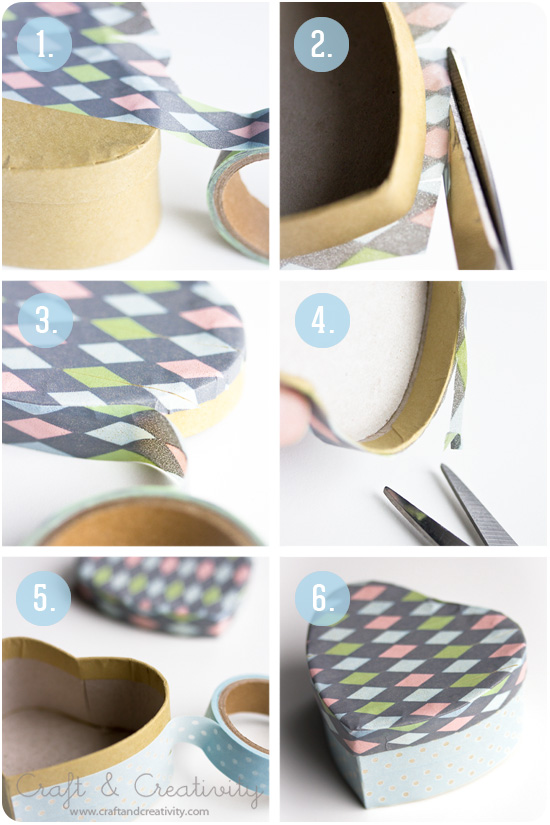
Gör så här: 
1. Täck ovansidan av locket med önskad tejp. Mönsterpassa så gott det går.
2. Klipp rent men lämna ett par mm runt kanten som du viker över på lockets sidor.
3. Täck sidorna med tejp, runt om hela locket.
4. Klipp rent.
5. Täck askens sidor på samma sätt.
6. Du är klar! Lacka asken med decoupagelack, om så önskas.
—-
Do like this:
1. Start by covering the lid with the tape of your choice. Pattern match for best result.  
2. Trim the tape but leave a little bit around the lid and fold over the edge. 
3. Cover the sides, all around the lid. 
4. Trim.
5. Cover the sides of the box in the same way as with the lid. 

6. You’re done! If you like you can top off with some decoupage laquer.


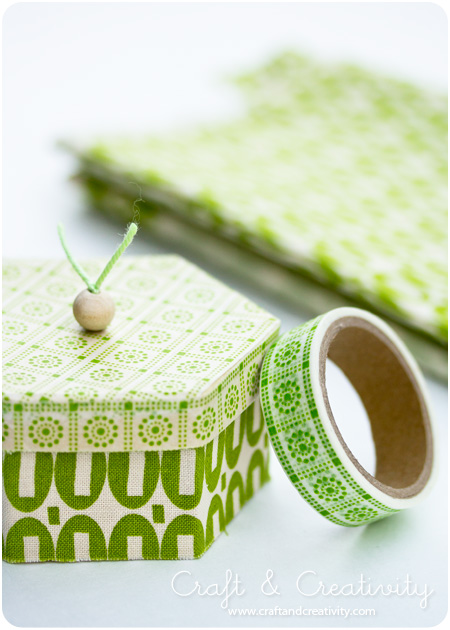
För att göra en liten knopp behöver du en bit garn, en stoppnål och två små träpärlor. Stick nålen genom locket och fäst en pärla på ovansidan av locket och en på undersidan. På så sätt säkrar du att det går att dra i knoppen utan att den lossnar.
——-
To make a small knob, you will need a piece of yarn, a darning needle and two small wooden beads. Push the needle through the lid and attach one bead on top of the lid and one on the bottom. This will ensure that the knob won’t detach when you pull it.


Den gröna asken är täckt med bit tyg. Också ett enkelt och fint sätt att piffa upp tråkiga askar. Jag limmade fast tyget med papperslim. /
The green box is covered with a piece of fabric. Also a simple and nice way to embellish dull paper boxes. I glued the fabric in place with paper glue.

Pappersdockor för utskrift –
Printable Paper Dolls

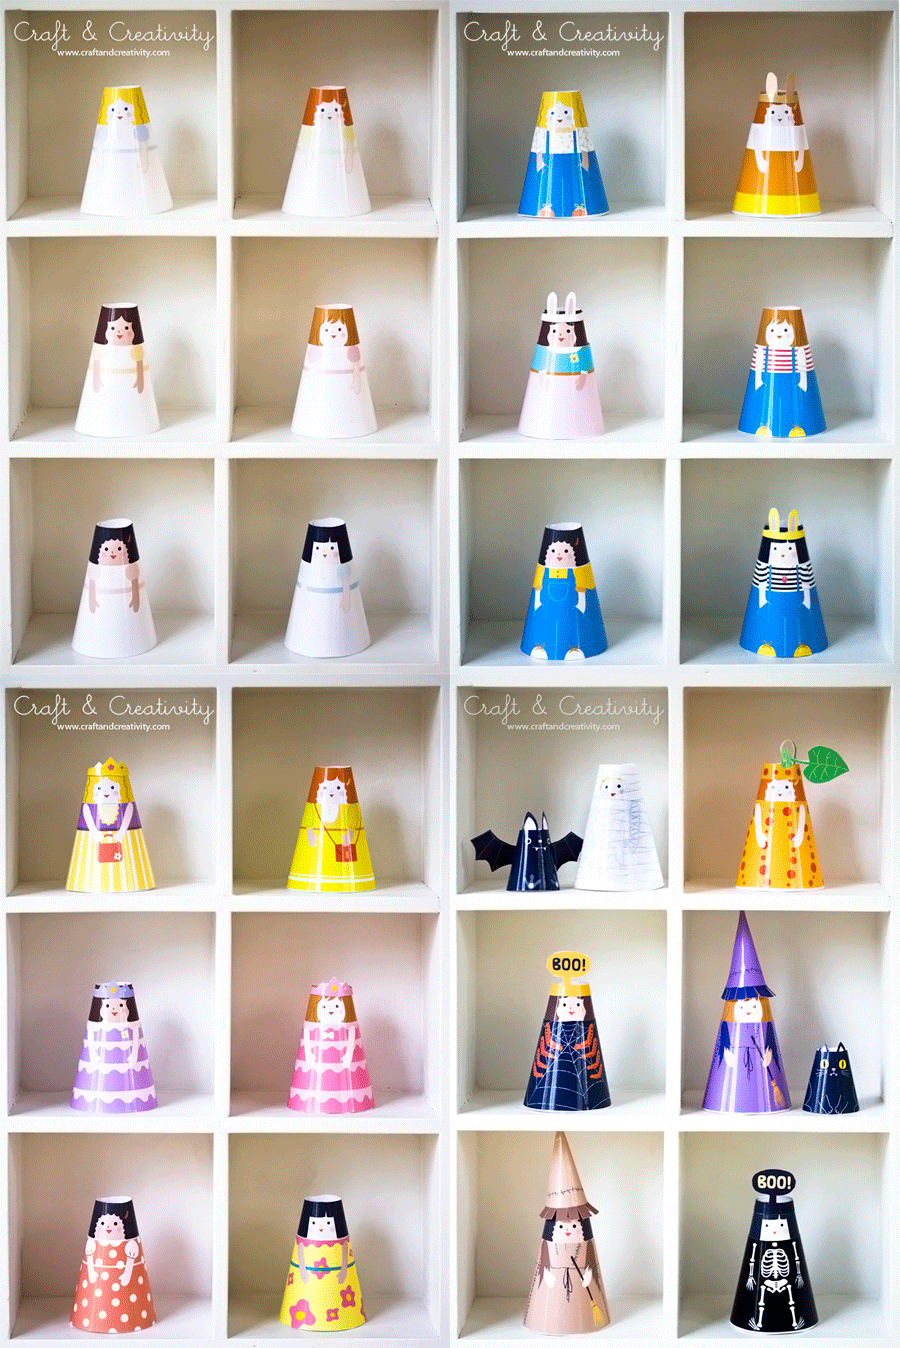
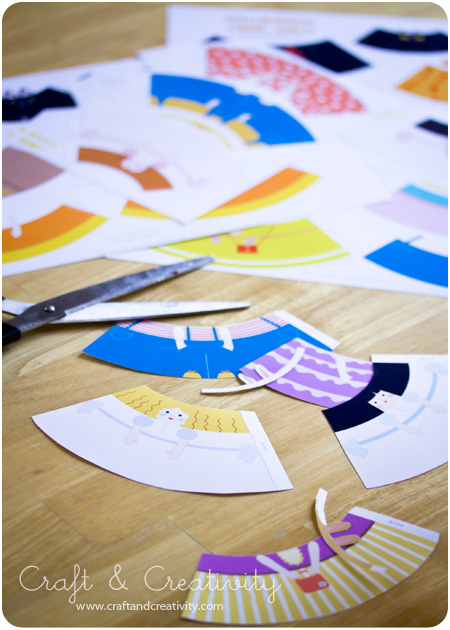
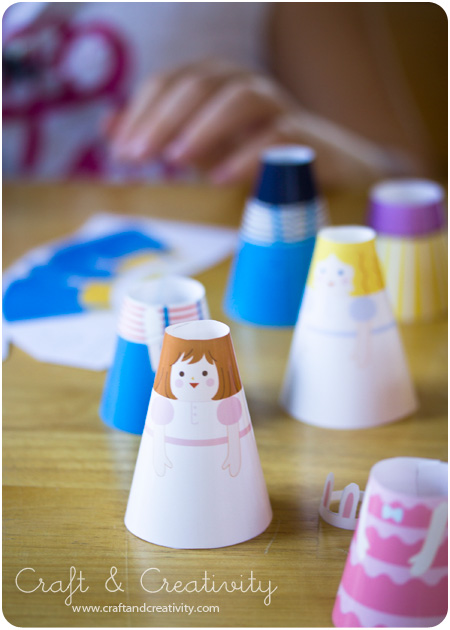
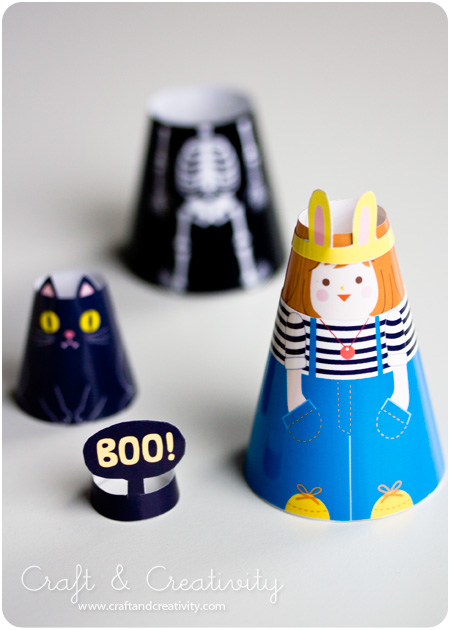
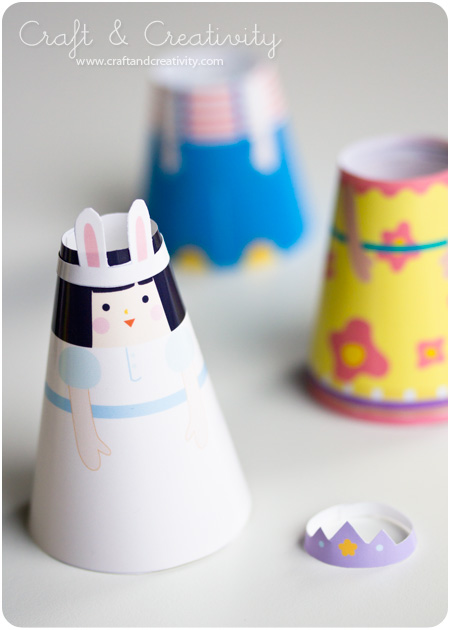
Dessa söta konformade pappersdockor kan man ladda hem gratis från Mr Printables. Vi skrev ut våra på fotopapper för att få klarare färger och mer stabilitet men det går säkert bra med vanligt skrivarpapper också.
—–
These cute cone-shaped paper dolls can be download for free from Mr. Printables. We printed ours on glossy photo paper, in order to get brighter colors and more stability. I’m sure ordinary printer paper will also work. 

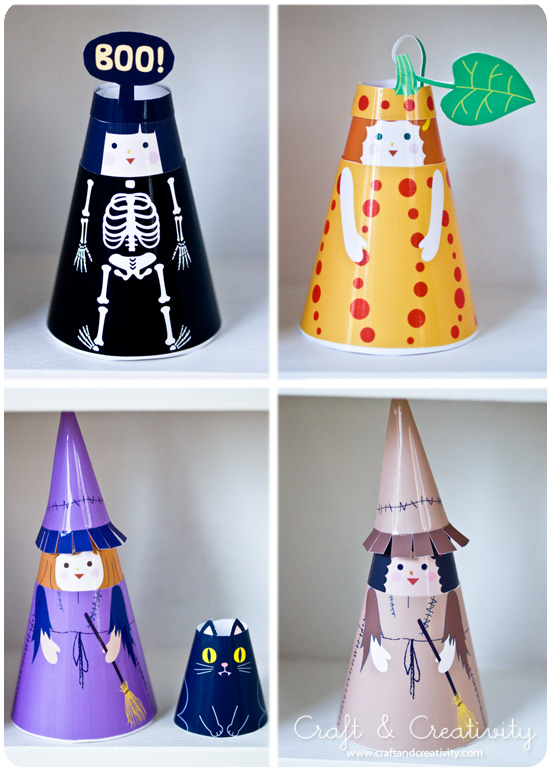
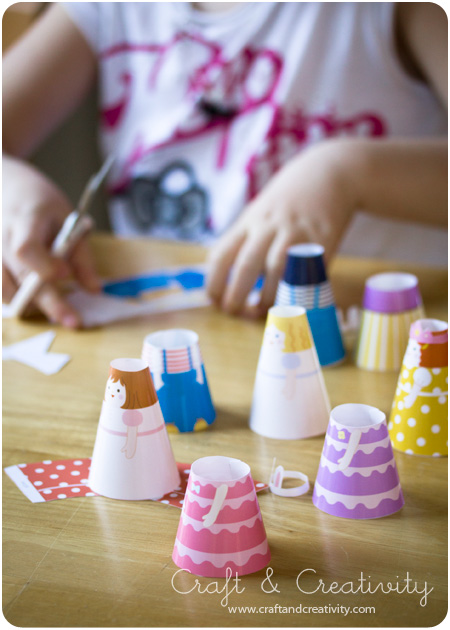
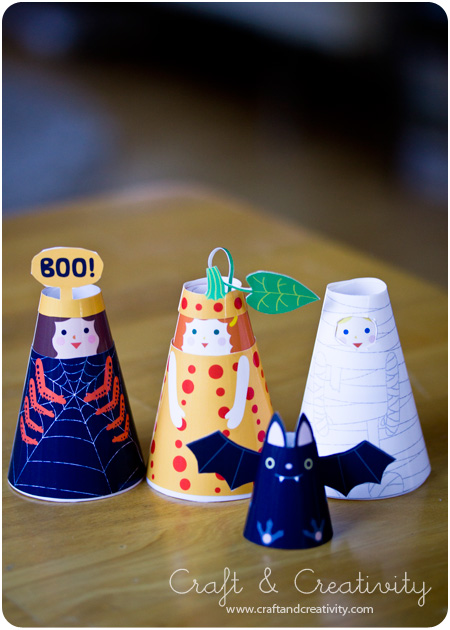
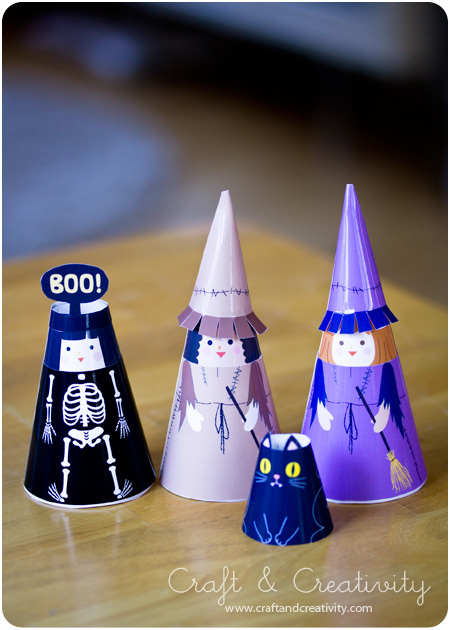
Det finns sex dockor att ladda ner och alla har två uppsättningar kläder plus en halloween-utstyrsel. Man kan byta kläder lätt som en plätt och mina tjejer har lekt timtals med sina nya dockor. /
There are six dolls to be downloaded and they all have two sets of clothes plus a Halloween outfit. Changing clothes is a breeze and my girls played for hours with their new dolls.


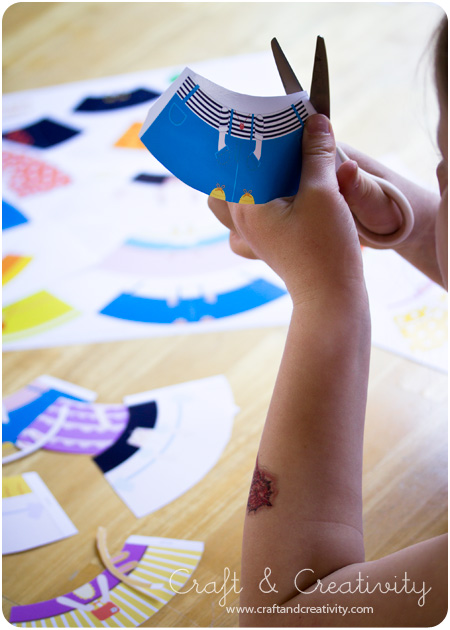
Min åttaåriga dotter klippte ut delarna och jag monterade. Ett mysigt och enkelt pyssel att göra tillsammans och ett tips inför höstlovet för er som är lediga med era småttingar. /
My eight year old daughter cut out all the parts and I did the assembling. A nice and simple crafts to make together. 


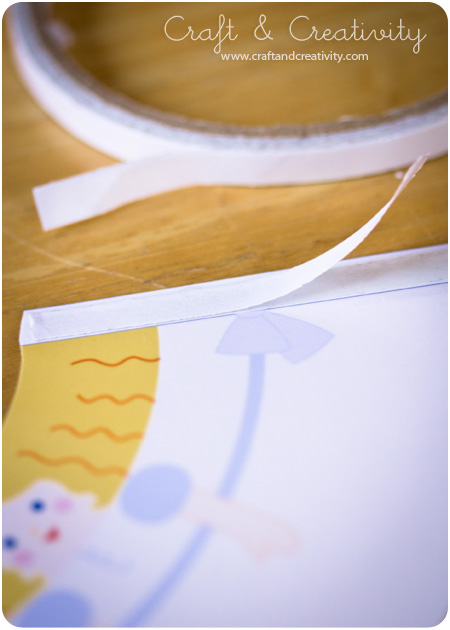
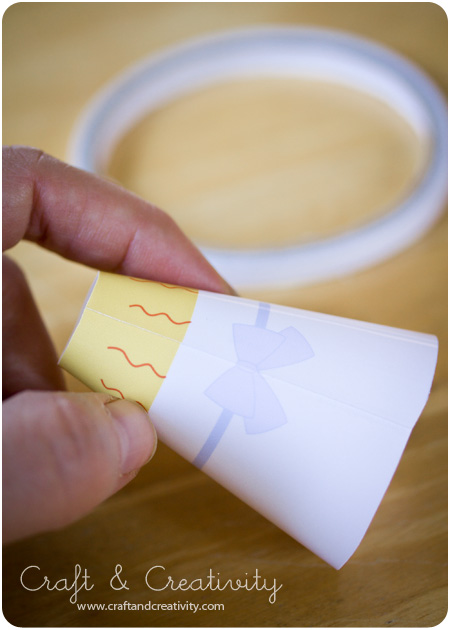
Mr Printables föreslår att man använder klister för monteringen, men jag & dottern föredrar dubbelhäftande tejp eftersom man slipper torktider och det kladdar mindre. Dockorna är väldigt enkla att montera. Man rullar helt enkelt ihop dem till en kon och fäster i ryggen.
—-
Mr. Printables suggests using glue at the back, but me and my daughter prefer double-sided adhesive tape since you you eliminate drying time and creates less mess. The dolls are very easy to assemble. You simply roll them into a cone and secure at the back.


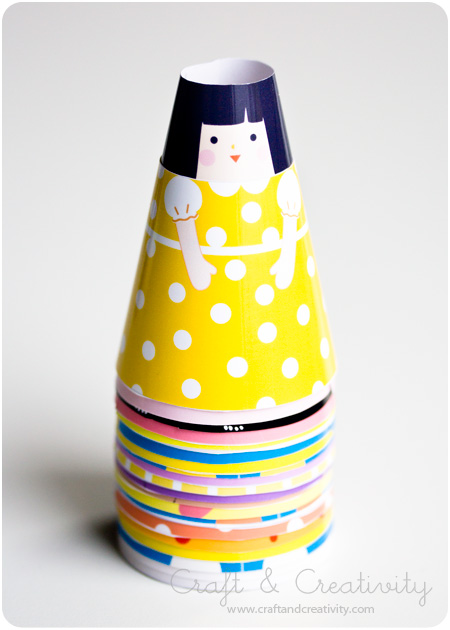
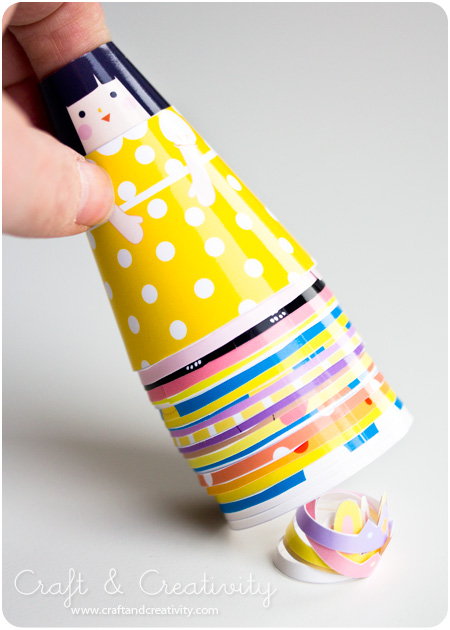
Och när barnen har lekt klart så kan man stapla pappersdockorna och kläderna på varandra. På så sätt tar de upp minimalt med utrymme. /
And when the kids are finished playing you can stack the paper dolls and their clothes in a pile. Thanks to this they take up a minimum of space. 


På den här sidan kan du ladda ner dockor med kläder:
Mr Printables Paper Cone Girls.
Och här laddar man hem Halloween-kostymerna:
Mr Printables Cone Girls at Hallween.
—-
On this page you can download the dolls with their clothes:
Mr. Printables Paper Cone Girls.
And here you can download home the Halloween costumes:
Mr. Printables Cone Girls at Hallween.

iPhone snabbfix – iPhone Quick Fix

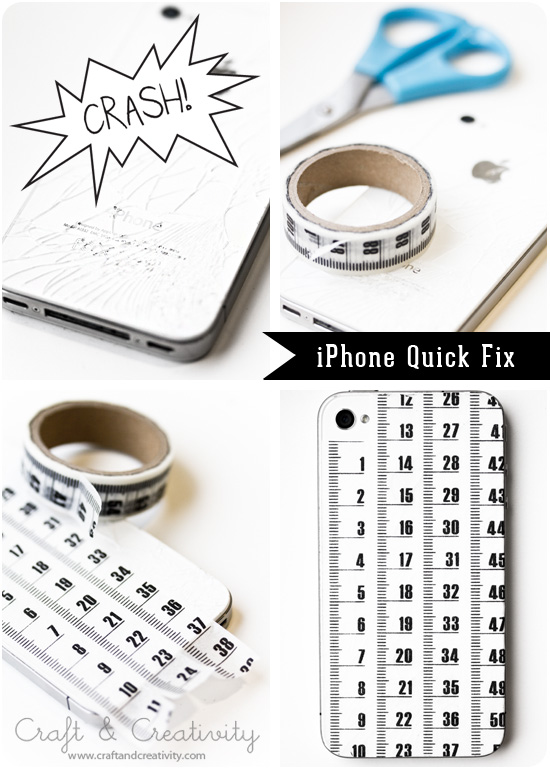
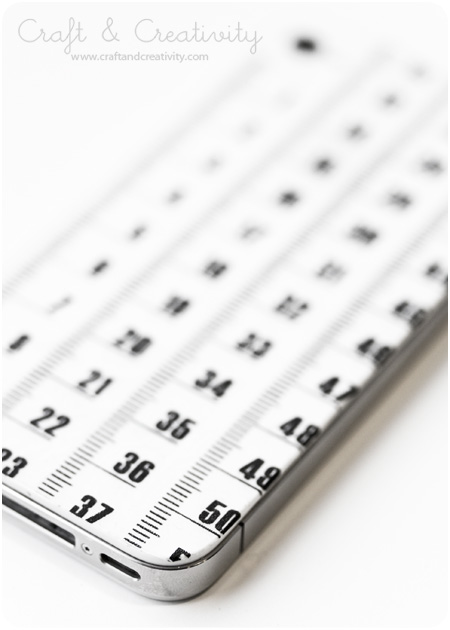
Jag vet, jag är klantig. Säg inget. 😉 Men om man, som jag, tappar sin mobil i asfalten och glaset på baksidan krossas så finns det en snabb & billig lösning, som dessutom ser lite kul ut. Tejpa baksidan med washitejp (mönstrad papperstejp), klipp bort överflödet och du kan använda telefonen ett tag till. Självklart kan du tejpa din telefon även om den inte är trasig, som ett billigt alternativ till mönstrade mobilskal.
—-
I know, I’m clumsy. Don’t say anything. 😉 But if you, like me, dropped your iPhone on the ground and happened to crush the back glass, there is a quick and inexpensive fix to this. Which also looks kind of fun. Tape the back of the phone with washi tape (japanese masking tape), cut away the access and you can use your phone for a while longer. Needless to say you can tape your phone even if it’s not broken, as an inexpensive alternative to a patterned mobile cover. 

Tejpen håller sig snygg några veckor, sedan kan man enkelt byta ut tejpen. Om man nu inte, vid det laget, lagat telefonen eller kanske t o m köpt en ny. 🙂
The tape will keep fresh for a few weeks, then you can easily replace the tape. That is, if you haven’t, by then, repaired your phone or perhaps even bought a new one. 🙂

Bokåtervinning – Recycling old books

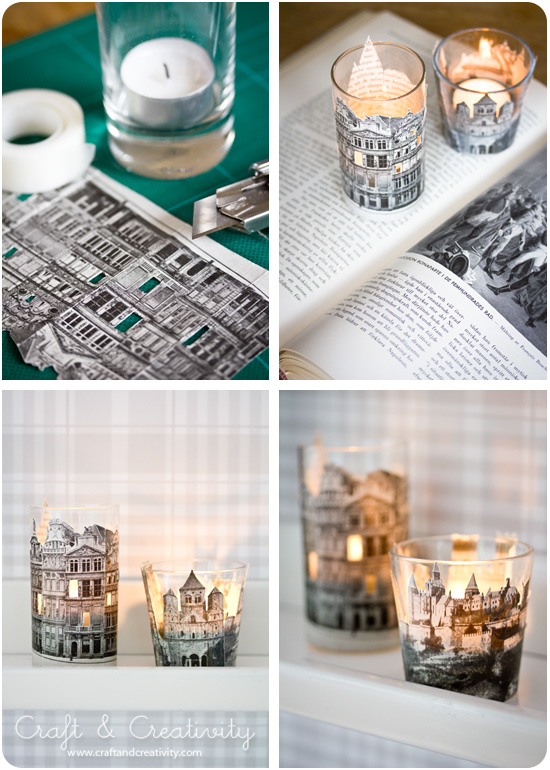
Efter pärlträffen förra helgen var jag och mamma på loppis. Jag var på jakt efter gamla böcker och fick med mig sju tunga, tjocka uppslagsböcker hem. Jag ville testa en pyssel med utklippta pappershus runt ljushållare, som jag sett bland annat hos Sweet Paul.

After the bead meet last weekend, my mom and I went to a flea market. I was on the search for old books and I brought seven heavy encyclopedias with me home. The plan was to make paper house candle holders, like those I’ve seen at Sweet Paul’s.   

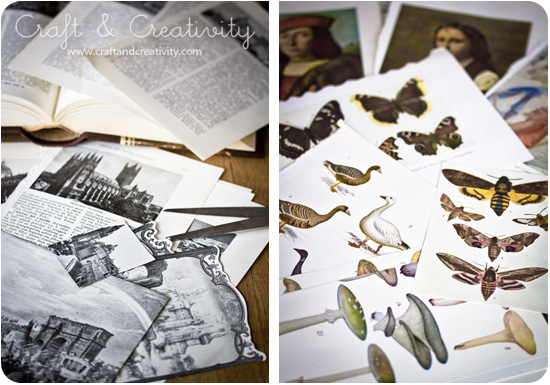
Det var egentligen fotografier på hus jag var ute efter men de lexikon och historieböcker jag fick med mig hem innehöll även vackra bilder på växter, djur, målningar och kartor. Massor med pysselmaterial för framtiden! Som den bokälskare jag är gjorde det lite ont i hjärtat att riva sönder böckerna men jag tröstade mig själv med att de var slitna och att de bara kostade 1 krona styck. Plus att de antagligen kommer sprida mer glädje som inredningsdetaljer än som dammiga gamla böcker på en loppis.
—–
It was originally looking for pictures of old houses, but the dictionaries and history books I came home with also contained beautiful illustrations of flowers, animals, paintings and maps. Lots of material for future crafting! Being the bookwork I am, it was with a little sadness in my heart that I tore the books apart. I consoled myself with the fact that the books were worn and only cost me 1 SEK (10 cent) each. Plus, they are likely to spread more joy as interior accents than dusty old books at a flea shop. 

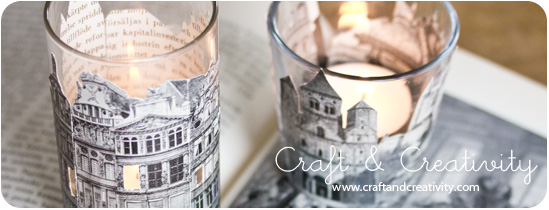
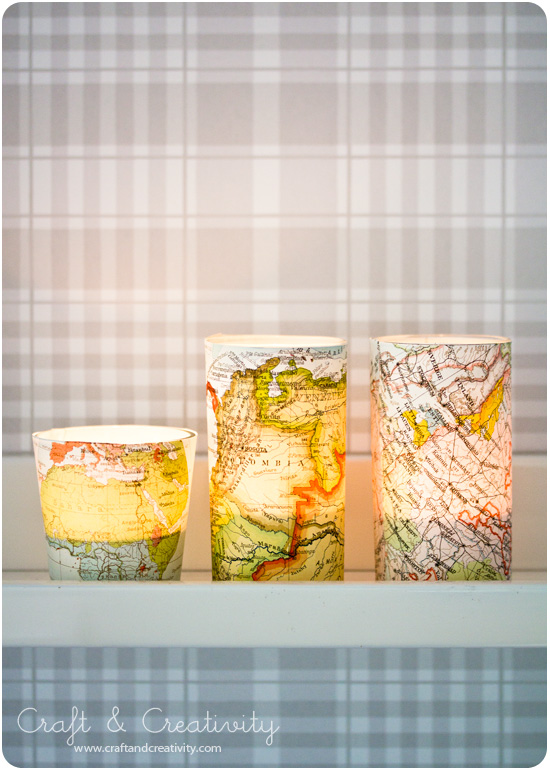
Jag klippte ut husen med en sax och skar ut några av fönstren med en hobbykniv, för att skapa en genomlysningseffekt. Sedan satte jag papperet runt dricksglas och tejpade ihop på baksidan. Slutligen klippte bort överflödigt papper för att passa glasets form. En annan idé för återvinning kan vara att använda gammal glasburkar.
—-
I cut out the houses with a pair of scissors and cut out a couple of the windows with an exacto knife to create a transparency effect. I wrapped the paper around small drinking glasses and and secured with tape at the back. Finally, I cut away any access paper. Another idea for recycling could be to use old jars instead of glasses. 

   
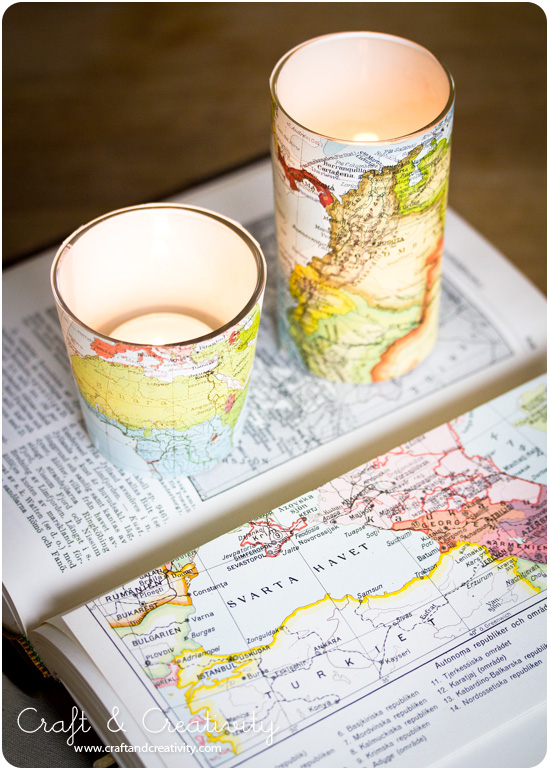
När jag väl var varm i kläderna fortsatte jag med kartorna och gjorde likadant med dem. /
While I was on a roll, I did the same with the maps. 


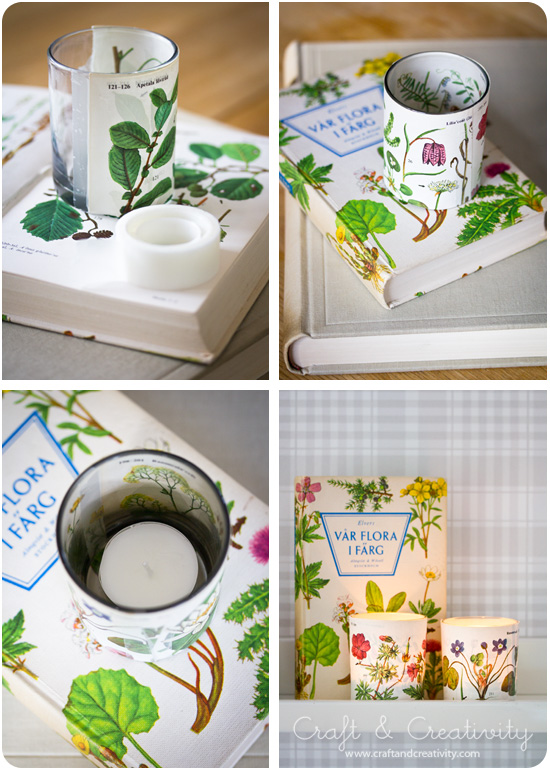
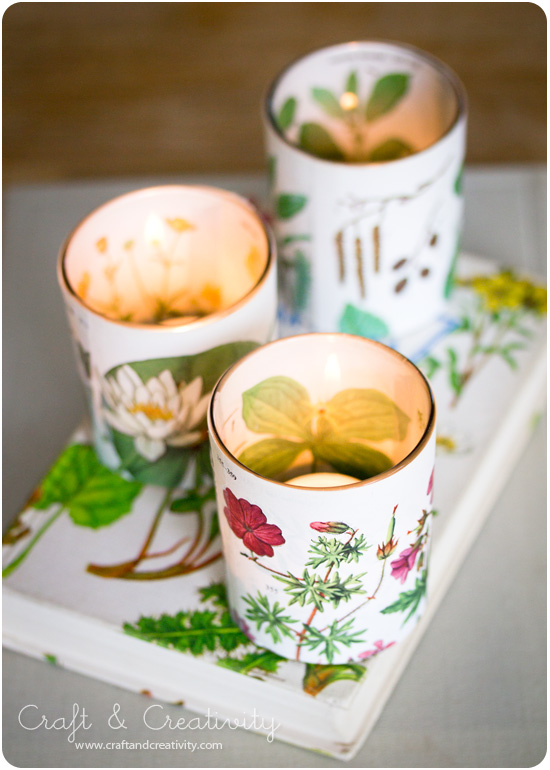
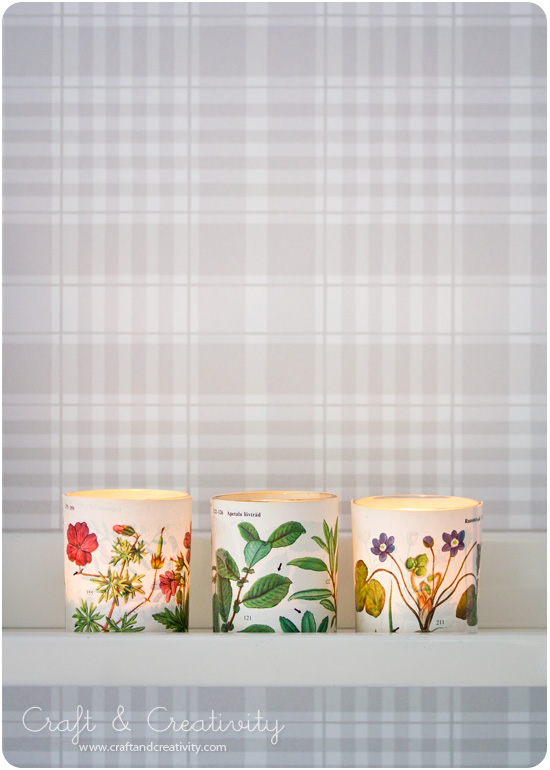
En gammal florabok som jag loppisfyndat tidigare fick också vara med och bidra till samlingen av ljuslyktor. De blev nästan finast av alla, tycker jag. Florabilder har jag använt förut när jag tejpade upp dem i hallen på övervåningen. /
An old botanical book from a previous flea market bargain-hunt also contributed to my collection of votives. I think they turned out to be the prettiest of them all. I’ve used botanical pictures before when I taped them to a wall in our upstairs hallway. 

Knappar på ståltråd – Buttons on wire

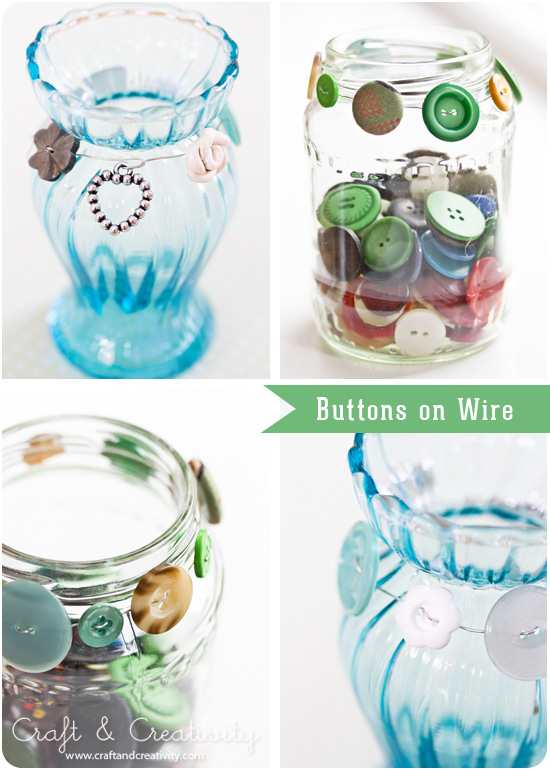
Med ganska små medel kan man piffa upp vardagliga saker hemma och ge dem din egen unika design. Det här kan vara ett sådant exempel. Börja med att samla ihop gamla knappar eller hängen som du har liggande i gömmorna. Det går ofta också att fynda knappar på loppis för en spottstyver. Titta i skåpen och se om du har några gamla glasburkar, vaser eller krukor som skulle passa att piffa till.
—-
With relatively small means you can spice up everyday things in your house and give them your own unique design. This could be one of those examples. Start by collecting old buttons or pendants that you might have lying around. Or for that matter, you can often find buttons at the flea market for a bargain price. Take a look in your cupboards and see if you can find some old glass jars, vases or pots that could use a make-over. 

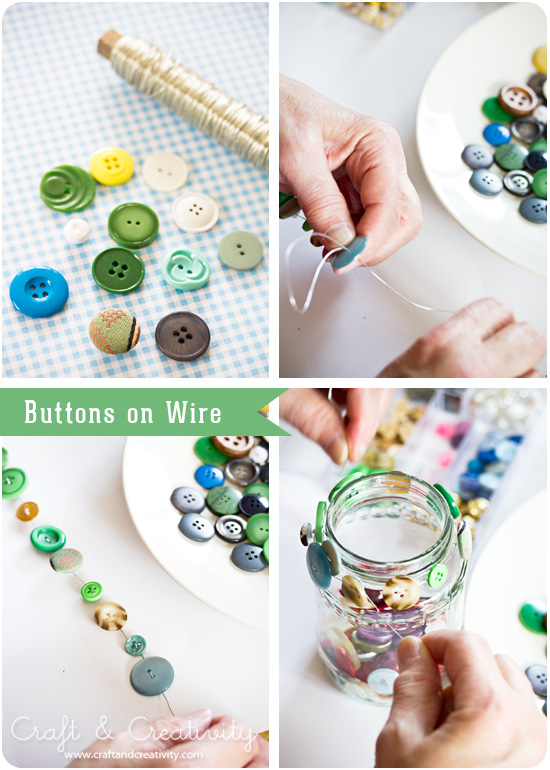
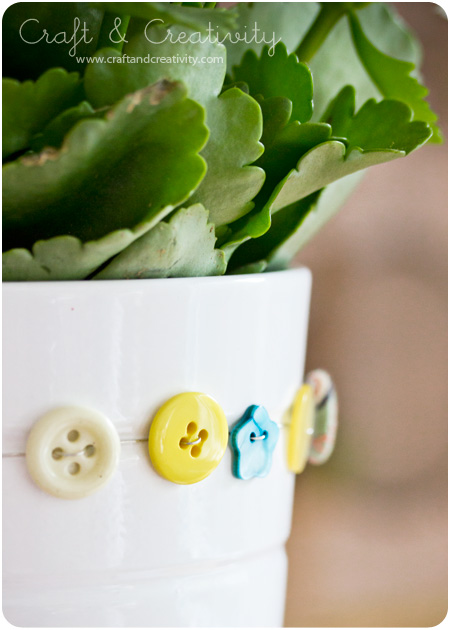
Trä knapparna på en ståltråd och vira dem runt din burk/vas/kruka. Jag valde att ha lite avstånd mellan knapparna. Fäst genom att tvinna ändarna på ståltråden några varv och klipp av överbliven ståltråd med en avbitartång. /
Thread your buttons on craft wire and wrap around your jar / vase / pot. I chose to leave some space between the buttons. Secure by twisting the ends of the wire. Cut off excess wire with wire cutters.

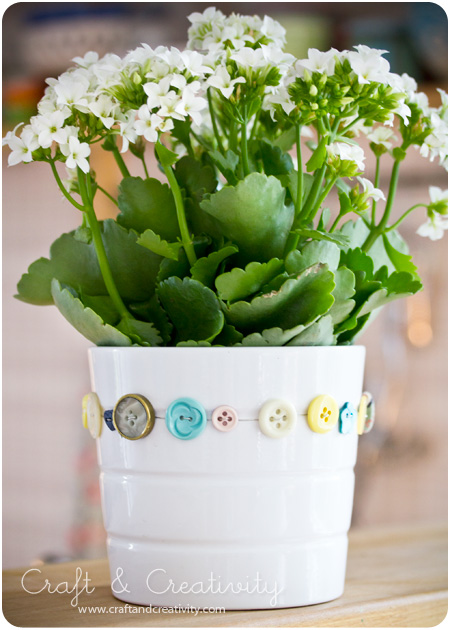
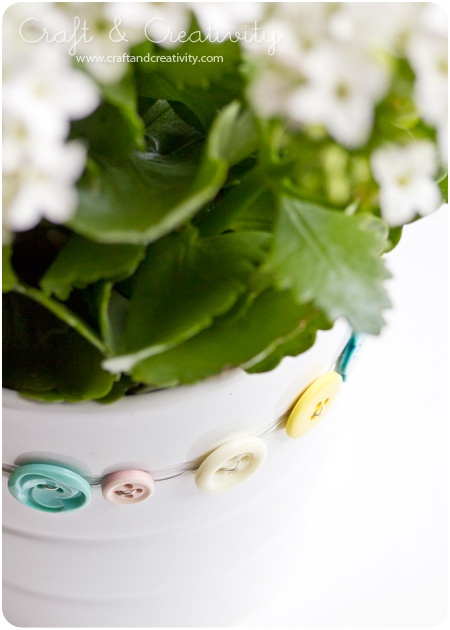
En helt vanlig billig kruka har fått ett nytt utseende. Just den här passade bra eftersom den var skårad och ståltråden hålls därför på plats. Om man har en kruka som är helt slät kan man fästa ståltråden med lite dubbelhäftande tejp på ett par ställen (på baksidan av knapparna). /
An ordinary flower pot with a new twist. This particular pot worked very well since it is carved, and because of that the wire is held in place. If you have a pot that is completely smooth, you can attach the wire with some double-sided adhesive tape (on the back of a few of the buttons). 


Inspirationen till detta pyssel fann jag hos Lady by the Bay. /
I found the inspiration for this craft at Lady by the Bay

Origami-fjärilar – Origami butterflies

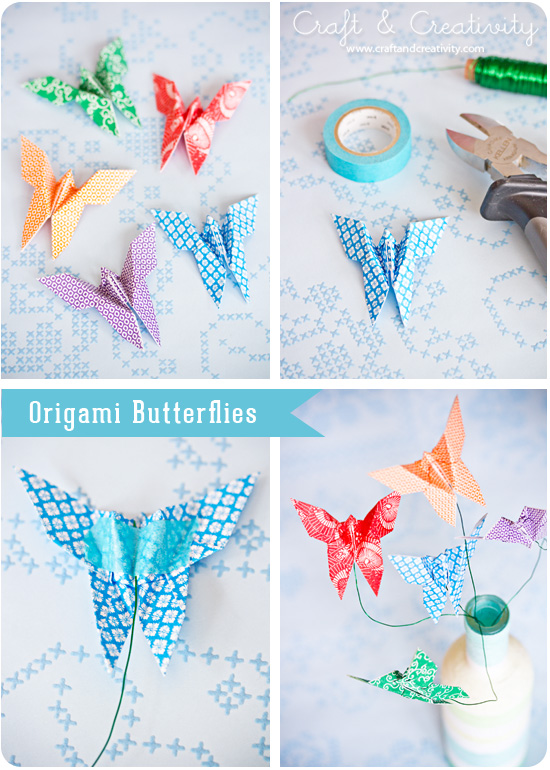
Jag har fastnat lite för det här med origami. Med vackra papper kan man göra mycket roligt. Som dessa fjärilar till exempel. Jag följde denna utmärkta beskrivning på YouTube. När jag vikt fjärilarna klart fick jag idén att fästa dem på ståltråd (jag använde tejp, men en klick klister fungerar säkert också).
—–
I’ve been a bit hooked on origami lately. You can make so many great things with pretty paper. Like these butterflies for example. When making them I followed this excellent tutorial on YouTube. After I folded them, I got the idea to attach the butterflies to a wire (I used washi tape, but I’m sure a dab of glue would work as well). 

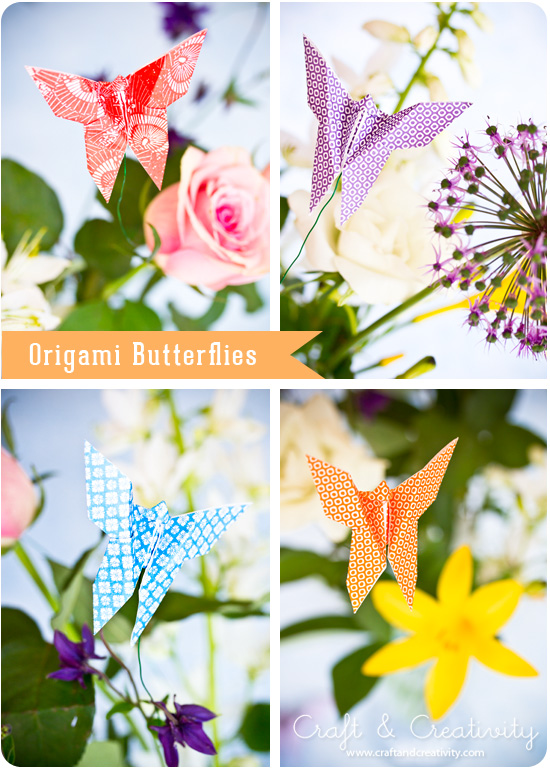
Placera fjärilarna i en bukett med blommor och det blir en perfekt gå-bort-present. Eller fäst en fjäril på ett paket alternativt dekorera bordet med dem när du ska ha fest. /
Place the butterflies in a bouquet of flowers and you get a nice going-away gift. Or attach a butterfly to your gift wrapping or use them as table setting decorations.

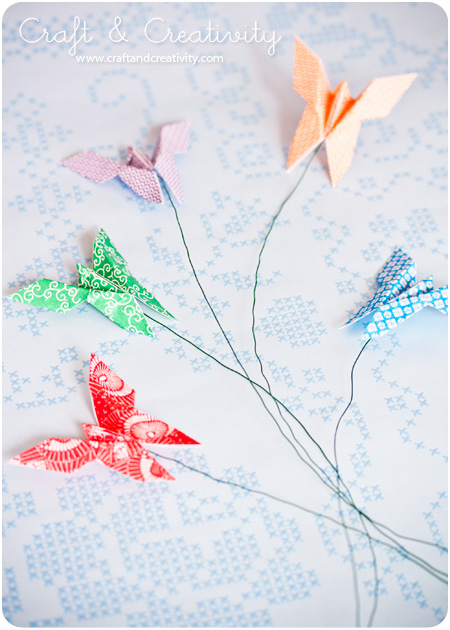
Eller gör en bukett bara bestående av färgglada fjärilar… /
Or make a bouquet consisting only of colorful paper butterflies …

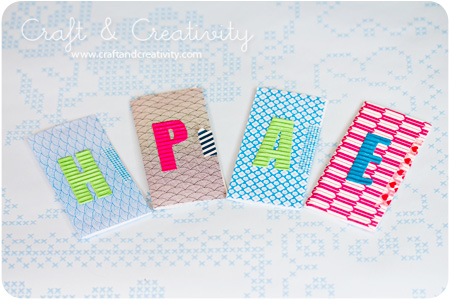
Under tiden som jag vek mina fjärilar så gjorde äldsta dottern bokmärken till hela familjen. Hon vek ett origamipapper på längden, tejpade ihop med washitejp och klistrade fast pappersbokstäver. /
While I was folding the butterflies my eldest daughter made bookmarks for the whole family. She used origami paper, folded it in half, sealed it with washi tape and glued paper letters on top.