Stenskyltar till trädgården –
Pebble plant markers

Pebble plant markers - by Craft & Creativity

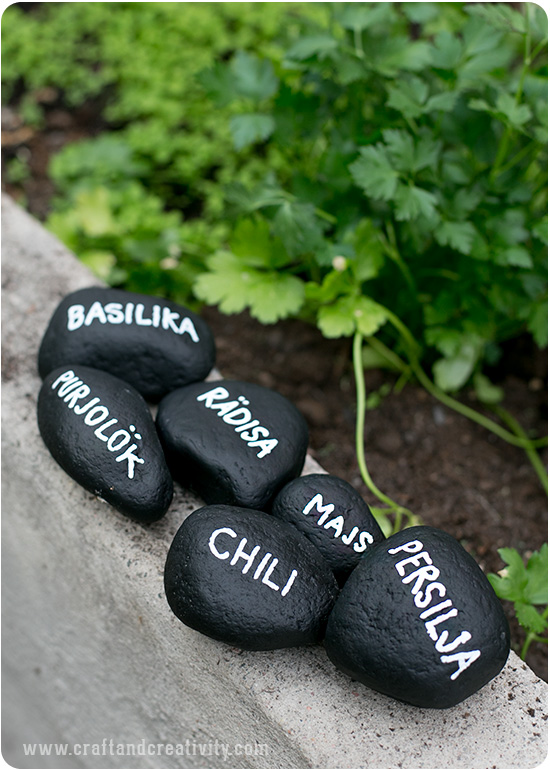
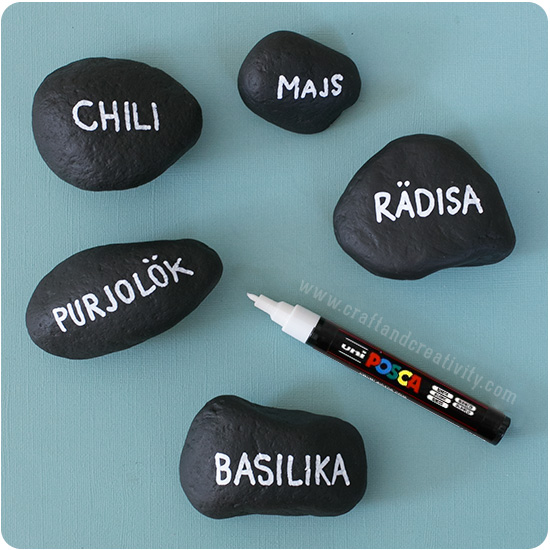
För några veckor sedan gjorde jag enkla små stenskyltar till vårt växthus där barnen planterat sina egna grönsaker och kryddväxter.
———-
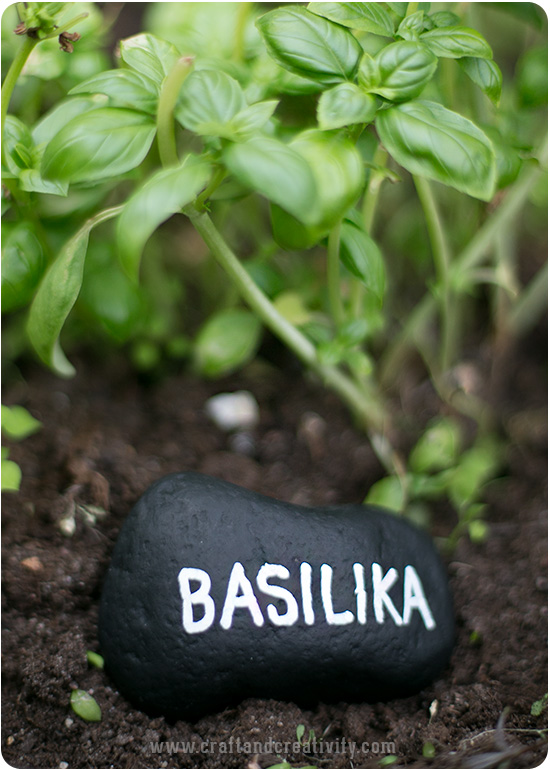
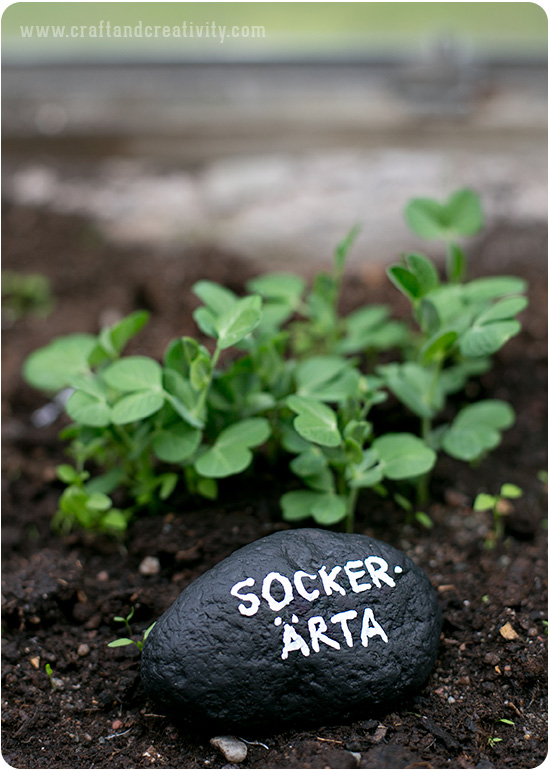
A few weeks ago I made these plant markers for our greenhouse where the children planted their own vegetables and herbs. 

Pebble plant markers - by Craft & Creativity

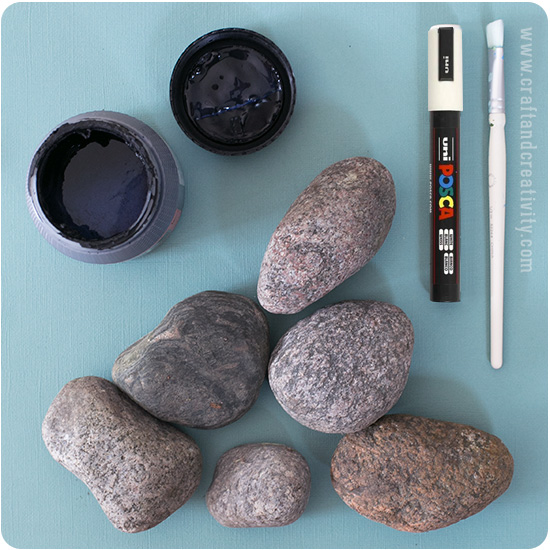
Du behöver: Stenar, tavelfärg, en pensel och en permanent vit tuschpenna. Tavelfärg använder man egentligen för att måla på släta ytor (som väggar, trä eller spånskivor) om man vill göra en egen griffeltavla, men jag gillar den matta ytan som tavelfärgen ger och jag ville att stenarna skulle se ut som små griffeltavlor, även om texten inte går att sudda.
————-
You will need: Pebbles, chalkboard paint, a brush and a white permanent marker. Chalkboard paint is normally used for painting on smooth surfaces (such as walls, wood or particle board) to make chalkboards, but I like the matte surface and wanted the pebbles to look like small chalkboards, even if the text is permanent.

Blackboard pebbles for the garden - by Craft & Creativity

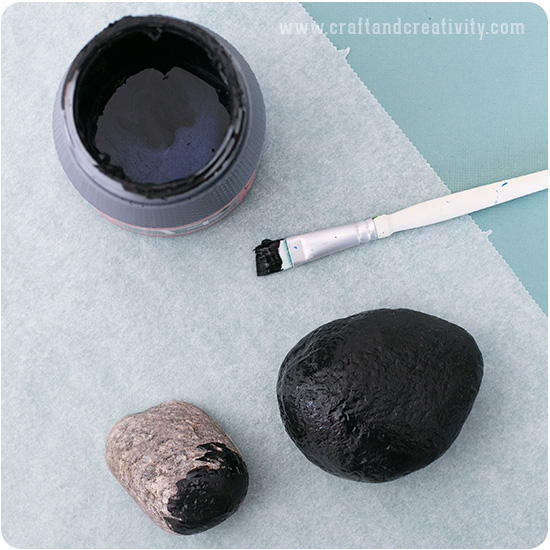
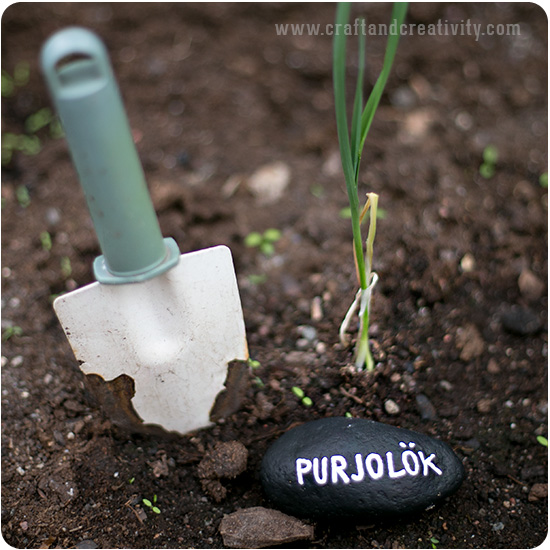
Gör så här: Tvätta stenarna och måla dem sedan med tavelfärgen och låt torka. Färgen torkar på ca 30 min. Måla två lager om du inte tycker att färgen täcker riktigt. Sedan är det bara till att skriva texten på stenarna och du är klar!
———-
Do like this: Wash the pebbles and paint them with chalkboard paint and let dry. The paint dries in about 30 minutes. Paint two coats if needed. Now write on the pebbles and you’re done!

Pebble plant markers - by Craft & Creativity

Pebble plant markers - by Craft & Creativity

Pebble plant markers - by Craft & Creativity

Pebble plant markers - by Craft & Creativity

Gnuggisar på ägg –
Rub-ons on Easter eggs

Rub-ons on Easter eggs - by Craft & Creativity

Ett sätt att dekorera ägg till påsk kan vara att använda rub-ons (s k gnuggisar /gnuggmotiv). Det är enkelt och blir effektfullt.
————-
One way to decorate Easter eggs is to use rub-on tranfers. It’s easy and looks pretty. 

Rub-ons on Easter eggs - by Craft & Creativity

Börja med att koka äggen. Jag använde ekologiska hönsägg. Låt svalna och se till så att skalet är torrt. Klipp ut önskat motiv, lägg det ovanpå ägget och gnugga fast motivet på ägget med träpinnen som följer med i förpackningen. Idén fick jag från Country Living, via Pinterest.
——-
Start by boiling the eggs. I used organic chicken eggs. Allow the eggs to cool and make sure that they are dry. Cut out the motif of your choice, place it on top of the egg and transfer the motif to the egg by rubbing with a wooden stick (ice cream stick for example). I got this idea from Country Living via Pinterest.

Rub-ons on Easter eggs - by Craft & Creativity

Det känns nästan lite synd att knäcka skalen och äta upp äggen. Men nu är de i alla fall förevigade på bild. 🙂 Vill man använda gnuggisarna på något mer beständigt så kan man gnugga fast dem på småstenar, betonghjärtan eller askar t ex.
———-
It kind of feels likes a pity to crack the shells and eat the eggs. But now at least I have them on photo. 🙂 If you like to use rub-ons on something more durable – you can transfer them to pebbles, concrete hearts or boxes for example.

Gnuggmotiv på askar –
Rub on decorated boxes

Här har jag målat en enkel brun pappersask med vit hobbyfärg och dekorerat med gnuggisar (rub-ons). Jag fyllde asken med praliner och det blev en fin och personlig gå-bort-present.
—-
Here I’ve painted a simple brown paper box with white hobby paint and decorated it with rub-ons. I filled the box with chocolates and used it as a pretty little hostess gift.

Måla asken för sig och locket för sig. När färgen torkat så klipper man ut det motiv man önskar använda från mönsterarket. Lägg motivet på asken och gnugga med träpinnen som följer med tills hela motivet har fäst mot underlaget. Lacka eventuellt asken med decoupagelack när du är klar.
——–
Paint the box and the lid separately. When the paint is dry, cut out the rub-on of your choice from the pattern sheet. Place the image over the box and rub with a wooden stick (ice cream stick for example). If you like you can finish off with a coat of Mod Podge.


Matilda som jobbar för Make & Create (hon som hade pimpat sina hörlurar) visade mig sitt betonghjärta som hon pyntat med gnuggisar. Så kan man alltså också göra och det blir hur fint som helst! Eller för den delen använda gnuggisar på småstenar, som jag gjorde i somras.
———-
Matilda who works for Make & Create (the same Matilda who pimped her earphones) showed me this concrete heart that she had decorated with a rub-on. So that’s another great and decorative way to use rub-ons! Or for that matter, use them on pebbles, like I did last summer. 

Pyntade småstenar – Decorated pebbles

Jag ville göra något mer av de stenar jag plockade på semestern och då kom jag ihåg en pysselidé som jag sett på bloggen GardenMama, nämligen att använda gnuggisar (skrapmotiv/rub-on) på stenarna. Hur enkelt som helst. Gör så här: Klipp ut en gnuggis, gnugga fast den på stenen med en träpinne (t ex glasspinne) eller liknande och sedan är du klar.
—-
I wanted to make something else with the pebbles I picked on our vacation and then I remembered a craft idea that I spotted on GardenMama’s blog. More specifically using transferable images (rub-ons) on stones. It’s as simple as 1-2-3. Do like this: Start by cutting out your rub-on, place the image over your stone, rub with a wooden stick (ice cream stick for example) and your done.


Stenarna får gärna vara så släta som möjligt, då fastnar motiven lätt som en plätt. /
Use as smooth stones as possible, and the images will stick without any hassle. 


Nu bor dessa dekorativa stenar i vårt växthus. Kanske kommer några av dem bli presenter. Om jag kan skiljas från dem, vill säga. 🙂 /
These decorative stones now reside in our greenhouse. Perhaps some of them will be gifts. If I can part with them, that is. 🙂 


Några andra typer av gnuggismotiv, i färg eller spetsmönster. /
A couple of other types of rub-on motives, in color or lace patterns.

Barnen gjorde några stenar också. Tjejerna var väldigt delaktiga i själva insamlingen av stenarna: “-Mamma, visst var den här stenen rund och fin?”. 🙂
The kids made some stones as well. The girls were very involved in collecting the stones on the beach: “-Mom, isn’t this a nice and round stone?” 🙂

En kombinerad dekoration och reseminne. Plus att de är mysiga att hålla i handen, runda och släta. /
A combined decoration and souvenir. In addition to that, they are really nice to just hold in your hand, round and smooth. 

Duktyngder – Tablecloth Weights

Inspirerad av duktyngderna som jag fick upp ögonen för på konsthantverksgruppen Kaos i Södra Mellby har jag gjort egna varianter. Jag vet inte om ni har samma problem som oss, men här hemma tar vinden alltid duken när man försöker duka fint på altanen. Nu har vi en lösning på detta (lilla men dock irriterande) problem. Stenarna är reseminnen som jag samlade på stranden utanför Simrishamn.

Inspired by the tablecloth weights that caught my eye at the handicraft store Kaos in Södra Mellby, I’ve made my own versions. I don’t know if you have experienced the same thing as we have, but at our home the tablecloth always blows away in the wind when you’re trying to set a nice table on the patio. Now we have a solution to this (small, but still annoying) problem. The pebbles are souvenirs that I picked at the beach on our recent trip to Simrishamn, Skåne. 

Du behöver: Stenar (från stranden kanske?), ståltråd, en tång och klämmor. Klämmor kan man säkert köpa på järnaffären. Mina kommer från Ikea och heter Deka.
Gör så här: Sno ståltråden runt stenen som illustrerat i bilderna ovan. Snurra ihop ändarna och forma en ögla. Sätt på klämman och du är klar!
—-
You need: Pebbles (from the beach, perhaps?), wire, pliers and clips. Clips can probably be found at the hardware store. Mine are from Ikea and called Deka.
Do like this: Wrap the wire around the pebble as described in the pics above. Spin the ends together and form a loop. Attach the clip and you’re done!

Jag har ett gäng vackra stenar kvar som jag har andra planer för… Fortsättning följer. /
I have a bunch of beautiful pebbles left that I have other plans for … To be continued.

Dagens pyssel, måla kastanjer –
Craft of the Day, painting chestnuts

Förutom att måla på stenar måste det finnas det andra naturmaterial att använda sin kreativitet på… Min man säger att jag har rastlösa fingrar och det stämmer onekligen. Hobbyfärgen var redan inhandlad och bara väntade på att bli använd lite till.

I trädgården står ett kastanjeträd. Visst borde man kunna måla på kastanjer? Jodå, det gick!
(hade lite dålig fantasi så det blev familjens initialer igen…)

In addition to painting on pebbles, there must be the other natural materials to use one’s creativity on … My husband says I have restless fingers and he knows me oh so well.  The hobby paint was already purchased and just sitting there, waiting to be used some more.

In our garden stands a chestnut tree. Certainly you should be able to paint on chestnuts? Oh yes, you can!

Make & Create

Nylonpenslar

Plus Color


Make & Create - logo

Dagens pyssel, måla stenar –
Craft of the Day, painting pebbles

Jag och tjejerna hittade fina runda stenar i trädgården och utanför skolan och jag fick idén att göra något fint av dem. Jag började med att måla våra initialer men nu är jag sugen på att göra hela alfabetet. Måste bara hitta fler stenar. 🙂

GÖR SÅ HÄR:

  1. Tvätta stenarna, låt torka.
  2. Använd hobbyfärg och en smal rund pensel. Måla en färg i taget och låt torka emellan. Färgen torkar snabbt, på 10-20 minuter.
  3. När du målat klart och färgen torkat ordentligt är det dags att lacka. Om stenarna ska vara utomhus krävs extra stark skyddslack. Penslarna rengörs då i renad terpentin.

Me and the girls found some round stones in the garden and outside of school and I got the idea to make something nice of them. I started to paint our initials, but now I’m eager to do the whole alphabet. Just have to find more pebbles. 🙂

HOW-TO:

  1. Wash the stones, let dry.
  2. Use water soluble hobby paint and a small round brush. Paint one color at a time and let dry in between. The paint dries quickly, in about 10-20 minutes.
  3. When you finished painting and paint has dried thoroughly, it is time to varnish. If the stones are to be placed outdoors, then use extra strong protective coating. In that case the brushes must be cleaned with purified turpentine.
Make & Create

Lack

Plus Color

Nylonpenslar


Make & Create - logo