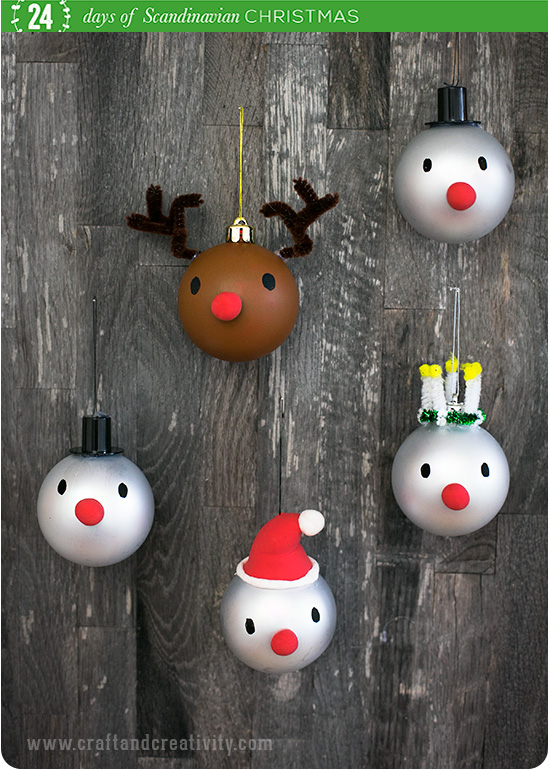
Igår delade Maria på Made by Mary med sig av sitt frestande recept på julgodis med nougat, hallon och vit choklad och idag är det åter min tur att ta över stafettpinnen i julkalendern 24 kreativa dagar i december för lucka nr 11. Jag tänkte visa hur jag har piffat till vanliga julgranskulor och med små medel gjort dem lite roligare.
———
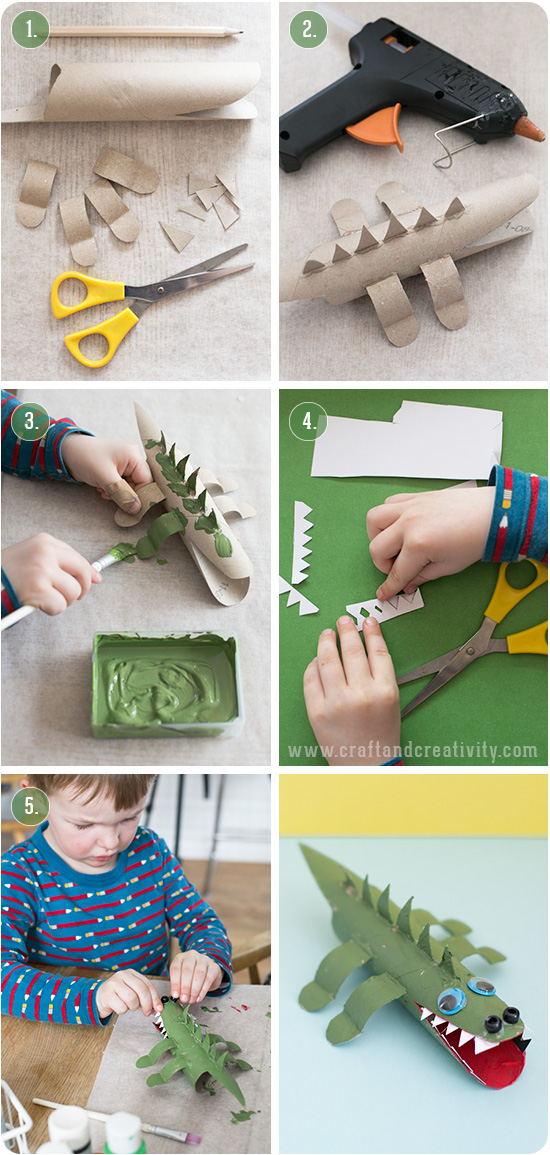
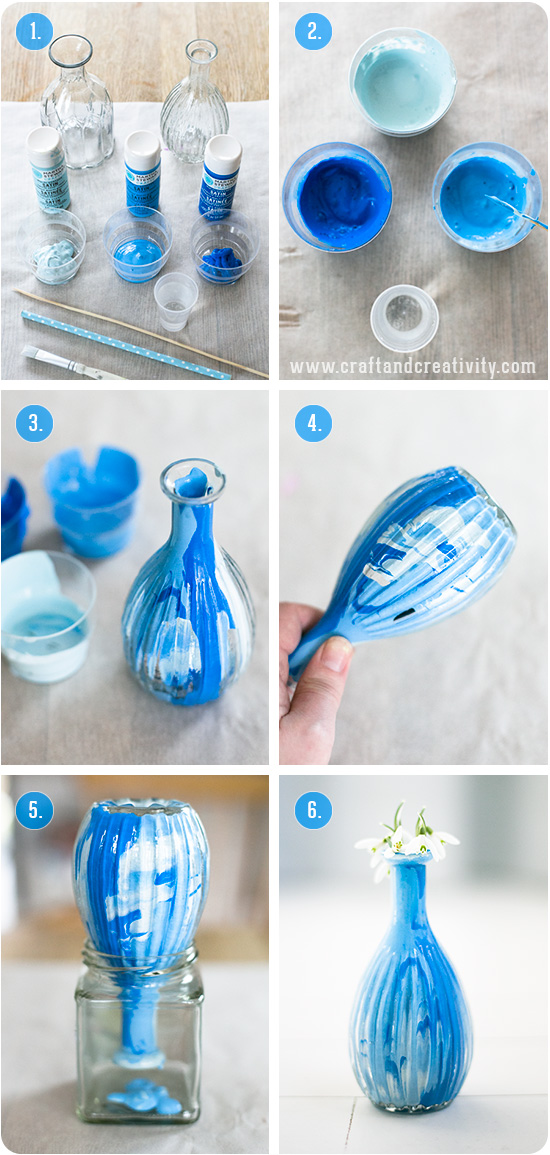
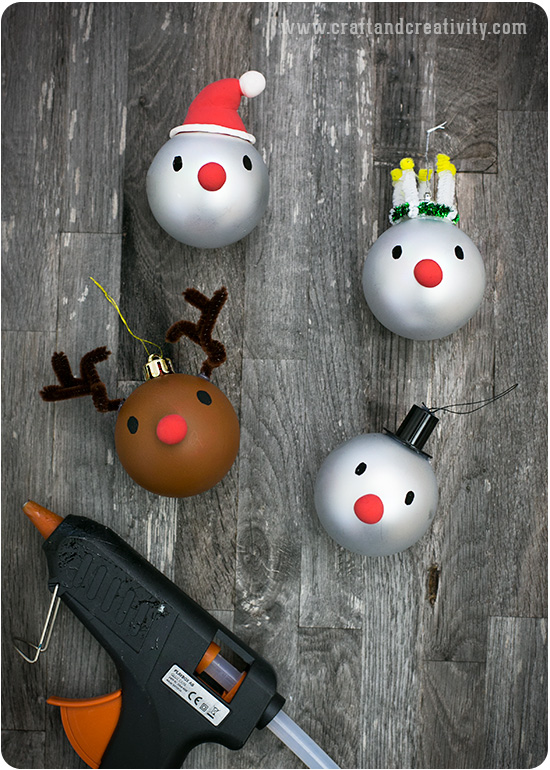
Yesterday Maria at Made by Mary shared with us her delicious recipe for Christmas sweets with nougat, raspberries and white chocolate and today it’s my turn again to take the baton in the Christmas calendar 24 Creative Days of Christmas. I thought I’d show you how I pimped plain Christmas ornaments and made them more fun in a simple few steps.
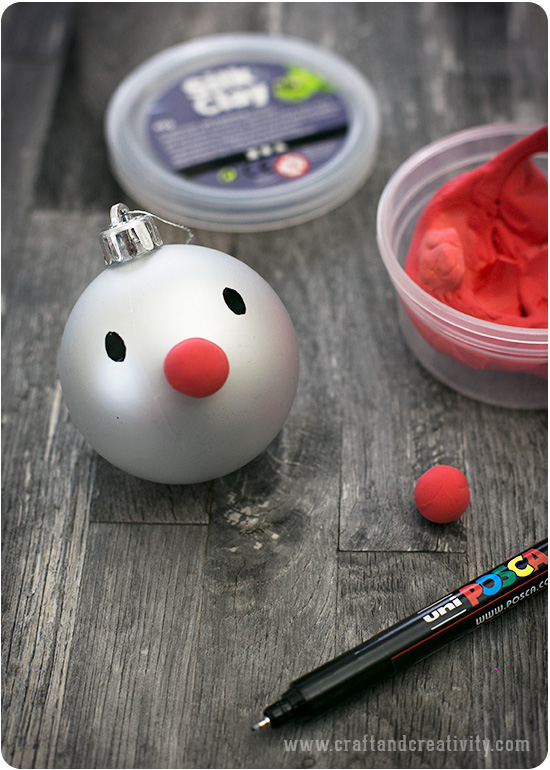
Grunden är enkel. Jag använde gamla julgranskulor som jag hade hemma, målade ögon med en svart permanent Uni Posca penna med tunn spets och gjorde näsor av favoritleran Silk Clay. Leran fäster på alla ytor, kladdar inte, torkar i luften och lämpar sig utmärkt även för små barn. Rulla en boll av leran och placera den i mitten av julgranskulan. Låt den sitta en liten stund så fäster den mot ytan av sig själv. Vill du att den ska sitta extra hårt så kan du limma fast den.
———–
The base is simple. I used plain Christmas ornaments, painted a pair of eyes with a black permanent Uni Posca marker and made noses with my favorite clay Silk Clay. This clay sticks to all surfaces, dries in the air and is suitable even for small children. Roll a ball of clay and place it in the middle of the ornament. Let it sit for a little while and it will stick to the surface by itself. Use glue if you want to make extra sure that it doesn’t fall off.
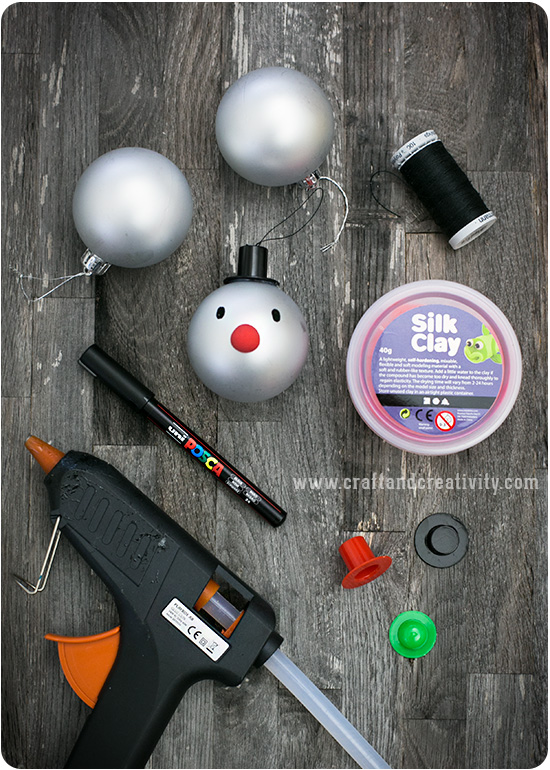
Till snögubbarna behöver du: Julgranskulor, sytråd, en svart permanent tuschpenna, röd Silk Clay, en limpistol (eller annat lim) och små plasthattar. Vill du göra en morot istället för en röd näsa så behöver du orange Silk Clay.
————-
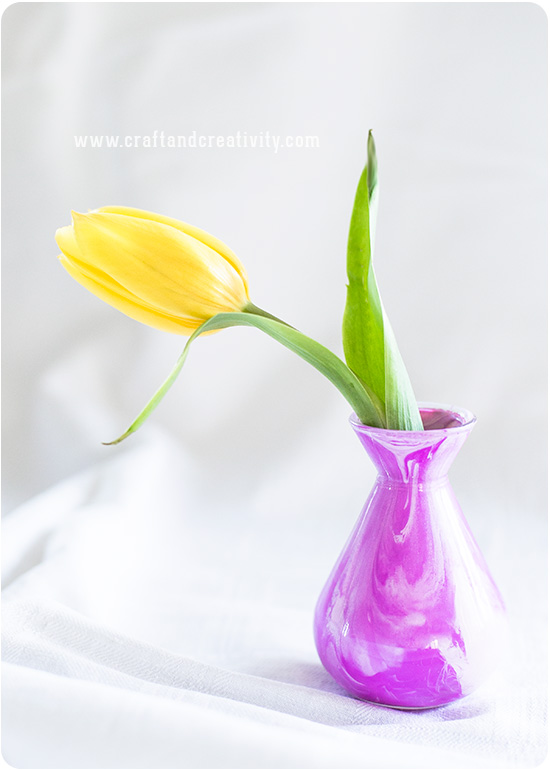
To make the snowmen you will need: Christmas ornaments, sewing thread, a black permanent marker, red Silk Clay, a glue gun (or other adhesive) and small plastic hats. Use orange Silk Clay if you want to make a carrot instead of a red nose.
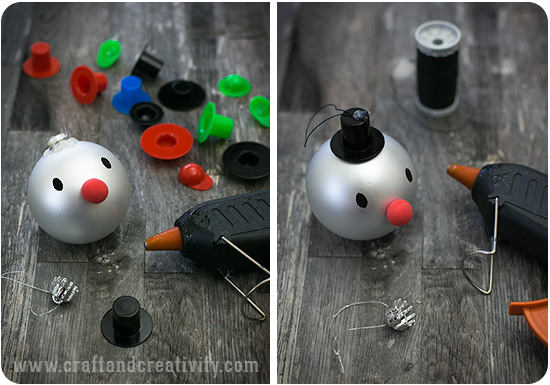
Så här gör du snögubbarna: När ögon och näsa är klara (se beskrivning ovan) så tar du bort metallkragen och limmar fast hatten. Tänk på att limpistolen blir väldigt varm så låt inte små barn använda den utan hjälp av vuxna. Klipp till en bit av sytråden, forma tråden till en ögla och limma fast ändarna på hattens ovansida. Nu kan du hänga snögubben i granen!
————-
How to make the snowmen: After making the eyes and the nose (see tutorial above), remove the metal top from the Christmas ornament and glue the hat in place. Keep in mind that the glue gun gets very hot so don’t let small children use it without adult supervision. Cut a piece of the sewing thread, form the thread into a loop and glue the ends to the top of the hat. Now the snowman is ready to hang in the Christmas tree.
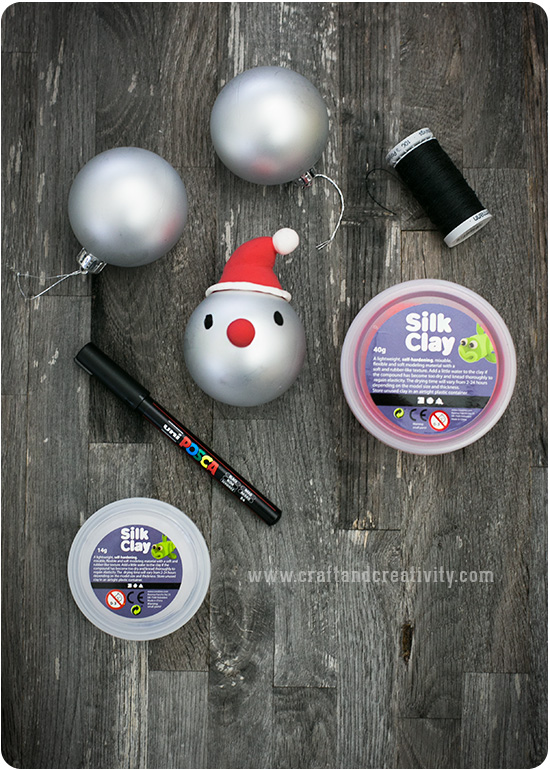
Till jultomtarna behöver du: Julgranskulor, sytråd, en svart permanent tuschpenna och Silk Clay i färgerna rött och vitt.
————-
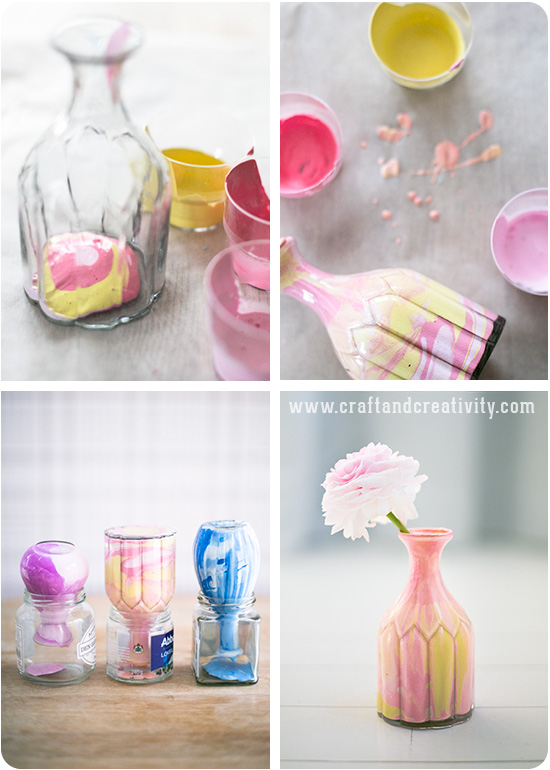
To make the Santas you will need: Christmas ornaments, sewing thread, a black permanent marker and Silk Clay in the colors red and white.
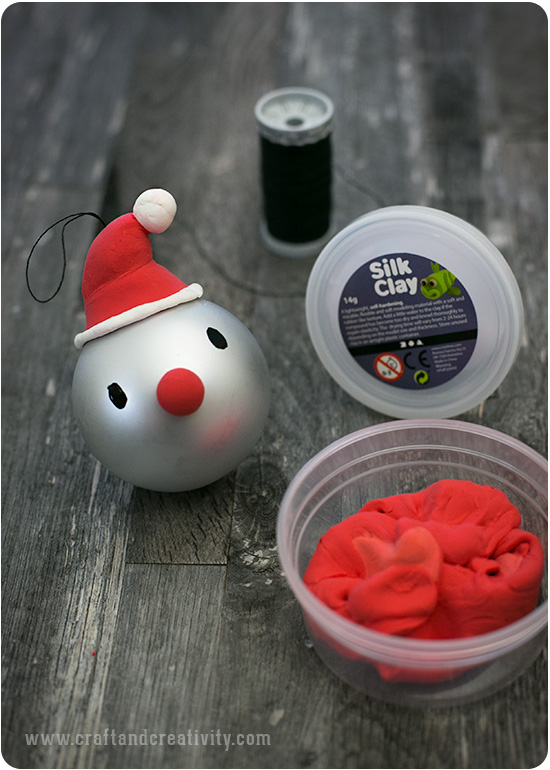
Så här gör du tomtarna: Börja med ögon och näsa (se beskrivning ovan). Forma en tomtemössa av röd och vit Silk Clay. Avlägsna julgranskulans metallkrage och tryck fast mössan över kulans topp. Du behöver inget lim, leran fäster mot kulan. Klipp till en bit av sytråden, forma tråden till en ögla peta in ändarna i leran. Säkra med lite extra Silk Clay vid behov.
————-
How to make the Santas: Start with the eyes and nose (see tutorial above). Form a Santa hat with red and white Silk Clay. Remove the metal top from the Christmas ornament and place the hat over the top. No adhesive is needed, the clay sticks to the surface by itself. Cut a piece of sewing thread, form the thread into a loop and tuck the ends in the clay. Secure with a bit of extra clay if necessary.
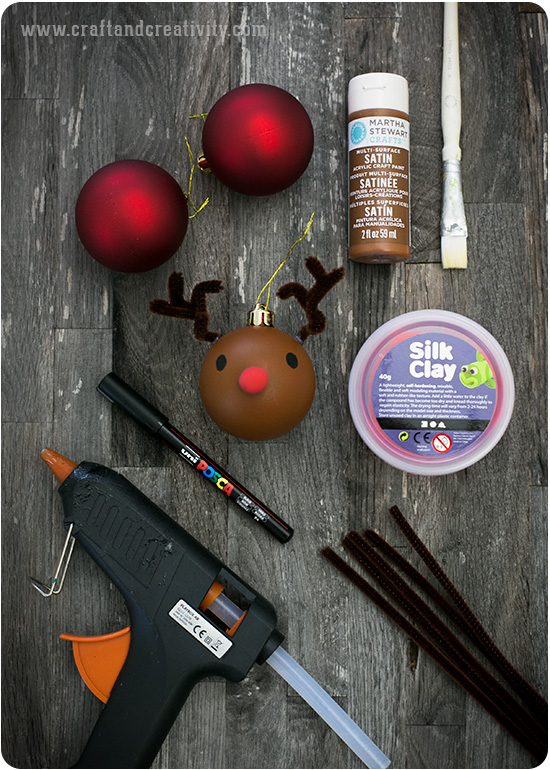
Till renen behöver du: Julgranskulor, brun hobbyfärg (t ex Martha Stewart satin paint i nyansen Chestnut brown), en pensel, en svart permanent tuschpenna, röd Silk Clay, en limpistol (eller annat lim) och 6 mm tjocka bruna piprensare.
————-
To make the reindeers you will need: Christmas ornaments, brown hobby paint (like Martha Stewart Satin Paint in the color Chestnut brown), a paint brush, a black permanent marker, red Silk Clay, a glue gun (or other adhesive) and brown pipe cleaners.
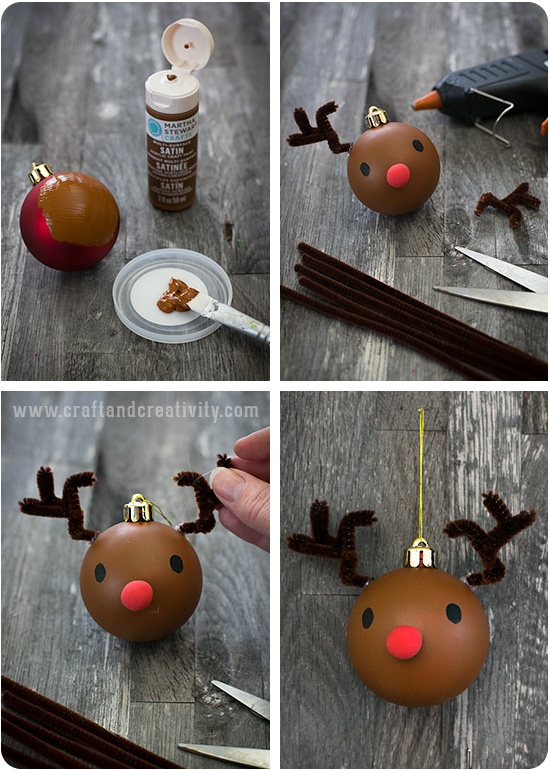
Så här gör du renarna: Måla kulan brun. För mig räckte det med ett lager färg. Det är lättare att måla en matt kula än en blank. Du kan ta bort metallkragen under tiden som du målar, låta kulan torka ca 30 min och sedan sätta tillbaka kragen igen. På så sätt slipper du får färg på den. Måla ögon och sätt dit näsan (se instruktioner högre upp). Forma två likadana horn av bruna piprensare och limma fast hornen på sidorna av julgranskulan. Håll fast hornen ca 5 min under tiden som limmet torkar. Tänk på att limpistolen blir väldigt varm så låt inte små barn använda den utan hjälp av vuxna.
————-
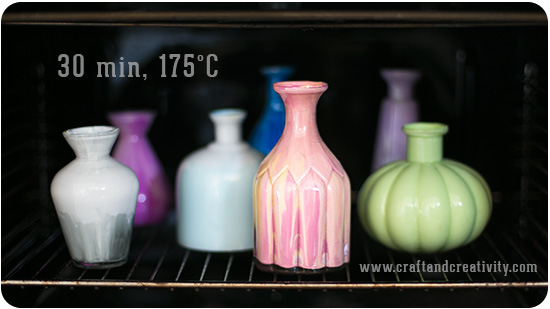
How to make the reindeers: Paint the ornament brown. One coat was enough when I made mine. It’s easier to paint a matte surface then a shiny one. Remove the metal top while you paint, let the ornament dry for about 30 minutes and then put the metal top back on again. This way you avoid getting paint on it. Paint the eyes and add the nose (see tutorial above). Form two identical horns using brown pipe cleaners and glue the horns to the sides of the ornament. Hold the horns about 5 minutes while the glue dries.Keep in mind that the glue gun gets very hot so don’t let small children use it without adult supervision.
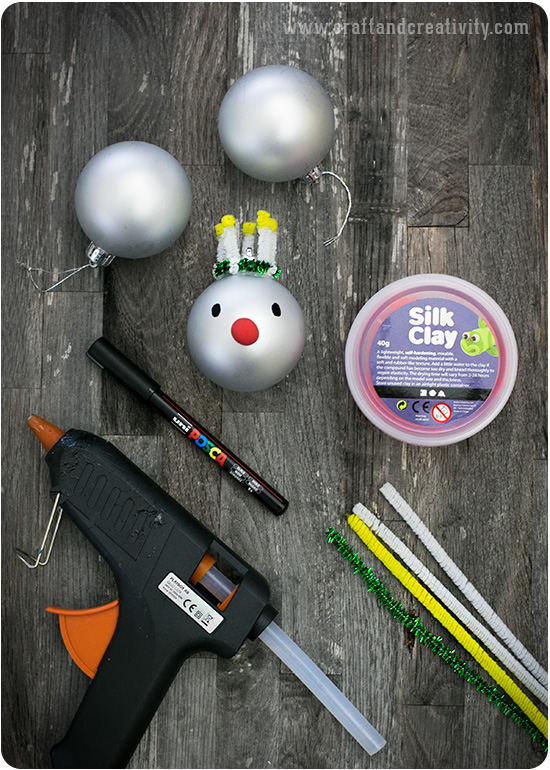
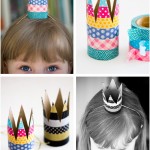
Till Lucia-kulan behöver du: Julgranskulor, en svart permanent tuschpenna, röd Silk Clay, en limpistol (eller annat lim) och 6 mm tjocka piprensare i färgerna grönt, gult och vitt.
————-
To make the Lucias you will need: Christmas ornaments, a black permanent marker, red Silk Clay, a glue gun (or other adhesive) and pipe cleaners in the colors green, yellow and white. Lucia (or St Lucy’s Day) is celebrated on the 13th of December in the Scandinavian countries. Read more about Lucia on my friend Gina’s blog Willowday.
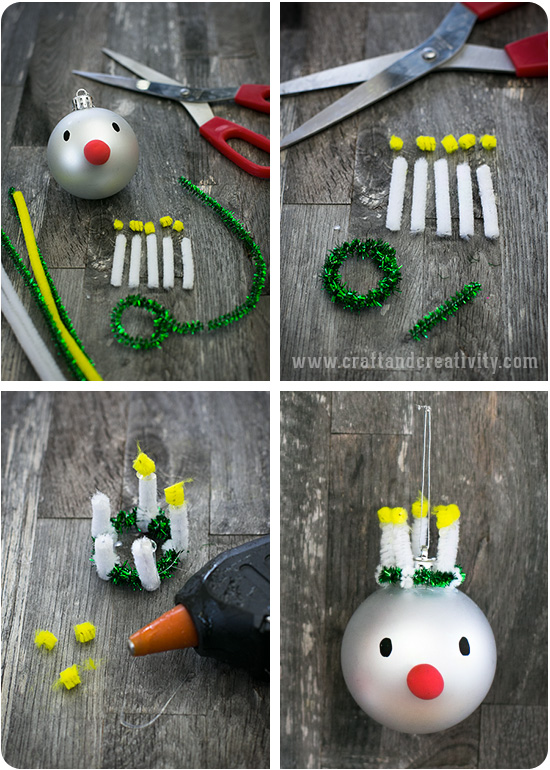
Så här gör du Lucia-kulorna: Gör ögon och näsa på samma sätt som med de övriga kulorna. Till ljusen behöver du 5 st ca 4 cm långa bitar av vit piprensare och 5 st ca 5 mm långa bitar av gul piprensare. Forma 1 st grön piprensare som en ring (ca 4 cm i diameter) och vira resten av piprensaren runt ringen hela varvet runt. Klipp av det som blir över. Sätt fast vart och ett av ljusen genom att snurra nedre delen av de vita piprensarna ett varv runt den gröna ringen. Limma fast de små bitarna av gul piprensare högst upp på ljusen. Tänk på att limpistolen blir väldigt varm så låt inte små barn använda den utan hjälp av vuxna.
————-
How to make the Lucia ornaments: Make the eyes and nose in the same way as with the other ornaments. For the candles in the crown you will need 5 pc of white pipe cleaners (approx 4 cm long) and 5 pc of yellow pipe cleaners (approx 5 mm long). Shape one pipe cleaner like a ring (about 4 cm in diameter) and wrap the rest of the pipe cleaner around the ring full circle. Cut off the excess. Attach each of the candles by wrapping the lower part of the white pipe cleaner once around the green ring. Glue the small parts of the yellow pipe cleaners to the top of the candles. Keep in mind that the glue gun gets very hot so don’t let small children use it without adult supervision.
Det var allt för idag. Imorgon är du varmt välkommen att titta in till Helena Nord på Mormorsglamour för lucka nr 12. Följ The Creative Collective och vår julkalender på Facebook och Pinterest för att inte riskera missa en enda lucka! På Instagram taggar vi våra bilder med #24kreativadagar.
————
That was all for today. Tomorrow, you are most welcome to visit Helena Nord at Mormorsglamour for door No. 12. Follow The Creative Collective and our Christmas Calendar at Facebook and Pinterest to not risk missing a single day! On Instagram we tag our pictures with #24creativedays.

1. Hildas hem, 2. Willowday, 3. Craft & Creativity, 4. Hemma med Helena,
5. Pastill, 6. Mini Piccolini, 7. Willowday, 8. Mormorsglamour, 9. Lina by the Bay,
10. Made by Mary, 11. Craft & Creativity, 12. Mormorsglamour, 13. Pysselbolaget,
14. Hemma med Helena, 15. Hildas hem, 16. Mini Piccolini, 17. Willowday, 18. Pastill,
19. Hemma med Helena, 20. Made by Mary, 21. Mormorsglamour,
22. Craft & Creativity, 23. Lina by the Bay, 24. Pysselbolaget