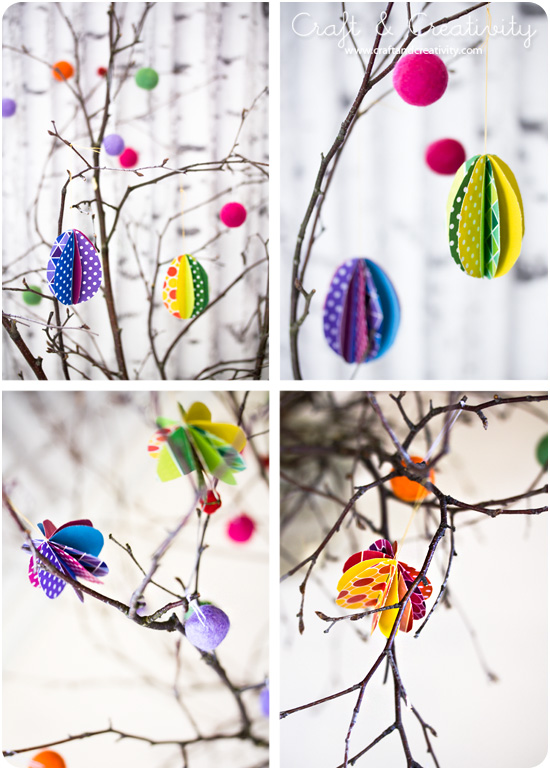
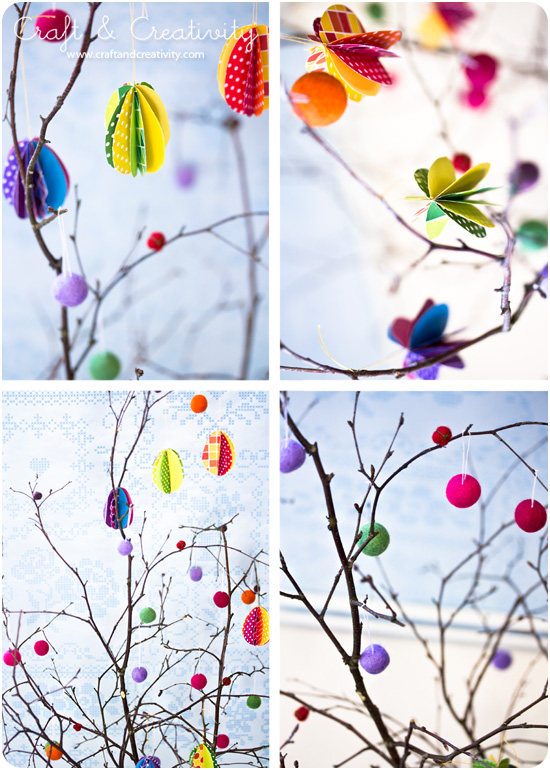
Vi har pyntat vårt kontor med ett stort och maffigt påskris. I björkriset har vi hängt upp pappersäggen som jag skrev om igår, samt ett gäng ullpärlor på tråd. Fäst en sytråd i ullpärlorna och du har ett enkelt och fint påskpynt. När påsken är över kan man dra ur tråden och använda ullpärlorna till något annat, om man vill.
—————–
We’ve decorated our office with a big Easter twig. In our birch twig, we hung the paper eggs I wrote about yesterday, and a bunch of wool beads. Attach a sewing thread to the wool beads and you got yourself a simple and pretty Easter decoration. After Easter you can remove the threads and use the wool beads for something else, if you like.
Author Archives: Helena, Craft and Creativity
Ullpärlor i påskriset –
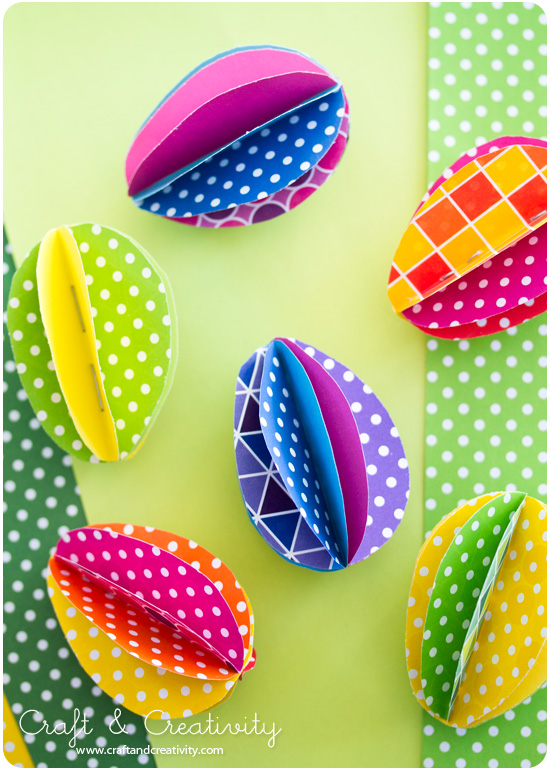
Pappersägg – Paper eggs
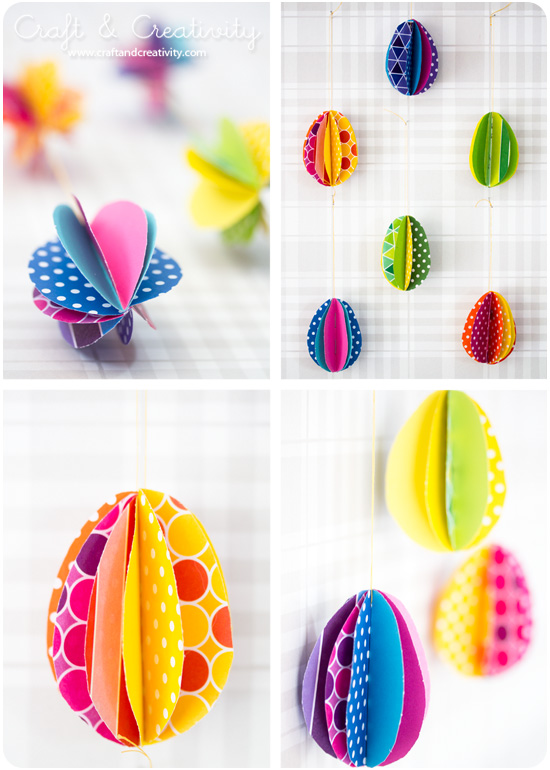
Nej, nu har det varit på tok för lite färg i bloggen på sistone! Det här duger inte. 😉 Idag tänkte jag tipsa om världens enklaste pappersägg. Det enda man behöver är mönstrade eller enfärgade papper, sax, häftapparat, nål & tråd.
———
We’ve had far too little color here at Craft & Creativity this past week! This will not do. 😉 Today I’m going to show you the world’s easiest paper eggs. All you need is patterned or plain paper, scissors, a stapler, a needle & some thread.
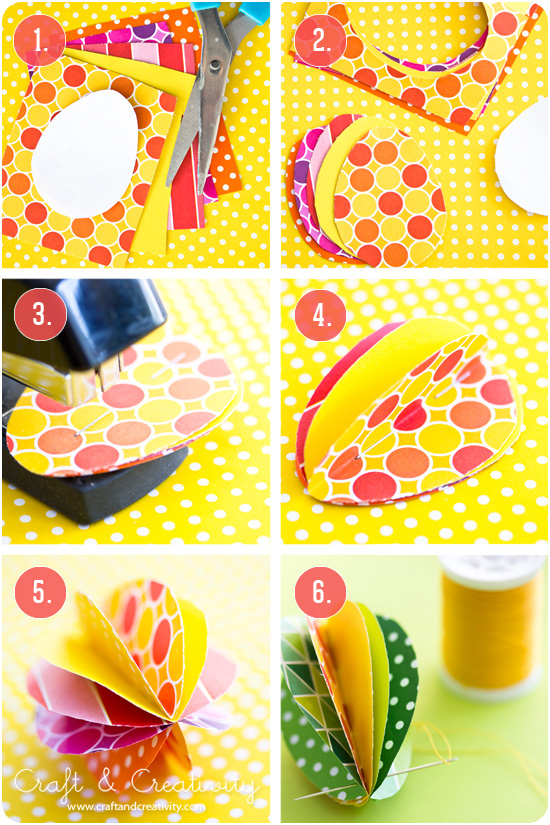
 Gör så här:
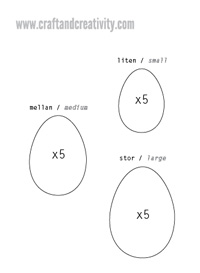
1. Ladda hem och skriv ut ägg-mallen till vänster (eller rita en egen mall). Klipp ut önskad storlek. Välj ut 4-5 mönstrade eller enfärgade papper som du tycker passar ihop. Lägg dem ovanpå varandra med mallen överst.
2. Klipp runt mallen, genom alla lager med papper.
3. Lägg samman dina ägg och häfta ihop dem i mitten. Jag måttade inte, det är inte så noga att det blir exakt i mitten tycker jag.
4 & 5. Veckla ut ägget.
6. Gör ett hål högst upp med en synål och fäst en tråd för upphängning.
Do like this:
1. Start by downloading and printing the egg template above to your left. Cut out the size you want. Select 4-5 sheets of patterned or plain paper that you like. Stack them together with the template on top.
2. Cut around the template, through all layers of paper.
3. Stack your eggs and staple them together in the middle. I didn’t measure, it’s not important that it’s the exact middle.
4 & 5. Unfold your egg.
6. Make a hole at the top with a sewing needle and attach a piece of thread for hanging.
En riktig färginjektion, tycker ni inte? 🙂 Vill man inte göra dem äggformade så gör man dem runda istället. Då skulle man t ex kunna fästa dem på en lång tråd och göra en girland som passar året om!
———–
A proper color explosion, don’t you think? 🙂 If you don’t wish to make them egg-shaped, make them round instead. Then you could attach them to a long thread and make a garland that would fit all year round!
Gnuggisar på ägg –
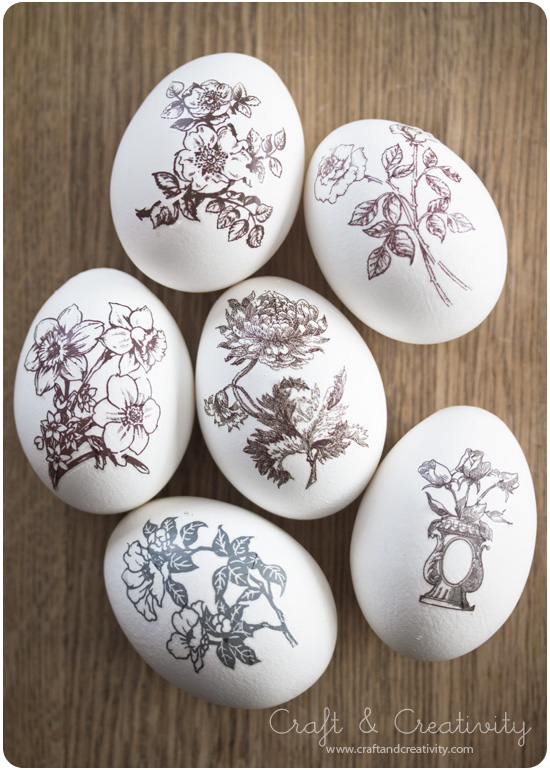
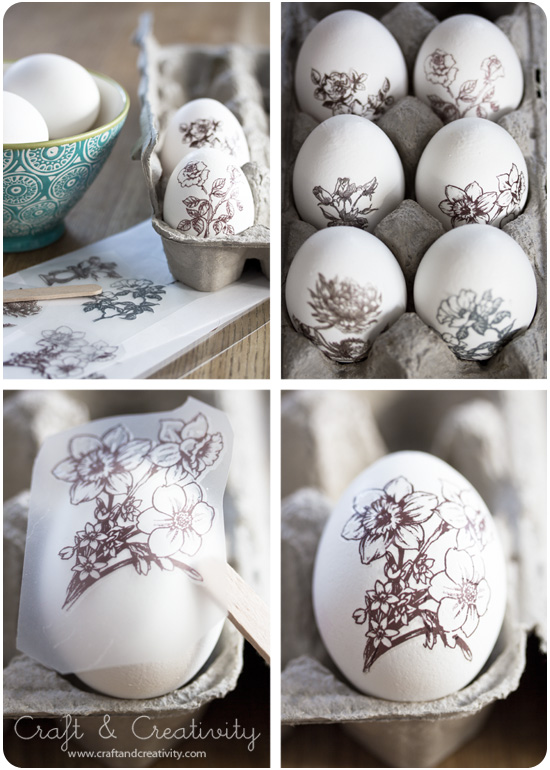
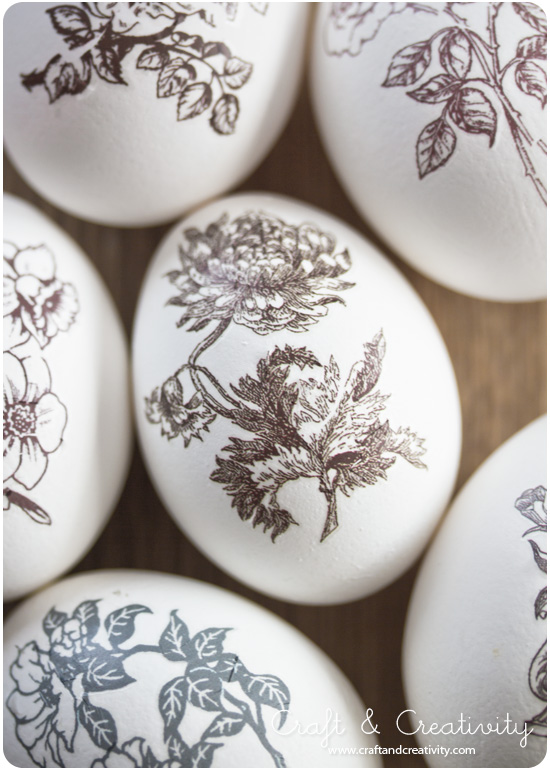
Rub-ons on Easter eggs
Ett sätt att dekorera ägg till påsk kan vara att använda rub-ons (s k gnuggisar /gnuggmotiv). Det är enkelt och blir effektfullt.
————-
One way to decorate Easter eggs is to use rub-on tranfers. It’s easy and looks pretty.
Börja med att koka äggen. Jag använde ekologiska hönsägg. Låt svalna och se till så att skalet är torrt. Klipp ut önskat motiv, lägg det ovanpå ägget och gnugga fast motivet på ägget med träpinnen som följer med i förpackningen. Idén fick jag från Country Living, via Pinterest.
——-
Start by boiling the eggs. I used organic chicken eggs. Allow the eggs to cool and make sure that they are dry. Cut out the motif of your choice, place it on top of the egg and transfer the motif to the egg by rubbing with a wooden stick (ice cream stick for example). I got this idea from Country Living via Pinterest.
Det känns nästan lite synd att knäcka skalen och äta upp äggen. Men nu är de i alla fall förevigade på bild. 🙂 Vill man använda gnuggisarna på något mer beständigt så kan man gnugga fast dem på småstenar, betonghjärtan eller askar t ex.
———-
It kind of feels likes a pity to crack the shells and eat the eggs. But now at least I have them on photo. 🙂 If you like to use rub-ons on something more durable – you can transfer them to pebbles, concrete hearts or boxes for example.
Små tidningsägg – Newspaper eggs
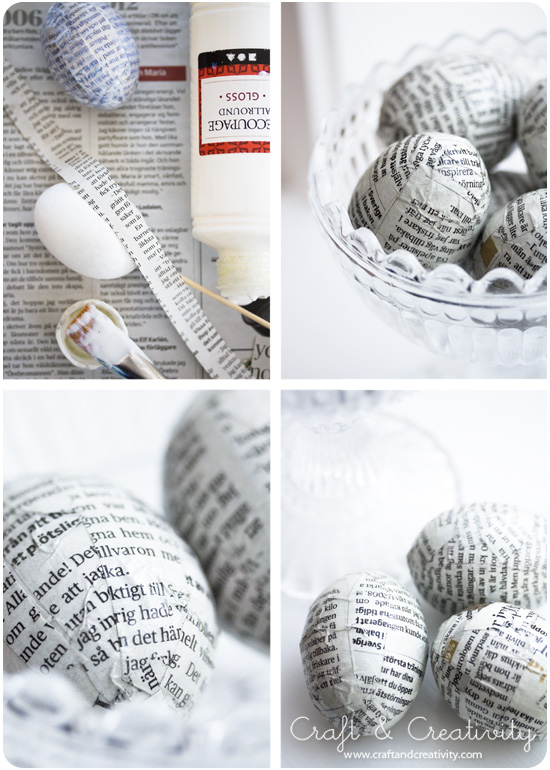
Igår visade jag hur mina gamla påskägg fick sig ett lyft med lite vit färg och tidningspapper. Idag tänkte jag visa hur man kan enkelt kan dekorera små ägg också. Till detta pyssel använde jag styroporägg/frigolitägg. Jag valde den minsta storleken som är 6×4 cm.
————
Yesterday, I showed you my Easter egg make-over. Today I thought I’d show you an easy way to decorate small eggs too. For this craft, I used styrofoam eggs.
Gör så här:
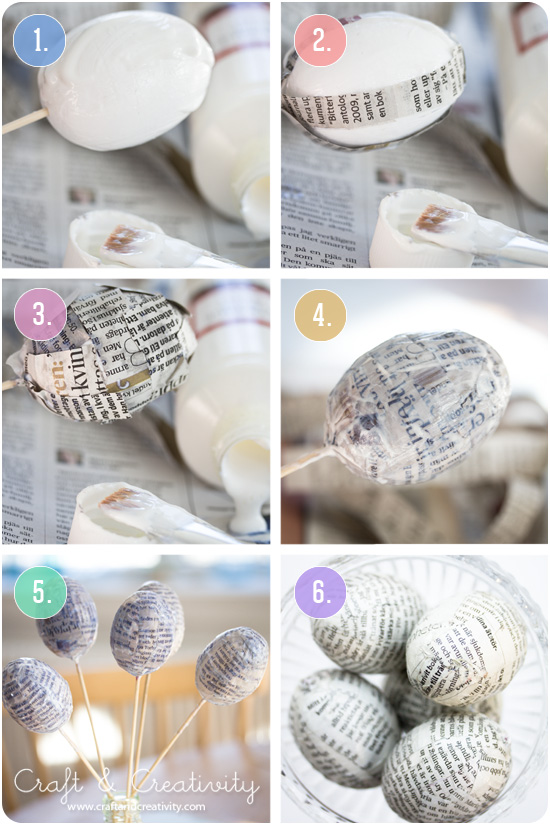
1. Sätt ägget på en grillpinne. Pensla på ett lager decoupagelack (matt eller blankt).
2. Klipp ut remsor/småbitar av tidningspapper. Börja täcka ägget med papperet.
3. Fortsätt tills ägget är helt täckt med papper.
4. Pensla på ett tjockt lager decoupagelack ovanpå papperet, tills det är genomblött.
5. Stryk med fingrarna över ägget för att släta ut papperet. Låt äggen torka.
6. När äggen torkat ljusnar papperet igen. Det tar ett par timmar.
———–
Do like this:
1. Start by sticking your styrofoam egg on a barbecue stick. Apply a layer of decoupage glue (or Mod Podge).
2. Cut strips or small pieces of newspaper. Begin to dress the egg with the paper.
3. Continue until the egg is completely covered.
4. Brush on a thick layer of decoupage on top of the paper until it’s soaked.
5. Stroke with your fingers over the surface to smooth out the paper. Leave to dry.
6. Once the eggs have dried the paper will lighten. It takes a couple of hours.
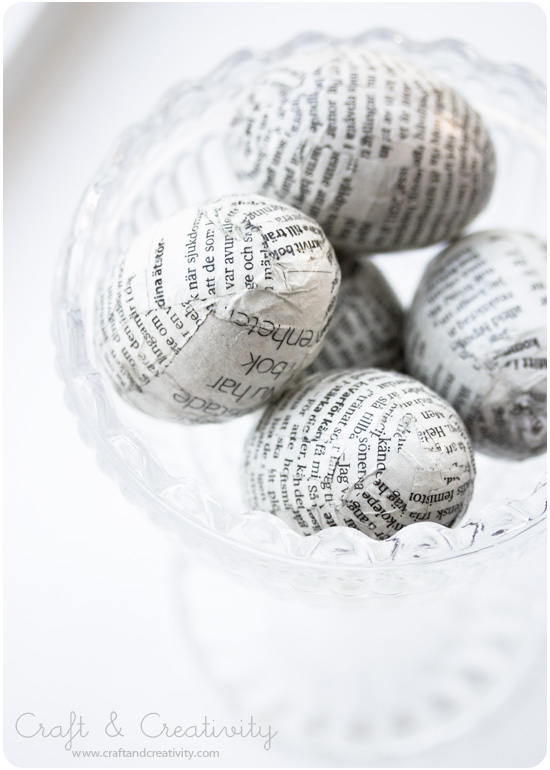
Samla äggen i en liten skål, kanske tillsammans med vita fjädrar? Eller fäst en tråd i dem och häng i påskriset.
———-
Display the eggs in a pretty bowl, perhaps together with some white feathers? Or attach a string and let hem hang in an Easter twig.
Påskägg “make-over” –
Easter egg make-over
Påskägg är en viktig del i vår familjs påskfirande och det är inte bara barnen som förväntar sig ett ägg fyllt med godsaker under kudden på påskaftons morgon. 😉 Istället för att köpa nya ägg år för år fick jag idén att återvinna gamla påskägg men ge dem ett nytt utseende.
————-
Candy filled easter eggs are an important part of our family’s Easter celebration and it’s not just the kids who expect an egg filled with sweets under their pillow on Easter Eve morning. 😉 Instead of buying new eggs every year, I got the idea to recycle old Easter eggs but give them a new look.
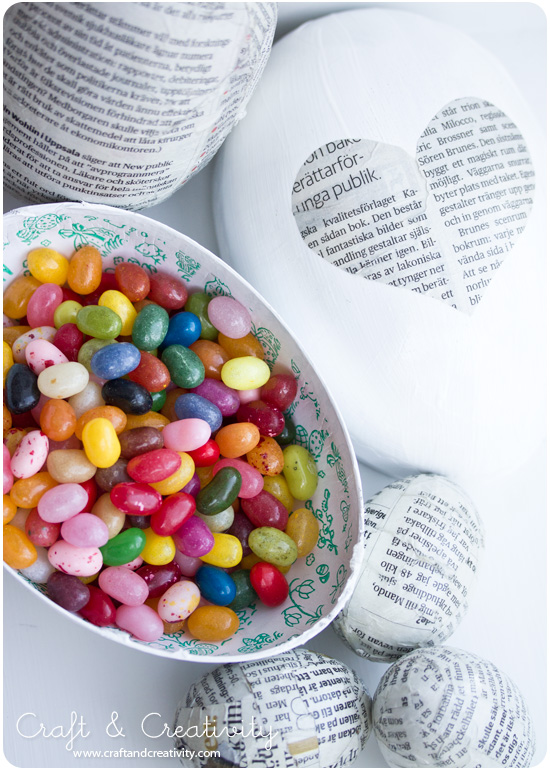
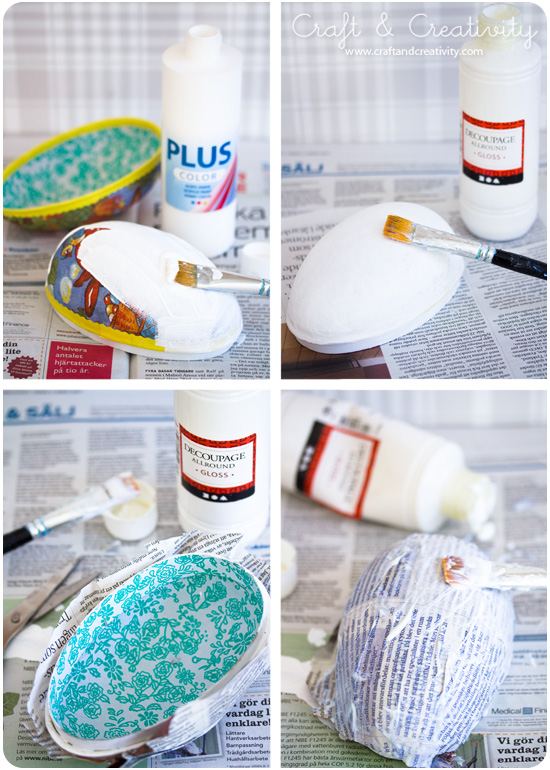
I förrådet har vi en hel plastback full med påskägg från många påskar tillbaka. Jag valde ut ett par av dem och gav dem en riktig make-over. Först och främst målade jag dem med vit hobbyfärg, i mitt fall Plus Color hobbyfärg eftersom den täcker bra och torkar fort. Två lager färg blev lagom. När färgen torkat penslade jag på ett lager decoupagelack. Jag klippte ut en stor bit tidningspapper och klädde ägghalvorna var för sig (remsor eller småbitar av papper fungerar också). Sedan penslade jag ytterligare ett lager decoupagelack på ytan. För att släta till papperet drog jag med fingrarna över ytan. Kladdigt men effektivt! Jag avslutade med att klippa bort överflödigt papper.
——————
In our basement we have a whole box filled with Easter eggs from many Easters past. I picked out a couple of them and gave them a real make-over. First, I painted them with white hobby paint. Two coats did the trick. When the paint had dried, I brushed on a layer of decoupage glue/lacquer (you could also use Mod Podge). I cut out a big piece of newspaper and dressed each half of the eggs separately with the paper (you could also try strips or small pieces of newspaper). When I was done with that, I used the brush to add another coat of decoupage on top. To smooth the paper out, I drew with my fingers over the surface. Messy, but effective! I finished off by cutting away the excess paper.
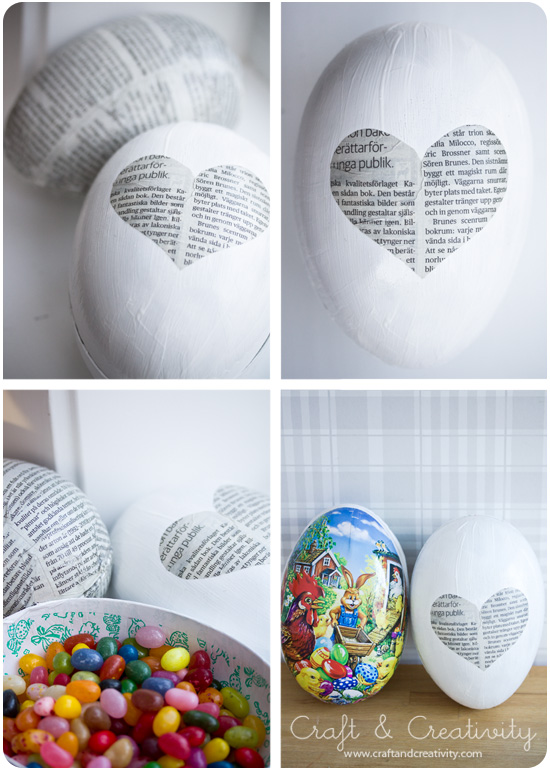
Ett av äggen täckte jag bara delvis med tidningspapper. Jag klippte ut ett hjärta, penslade på decoupagelack på mitten av ägget, placerade dit hjärtat och lackade ovanpå. En annan idé som jag inte hann testa nu var att dekorera de vitmålade äggen med vattenfärg eller tuschpennor t ex. Kan bli hur fint som helst! Något för det traditionsenliga familjepysslandet på påskafton, eller vad säger du mamma? 🙂
————
I chose to cover one of the eggs only partially with newspaper. I cut out a heart, brushed decoupage on the center of the egg, place the heart there and added a coat of decoupage on top. Another idea I had (but didn’t have time to try) was to decorate the white painted eggs with watercolor or markers, for example. Could look very nice! Something for our Easter Eve traditional family crafting, don’t you think mom? 🙂
Turkosa askar med snygga hörn –
Turquoise boxes with pretty corners
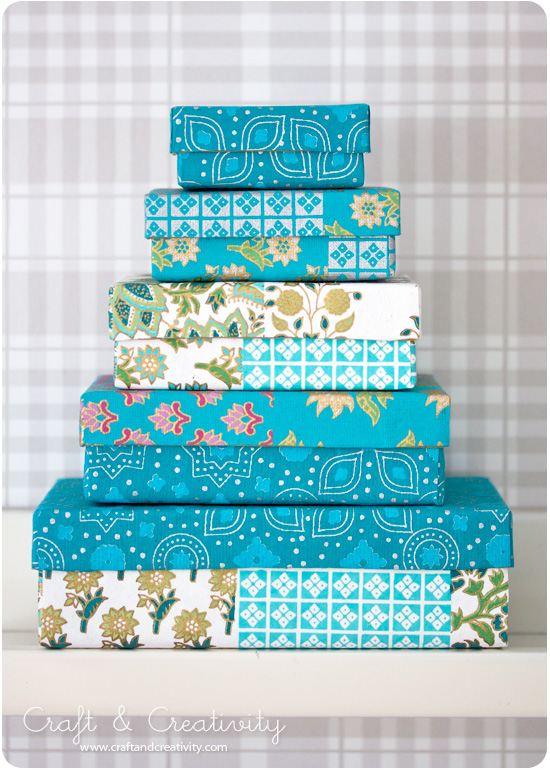
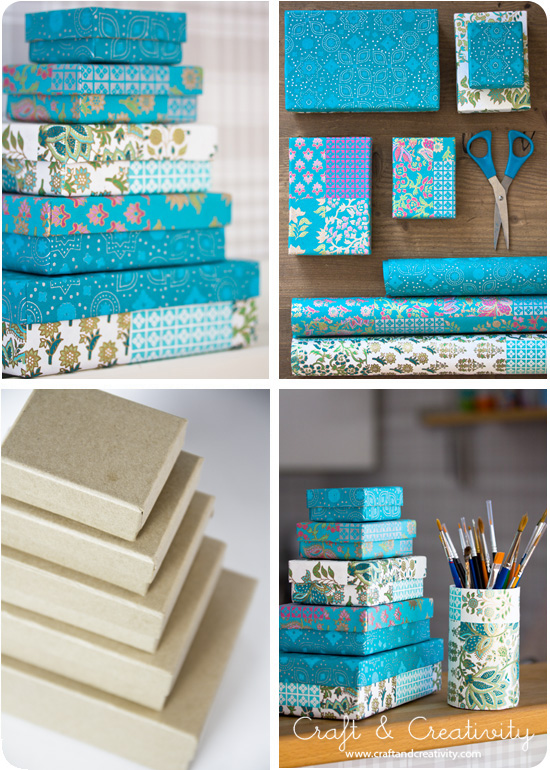
Jag fick ganska mycket turkost papper kvar efter mitt pennburk-projekt och resterna har jag nu använt till att klä in ett gäng askar, 7-17 cm långa. Dessa tänkte jag använda som presentaskar, om jag inte behåller dem själv vill säga. 😉
————
I had a lot of turquoise paper left efter my pen holder project and I used the rest to cover a bunch of small boxes. I thought I’d use them as gift boxes, if I manage to part with them that is. 😉
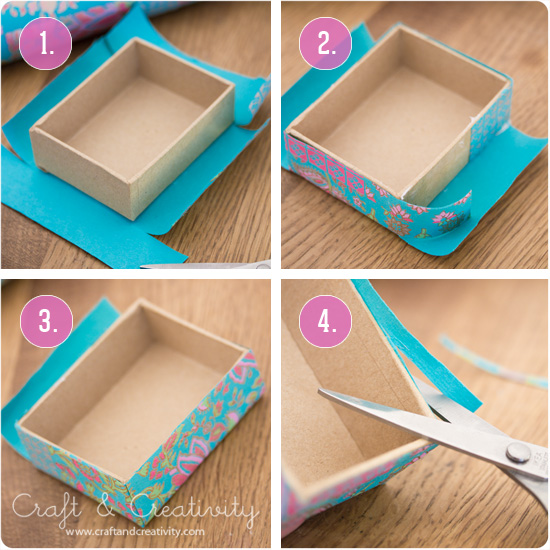
Så här gör jag för att få fina hörn när jag klär in askar och lådor, vare sig det är små askar eller stora skokartonger.
- Placera asken på ditt papper, måtta lite grovt (tänk på att det ska räcka för att täcka sidorna) och klipp ut en lagom bit. Stryk på lim på botten av asken. Jag använde limstift som jag tycker fungerar väldigt bra när papperet är av lite tjockare kvalitet, som detta papper. Klipp fyra jack mot hörnen, som visat ovan.
- Stryk på lim runt ytterkanterna. Vik upp kortsidorna av papperet och vik flikarna runt hörnen och på långsidorna av asken.
- Stryk på lim på långsidorna igen, på ovansidan av flikarna som du precis limmat fast. Vik upp långsidorna av pappet.
- Klipp bort överflödigt papper och du är klar! Gör på samma sätt med locket och låt limmet torka ordentligt innan du sätter locket på asken.
———
This is how I get pretty corners when I cover my boxes, whether it’s small boxes or large shoe boxes.
- Place the box on the paper of your choice. Keep in mind that the paper must be big enough to cover the sides too. Cut the paper approximately the right size. Apply glue to the bottom of the box. I used glue stick since I think it works very well with heavy paper, like this one (or like wallpaper samples for that matter). Cut four slits towards the four corners, as illustrated above.
- Apply glue around the outer edges of the box. Fold the short sides of the paper upwards and fold the tabs around the corners and towards the long sides of the box.
- Apply glue to the sides again, on top of the tabs that you just glued in place. Fold the long sides of the paper upwards.
- Cut away the excess paper and your done! Do the same with the box lid and let the glue dry properly before placing the lid on the box.
Dekorerade pennburkar –
Decorated pen holders
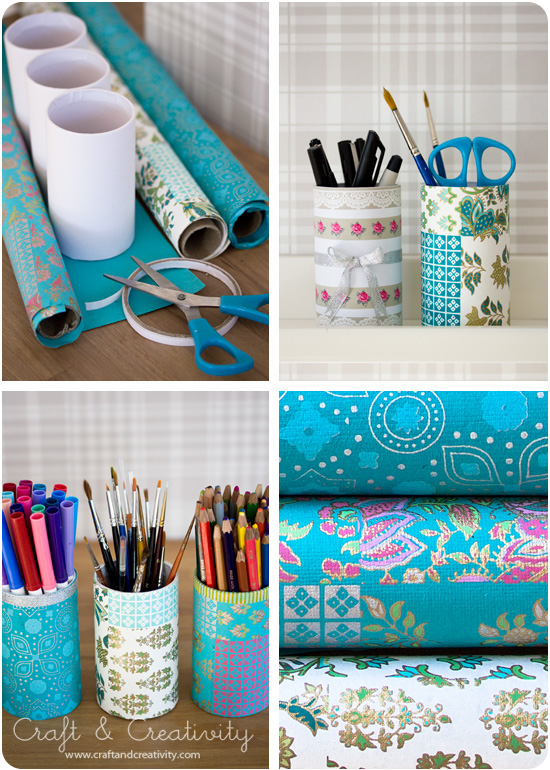
Jag vet inte hur det är hemma hos er men vi har alltid brist på pennburkar. De burkar som finns är överfulla med tuschpennor, blyertspennor, saxar, linjaler, penslar och annat småplock. När jag städade barnens pysselhyllor blev jag inspirerad att fixa till ny pennförvaring.
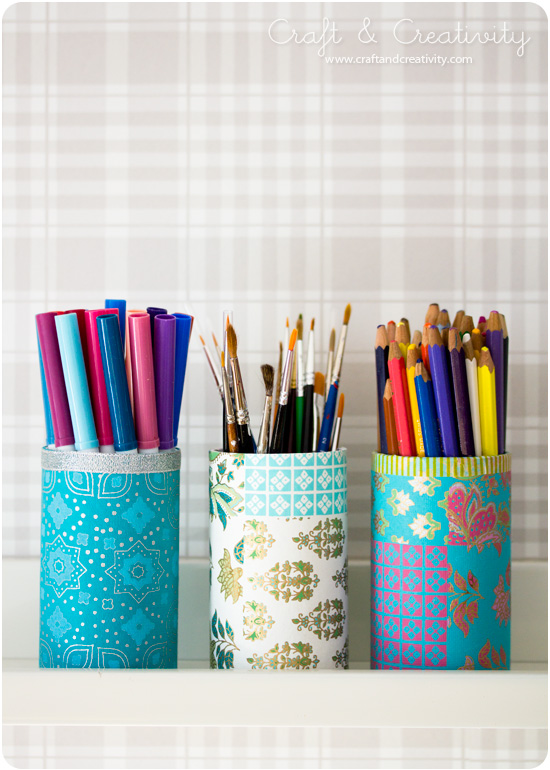
Jag använde pennställ i papp och dekorerade dem med ett mönstrat handgjort papper i turkosa nyanser som jag tycker är fint. Man kan också använda gamla konservburkar och täcka dem med fina papper. En av mina burkar pimpade jag med papperstejp och ett silvrigt band.
—————-
I don’t know about you, but in our house we always have a shortage of pen holders. The ones we have are overfull with felt pens, pencils, scissors, brushes and other little things. When organizing the kids’ craft shelves, I got inspired to create some additional pen storage.
I used cardboard pen holders (you could also use old tin cans) and decorated them with a turquoise patterned handmade paper that I really like. I pimped one of the pen holders with washi tape and a silver ribbon.
För att fästa papperet på burken använde jag dubbelhäftande tejp. Ett annat alternativ kan vara att använda limstift eller papperslim. Nu är det ordning och reda på våra pennor & penslar!
———-
In order to attach the paper to the paper can, I used adhesive tape. Another way could be to use glue stick or paper adhesive. Voilà! Now all our pens, pencils and brushes are in order!
Stora Bloggdagen
Stora Bloggdagen den 4 maj – jag kommer vara där! Kommer du? Jag vet några av er som anmält sig och det ska verkligen bli roligt att ses!
Det har varit lite lugnt med uppdateringar senaste veckan. Jag har dock en hel del pyssel och beskrivningar på gång. Vänta ni bara! Kram /Helena
Knappringar – Button rings
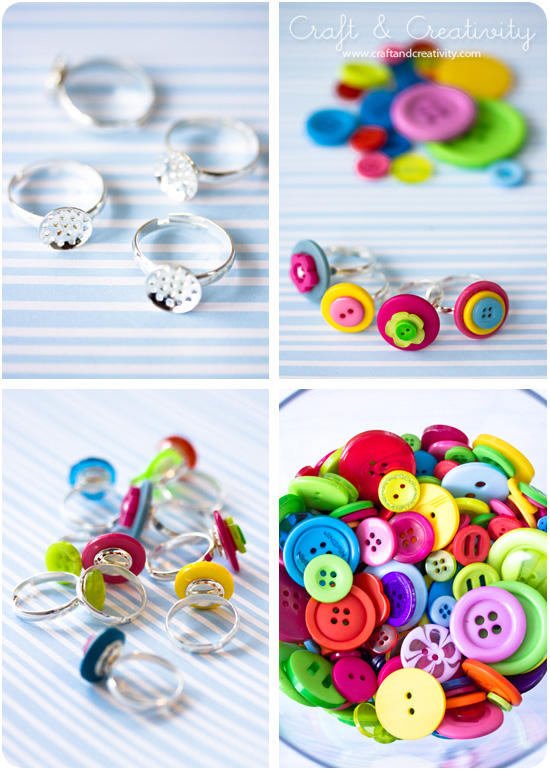
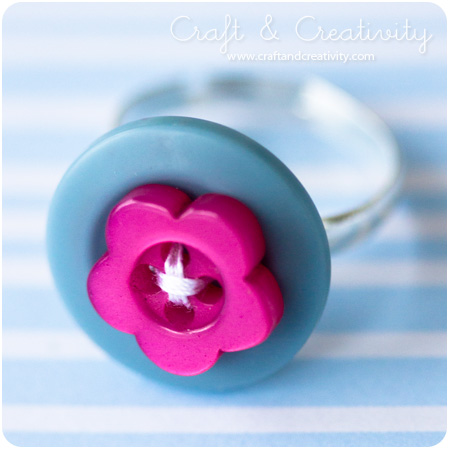
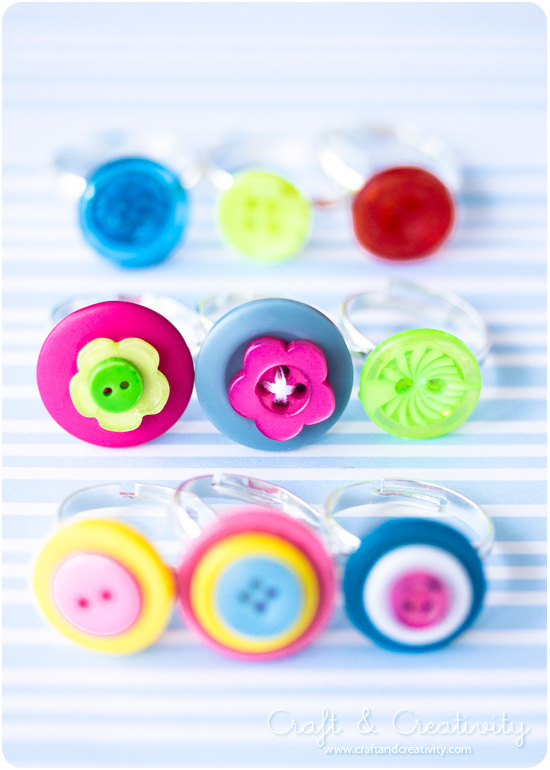
Jag fortsätter pyssla med med mina glada knappar. Förra månaden, när jag gjorde mina knappblommor fick jag även en idé att göra smycken av knapparna. Det har nu resulterat i knappringar! De har blivit en succé här hemma och barnen och jag nästan slåss om dem. Jag har haft mina på mig på jobbet och fått många positiva kommentarer.
———-
I keep crafting with my happy buttons. Last month, while making my button flowers, I got the idea to use the button for making jewelry. This has now resulted in a bunch of button rings! They’ve become very popular in our family and the kids and I almost fight over them. I’ve wore my rings to work and received many positive comments.
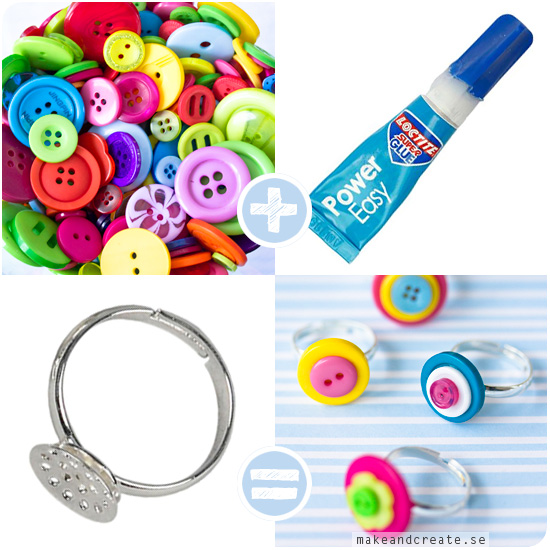
Du behöver: Knappar i olika storlekar & färger, sekundlim och ringar med en platta att fästa knapparna vid. Jag använde försilvrade broderiringar som går att justera i storlek för att passa både små och stora fingrar. Mixa & matcha knappar och limma fast dem på ringen. Sekundlim torkar, som namnet antyder, blixtsnabbt så var försiktig. Du vill inte limma ihop fingrarna. 😉
——————-
You will need: Buttons in different sizes & colors, super glue and rings with a plate to attach the buttons. I used adjustable silver-plated sieve rings. Mix & match the buttons and glue them on the plate of the ring. Super glue dries really quick, so be careful. You don’t want to get it on your fingers. 😉
Vill man så kan sy fast knapparna istället för limma. Broderiringarna har små hål i den runda plattan och med en smal nål kan man sy fast knapparna med sytråd.
————
If you like you can sew the buttons in place, instead of gluing. Sieve rings have a round plate with small holes and with a fine needle and some sewing thread you can sew the buttons to the plate.
Jag har sett andra söta knappringar hos Prickig och Lilla a. De har gjort sina knappringar med elastiskt band istället. Smart! Ta även gärna en titt på Pysselbolagets tjusiga knapparmband, även dessa gjorda med gummitråd.
—————
I’ve seen other cute button rings at Prickig and Lilla a. They made their button rings using elastic thread instead. Smart! And why not take a look at Pysselbolagets sweet button bracelets, also made with rubber thread.
Hushyllor på fler sätt –
House shelves in more ways
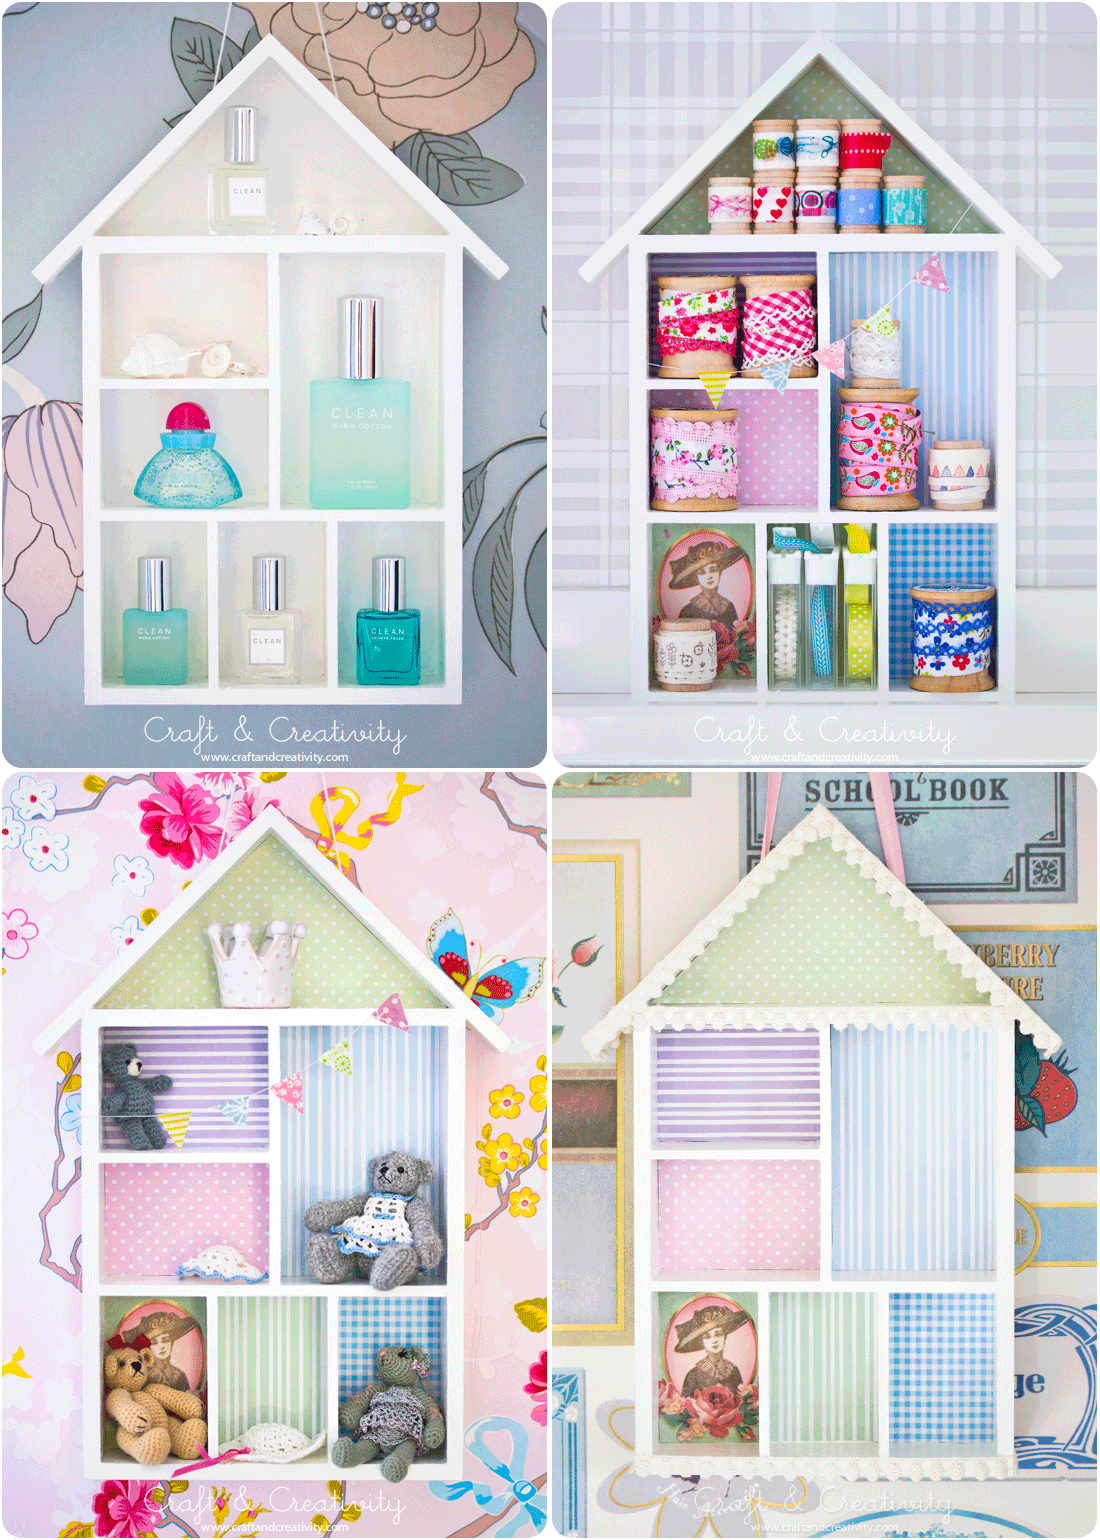
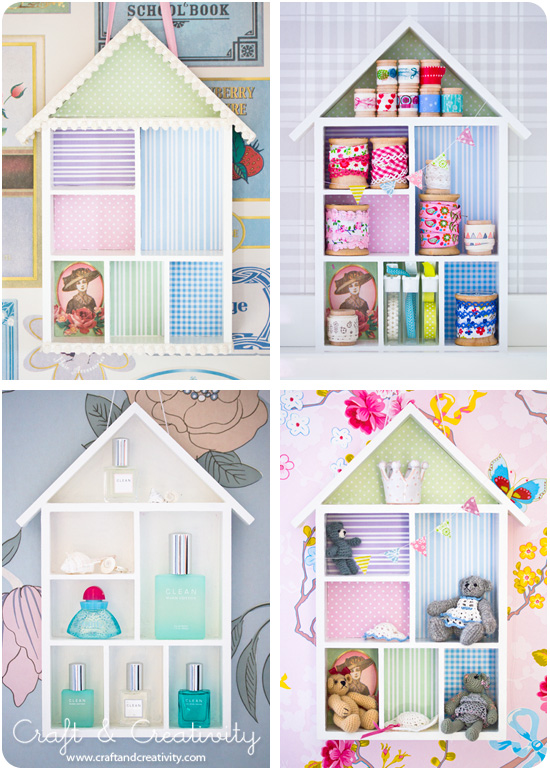
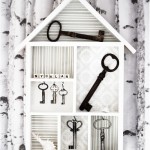
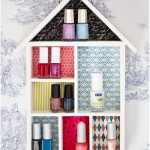
Jag har visat dessa små söta hushyllor tidigare och då använt dem som förvaring för gamla nycklar och för nagellacksflaskor. Här kommer ytterligare ett par sätt att dekorera prylhyllor och olika användningsområden för dem.
————
I’ve blogged about these cute little shelves before. I then used them as a Key cabinet and a Nail polish shelf. Now I’m going to show you some additional ways to decorate small shelves and different ways to use them.
Hyllan är ursprungligen träfärgad men har målats vit med vanlig hobbyfärg. Jag dekorerade en hylla med en blandning av designpapper och små tapetprover. Längst ner till höger ser ni barnens nallar som min duktiga mamma virkat.
————–
This particular shelf is comes unpainted and I painted it with regular white hobby paint. I decorated the back of one of the house shelves with a mix of paper scraps and wallpaper samples. At the bottom right you can se my girls’ tiny teddy bears, crocheted by my talented mum.
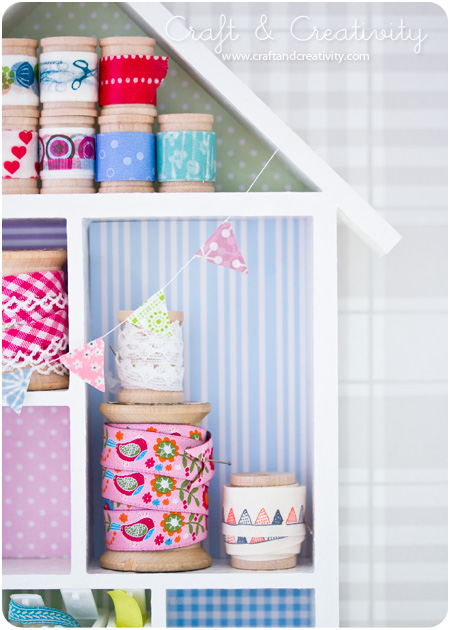
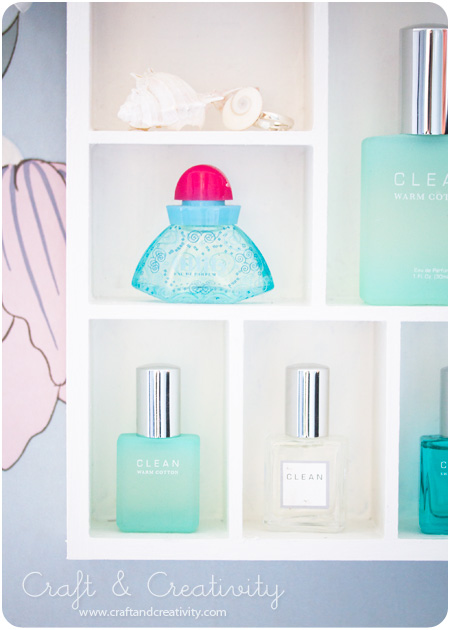
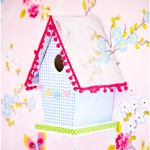
Hyllan till vänster är fylld med fina band på trådrullar och har fått en girland med vimplar av washitejp. Jag girlanden på samma sätt som till dotterns upplysta fågelholk. Till höger används hyllan till små flaskor med parfymprover.
———
The shelf to the left is filled with pretty ribbons on spools and decorated with a pennant garland made of washi tape. I made the garland the same way I made the one for my daughter’s birdhouse lamp. The shelf to the right is used to store small bottles of perfume samples.

