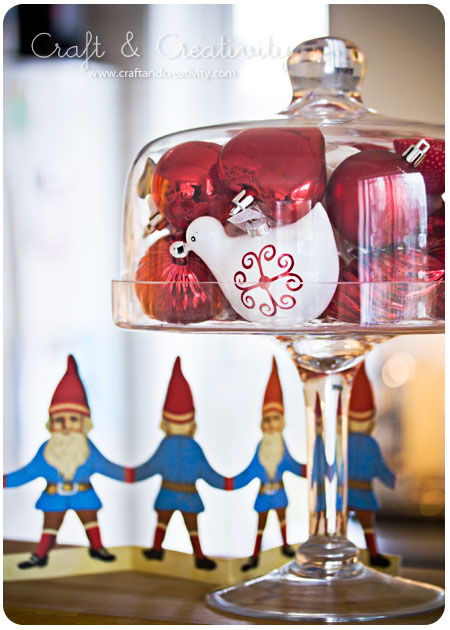
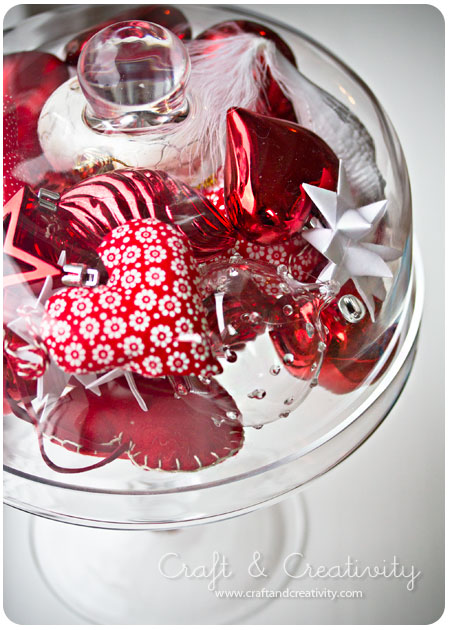
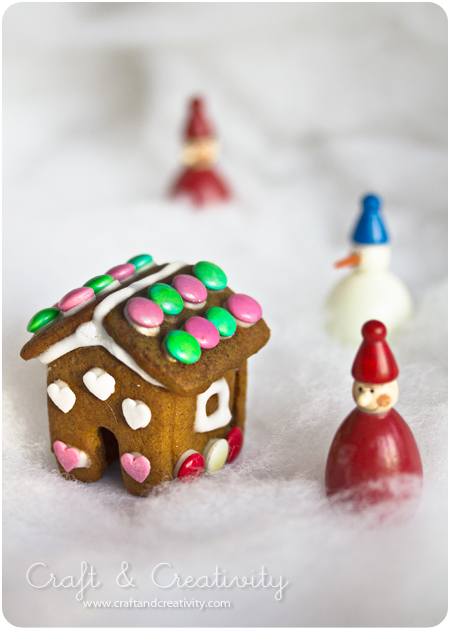
Om man inte har en julgran så kan man använda sina julgranskulor och julpynt på andra sätt. 🙂 Så här gjorde jag.
———-
If you don’t have a Christmas tree so you can display your Christmas baubles and decorations in other ways. 🙂 This is what I did.
Tag Archives: diy
Idé för julpynt –
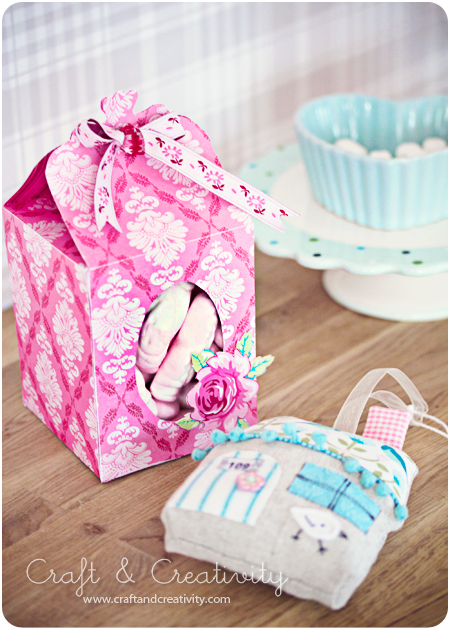
Sött innehåll – Sweet content
Apropå presentasken jag pysslade ihop härom dagen så fick jag flera förslag på vad jag skulle fylla den med. Bland annat Hanna som tipsade om julgodis och Finurliga fröken som kläckte idén med skumtomtar. Självklart! Varför tänkte jag inte på det? Tack för tipsen tjejer. 🙂
Asken får följa med tyghuset till sina nya ägare, goda vännerna A & N. Huset sydde jag med hjälp av mönster från Retro Mama, jag har bloggat om det här.
——–
About that gift box I made the other day, I got several suggestions on what to fill it with. For example Hanna who suggested Christmas candy and Finurliga fröken who suggested JuleSkum (kind of like marshmallow shaped Santas). It’s perfect! Why didn’t I think of that? Thanks for the tips girls. 🙂
The box will accompany the fabric house to their new owners, our good friends A & N. I made the house using a template from Retro Mama, as blogged about here.
Dagens pyssel, randigt julhänge –
Craft of the Day, Striped Paper Ornament
En amerikansk pysselblogg som jag följer är How About Orange och där finns med massor med roliga pysseltips, beskrivningar och mönster. Dessutom är den fylld med vackra fotografier.
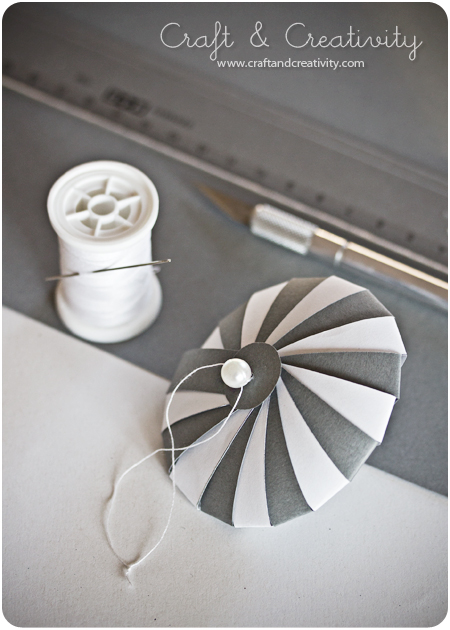
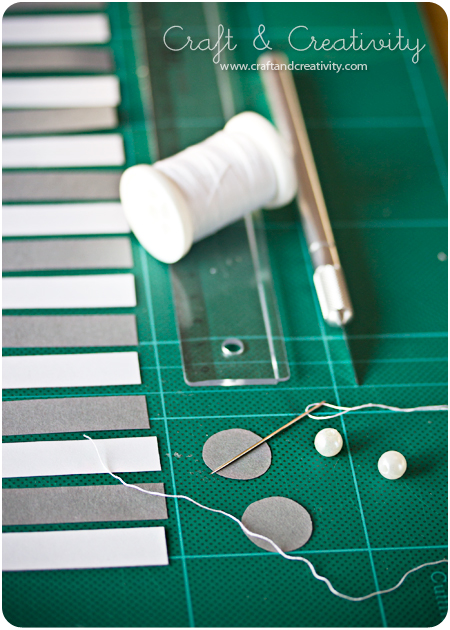
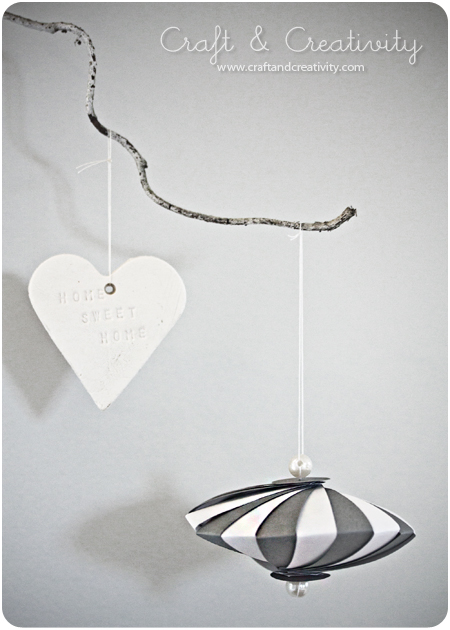
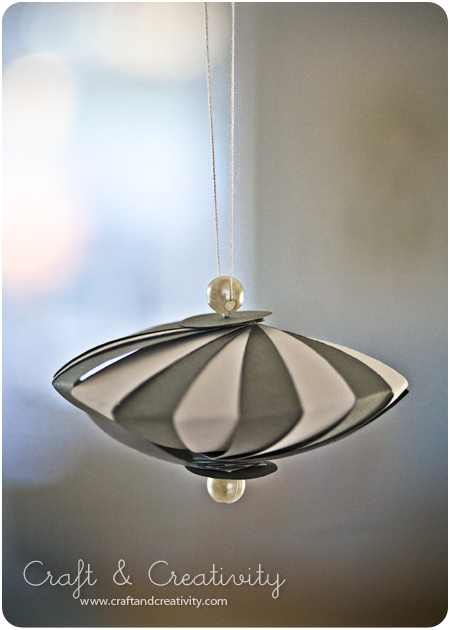
Ett av tipsen jag fastnat för är dessa randiga julhängen i papper, de ser nästan ut som om de hör hemma på tivoli. De var enkla att göra och det krävdes inte mycket material. Klicka er till How About Orange för att se beskrivningen.
Måtten är i tum och remsorna ska vara 3,5″ x 0,5″, vilket enligt vårt mätsystem är ca 8,9 x 1,3 cm. Lite pilligt att mäta ut (om man inte har en linjal som även visar tum). Därför har jag gjort en mall i Illustrator som ni kan ladda hem i pdf-format om ni vill.
Klicka här för mallen. Förslagsvis kan man skriva ut mallen en gång på vitt papper och en gång på färgat papper (inte för mörkt för då syns nog inte utskriften). Då har man remsor som räcker till två julhängen och man kan blanda färgerna så man får randiga hängen.
How About Orange is an American craft blog that I’ve followed for some time and I’m a big fan of Jessicas work. There you can find lots of fun craft tips, tutorials and templates. Furthermore, it is filled with beautiful photographs.
One of her crafty tips that I’ve fallen for is these striped paper ornaments, they almost look like they belong at a carnival. They were easy to make and required very little material. Click your way to How About Orange to see the tutorial.
The dimensions are in inches and the strips should be 3.5 “x 0.5”, which according to the metric system is approximately 8.9 x 1.3 cm. A bit tricky to measure when you have a ruler which only shows centimeters. 🙂 Therefore I made a template in Illustrator, you can download in pdf format if you wish.
Click here for the template. I suggested you print out the template once on white paper and once on colored paper (not too dark or else the print will not be visible). Then you get enough strips to make two ornaments and you can mix the colors to get the striped effect.
Dagens pyssel, pappersask –
Craft of the Day, paper box
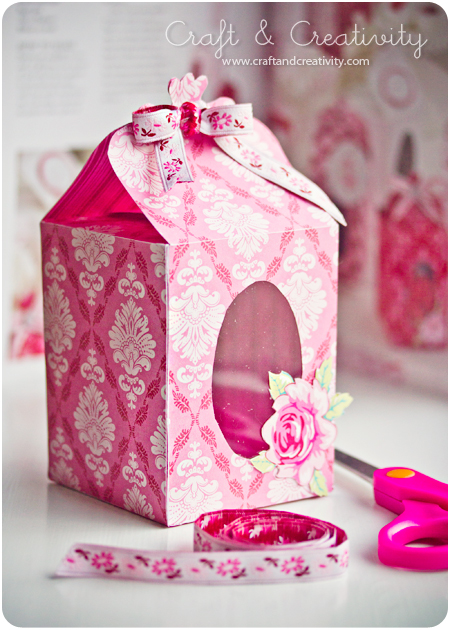
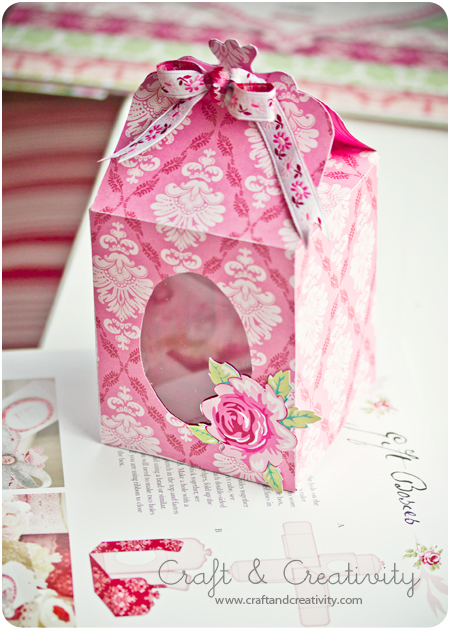
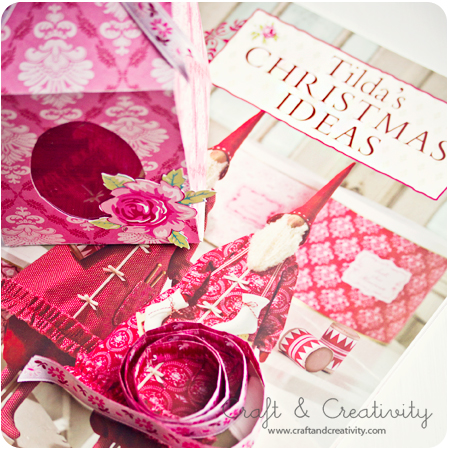
Jag köpte “Tilda’s Christmas Ideas” härom dagen och i den fanns det mycket fint pyssel. Bland annat en mall för att göra dessa askar. Jag vet inte om min ask blev så julig men den blev ganska söt hur som helst. Nu är bara frågan vad jag ska fylla den med. 🙂 Jag önskar er en mysig tredje advent!
——
I bought “Tilda’s Christmas Ideas” the other day and it’s full of inspiration, including a template to make these boxes. I don’t know if my box turned out very Christmassy, but it’s kind of pretty anyway. The question is what to fill it with. I wish you a great 3rd Sunday of Advent. 🙂
Det finns en hel del gratis ask-mallar att ladda hem från nätet. Inte just den här, men många andra: /
There’s a lot of box templates to download from the web, for free. Not this one exactly, but many others:

Speckless / Oh the lovely things

Create Studio / Martha Stewart
Dagens pyssel, filthjärtan –
Craft of the Day, felt hearts
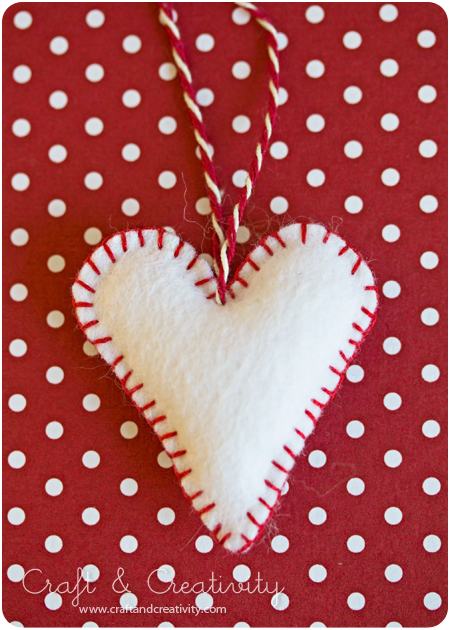
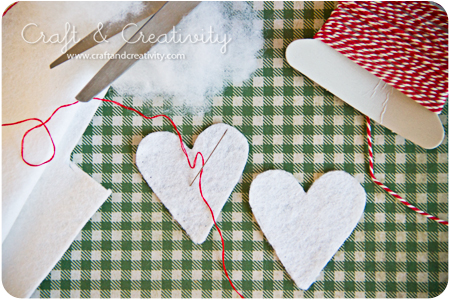
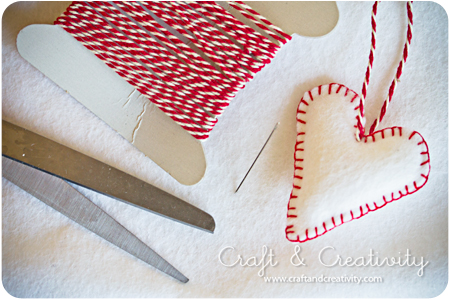
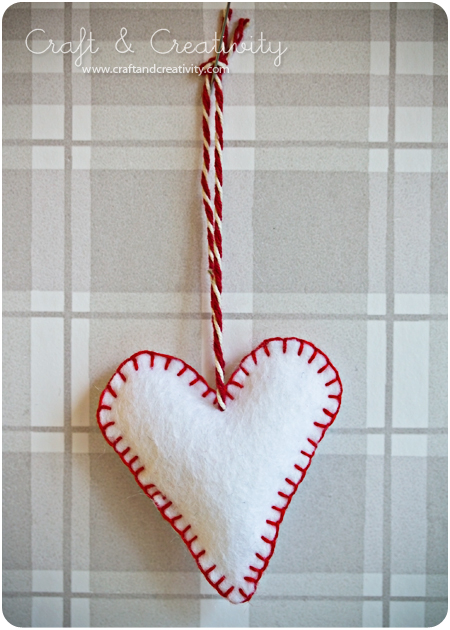
Ja då var det dags för fler hjärtan. 🙂 Jag gillar rött och vitt i granen och då kommer dessa filthjärtan förhoppningsvis passa bra. Jag hade vit filt över efter marängerna och hus-ljuslyktorna. Dessa hjärtan är enkla att göra. Du behöver vit filt, sax, sytråd (eller broderitråd), nål och ett band att hänga hjärtat i.
För att måtta hjärtana kan man använda en pepparkaksform till exempel, eller rita för hand. Klipp ut två hjärtan. Sy runt kanten med langettstygn men spara en liten öppning. Fyll med vadd och sy igen det sista. Fäst ett band för upphängning.
It’s about time for some new hearts. 🙂 I like the combination of red and white in the Christmas tree and these felt hearts will hopefully fit right in. I had some scraps of white felt left from the meringues and the felt house lanterns.The hearts are really easy to make. You need white felt, scissors, sewing thread (or embroidery thread), a needle and string or yarn for the hanging.
In order to get the right heart shape, you can use a cookie cutter, or simply draw by hand. Cut out two hearts. Sew around the edge with blanket stitch, but leave a small opening. Fill the heart with cotton wool and close the gap. Attach a string for hanging.
Pyntade pepparkakor – Decorated gingerbread
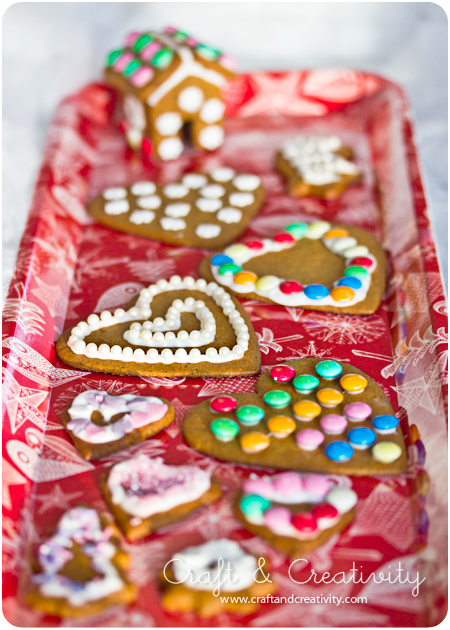
Jag och min 4-åring pyntade pepparkakorna som vi bakade härom dagen. Vi tömde strösselförrådet kan man säga. Hur kul som helst. /
My 4-year-old and I decorated the gingerbread we baked the other day. You could say that we emptied our stash of sprinkles… And we had so much fun.
Dagens pyssel, flätade hjärtan –
Craft of the Day, braided hearts
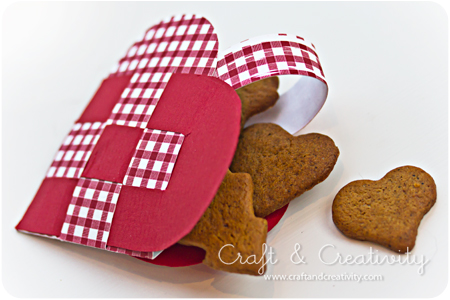
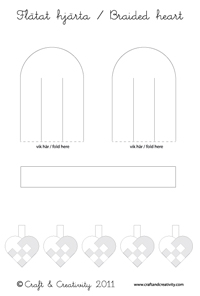
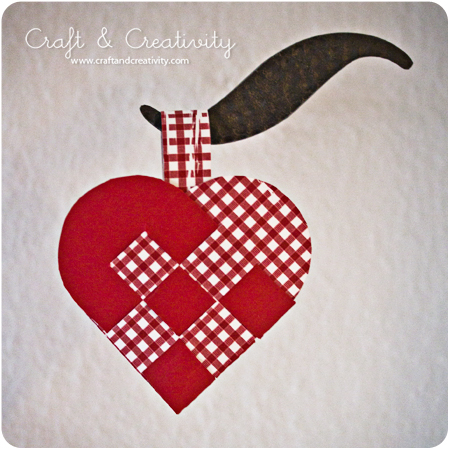
Flätade hjärtan är ett typiskt julpyssel i vår familj. Ladda ner min mall genom att klicka på denna länk eller på bilden. Klipp ut mallen. Vik det papper du valt dubbelt. Lägg mallen på papperet. Den streckade kanten på mallen ska ligga mot pappersviket. Rita runt mallen och klipp ut. Du behöver två likadana “hjärthalvor”, gärna i kontrasterande färg eller olika mönster.
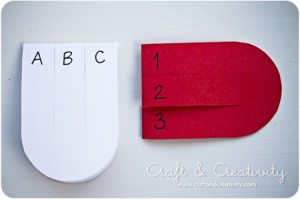
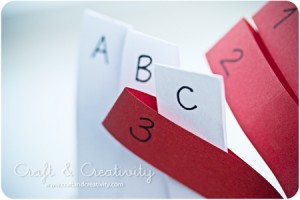
Om du aldrig har flätat hjärtan förut så föreslår jag att du börjar med en “dummy” i vanligt kopieringspapper och skriver siffrorna 1-3 på den ena halvan och bokstäverna A-C på den andra, som på min bild.
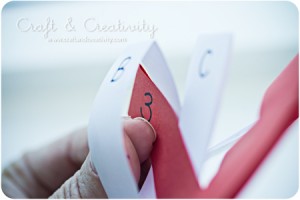
Börja med 3:
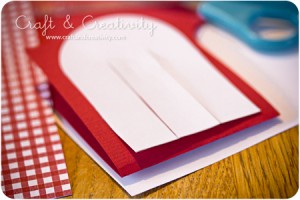
Trä 3 över C, genom B och över A (som på bilderna nedan).
Nu är dags för nr 2:
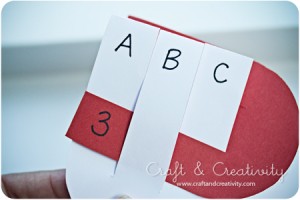
Trä 2 genom C, över B och genom A.
Och slutligen 3:
Trä 3 över C, genom B och över A.
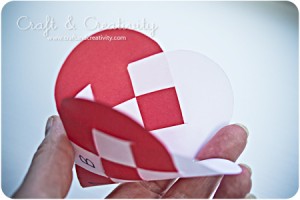
Nu ska hjärtat gå att öppna som en korg.
Klistra eller tejpa fast handtaget. Klart!
Braided hearts is a typical Christmas craft in our family. Download my template by clicking on this link. Cut out the template. Fold the paper of your choice. Place the template on the paper. The dashed line on the template must align against the paper folding. Trace around the template with a pen and cut. You need two identical “half hearts”, preferably in a contrasting color or different patterns.
If you’ve never braided hearts before I suggest you start with a “dummy” in plain copy paper and mark one half with the numbers 1-3 and the other one with the letters A-C, like in my picture.
Start with no 3:
Thread 3 over C, through B and over A (as shown in my pictures above)
Now it’s time for no 2:
Thread 2 through C, over B and through A.
And finally, no 3:
Thread 3 over C, through B and over A.
Now you should be able to open the heart like a basket.
Glue or tape the handle in place. You’re done!
Dagens pyssel, filthus –
Craft of the Day, felt houses
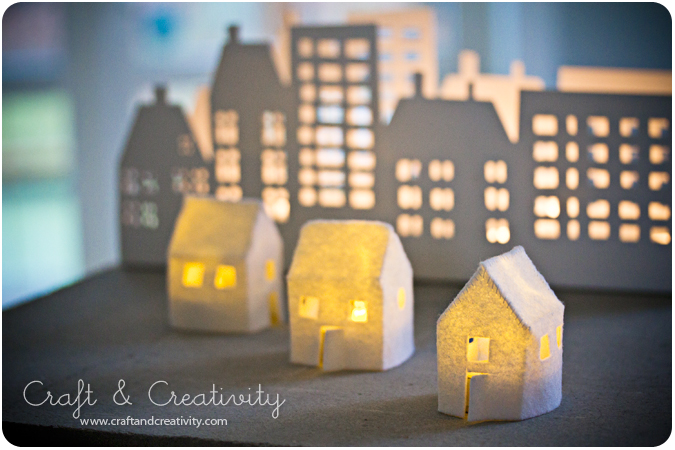
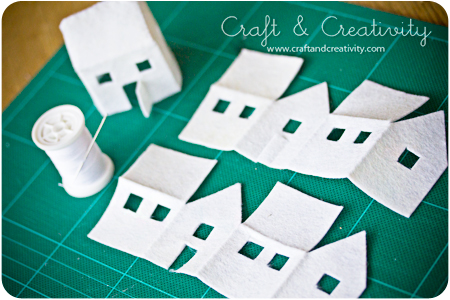
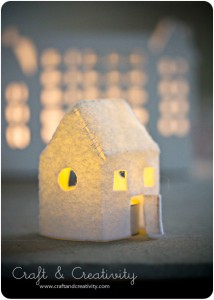
Jag tror det var via Pinterest eller Craftgawker som jag hamnade på pysselbloggen Poopscape Projecets och fastnade direkt för Claires små fina filthus. Det är något speciellt med hus. Materialet till filthusen hade jag redan hemma så härom kvällen satte jag fart.
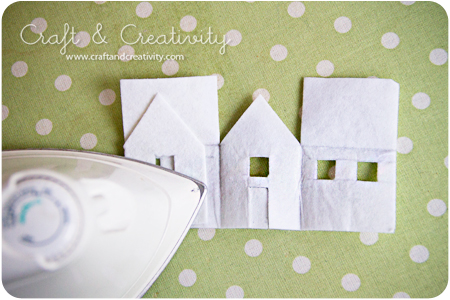
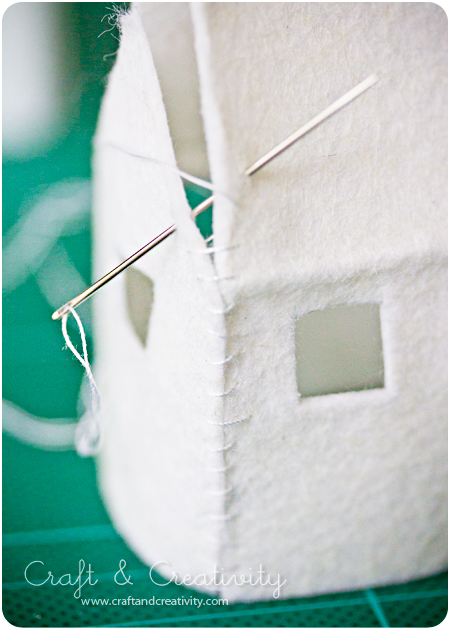
Inspiration, beskrivning och mall kommer som sagt från Poopscape Projects men istället för att pensla på tygstärkelse på de färdiga husen så strök jag på vliseline (min nya favorit, det är så roligt att jobba med!) innan jag ens skar ut husformerna. Fungerade perfekt, husen blev hur stabila som helst.
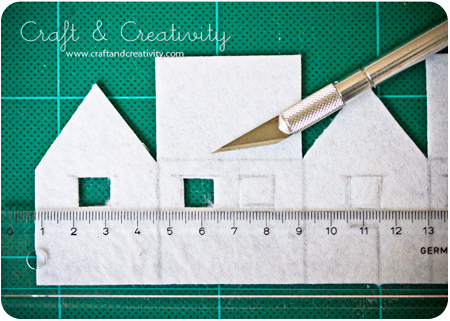
Det enda man behöver är alltså: Vit filt, vliseline (eller tygstärkelse + pensel), hobbykniv, skärmatta eller annat bra underlag, linjal, vit sytråd, nål och strykjärn. Och elektriska värmeljus om man vill kunna “tända” dem. Använd absolut inte vanliga värmeljus (det behöver jag inte ens skriva va?).
I think it was through Pinterest or Craft Rest or Craftgawker that I ended up on the craft blog Poopscape Projects, and immediately got hooked on Claire’s neat felt houses. There’s something special about houses. I had all the necessary material available to make the felt houses at home and got started the other evening.
As mentioned, the inspiration for this craft comes from Poopscape Projects and there you can find a great tutorial and a template. Instead of applying fabric stiffener I used fusible interfacing (my new favorite, it’s so fun and easy to work with!) before even cutting out the house shapes. Worked perfectly, the houses became very stabile.
All you need is this: White felt, fusible interfacing (or fabric stiffener + brush), exacto knife, cutting mat, ruler, white sewing thread, a needle and an iron. And electric tea lights if you want to “light” your houses. Please never use ordinary tea lights (I don’t even have to point that out to you, do I?).
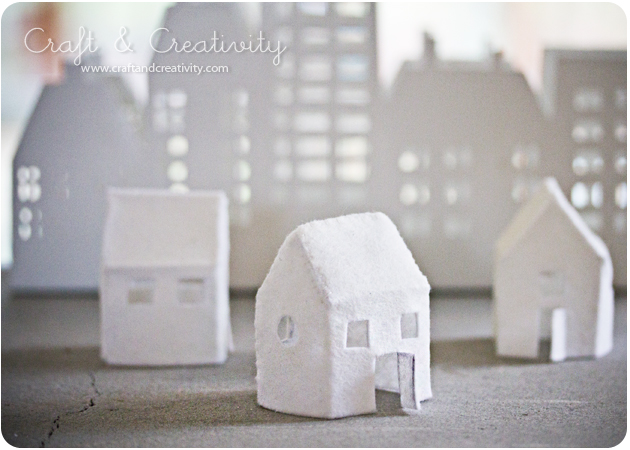
Ljushållaren med stadsmotiv som står i bakgrunden kommer från butiken Village, men den har ett par år på nacken.
Man kan ju också tänka sig sy ett litet golv på dem, trä i ett snöre och hänga dem i julgranen…
The “city” candle holder in the background comes from a chain of stores called Village here in Sweden, and I’ve had it for a couple of years.
Another idea could be to add a floor to the house, attach a string and hang it the Christmas tree …
Dagens pyssel, papperslera –
Craft of the Day, paper clay
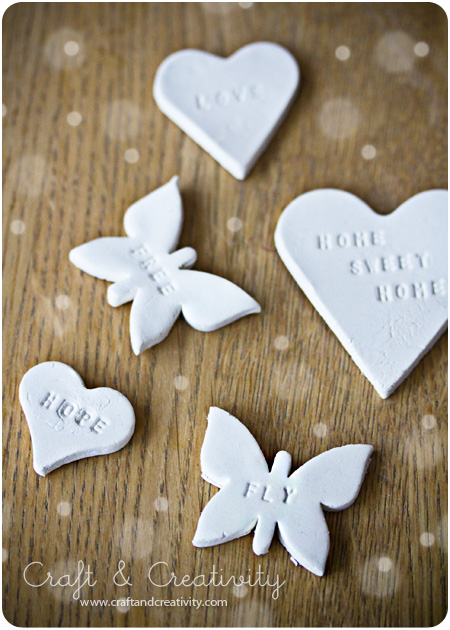
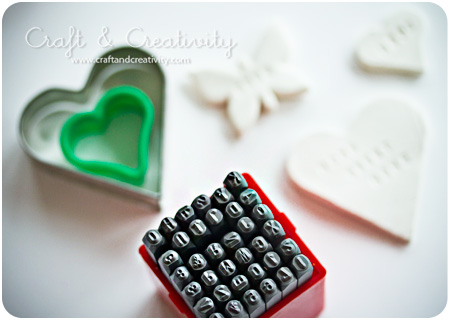
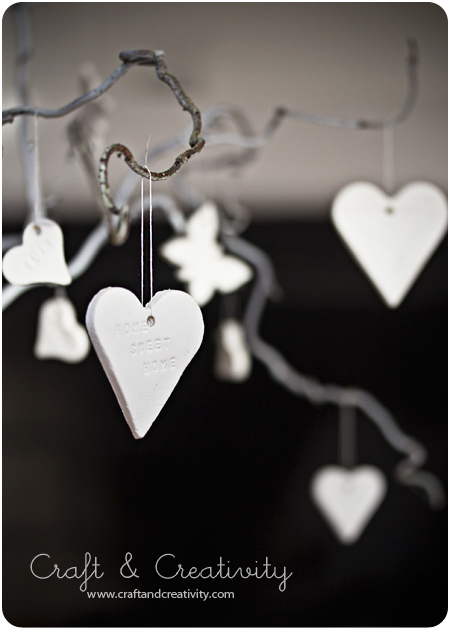
Pepparkaksformar kan man använda till mycket annat än bak. Jag köpte självtorkande papperslera som jag kavlade ut. Sedan stansade jag ut olika former och stämplade figurerna med mina bokstavsstansar av härdat stål. Figurerna blir otroligt lätta när de torkat, de väger verkligen inte mer än papper.
You can use cookie cutters for many purposes other then baking. I bought air-drying paper clay that I rolled flat with a rolling pin. I punched out various forms with the cookie cutters and stamped my figures with my letter punches. The ornaments are incredibly light when dried, the weigh no more then paper.
Dagens pyssel, “pimpad” burk –
Craft of the Day, “pimped” jar
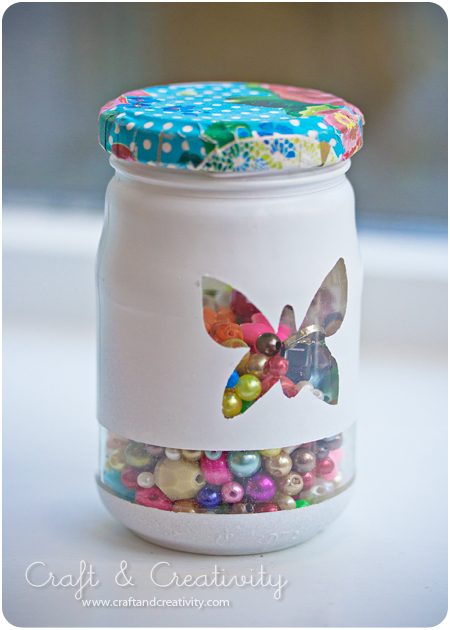
Det finns många sätt att piffa till en gammal glasburk. Det här är ett sätt. Jag har testat ett par andra varianter tidigare: se här, här och här. /
There are many ways to decorate an old glass jar. This is one way. I’ve tried a couple of other variations before: take a look here, here and here.
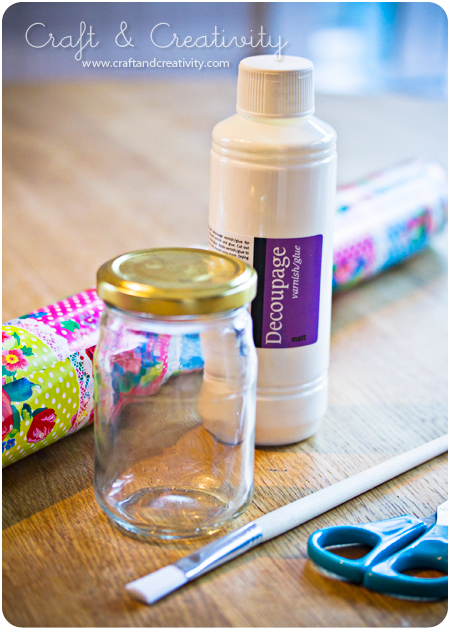
Jag började med locket. Till det använde jag presentpapper, decoupage (klister & lack i ett), sax och pensel. / I started with the lid. For this I used wrapping paper, mod podge (varnish & glue all-in-one), scissors and brush.
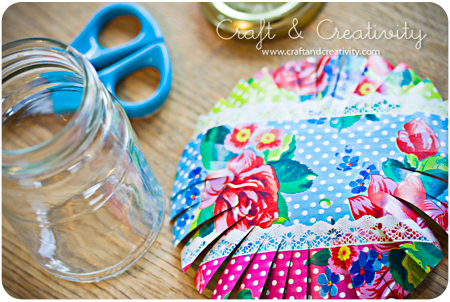
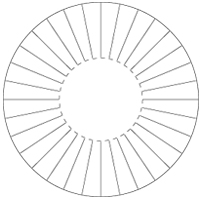
Jag måttade med locket och klippte ut en rundel som var några cm större. Sedan klippte jag remsor in mot mitten. Se skiss (den streckade inre cirkeln symboliserar lockets kant:
———-
I measured out a circle that was a couple of inches larger then the lid. Then I cut strips towards the center of the circle. See my figure below (the dashed inner circle symbolizes the edge of the lid:
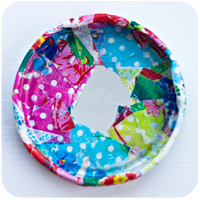
Jag penslade på decoupage runt hela locket och placerade locket i mitten av papperet. Sedan vek jag remsorna runt kanten. Se bild ovan till höger. När det torkat lite penslade jag decoupage utanpå locket också, som en lack på pappet. Jag lät torka i två timmar.
——–
I covered the lid with mod podge and placed the lid in the middle of the paper. Then I folded the strips around the edge. See the right hand picture above. When it had dried for a bit I mod podged the outside of the lid as well, coating the paper. I let it dry for about two hours.
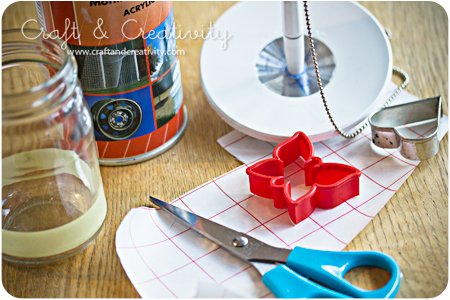
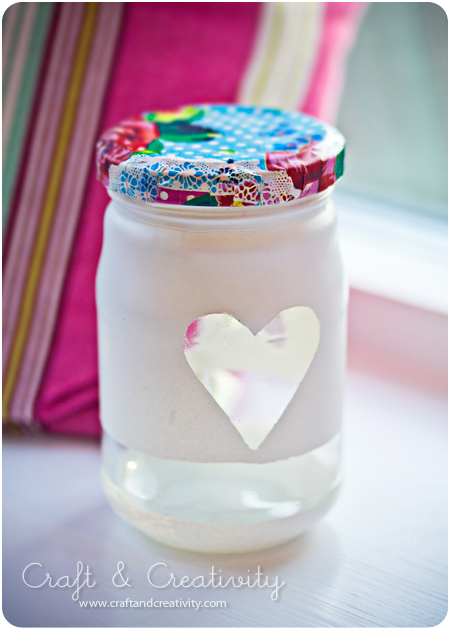
Under tiden målade jag burken. Till den använde jag: Vit sprayfärg, kakmått, självhäftande plast, penna, sax och en gammal tidning. Jag tejpade det område jag inte ville ha spraymålat. Med kakmåtten som mall klippte jag ut figurer i självhäftande plast. Dessa dekaler fäste jag på burken. Burken ställde jag sedan upp och ned på tidningspapper och spraymålade utomhus. När färgen torkat tog jag bort tejpen och plastdekalerna.
———-
In the meantime, I painted the jar. For this I used: White spray paint, cookie-cutters, self-adhesive plastic, pencil, scissors and an old newspaper. I taped the area I didn’t want paint on. With cookie-cutters as templates I cut out a couple of shapes of the adhesive plastic. I attached the shapes on the jar. I put the jar upside down on a newspaper and spray painted it outdoors. When the paint had dried, I removed the tape and the plastic shapes.
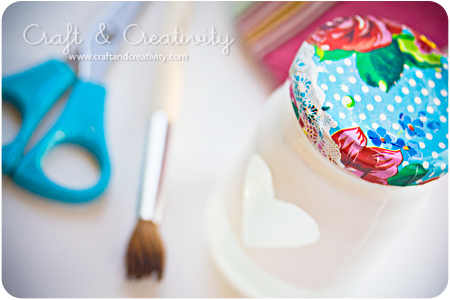
Ett lager lack till ovanpå locket så var jag nöjd. /
Another coating of mod podge on the top of the lid and I was satisfied.

