Krympplast igen – More shrink plastic

Shrink plastic jewelry - by Craft & Creativity

Jag har roat mig med att göra fler smycken i krympplast. Ni som följt mig ett tag har kanske sett att jag tidigare gjort berlocker, halsband och miniporträtt av barnen. Övning ger färdighet brukar man säga och jag tycker jag har fått riktig snits på det här nu. Det viktigaste jag lärt mig är att låta en plåt vara i ugnen medan den blir varm. När ungen uppnått rätt temperatur (160-170°C) så tar jag ut den heta plåten, lägger på ett bakplåtspapper och placerar ut mina krympplast-motiv. Bränn dig inte! In med plåten i ugnen och på mindre än en minut har motiven krympt och de blir mycket plattare och finare än när jag stoppar in dem i ungen på en kall plåt eller form. Att jag inte tänkt på det tidigare!
—————
I’ve made myself some more shrink plastic jewelry. Those of you who have followed me for a while may have seen me making shrinky dink charms, necklaces and miniature portraits of the kids. Practice makes perfect as the saying goes, and I think I got a real hang of it now. The most important thing I learned is to keep the oven tray in the oven while it heats up. When the oven has reached the right temperature (320°F /160°C), I take out the tray, add a baking sheet and place my shrink plastic objects on top. Don’t burn yourself! Place the tray in the oven and in less then a minute the plastic shrinks. They melt quicker and get a lot flatter and prettier then when I put them in the oven on a cold plate or dish. Why didn’t I think of this before?  

Shrink plastic jewelry - by Craft & Creativity

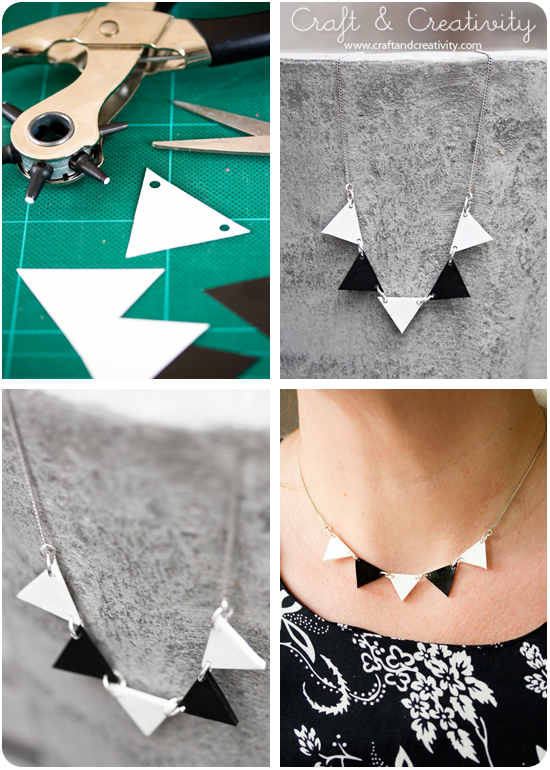
Ovan har jag gjort ett halsband av små vimplar. Efter att ha sett liknande halsband i olika affärer ville jag göra en egen variant och då passade krympplast perfekt som material. Jag klippte ut trianglar och gjorde hål med en håltång i två av hörnen. Hålslag fungerar också men ger lite större hål. Efter att vimplarna krympt och svalnat (tar bara några minuter) trädde jag i o-ringar. Jag fäste de yttersta två ringarna i en kedja med lås och halsbandet var klart! Ett tips för återvinning är att använda kedja & lås från ett halsband man inte längre använder. 🙂
————-
Above you can see I made ​​a necklace of small pennants. Having seen similar necklaces in various shops I wanted to make my own version, and I realized shrink plastic was the perfect material. I cut out triangles and made holes with a hole puncher. After the triangles shrunk and cooled off (it only takes a few minutes), I joined them together using jump rings. I attached a necklace chain with clasp to the two outer jump rings and the necklace was done! A tip is to recycle a chain & clasp from a necklace you no longer use. 🙂

Shrink plastic jewelry - by Craft & Creativity

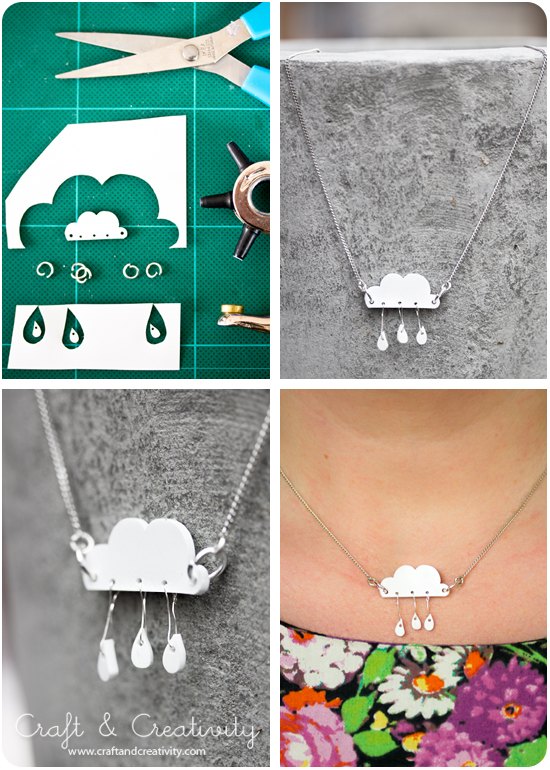
Molnet och dropparna ritade jag för hand på papper och använde som mall när jag klippte i krympplasten. Jag gjorde tre mindre hål för dropparna och två större för o-ringarna. Dropparna hängde jag i silverfärgad metalltråd (sytråd fungerar säkert också). En annan idé skulle kunna vara att hänga kedjor i molnet, som Passionflower på Etsy gjort. Ovan kan ni för övrigt se ett exempel på hur mycket krympplasten krymper i ugnen, d v s till ca 1/3.
———–
I drew the shape of the cloud and the drops by hand on a piece of paper and used it as a template when I cut the shrink plastic. I made three small holes for the drops, and two larger ones for the jump rings. I hung the drops in silver metallic thread (you could probably use sewing thread as well). Another idea would be to hang chains in the cloud, as Passionflower at Etsy did. Above you can also see an example of how much the plastic actually shrinks, ie to about one third. 

Shrink plastic jewelry - by Craft & Creativity

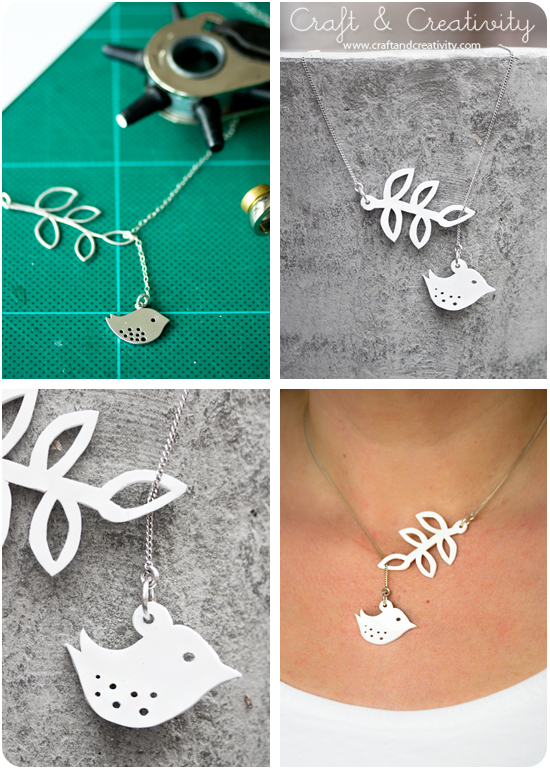
Fågeln och grenen är en efterapning av ett smycke som jag köpt från Royal Gold Gifts på Etsy och som jag tycker mycket om. Här använde jag sax, håltång och hobbykniv för att få till detaljerna.
———–
The bird and the branch’s is an imitation of a piece of jewelry that I purchased from Royal Gold Gifts at Etsy, and which I’m very fond of. Here I used scissors, a hole punch and an exacto knife to get the details right.

Shrink plastic jewelry - by Craft & Creativity

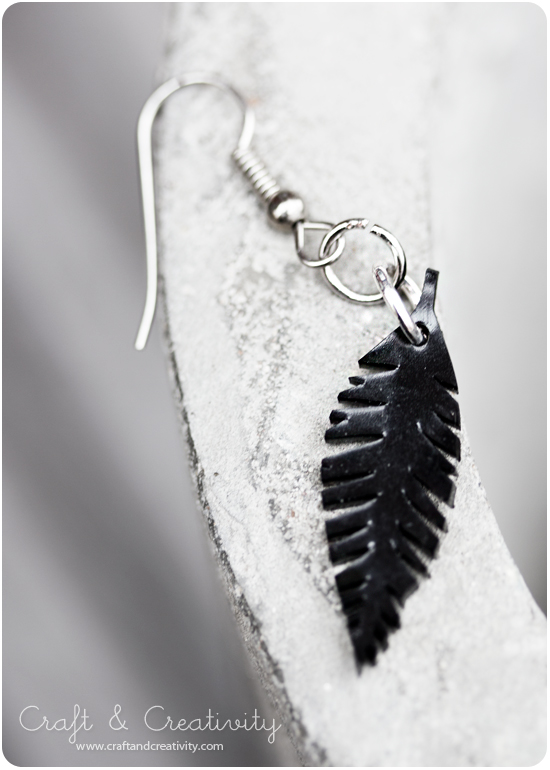
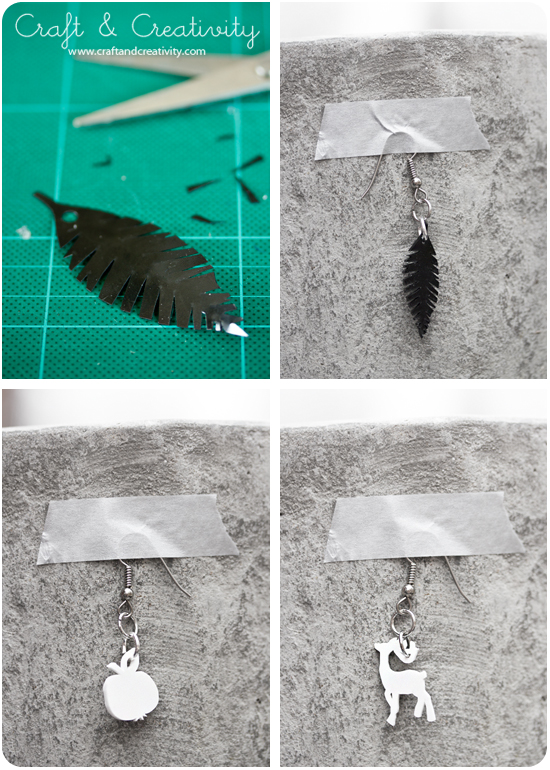
Till sist några örhängen – en fjäder, ett äpple och en ren. Krympplast finns i vitt, svart, matt transparent och blank transparent. Tycker man det är svårt att komma på motiven själv kan man få mycket inspiration genom att titta på gratis clipart, t ex på Microsoft Clipart. För mer krympplast-inspiration rekommenderar jag Pinterest, där finns hur mycket som helst!
———
Finally, some earrings – a feather, an apple and a reindeer. If you think it’s difficult to come up with ideas for shapes yourself, you can get a lot of inspiration by looking at free clipart, at Microsoft Clipart for example. For additional shrink plastic inspiration, I recommend Pinterest. There you will find tons of shrinky dink crafts! 

Washitejpade värmeljus –
Washi taped tea lights

Washi taped tea lights - by Craft & Creativity

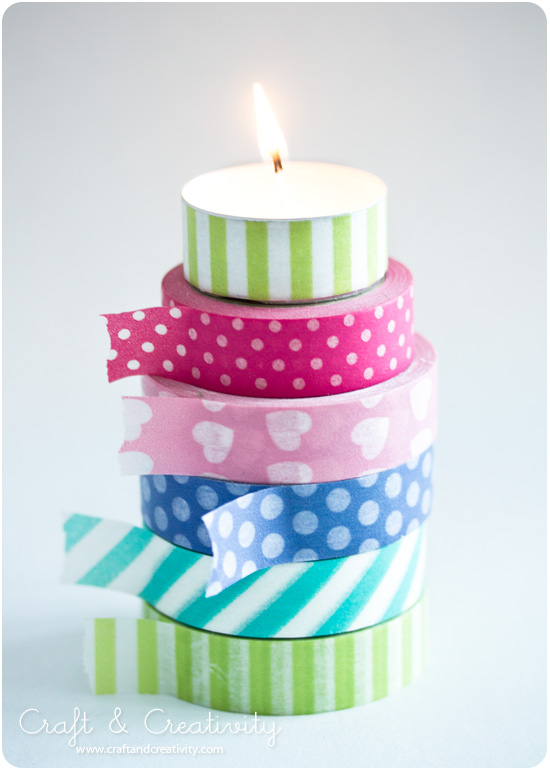
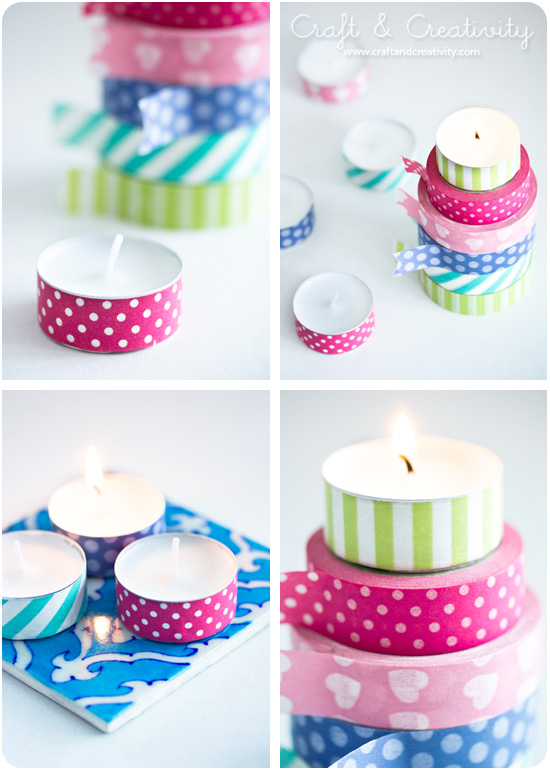
Detta pyssel har florerat på många ställen i bloggvärlden (bl a hos Trendenser, Våga skapa, Lydia HolmbergJohanna Stenvall och fixa & dona). Med min nya fina tejp hemma bestämmer jag mig för att vara en härmpapa och testa detta roliga tips. Att sätta washitejp runt värmeljus – kan det bli enklare än så? Ställ ljusen på en kakelplatta eller ett fat och kombinera olika färger & mönster. Fint som sjutton. När ljusen brunnit ner kan du återanvända tejpen!
————
I’ve spotted this craft all over the blogosphere (for example at Trendenser, Våga skapa, Lydia Holmberg, Johanna Stenvall and fixa & dona). With all my pretty new washi tape available, I decided to be a copycat and try this out. Putting washi tape around tea light candles – could it get any easier than that? Place your tea lights on a tile or a plate and combine different colors & patterns. It looks really nice! When the candles burned down, you can reuse the tape! 

Washi taped tea lights - by Craft & Creativity

Slutligen – för er som tänker på säkerheten. Jag har bränt ner åtskilliga washitejpade värmeljus och värmen har i mitt fall inte påverkat tejpen. Men jag vill ändå påminna er om att – lämna aldrig ett brinnande ljus utan uppsikt! Av säkerhetsskäl bör du också vara försiktig med att ställa värmeljus för tätt ihop. Pyssla lugnt! 🙂
——–
Finally – for those of you who worry about safety. I have burned down several washi taped tealights and in my case the heat did not affect the tape. But I would still like to remind you to never ever leave a burning candle unattended! For security reasons, you should also be careful not to put tea lights too close together. Happy crafting! 🙂 

Enkla kalaskronor – Simple party crowns

Simple birthday crowns - by Craft & Creativity

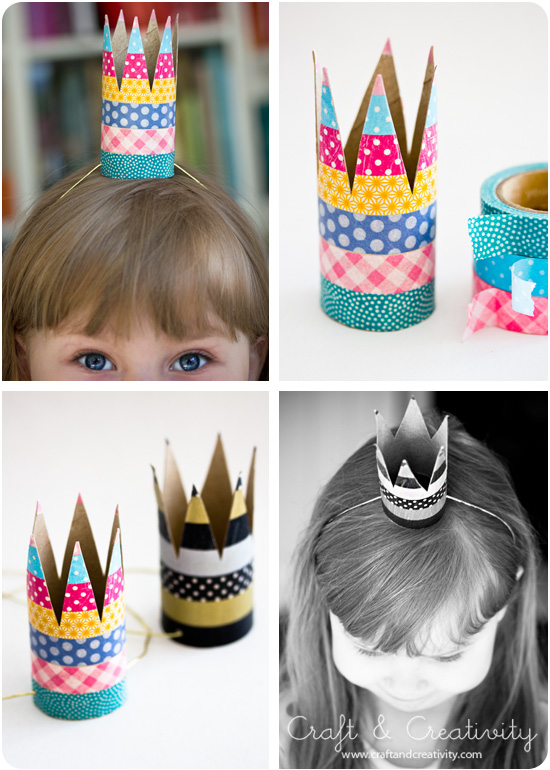
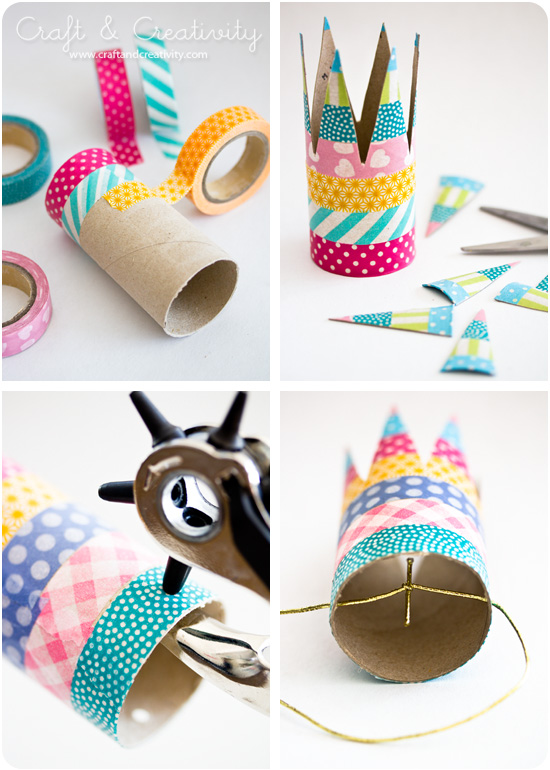
Med toalettrullar kan man göra mycket skoj. Som till exempel prins- och prinsesskronor till ett kalas! Duka med en krona på varje tallrik eller låt barnen göra egna på kalaset. Idén hittade jag hos Lilla A, men istället för att måla kronorna använde jag och dottern washitejp.
————
You can make lots of fun stuff with toilet papper rolls. For example these birthday party  crowns! Place a crown on each plate when you set the table or let the kids make their own at the party. I found this idea at Lilla A, but instead of painting the painting the rolls, me and my daughter used washi tape. 

Simple birthday crowns - by Craft & Creativity

Du behöver: Toapappersrullar, washitejp, sax, elastisk snodd och en håltång (det går också bra att göra hål med en stoppnål eller liknande).
Gör så här: Tejpa med washitejpen runt rullen. Klipp till spetsarna. Gör två hål längst ner. Trä i den elastiska snodden och knyt en dubbelknut på lagom avstånd för att passa ett barns huvud.
———-
You will need: Toilet paper rolls, washi tape, scissors, elastic cord and hole punch pliers (you could also use a darning needle or pricker to make the holes).
Do like this: Tape with the washi tape around the paper roll. Cut the points of the crown. Make two holes at the bottom. Thread the elastic cord through the holes and tie a double knot to fit a child’s head.  

Simple birthday crowns - by Craft & Creativity

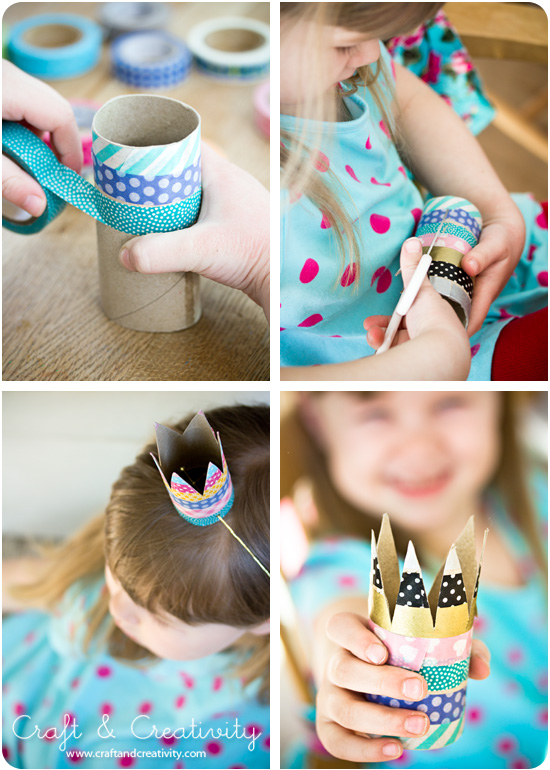
Min femåriga dotter gjorde ett antal kronor helt själv och tyckte det var väldigt roligt.
———
My five year daughter made a number of crowns all by herself and she really enjoyed it. 

Honeycomb pappersbollar –
Honeycomb pom-poms

DIY Honeycomb paper ball - by Craft & Creativity

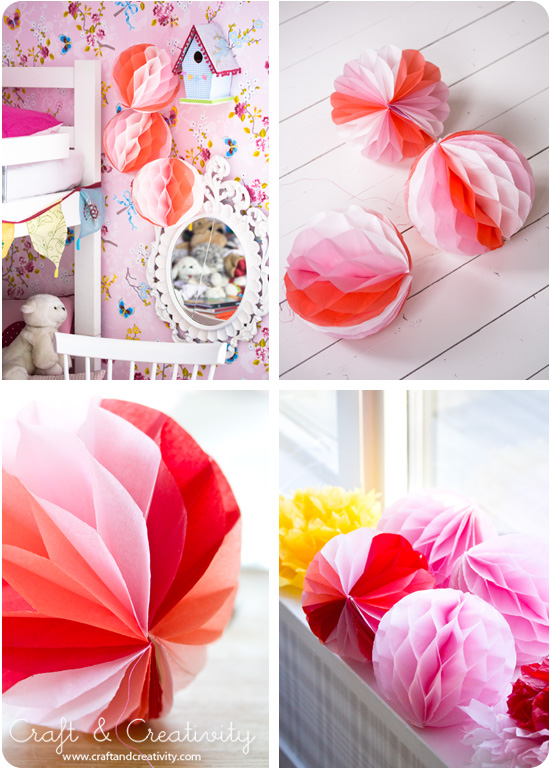
Idag tänkte jag visa hur man gör eget honeycomb-papper (dragspelspapper) och hur man sedan kan göra fina pompom-bollar av papperet. Bollarna är snygga till kalas, bröllop, dop eller bara hängande hemma som en inredningsdetalj. Min beskrivning nedan visar hur man gör ett 25×35 cm stort honeycomb-papper som räcker till tre bollar (18 cm i diameter). Du behöver 9 ark silkespapper och minst en rulle dubbelhäftande tejp för att göra 3 bollar.

Inspirationen kommer från den inspirerande sidan Mr. Printables. Jag har dock gjort om idén lite efter eget huvud. Bland annat använder jag dubbelhäftande tejp eftersom jag märkt att det håller mycket bättre än att limma med limstift.
————
Today I thought I’d show you how to make your own honeycomb paper and how to make pretty pom pom paper balls out of it. These paper balls are great for parties, weddings, christenings or simply use them as an interior detail in your home. My tutorial shows you how to make a 25×35 cm lagre honeycomb paper which is enough for three paper balls (18 cm in diameter).

This craft was inspired by a great tutorial over at Mr. Printables. However, I made mine a bit differently. For example, I used double sided adhesive tape after noticing that it holds better then glue stick. 

DIY Honeycomb paper ball - by Craft & Creativity

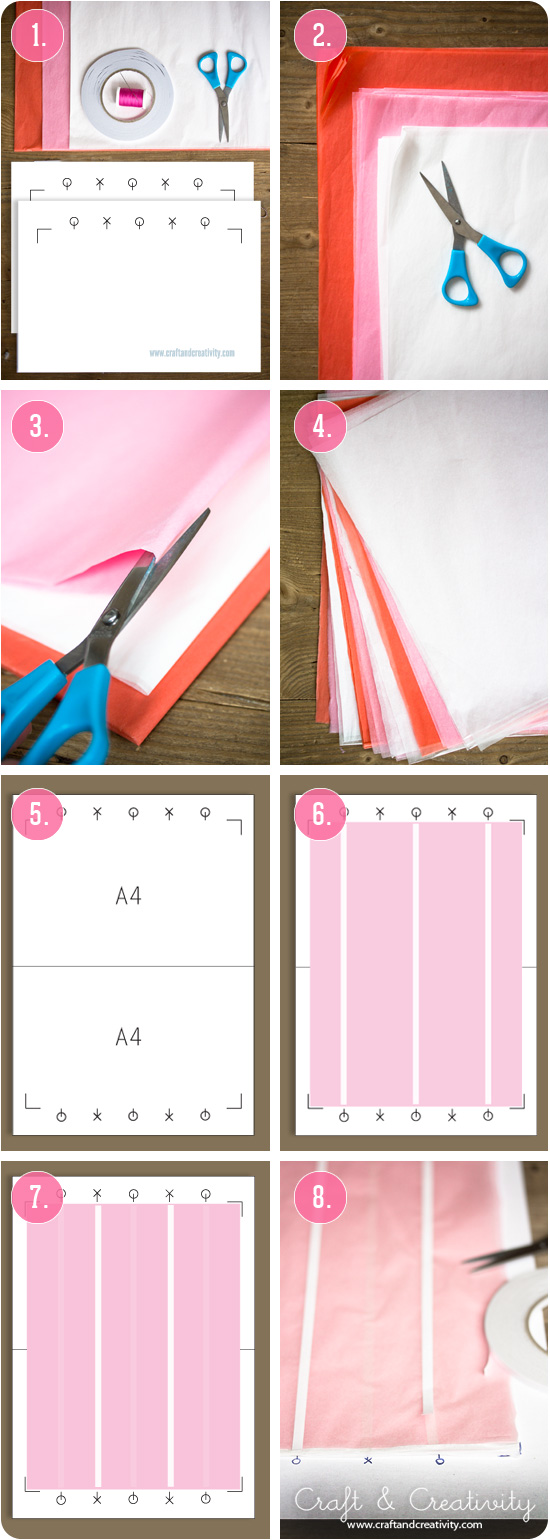
  1. Du behöver: 9 ark silkespapper 50×70 cm, en stor rulle dubbelhäftande tejp (min är 6 mm bred), vass sax, två ex av min mall (ladda ner här), sytråd, nål och en bit vanlig tejp för at tejpa ihop mallarna.
  2. Gör så här: Välj färg/färger på ditt silkespapper. Den här gången valde jag tre olika färger, tre ark av varje (vit, rosa & orange/korall). Vik arken på hälften och sedan en gång till = 36 lager silkespapper med måttet 25×35 cm.
  3. Klipp i viken så du får 36 separata ark.
  4. Mixa färgerna. Jag valde att växla färg efter 4 ark för att få randiga bollar.
  5. Nu ska alla ark tejpas. Skriv ut 2 ex av min färdiga mall för att underlätta arbetet. Tejpa ihop de två mallarna som bilden visar ovan. Min mall passar ark som är 25×35 cm. Vill du göra större eller mindre bollar får du göra en anpassad mall med dina egna mått.
  6. Lägg ditt första ark silkespapper på plats. Tejpa med den dubbelhäftande tejpen mellan varje O. Det blir totalt 3 linjer. Ta bort skyddspapperet från tejpen.
  7. Lägg nästa ark silkespapper ovanpå det första. Detta ark tejpar du mellan varje X, det blir totalt 2 linjer.
  8. Fortsätt med alla 36 ark, vartannat ark tejpas mellan X:en och vartannat ark tejpas mellan O:na. Oroa dig inte om silkespapperet hamnar lite på snedden eller om allt inte ser perfekt ut, resultatet kommer bli bra ändå.

—–

  1. You will need: 9 sheets of 50×70 cm tissue paper, one big roll of double sided adhesive tape (mine is 6 mm wide), sharp scissors, two copies of my template (download here), sewing thread,a needle and a piece of tape to assemble the two templates. 
  2. Do like this: Select the color / colors of your tissue paper. This time, I chose three different colors, three sheets of each (white, pink & coral). Fold the sheet in half and then again = 36 layers tissue paper with the dimension 25×35 cm.
  3. Cut through all the papers in the fold to get 36 separate sheets.
  4. Mix the colors. I chose to change color after 4 sheets to get a striped effect.
  5. Now, time to tape all of the sheets. Print two copies of my template to simplify your work. Tape the two templates together as shown above. My template is adapted for sheets that are 25×35 cm. If you wish to make larger or smaller paper balls, you need to make a custom template with your own measurements. 
  6. Put the first sheet of tissue paper in place. Tape with double sided adhesive tape between each O. There will be a total of three lines. Remove the backing from the tape.
  7. Place the next sheet of tissue paper on top of the first. This time tape between each X and there will be a total of two lines. 
  8. Continue with all 36 sheets. Every other sheet is to be taped between the X’s and every other sheets is to be taped between Os. Do not worry if the tissue paper ends up a bit crooked or if not everything looks perfect, the result will be fine anyway.

DIY Honeycomb paper ball - by Craft & Creativity

  1. Nu är ditt honeycomb-papper klart. Det är dags att göra bollarna!
  2. Skriv ut mina mallar (ladda ner här). Klipp ut 1 ex av halvmånen och 3 ex av den runda. Det fungerar bra med vanligt skrivarpapper.
  3. Lägg halvmånemallen på honeycomb-papperet och måtta så du får ut tre halvmånar. Notera att mallarna måste ligga åt samma håll som mina ovan.
  4. Klipp ut dina tre halvmånar.
  5. Vik det ena runda papperet på mitten. Lägg honeycomb-papperet i mitten av viket. Fäst det insidan av det vita papperet mot silkespapperet med dubbelhäftande tejp (eller limstift), först på den ena sidan…
  6. … och sedan på den andra sidan.
  7. Så här ska det se ut när du tejpat klart.
  8. Trä nålen med sytråd. Stick den genom alla lager papper i ena hörnet av halvmånen. Knyt en knut ca 1 cm ut på tråden, annars går inte bollen att fälla ut. Klipp av tråden. Gör likadant med andra hörnet men klipp inte av tråden utan spara den till upphängning.
  9. Fäst dubbelhäftande tejp på ena sidan av din halvmåne. Eller limma med limstift. Tag bort skyddspapperet från tejpen. Fäll upp bollen så att de vita utsidorna sidorna möter varandra och tejpen fäster.
  10. Volià, en boll! Upprepa punkt 5-9 för de andra två pappersbollarna.

———

  1. Now your honeycomb paper is ready. It’s time to make the honeycomb pom-poms!
  2. Print my templates (download here). Cut one example of the half circle and three copies of the round. Plain printer paper will work just fine. 
  3. Place the half circle template on top of your honeycomb paper and measure so you get three half circles. Note that the templates must lie in the same direction as mine above.
  4. Cut out your three half circles.
  5. Fold one of the round papers in half. Add one of your honeycomb paper half circles in the middle of the fold. Tape the inside of the white paper to the honeycomb paper with adhesive tape (or glue sticks), first on one side …
  6. … and then on the other side.
  7. This is how it should look when your done taping.  
  8. Thread the needle. Stick the needle through all the layers of paper in one corner of half circle. Tie a knot about 1 cm out on the thread, otherwise the ball won’t open. Cut the thread. Do the same with the other corner, but don’t cut the thread, save it for hanging.
  9. Attach double-sided adhesive tape on one side of your half circle. Or glue with glue stick. Remove the backing from the tape. Open up the ball so that the white sides of the paper face each other and the tape sticks. 
  10. Volia, your pom-pom is ready! Repeat steps 5-9 for the other two paper balls.

DIY Honeycomb paper ball - by Craft & Creativity

Jag ska inte sticka under stol med att det är pilligt och tidskrävande att göra honeycomb-papper men för färdiga pompom-bollar kan man få betala ganska mycket pengar, så det kanske kan vara värt det? Att göra dessa tre bollar tog mig drygt en timme. Det hade kanske gått snabbare om jag inte hade haft så mycket hjälp av katten Minus… 😉
——–
I will not deny that making honeycomb paper is a bit tricky and time consuming. But on the other hand buying ready-made ones can be quite expensive and I really think it’s worth it. Making these three pom-poms took me just over an hour. Perhaps it would have gone quicker if I hadn’t had so much help from our cat Minus… 😉 

Decoupage på galgar –
Decoupage clothes hangers

Decoupage clothes hangers - by Craft & Creativity

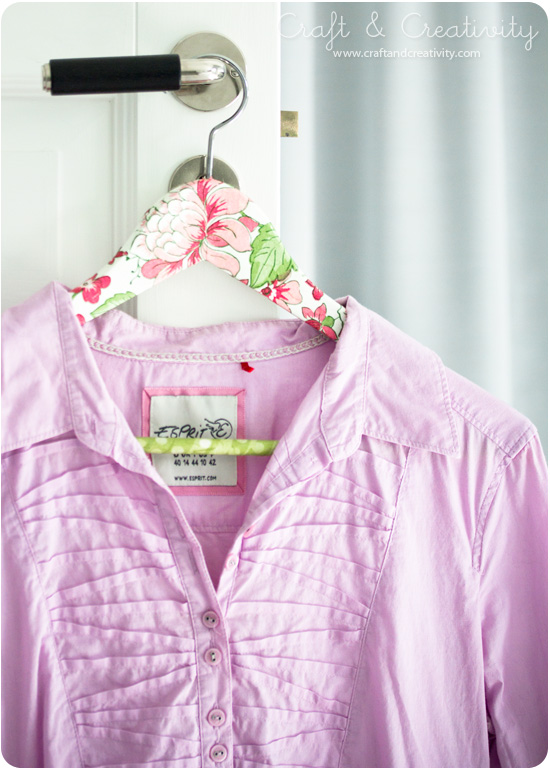
Vi var i behov av fler galgar hemma (varför har vi alltid för få galgar?) och jag köpte mig ett gäng på Ikea. För att göra dem lite mer personliga dekorerade jag dem med servetter och decoupagelack.
————
The family needed more clothes hangers (why are we always short of hangers?) and I bought a bunch over at Ikea. To make them a bit more personal I decorated them with napkins and decoupage glue (you could also use Mod Podge).

Decoupage clothes hangers - by Craft & Creativity

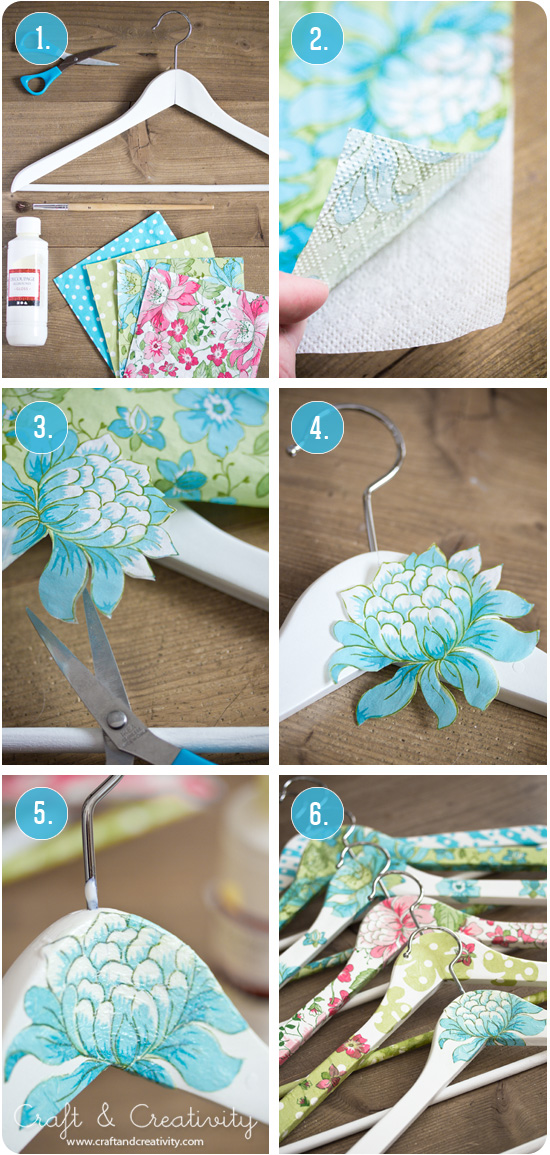
  1. Du behöver: Vita trägalgar, decoupagelack, pensel, sax och servetter (eller decoupagepapper). Servetterna är tunna och underlaget kommer lysa igenom, därför är det bra med vitt underlag.
  2. Gör så här: Dela upp servetten genom att ta bort alla vita lager. Det är bara det översta mönstrade lagret av servetten som ska användas.
  3. Klipp ut de motiv från servetten du vill använda för att täcka hela eller delar av galgen.
  4. Pensla på ett tunt lager decoupagelack på galgen och placera motivet ovanpå. Släta försiktigt ut servetten med en pensel.
  5. Pensla decoupagelack ovanpå motivet.
  6. Låt torka, det tar max en timme.

———

  1. You will need: White wooden hangers, decoupage glue (or Mod Podge), a brush, scissors and napkins (or Decoupage Paper). 
  2. Do like this: Divide the napkin by removing all the white layers. It is only the patterned top layer of the napkin you want to use.
  3. Cut out the parts you need from the napkin, to cover all or parts of your hangers. 
  4. Brush a thin coat of decoupage on the hanger, and place your pieces of napkin on top. Gently wipe with a brush over the surface to smooth it out.
  5. Add a second layer of decoupage glue on top to seal. 
  6. Allow to dry. It takes up to one hour.

Decoupage clothes hangers - by Craft & Creativity

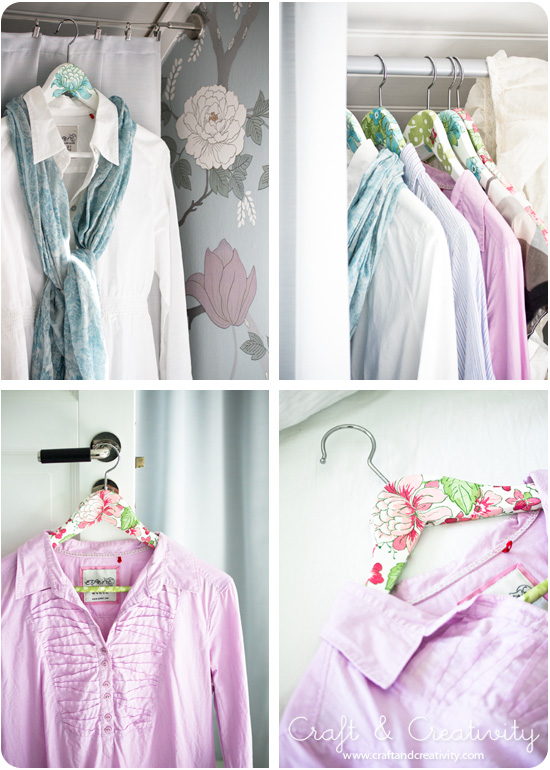
Nu är det vårfint i min garderob! För fler exempel på fint fixade galgar, ta en titt hos EdavictoriaaPastill.nuFröken Bauer och Eat Sleep Craft.
———
Now my closet is dressed up for spring! For more examples of pretty decorated hangers, take a look at Edavictoriaa, Pastill.nu, Fröken Bauer and Eat Sleep Craft.

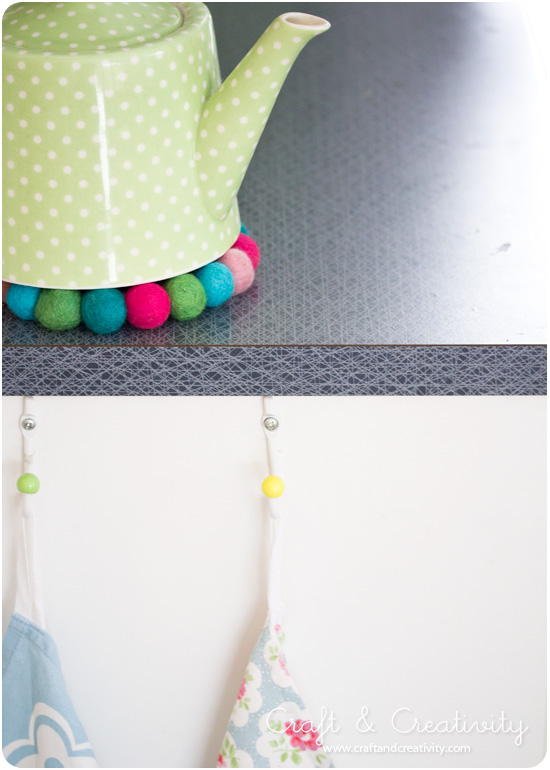
Grytunderlägg av ullpärlor –
Wool bead trivets

Wool bead trivets - by Craft & Creativity

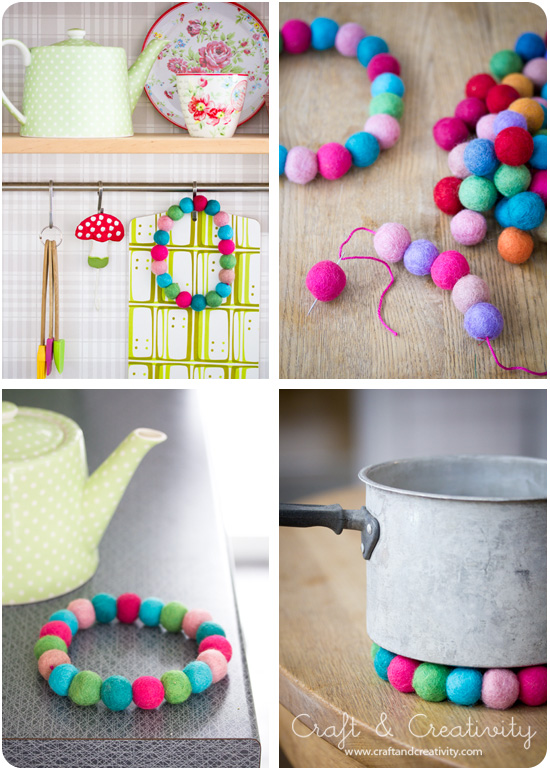
Förra våren gjorde våra vänner Karin & Freja Pysselbolaget så fina grytunderlägg av ullpärlor och nu har jag äntligen gjort slag i saken och tillverkat mina egna. Jag är jättenöjd med dem! För att göra underlägg som dessa tar du en bit garn och en vass nål och trär på ullpärlorna en och en. Måtta med dina kastruller för att få den storlek du vill ha. Knyt ihop garntåtarna. Jag rekommenderar varmt ett besök hos Pysselbolaget för massor med fler roliga & användbara pysseltips för hela familjen. Härom dagen gjorde de jättefina luftballonger av gamla julgranskulor – himla smart!
———–
Last spring our friends Karin & Freja over at Pysselbolaget made such pretty wool bead trivets and now I finally made my own. I’m very pleased with the result! To make trivets like these you take a piece of yarn and a sharp needle and thread your wool beads one by one. Use your pots to measure the right size. Tie the two ends of the yarn together. I warmly recommend a visit to Pysselbolaget for lots of happy & useful DIY’s for the whole family (it’s in Swedish and English). The other day they made really pretty hot air balloons out of old Christmas baubles – amazingly clever! 

Wool bead trivets - by Craft & Creativity

Ägg med mustasch – Mustache Eggs

Mustache Eggs - by Craft & Creativity

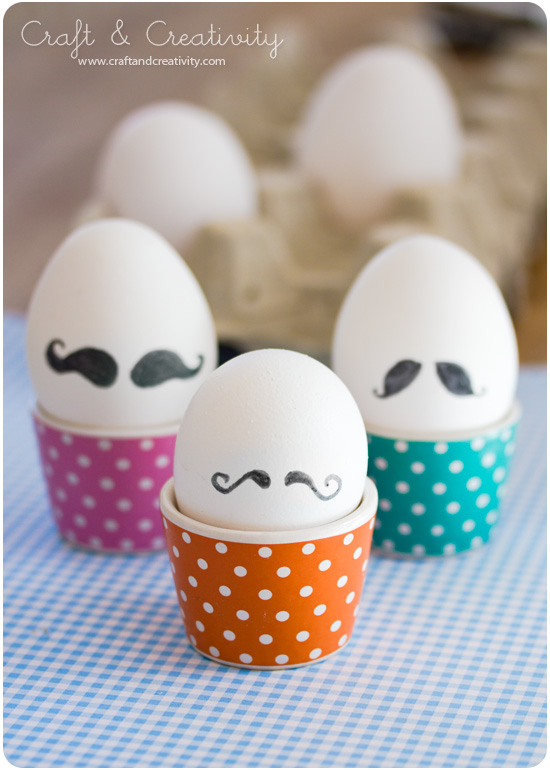
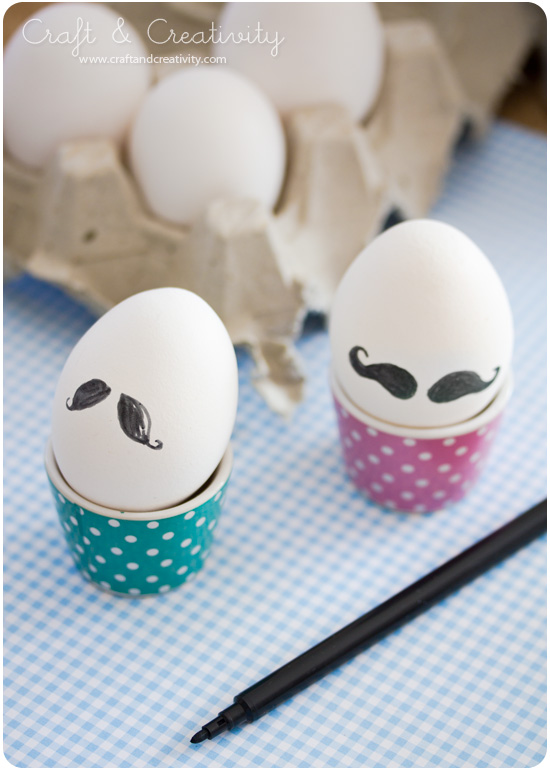
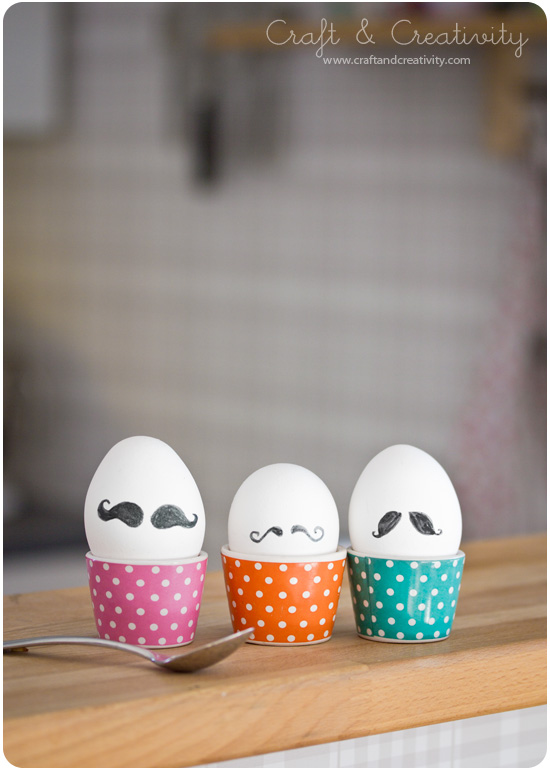
Att mustascher är i ropet i inrednings- och pysselvärlden är inget nytt under solen. Jag kan inte heller säga att jag är först med att måla mustascher på ägg. Men det spelar ingen roll – det är värt att upprepas. Ett snabbare påskpyssel är svårt att hitta och jag tycker att äggubbarna blev galet söta! Det blev lite Hercule Poirot över dem!
———-
That mustaches are trendy in the design and craft world, isn’t exactly new. And I can’t claim to be the first to put mustaches on eggs. But it doesn’t matter – it’s worth repeating. A quicker Easter craft is hard to find and I think my egg-men turned our crazy cute! They kind of look like Hercule Poirot! 

Mustache Eggs - by Craft & Creativity

Idén har jag, som sagt, sett på flera ställen, bland annat hos No. 2 Pencil, fast hon färgade sina ägg och gjorde mustascherna i svart självhäftande vinyl och de blev supersnygga! Jag var lite lat och målade mina med tusch istället. 😉
———–
As mentioned, I’ve seen this idea around, for example at No. 2 Pencil, although she colored her eggs and made the mustaches out of black adhesive vinyl and they turned out fantastic! Since I’m a bit lazy, I simply painted mine with a fiber pen. 😉 

Mustache Eggs - by Craft & Creativity

Glad Påsk på er mina kära bloggläsare! Hoppas ni får en riktigt mysig påsk med trevligt sällskap, god mat & en och annan sockerchock. Själv ska jag umgås med familj, släkt & vänner och på påskafton blir det påskpyssel hemma hos mamma, som traditionen bjuder.
———-
Happy Easter to you my dear blog readers! I wish you a nice Easter holiday. I will be spending mine with family & friends and on Easter Saturday we will be Easter crafting at my mum’s house, as a part of our Easter tradition. 

Glittrande ljushållare –
Sparkling tea light holders

Sparkling tea light holders - by Craft & Creativity

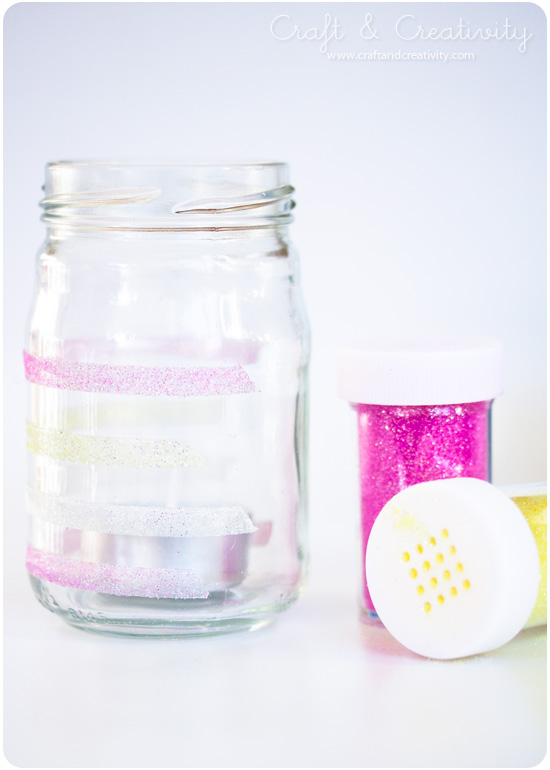
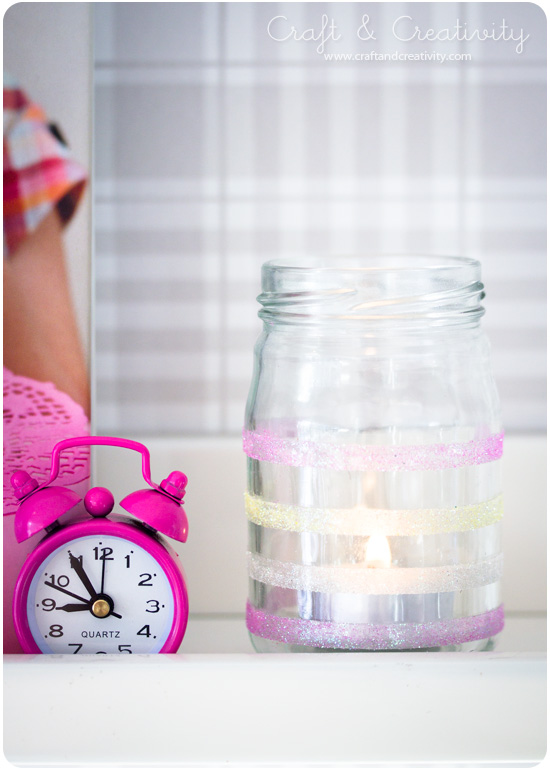
Med lite dubbelhäftande tejp och glitterströssel kan man glittra till gamla glasburkar och använda dem som ljushållare. Idén till detta pyssel fick jag via en bild på Pinterest. Jag har tyvärr inte lyckats hitta källan, trots detektivarbete från min sida.
———-
With a bit of double-sided adhesive tape and glitter sprinkles you can make old glass jars sparkle. Use them for candle holders for example. I got the inspiration for this craft from a picture on Pinterest. Unfortunately I haven’t managed to find the source, even after some detective work on my part. 

Sparkling tea light holders - by Craft & Creativity

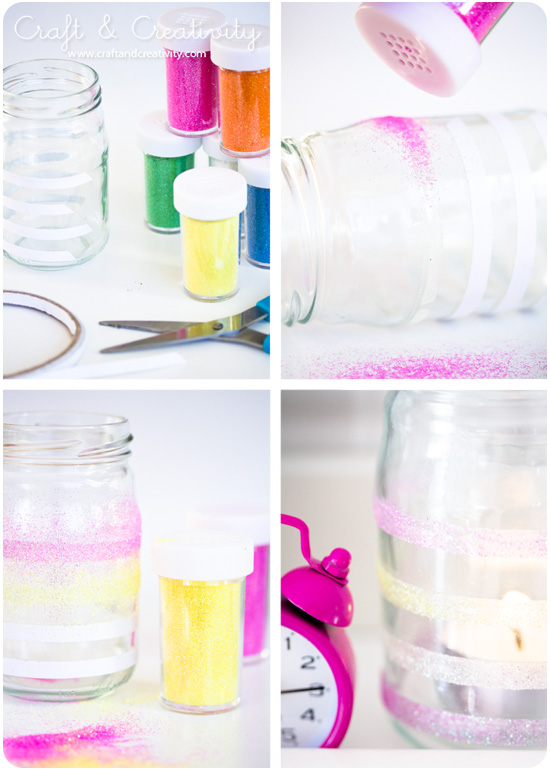
Klipp bitar av tejpen och tejpa fast den på en rendiskad glasburk. Ta bort skyddspapperet lite i taget och häll på glitter i önskad färg. Blås bort överflödigt glitter, ta bort mer skyddspapper och fortsätt med nästa färg.
———–
Cut pieces of the tape and tape it on a clean glass jar. Remove the protective paper a little at a time and add glitter in the color you like. Blow away excess glitter, remove more protective paper and continue with the next color.

Sparkling tea light holders - by Craft & Creativity

Det går att göra alla möjliga sorters mönster med tejpen och använder man ark med klisterfolie kan man även klippa ut olika former – som prickar, hjärtan eller stjärnor t ex.
——–
You can make all sorts of patterns with the tape and if you use sheets of adhesive foil you can also cut out different shapes – like dots, hearts or stars, for example.

Virknålsburk –
Crochet hook holder

Crochet hook holder - by Craft & Creativity

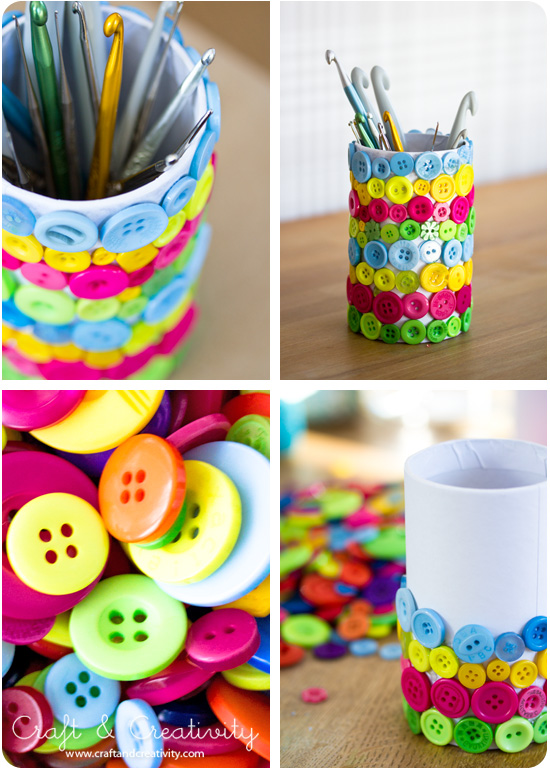
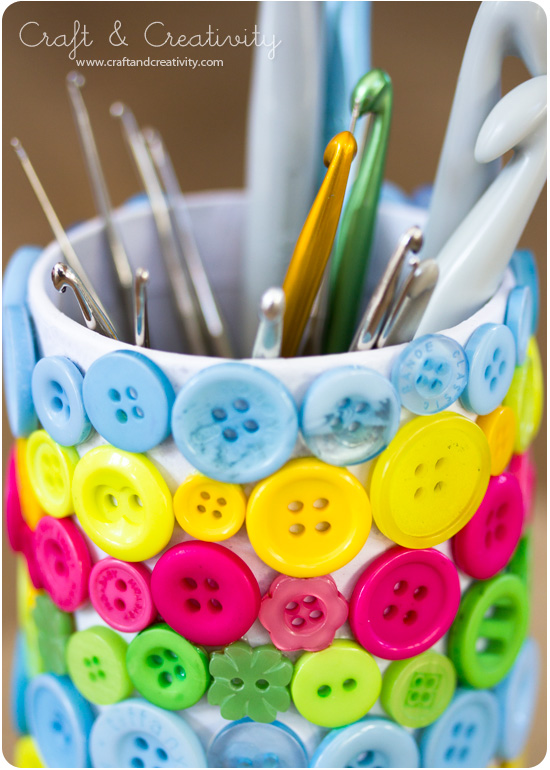
En annan kul sak jag har gjort med mina pennburkar är att täcka en av dem med knappar. Jag använder min burk till att samla mina virknålar.
—————
Another fun thing I’ve made with my pen holders is to cover one of them with buttons. I use mine to store all my crochet hooks.

Crochet hook holder - by Craft & Creativity

Limma fast knapparna med universallim. Det torkar snabbt.
—————
Glue the buttons in place with All Purpose Glue. It dries quickly. 

Barnens pennburkar –
The kids’ pen holders

Kid's pen holders - by Craft & Creativity

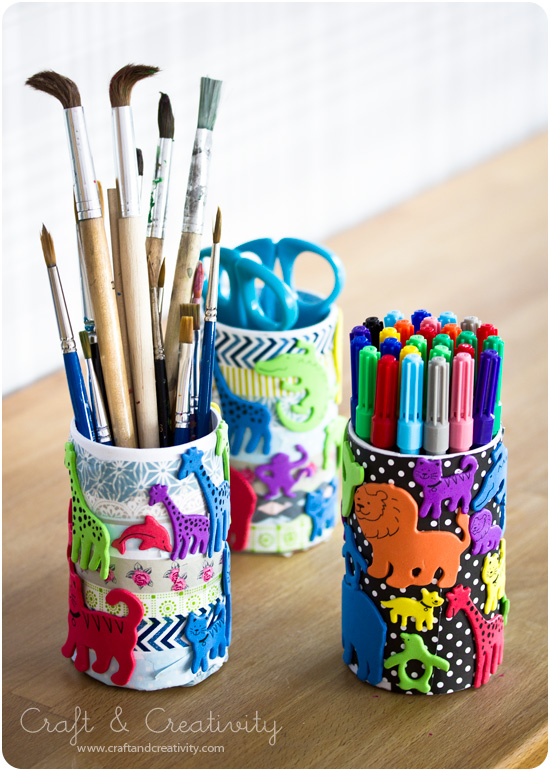
När jag fixade till mina nya pennburkar för ett par helger sedan så hade jag trevligt pysselsällskap av mina döttrar och två av deras kompisar. Jag tycker deras burkar blev supersnygga!
———-
A couple of weeks ago, while I was making my new pen holders, I had the pleasure of the company of my daughters and two of their friends. I think their pen holders turned out gorgeous!

Kid's pen holders - by Craft & Creativity

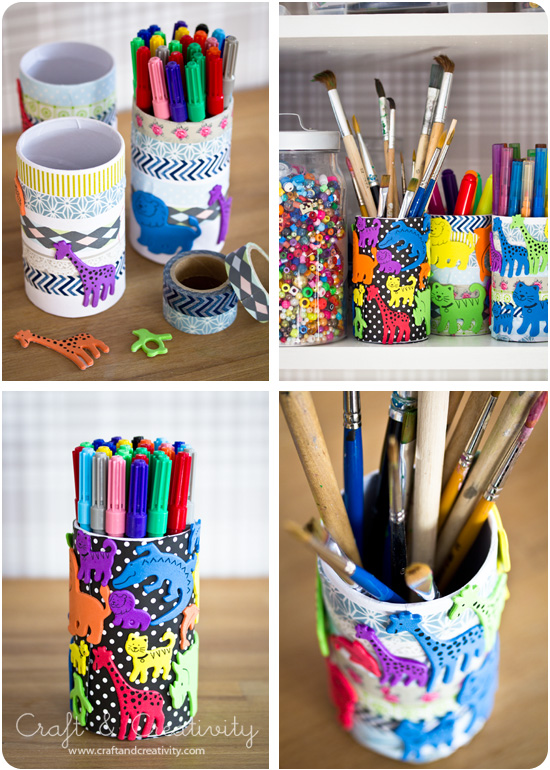
Med pennställ i papper, washitejp, prickiga papper och självhäftande djur av mossgummi har tjejerna skapat sina personliga pennburkar, helt efter eget huvud.
———-
With paper pen holders, a mix of washi tape, polka dotted paper and self-adhesive foam rubber animals, the girls created their own personal pen holders using just their imagination. 

Kid's pen holders - by Craft & Creativity

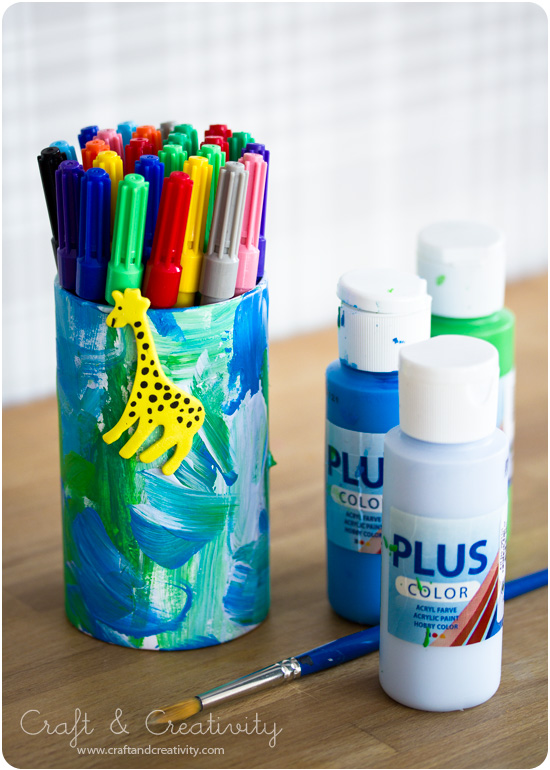
Här har Ellen 4 år målat sin pennburk i olika nyanser av blått och grönt och satt på en liten giraff. Jag tycker att den ser ut som om den är ute i djungeln och äter blad. 😉
———-
Here 4-year-old Ellen has painted her pencil holder in various shades of blue and green, and decorated it with a foam rubber giraffe. I think it looks like he’s out in the jungle eating leaves. 😉