Stora träknoppar till väggen –
Big wooden knobs for your wall

Big wooden knobs for your wall - by Craft & Creativity

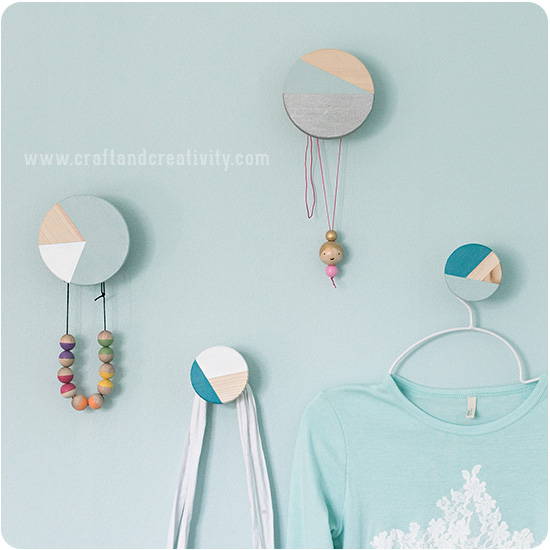
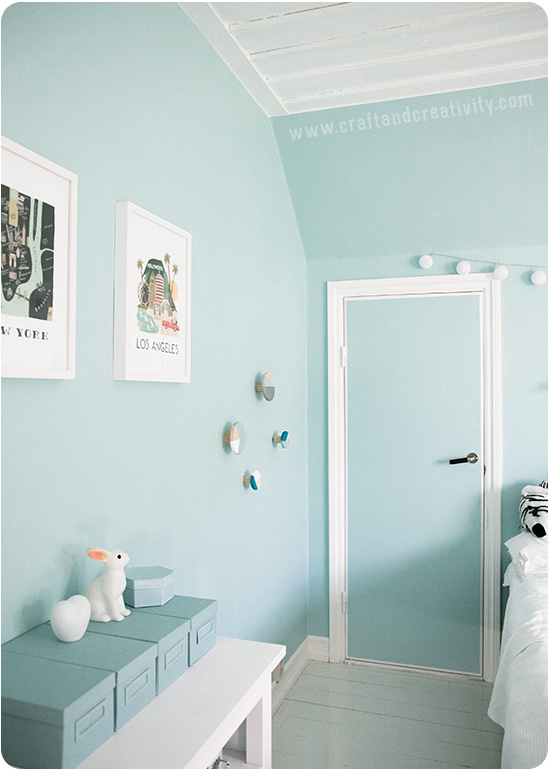
Stora designade trähängare är snygga att hänga på väggen men den designade varianten kan man få betala ett par hundra kronor för. Då känns det kanske roligare och mer prisvärt att dekorera sina egna till en bråkdel av priset. Jag målade ett gäng till barnens rum som vi precis gjort om och fick då möjlighet att matcha dem med väggfärgen.
———–
Designed wooden knobs can be quite expensive. So why not style your own for a fraction of the price? I painted mine to match the wall color in my daughters’ newly re-decorated room. 

Big wooden knobs for your wall - by Craft & Creativity

Du behöver: Stora träknoppar med tillhörande väggskruvar, maskeringstejp, en pensel och hobbyfärg. Jag använde färg från Martha Stewart Crafts och Plus Color hobbyfärg.
———
You will need: Large wooden knobs with matching wall screws, masking tape, a brush and acrylic paint. I used paint from Martha Stewart Crafts and Plus Color hobby paint.

Big wooden knobs for your wall - by Craft & Creativity

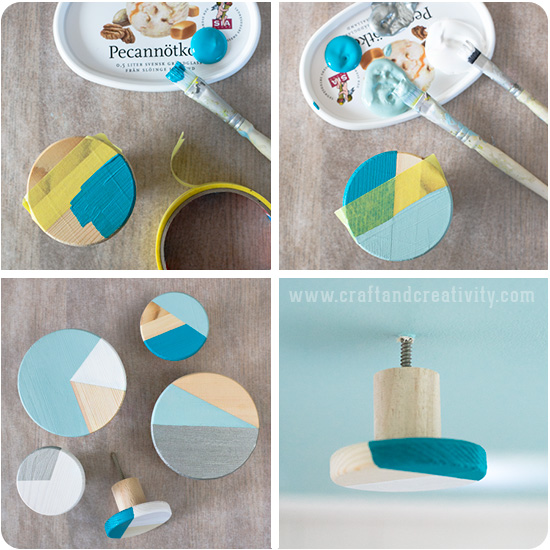
Gör så här: Måla knopparna enfärgade eller använd maskeringstejp för att göra olika grafiska mönster. Jag tejpade, målade, lät torka i ca 30-60 min, tog bort den första tejpen, tejpade på nytt och målade en överlappande färg. Lätt som en plätt! Delar av knopparna lät jag förbli omålade för att jag tycker att det är snyggt. När färgen torkat så skruvar du i de medföljande skruvarna. Knopparna skruvar du sedan in i väggen. Du kan behöva förborra med en smal borr och eventuellt plugga hålet, beroende på vad du har för vägg.
———-
Do like this: Paint the knobs in one solid color or use masking tape to make different graphic designs. I taped, painted, left to dry for about 30-60 min, removed the first tape, taped again and painted in an overlapping color. Easy peasy! I left parts of the knobs unpainted because I think it looks nice. When mounting the knobs in the wall you may need to start by drilling a small hole and/or use plugs, depending on what kind of wall you have.

Big wooden knobs for your wall - by Craft & Creativity

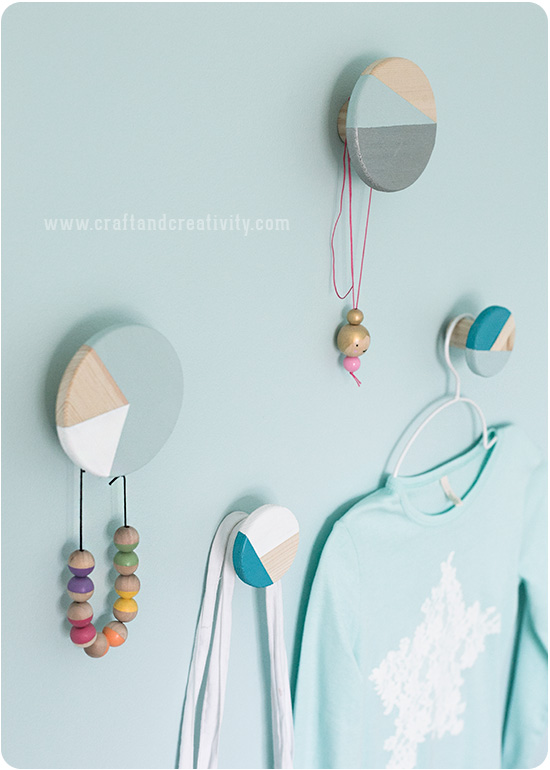
Nu kan barnen hänga sina kläder, väskor och smycken på knopparna! Halsbanden ovan är dels ett som jag målat och dels ett som vi fått av Karin & Freja på Pysselbolaget. Beskrivning finns på deras blogg.
———-
Now my daughters can use the knobs to hang their clothes, bags and jewelry! One of the necklaces above I made myself a couple of years back and the doll-like one was given to us by Karin and Freja at Pysselbolaget. You can find the tutorial on their blog

Big wooden knobs for the wall - by Craft & Creativity

Här ser ni mer av barnens nyrenoverade rum. Mina tjejer har valt att sova i samma rum och tycker än så länge att det är mysigt, i alla fall än så länge. Väggfärgen valde de själva. Trycken på väggen kommer ifrån Rifle Paper Co och de ljusturkosa rektangulära askarna kommer från Ikea.
————
Here you can see more from the kids newly re-decorated room. The girls have chosen to sleep in the same room because they think it’s cozy, at least for now. They chose the wall color themselves. The prints on the wall are from Rifle Paper Co and the rectangular boxes are from Ikea.

Big wooden knobs for your wall - by Craft & Creativity

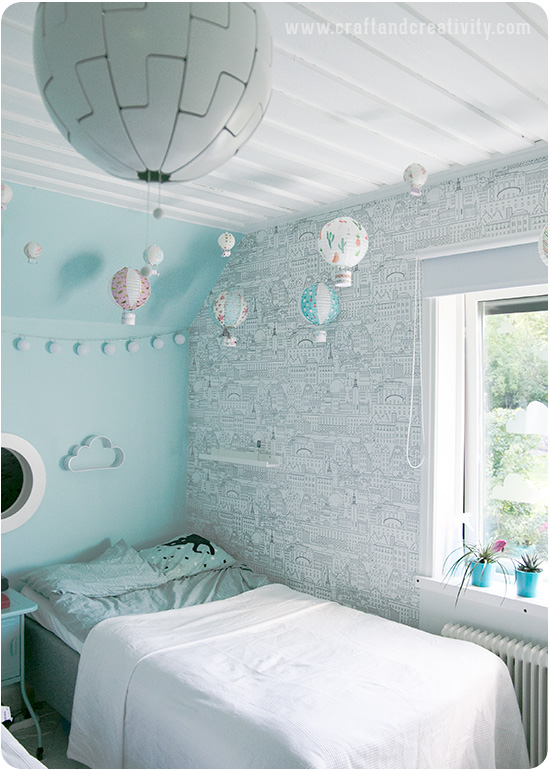
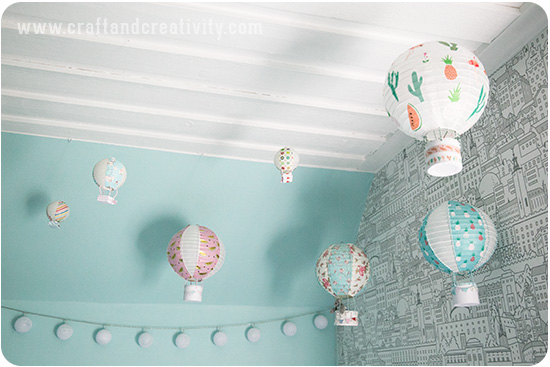
Barnen valde en fondvägg med Stockholmsmotiv från Duro (kollektion Aveny) och i taket hängde jag alla mina rislampor som förvandlats till luftballonger. Tanken är att luftballongerna svävar över Stockholm. Som de ofta gör på sommaren. Molnhyllan kommer från TGR och taklampan från Ikea.
———-
For one of the walls they chose a wall paper from Duro (Aveny/”Stockholm”) with a stylistic city skyline. From the ceiling I hung all of my paper lanterns turned into hot air balloons. The idea is that hot air balloons are flying over our capital city, Stockholm. Like they often do in the summertime. The cloud shelf comes from TGR/Tiger and the lamp is from Ikea.

Big wooden knobs for your wall - by Craft & Creativity

Washitejpat Duplo –
LEGO Duplo with washi tape

Washitejpat Duplo - av Craft & Creativity

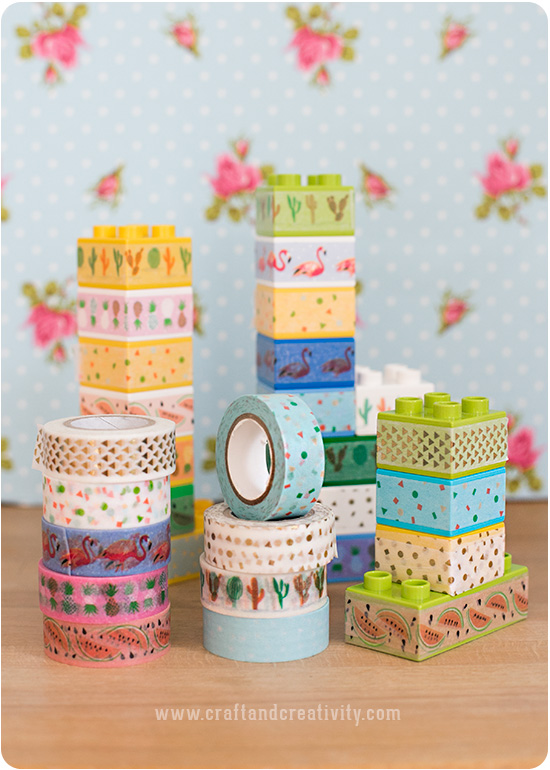
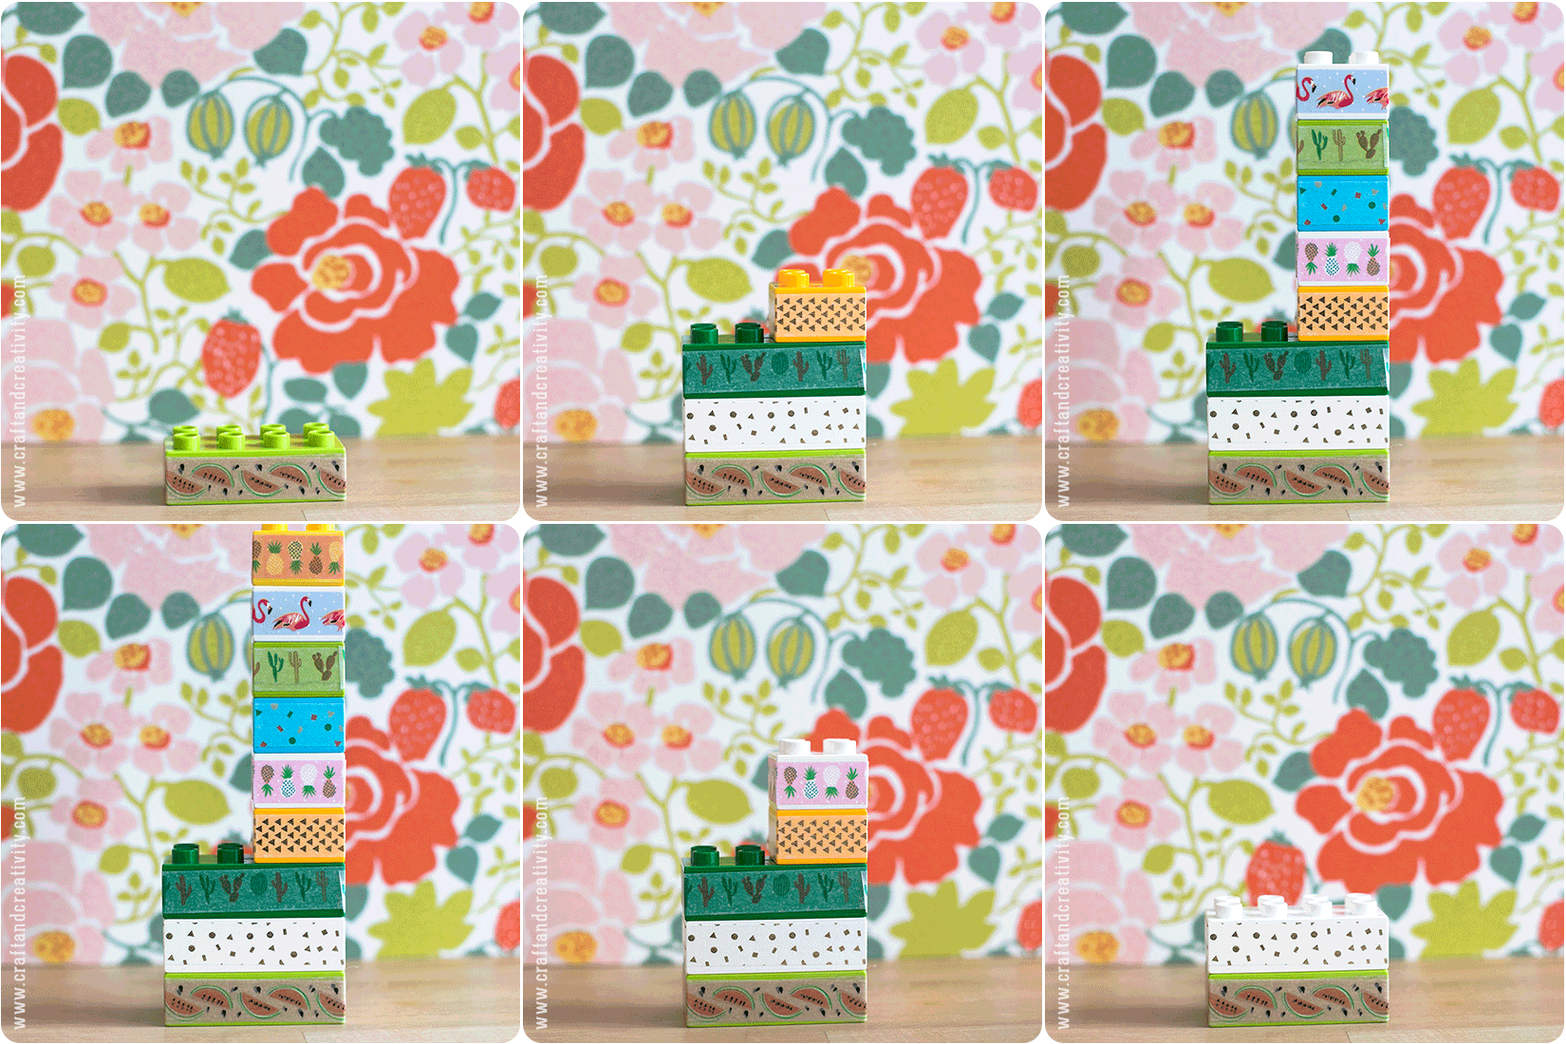
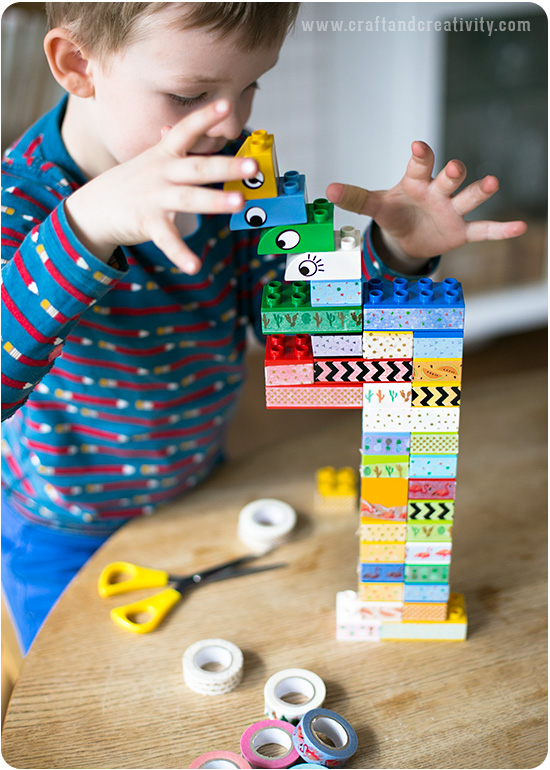
Gammalt Duplo-lego blir som nytt med lite mönstrad washitejp! Tejpen går att flytta eller ta bort och lämnar inte spår av klister efter sig. Washitejp är oftast 1,5 cm hög och passar därför bäst till stora legobitar, d v s Duplo.
————
Give your LEGO Duplo a new look with patterned washi tape! The tape can easily be removed or repositioned, leaving no traces of glue. Washi tape is usually 1,5 cm high and is therefore best suited for LEGO Duplo and not small LEGO. 

Washitejpat Duplo - av Craft & Creativity

Idén med att sätta washitejp på Duplo fick jag från bloggen No time for flash cards och jag kunde inte motstå frestelsen att testa själv! Allt du behöver är Duplo, washitejp och eventuellt en sax.
———–
I got the idea of putting washi tape on Duplo from the blog No time for flash cards and I couldn’t resist the temptation to try it out! All you need is LEGO Duplo, washi tape and a pair of scissors.

Washitejpat Duplo - av Craft & Creativity

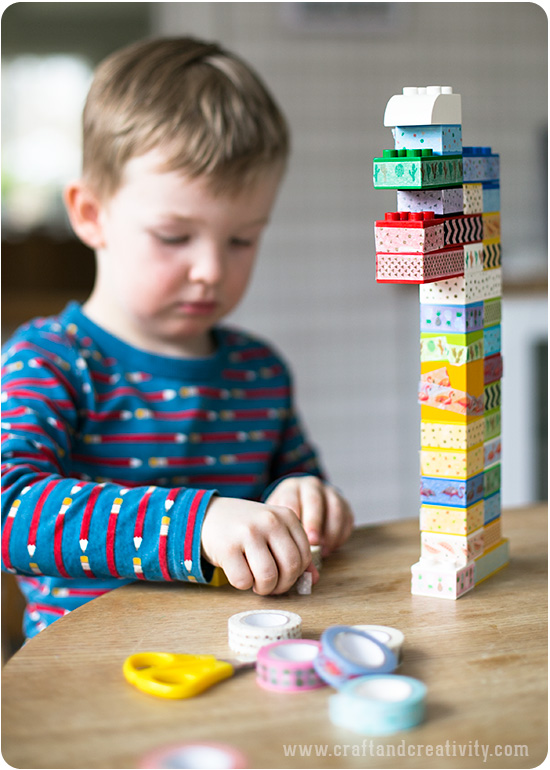
Min inlånade pysselkompis Henry tejpade ivrigt och under stor koncentration. Han gjorde ett toppenjobb!
———-
Henry, my crafting companion for the day did the taping willingly and with great concentration. He did a great job!

Washitejpat Duplo - av Craft & Creativity

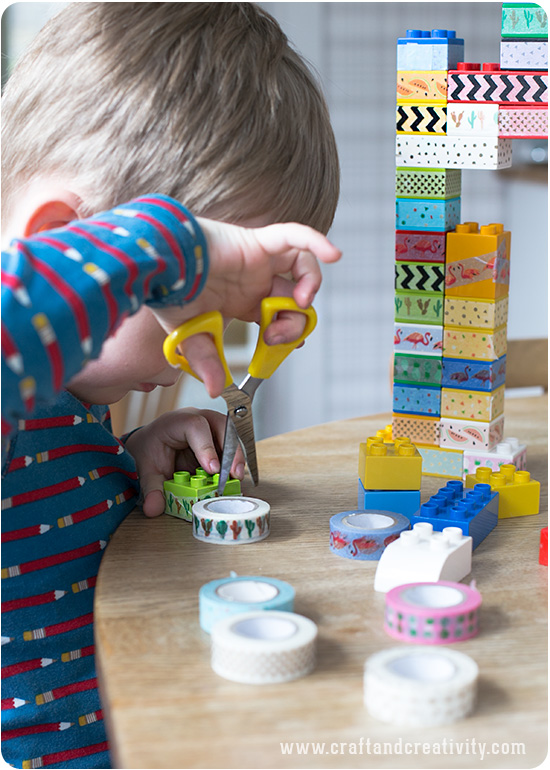
Washitejpen går bra att riva av för hand men vill man få raka snitt så kan man använda en sax.
———
You can tear the washi tape by hand but if you want straight cuts you can use a pair of scissors.

Washitejpat Duplo - av Craft & Creativity

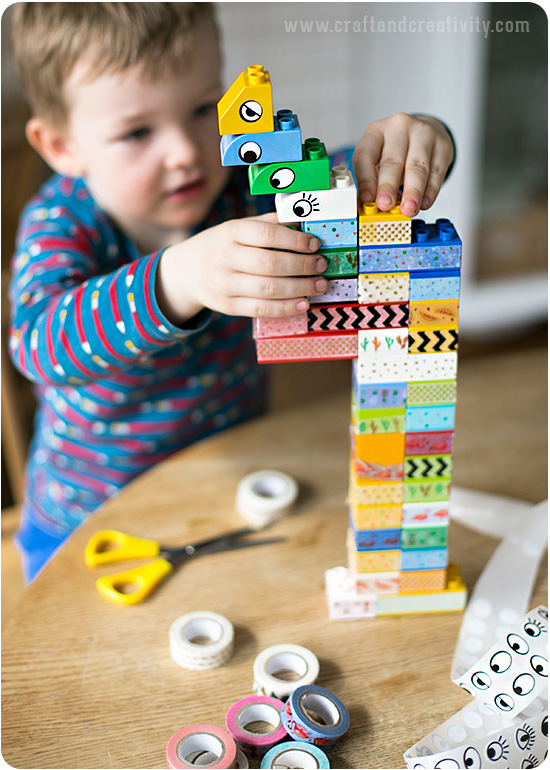
Henry låter hälsa att det är väldigt roligt att bygga med det mönstrade Duplot! Några av bitarna fick ögon istället för tejp. Notera att ögonen fäster hårdare än tejpen och kan vara lite svårare att ta bort men de ger en väldigt rolig effekt!
———-
Henry loves building with his patterned Duplo! Some of the pieces got eyes instead of tape. Please note that the eyes are more difficult to remove than the tape, but they do add a fun effect! 

Washitejpat Duplo - av Craft & Creativity

Hur högt kan man bygga tro? / How high can you build? 😀

Etiketter av träfanér & kork –
Wood veneer and cork tags

Wood veneer and cork tags - by Craft & Creativity

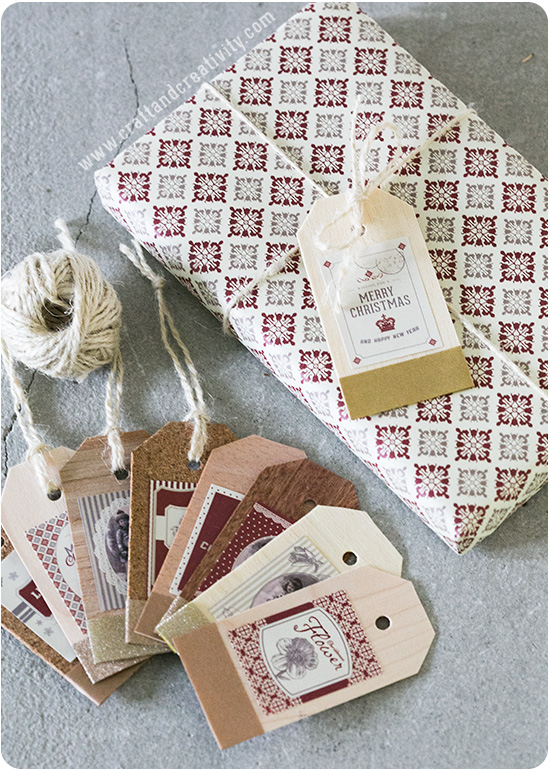
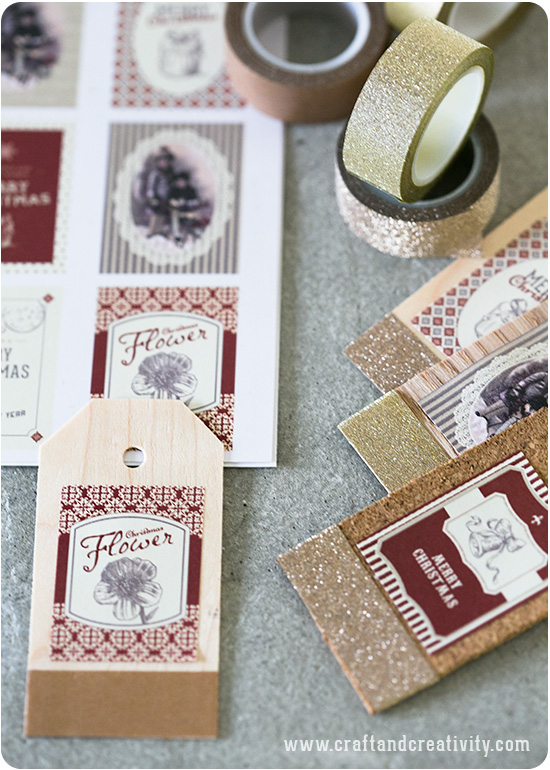
Jag fick en hel del träfanér över när jag gjorde mina granar och ville gärna skapa något mer med det fina materialet. En stunds funderande och experimenterande resulterade i dessa träetiketter som kommer passa fint till årets julklappar.
———-
I had an excess of wood veneer left after making my trees and wanted to create something more with this great material. A bit of thinking and experimenting resulted in these wood veneer tags that will look pretty on this year’s Christmas gifts. 

Wood veneer and cork tags - by Craft & Creativity

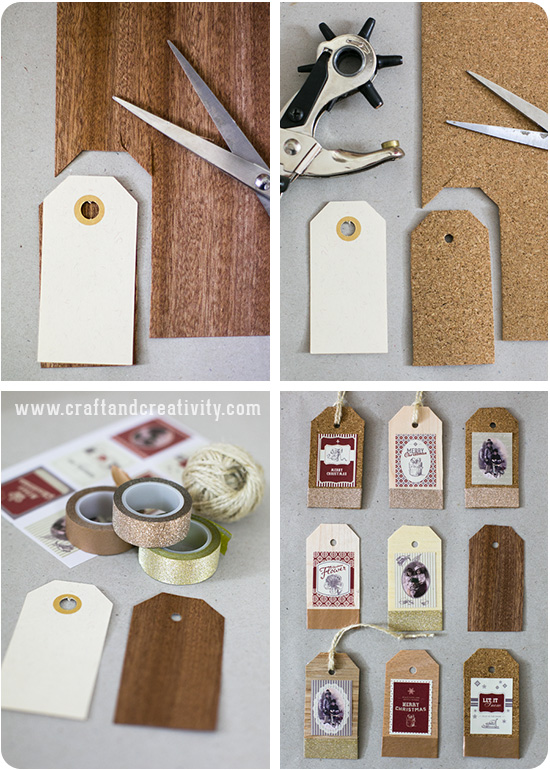
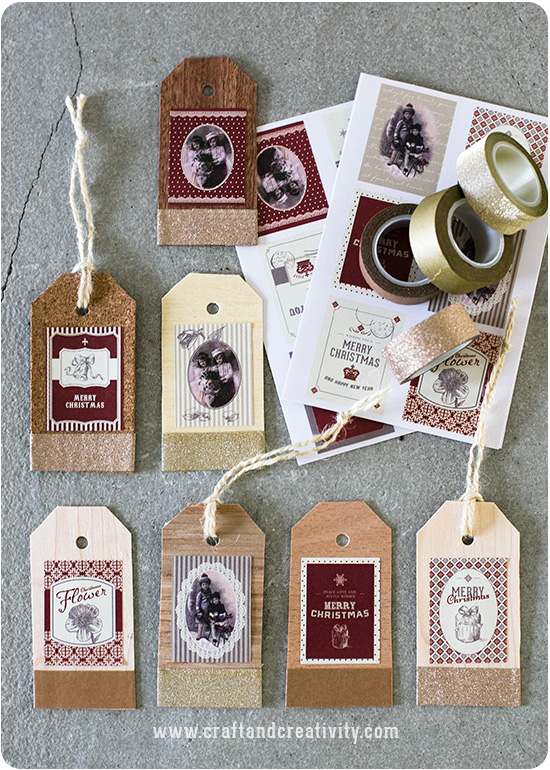
Jag använde ett manillamärke som mall när jag klippte ut mina etiketter och gjorde hål med en håltång. Eftersom jag hade några ark korkplattor hemma så klippte jag några etiketter av dem också när jag ändå höll på. Sedan dekorerade jag etiketterna med glittrig och metallicfärgad washitejp och motivstickers i gammal stil från Vivi Gade Design.
————–
I used a manila tag as template when cutting out my tags and made holes with a hole punch. Since I also had cork sheets lying around I cut some tags of them as well. I then decorated the tags with glittery and metallic washi tape and old style stickers from Vivi Gade Design. 

Wood veneer and cork tags - by Craft & Creativity

Som snören använde jag naturhampa. Vill du kunna skriva på etiketterna så rekommenderar jag blanka stickers att sätta på baksidan.
For strings I used natural hemp. If you want to be able to write on your tags, I recommend you to use blank stickers.

Wood veneer and cork tags - by Craft & Creativity

Det är bra att tänka på att tejpa hela vägen runt så att washitejpen överlappar på baksidan, på så sätt fäster den bättre än om den bara är tejpad på träytan.
———–
I advise you to tape all the way around the tag so that the washi tape overlaps on the back. It will stick better then if you only tape on the wood surface. 

Wood veneer and cork tags - by Craft & Creativity

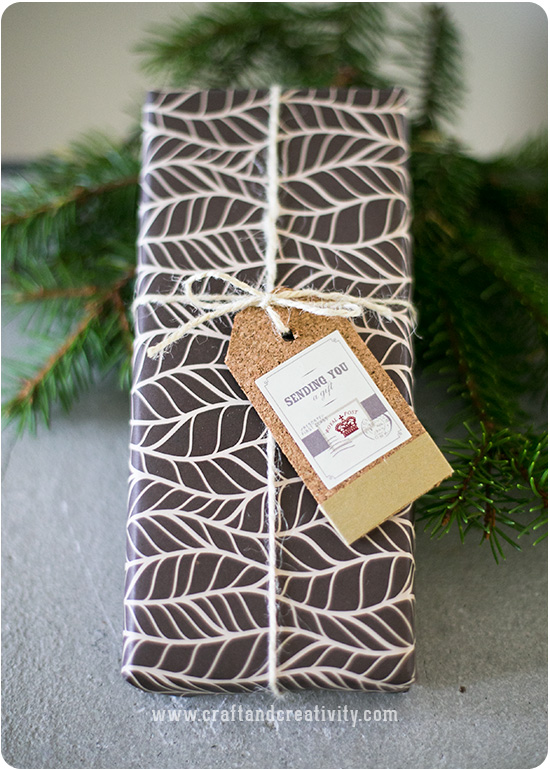
Så här blev resultatet. Paketet är inslaget i designpapper Oslo från Vivi Gade Design och presentpappret på bilden högst upp i inlägget heter Copenhagen.
————-
This is what the result looks like. The gift is wrapped with design paper Oslo from Vivi Gade Design and the gift wrapping paper in the top picture of this blog post is called Copenhagen.

Granar av träfanér – Wood veneer trees

Wood veneer trees - by Craft & Creativity

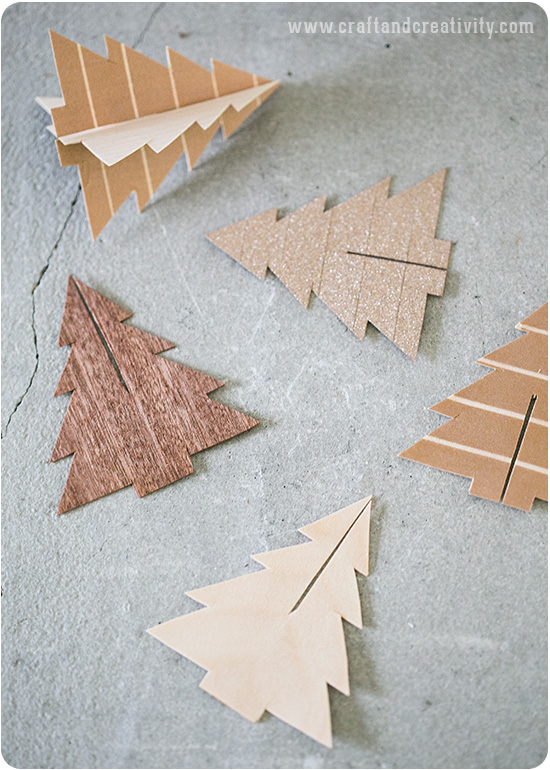
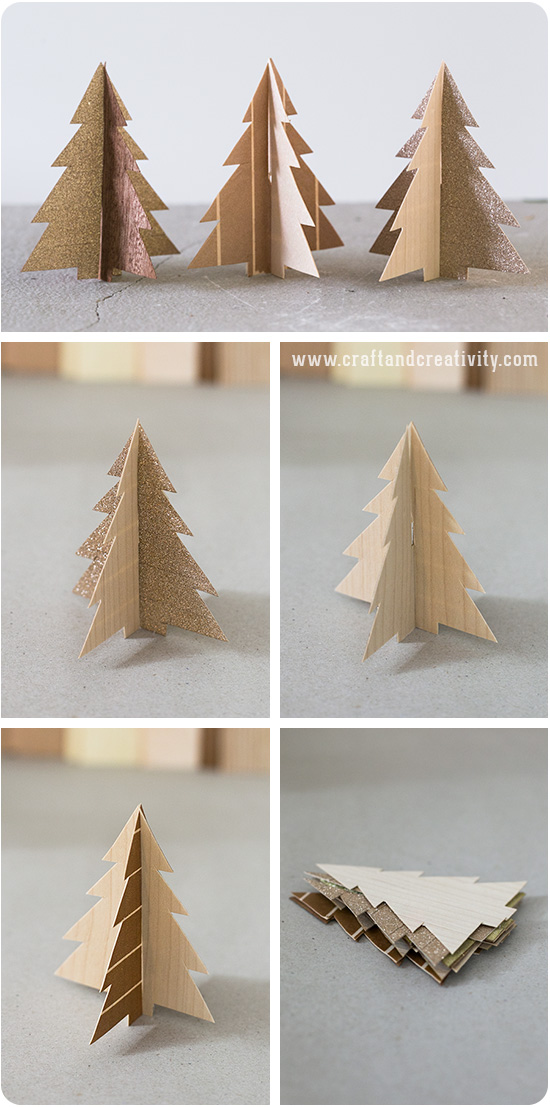
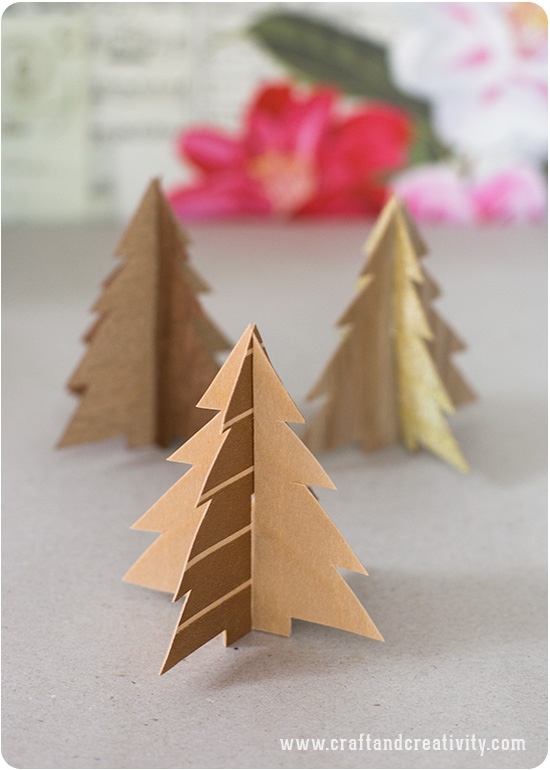
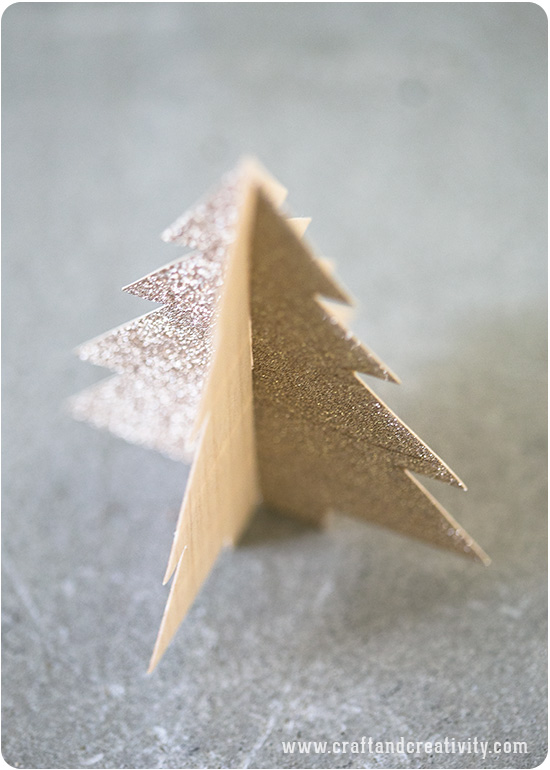
November är här och det betyder att det är helt legitimt att börja julpyssla! 😉 Jag mjukstartar med dessa små granar som jag klippt ut av träfanér och dekorerat med glittrig washitejp.
————-
November is here and that means that it’s perfectly legitimate to begin Christmas crafting! 😉 I started up with these small Christmas trees that I cut out of wood veneer and decorated with glittery washi tape. 

Wood veneer trees - by Craft & Creativity

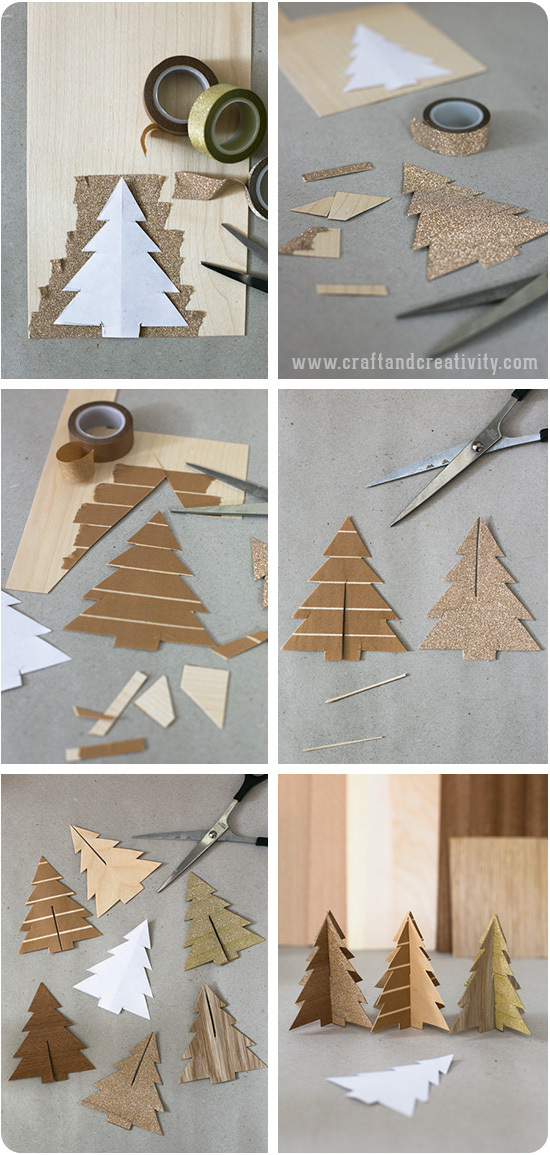
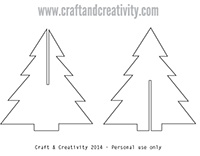
Wood veneer trees - by Craft & CreativityDu behöver: Träfanér (ca 1 mm tjock), washitejp (metallic/glitter) och en sax. Gör en egen mall på hur du vill att din gran ska se ut eller skriv ut min mall. Vill du inte använda träfanér så går det bra med tjockt papper eller kartong.
Gör så här: Tejpa ena sidan på din träfanér med washitejp, dels för att det blir fint men även för att ge extra stadga. Lägg mallen ovanpå det tejpade området, följ konturerna och klipp ut första granen. Låt ådringen på trät gå vertikalt genom granarna, då går de inte sönder lika lätt när du klipper. Klipp ut fler granar, det går åt 2 st till varje gran. Klipp ett jack från botten upp till mitten på första hälften av granarna och från toppen till mitten på andra hälften. Sätt ihop make med maka för att skapa dina 3D-granar.
————–
You will need: Wood veneer (about 1 mm thick), glittery washi tape and a pair of scissors. Make your own template or feel free to print and use mine. If you don’t want to use veneer you could use heavy paper or cardstock. 
Do like this: Tape one side of the wood veneer with washi tape, partly because it will look nice but it will also provide extra stability. Place the template on top of the taped area, trace the outline and cut your first tree. Let the grain of the wood run vertically through the trees. This will prevent the veneer to crack when you cut it. Cute as many trees as you like, you need two for each tree. Make an incision from the bottom to the middle of the first batch of the trees and from the top to the middle of the other batch. Assemble the two parts to make your 3D Christmas trees. 

Wood veneer trees - by Craft & Creativity

Efter jul när du vill plocka undan allt pynt så monterar du enkelt ner granarna och de tar väldigt lite plats. Mina granar är inspirerade av Dani på bloggen Gingered Things. Jag gjorde själv liknande av papper för tre jular sedan. Tag gärna även en titt på den här fina mobilen med små träd av träfanér från You Are My Fave.
————
After Christmas, when you want to put away and store all your decorations, you can easily mount down the trees and they will take very little space. My trees where inspired by Dani at the blog Gingered Things. I made similar trees myself three Christmases ago. Also take a look at this pretty veneer baby mobile from You Are My Fave

Wood veneer trees - by Craft & Creativity

Förutom att låta granarna stå uppställda bredvid varandra skulle man kunna limma fast ett snöre i toppen och hänga dem i julgranen.
————-
In addition to displaying the trees standing you could glue a piece of string at the top and hang them in your Christmas tree. 

Wood veneer trees - by Craft & Creativity

Återbruk av värmeljuskoppar –
Recycling of tealight cups

Recycling of tealight cups - by Craft & Creativity

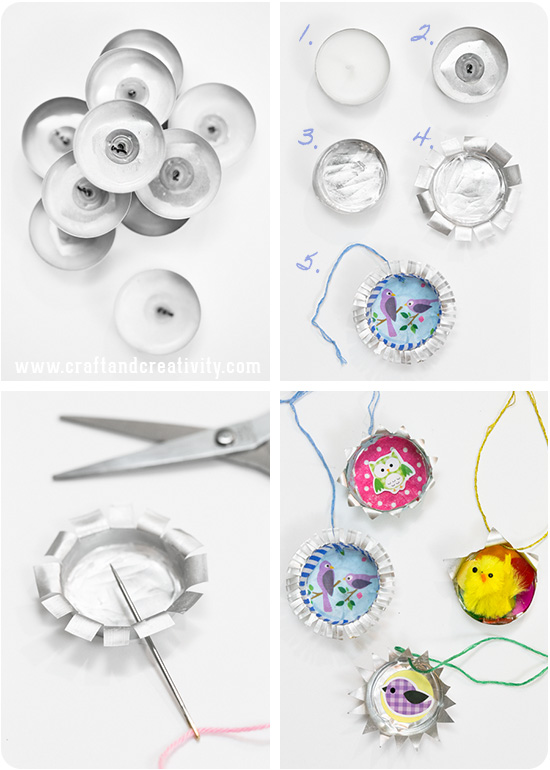
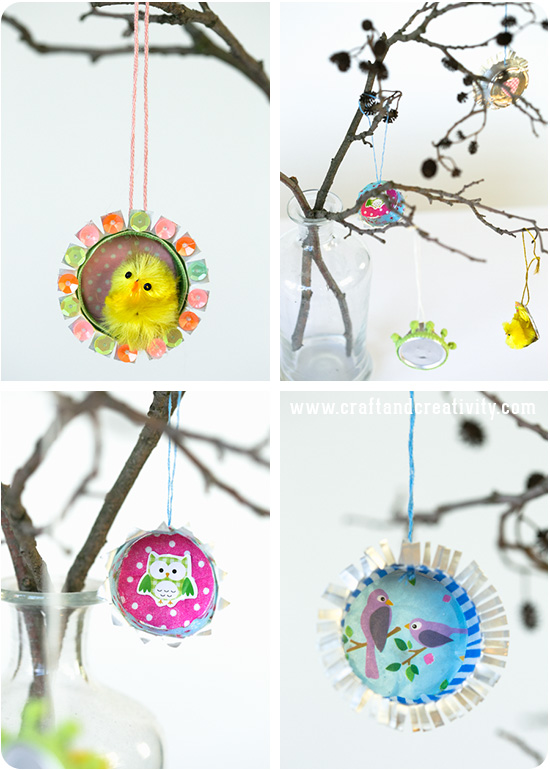
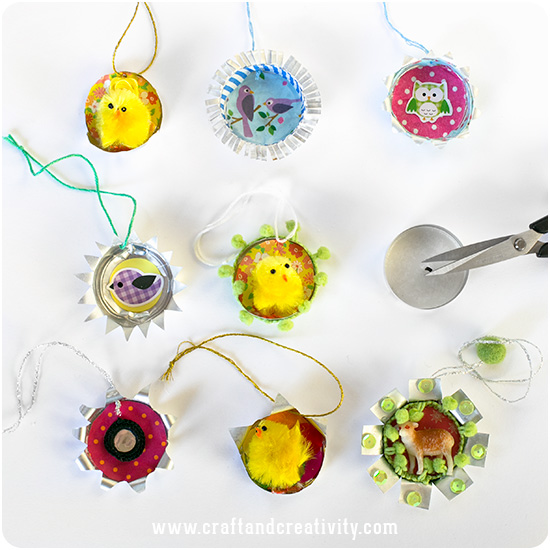
På ett år eldar vi i Sverige upp ca 300 miljoner värmeljus. Värmeljuskopparna är tillverkade av aluminium som går att återvinna och på så sätt sparar vi energi och värnar om miljön. Ett annat sätt är att återbruka dem och t ex göra söta hängen till påskriset eller julgranen. Börja med att ta bort metallbrickan i mitten (lägg den i metallåtervinningen) och skrapa ur resterna av stearin. Klipp till kanterna i önskat mönster, böj ut flikarna och dekorera dina ljuskoppar på valfritt sätt. Gör hål i kanten med en nål och trä ett snöre igenom.
—————-
In one year we use up about 300 million tealights, and that’s only here in Sweden. Tealight cups are made of aluminum which can be recycled and thus we save energy and are kind to our environment. Another way to re-use them is to make cute pendants for your Easter Twig or Christmas tree. Start by removing the metal disk in the middle and scrape out the remains of the candle wax. Cut the edges of your cup in different patterns, bend the tabs outwards and start decorating your cups. Make holes in the top with a needle and thread a string for hanging. 

Recycling of tealight cups - by Craft & Creativity

Detta pyssel kom till i lördags hemma hos Karin & Freja på Pysselbolaget då Karin föreslog att vi skulle göra påskhängen av värmeljuskoppar. Det är lätt att klippa i ljuskopparna och väldigt roligt att hitta på olika dekorationer. Använd gärna material som du har hemma – t ex knappar, washitejp, papper, klistermärken, små söta kycklingar, paljetter och fina band.
————
This is one of the crafts we created when visiting Karin & Freja at Pysselbolaget last Saturday. Karin suggested that we should make Easter decorations out of tealight cups. The cups are easy to cut and they are a blast to decorate. You can use supplies you have at home – such as buttons, washi tape, paper scraps, stickers, cute chickens, sequins and pretty ribbons.

Recycling of tealight cups - by Craft & Creativity

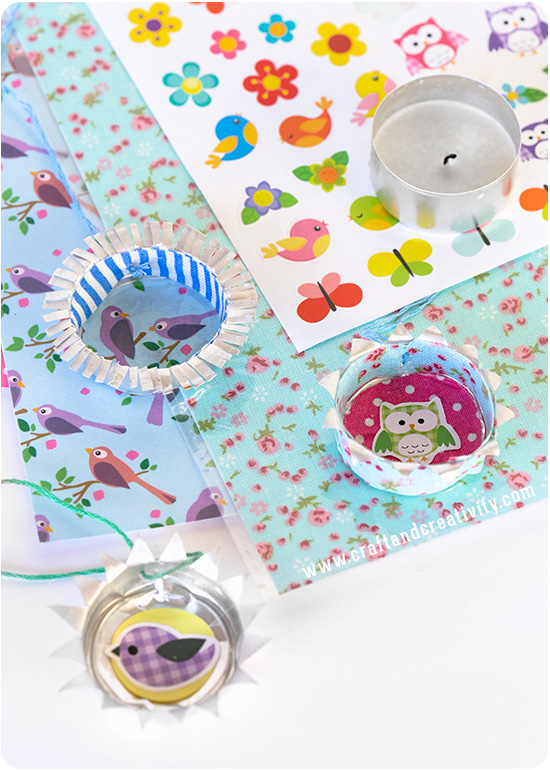
Jag dekorerade mina ljushållare med självhäftande bomullstyg, washitejp på A4-ark och söta klistermärken.
————
I decorated my tealight cups with adhesive fabric, washi paper sheets and cute stickers. 

Recycling of tealight cups - by Craft & Creativity

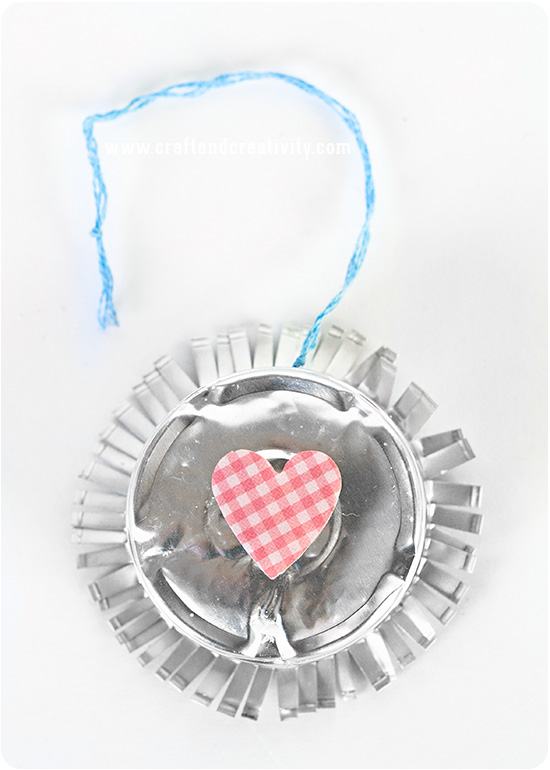
Även baksidan av värmeljuskopparna kan med fördel dekoreras.
——–
You can also decorate the back of the tealight cups. 

Recycling of tealight cups - by Craft & Creativity

Här ser ni några av Karins, Frejas, mina & min dotter Annies alster samlade. Klicka er in till Pysselbolaget för att se mer!
————
Here you see some of Karin’s, Freja’s, my & my daughter Annie’s creations gathered. Click your way to Pysselbolaget to see more! 

Visste du förresten att det är viktigt att peta bort den lilla metallbiten som håller fast veken innan man lämnar värmeljuskopparna till återvinning? Det är för att vekeshållaren är av järn, medan koppen är av aluminium. Om de smälts ner tillsammans så förloras möjligheten att återvinna aluminiumet. Sofia på Hildas hem skrev ett läsvärt blogginlägg om detta innan jul.
———
Did you know that it’s important to remove the small metal piece that holds the candlewick before you leave the tealight cups at the recycling center? It’s because the wick holder is made of iron, while the cup is made ​​of aluminum. If they are melted down together the ability to recycle the aluminum will be lost. Sofia at Hildas hem wrote an interesting blog post (in Swedish) about this before Christmas. 

Rislampa blir luftballong –
Paper lantern turned into hot air balloon

Paper lantern hot air ballons - by Craft & Creativity

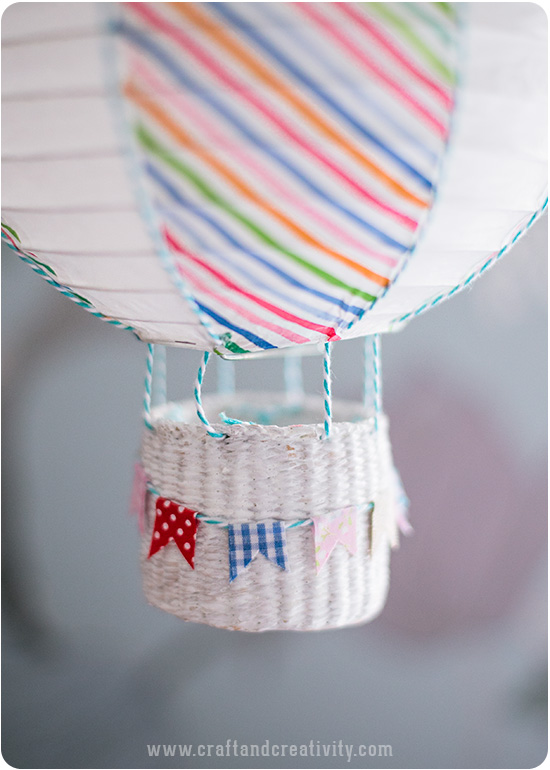
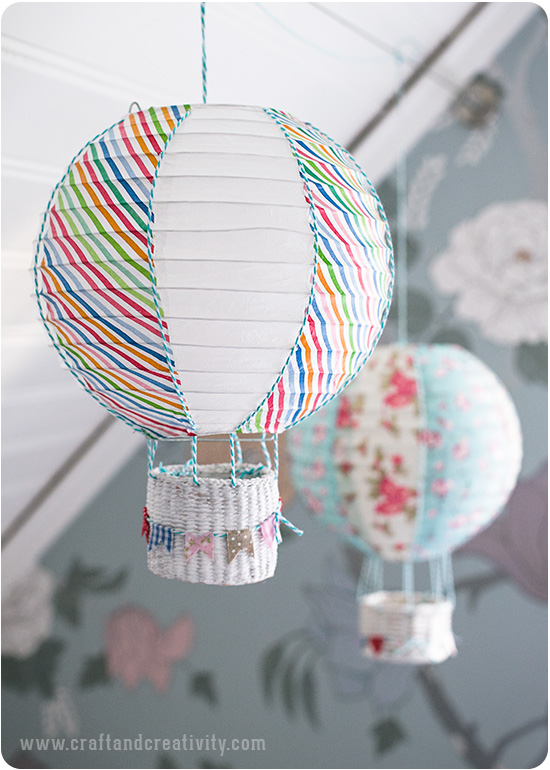
Jag tänkte visa er hur man kan göra söta luftballonger av enkla rislampor. Det du behöver är först och främst en (eller flera) rislampor. Mina är 20 cm i diameter, d v s inte jättestora. Lamporna dekoreras med decoupagepapper (silkespapper eller mönstrade servetter funkar också utmärkt) och till det behövs decoupagelack och en bred platt pensel. Till snören har jag använt tvinnat bomullssnöre, “Bakers twine”. Små korgar kan man hitta på loppis för en billig slant, eller använd en papperspåse eller en gammal konservburk. Min korg är målad med hobbyfärg och dekorerad med en bit bomullssnöre och vimplar gjorda av tygtejp.
———
I thought I’d show you how you can make pretty hot air balloons out of plain paper lamps (Chinese lanterns). What you need is first and foremost one or several round paper lanterns. The lanterns will be covered with decoupage paper (tissue paper or patterned napkins also work well) and in addition to that you need decoupage lacquer (or Mod Podge) and a brush. I used Baker’s twine for strings. Small baskets can be found at the flea market for a small penny, or you can use a paper bag or an old tin can. My basked was painted with white acrylic paint and decorated with a piece of Baker’s twine and pennants made of fabric tape. 
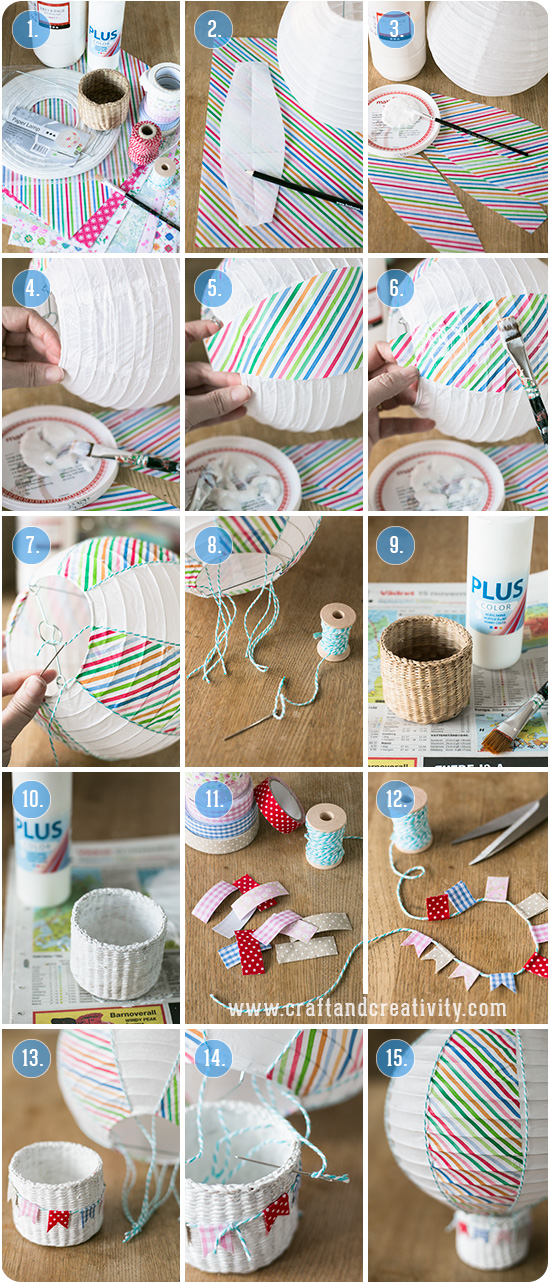
Paper lantern hot air ballons - by Craft & Creativity

Gör så här
Bild 1-3: Börja med att veckla ut lampan. Det är enklast om du gör en mall för att få till själva ellipsformen. Jag lade en bit servett över rislampan, ritade på servetten med blyerts genom att följa lampans lodräta linjer och klippte till min mall. Det behöver inte vara noga, resultatet blir fint ändå men gör gärna mallen lite längre än höjden på själva lampan. Måtta med mallen och klipp till dina bitar. Här använde jag 4 bitar ellipsformat decoupage-papper men om du vill täcka hela behöver du 8 bitar, förslagsvis i två olika mönster.
Bild 4-6: Pensla på ett relativt tjockt lager decoupagelack på rislampan. En del i taget. Lägg på den första biten mönstrat papper och pensla ytterligare ett lager decoupagelack ovanpå ditt papper. Vik över de bitar av papperet som sticker ut uppe och nere, till insidan av rislampan. Släta ut papperet med penseln så det fäster överallt. Det slätar ut sig ytterligare när det torkar. Gå varvet runt och täck hela eller vartannat “fält” av lampan.
Bild 7-8: När lampan torkat är det dags att fästa trådarna som ska korgen ska hänga i. Sy fast snöret uppe och nere på lampan vid varje “skarv” och lämna ca 15 cm av tråden kvar längst ner, totalt 8 snörstumpar.
Bild 9-12: Dags att fixa till korgen. Måla korgen med t ex vit Plus Color hobbyfärg och under tiden färgen torkar kan du göra vimplarna. Klipp tygtejpen i ca 4 cm långa bitar, ungefär 10 bitar. Ta bort skyddspapperet och vik tejpen över snöret så att sidorna med klister möts. Klipp till formen på vimpeln som du vill ha den. Jag gjorde två olika varianter på mina lampor. Knyt din girlang runt korgen när den torkat.
Bild 13-14: Sy fast var och en av snörstumparna jämnt fördelat runt korgen. Reglera dina snören för att korgen ska hänga rakt. Det är lite trixigt och enklast är att hänga upp ballongen i något och gärna ha ett par extra händer till hands. Knyt ihop stumparna två och två för att fästa tråden. Nu är luftballongen klar och kan monteras på en lampsockel eller bara användas som dekoration, utan belysning.
———–
How to:
Pictures 1-3: Start by unfolding your lamp. It’s easiest if you make a template to use on your decoupage paper to get the correct elliptical shape. I put a piece of napkin over my paper lantern and traced the vertical lines of the lantern onto the napkin with a pencil. I then cut out my template and used it to cut my decoupage paper into elliptical shaped pieces. It doesn’t have to be exact, the result will look nice anyway. But be sure to make your pieces of paper a bit longer then the height of the lamp. On this lamp I used 4 pieces of elliptical shaped decoupage paper, but if you want to cover the whole lamp you need 8 pieces, preferably in two different patterns. 
Pictures 4-6 : Brush a relatively thick layer of decoupage lacquer on top of the paper lantern, one part at a time. Add the first piece of decoupage paper and brush another layer on top of the paper, smoothing out any creases or wrinkles. Fold the access paper on the bottom and the top to the inside of the lamp. The paper will smooth out when it dries. Go the full circle around and cover it completely or every other ellipse. 
Pictures 7-8: When the lantern has dried, it’s time to add the strings in which to hang the basket. Fixate the cotton string by sewing it in place at each joint at the bottom and the top of the lantern and leave about 6″ (15 cm) of string at the bottom, a total of 8 strings.
Pictures 9-12: Time to decorate the basket. Paint it with hobby paint and while the paint dries, you can make the pennants. Cut 10 pieces of fabric tape, approx 4 cm long. Remove the backing paper and fold the tape over the string letting the adhesive sides meet. Make pennants by cutting the fabric tape into the shapes you like. I made two different versions for my baskets. Tie the string of pennants around the basket when dry.
Pictures 13-14: Sew each of the eight strings in place evenly around the basket. Adjust the length of the strings to make the basket hang straight. It’s a bit tricky and the easiest way is to hang the balloon into something and have an extra pair of helping hands. Tie up the strings in pairs to secure. Now the balloon is ready and can be mounted on a lamp base or simply be used as decoration, without lighting.
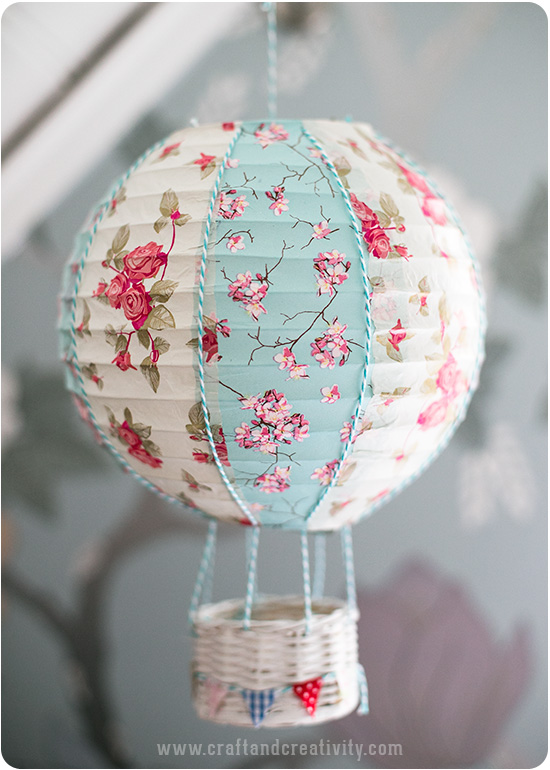
Paper lantern hot air ballons - by Craft & Creativity

Idén fick jag efter att ha länge beundrat Taj Wood & Scherer och deras fantasifulla lampor. Om man googlar runt lite går det att hitta fler exempel på papperslampor omgjorda till luftballonger. Besök gärna The Joyeful Journey där Joye använt papperspåsar som ballongkorgar. Jättefint! Det finns också exempel där man valt att målat sin rislampa, se t ex Hands Occupied.
———-
I got this idea after having long admired Taj Wood & Scherer and their fantastic lamp shades. If you google, you can find more examples of paper lanterns made into hot air balloons. Take a look at The Joyeful Journey where Joye used paper bags as balloon baskets. So pretty! I’ve also seen examples of painted paper lanterns, for example over at Hands Occupied.
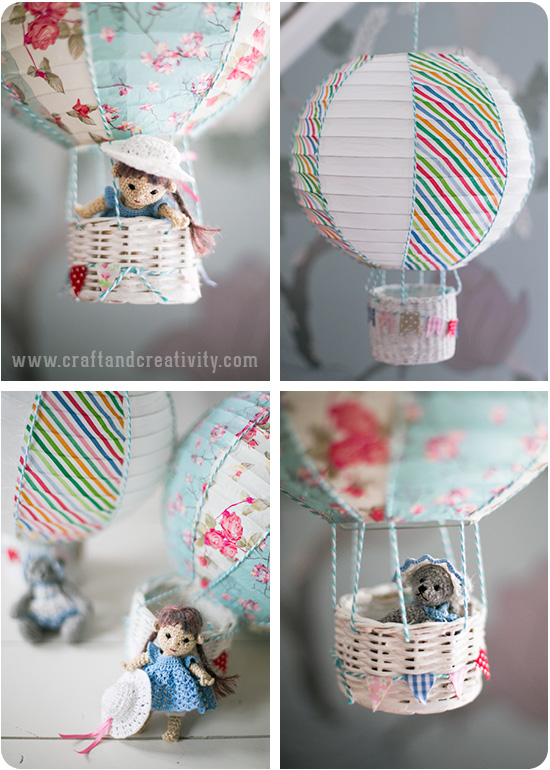
Paper lantern hot air ballons - by Craft & Creativity

Barnens leksaker står på kö för att testa luftballongerna och här är det min mammas lilla virkade docka och nalle som får ta en provtur. Besök gärna hennes blogg Annie’s Granny Design för fler av hennes virkade alster. På Etsy säljer hon virkbeskrivningar och färdigvirkade dockor, nallar och bokmärken i frivolitet.
————-
My kids’ toys are queuing up to try the hot air balloons and here it’s my mom’s tiny crocheted doll and teddy’s turn to take a test flight. Please visit her blog Annie’s Granny Design for more of her crocheted creations. She sells crochet patterns and crocheted dolls, teddy bears and tatted bookmarks over on Etsy

Paper lantern hot air ballons - by Craft & Creativity

Jag tycker att tygtejpen ger en fin textur till vimplarna och de ser nästan sydda ut. Det går förstås även bra att använda vanlig washitejp.
————-
I think the fabric tape adds a nice texture to the pennants and they look almost sewn. You can also use ordinary washi tape. 
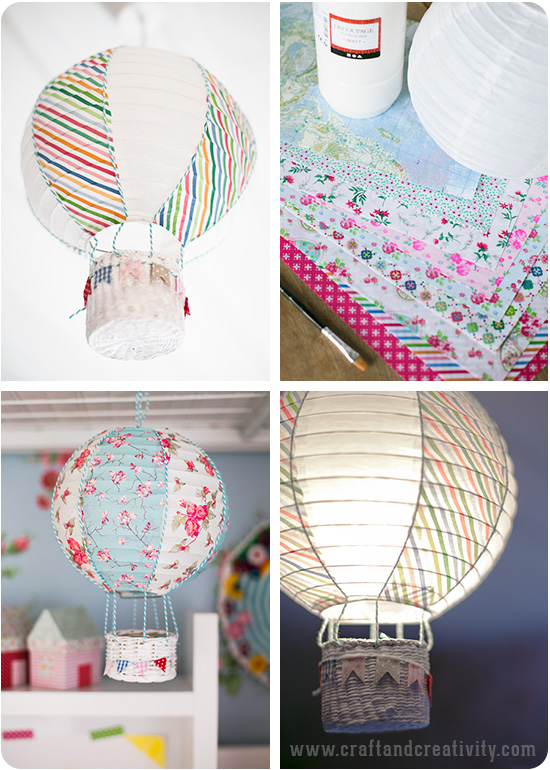
Paper lantern hot air ballons - by Craft & Creativity

Till mina rislampor som är 20 cm i diameter behövde jag 1 ark decoupagepapper (30×42 cm) för att täcka ballongen till hälften och 2 ark för att täcka den helt.
———–
My paper lamps are 8″ (20 cm) in diameter and I used one sheet of decoupage paper (12×16,5″) to cover the ballon in half and two sheets to cover it completely. 

Kinabok med decoupage
Notebook with decoupage

Notebook with decoupage - by Craft & Creativity

Decoupage var länge något helt oprövat för mig och det lockade mig inte ens att testa. Jag minns inte vad det var som fick mig att tänka om men det kan ha varit julgranskulorna som jag täckte med tidningspapper inför förra julen. Eller projektet med påskäggen… Plötsligt kom jag på att det här var ju både enkelt och kul! Nu har jag fått blodad tand och det har blivit en hel del projekt med decoupagelack senaste tiden.
———
For a long time, decoupage was unknown territory for me and it didn’t even tempt me to give it a try. I can’t quite remember what it was that made ​​me rethink but it could have been the Christmas baulbe makeover I made last Christmas. Or my project with the Easter eggs … I suddenly found myself thinking that this was both easy and fun! By now I think it’s a great technique and I’ve used decoupage lacquer for a lot of my recent projects

Notebook with decoupage - by Craft & Creativity

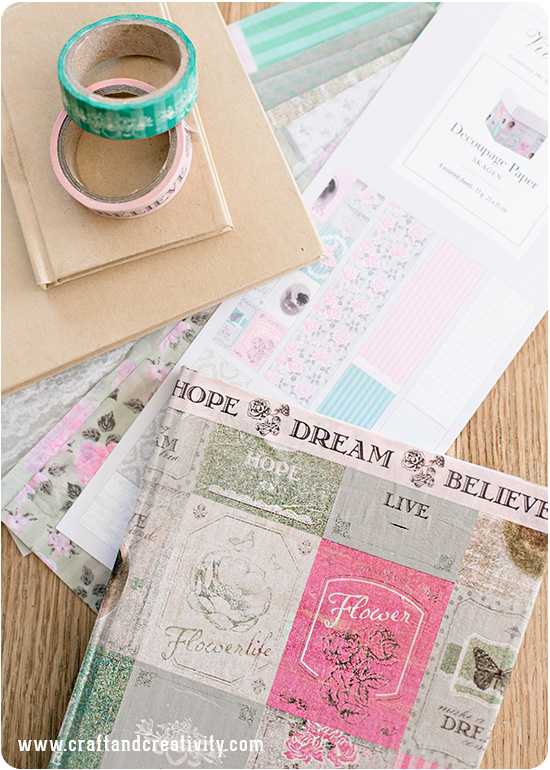
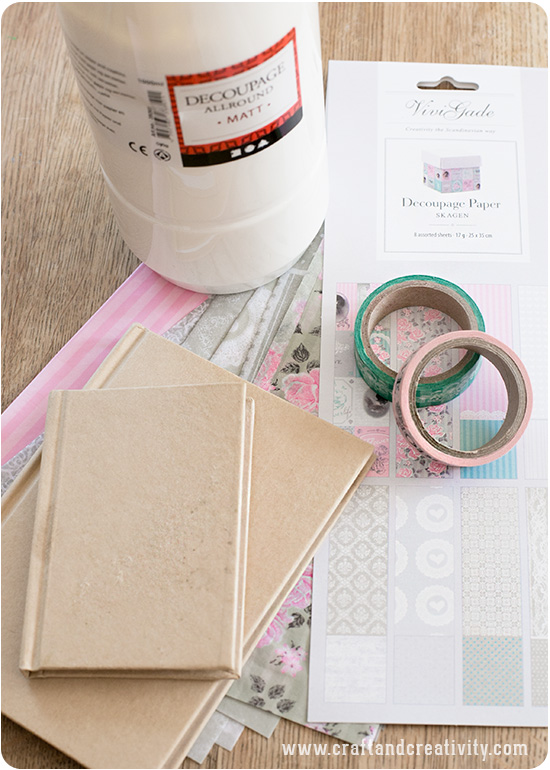
Nu senast klädde jag om kinaböcker med decoupagepapper. Jag gjorde på samma sätt som med mina textilklädda anteckningsböcker förutom att jag använde andra material. Jag penslade på ett tunt lager decoupagelack på bokens pärm, vek runt papperet runt boken, strök ut det försiktigt med fingrarna och avslutade med ett lager av samma lack ovanpå papperet. När lacket torkat dekorerade jag böckerna med washitejp.
————
Most recently, I dressed notebooks with decouopage paper. I used the same technique as with my fabric covered notebooks. except for using other materials. I brushed a thin layer of decoupage lacquer on top of the book cover, folded the paper around the book, smoothing the paper gently with my fingers and finished off with a coat of the same lacquer on top. Once the lacquer had dried I decorated my books with washi tape. 

Notebook with decoupage - by Craft & Creativity

Notebook with decoupage - by Craft & Creativity

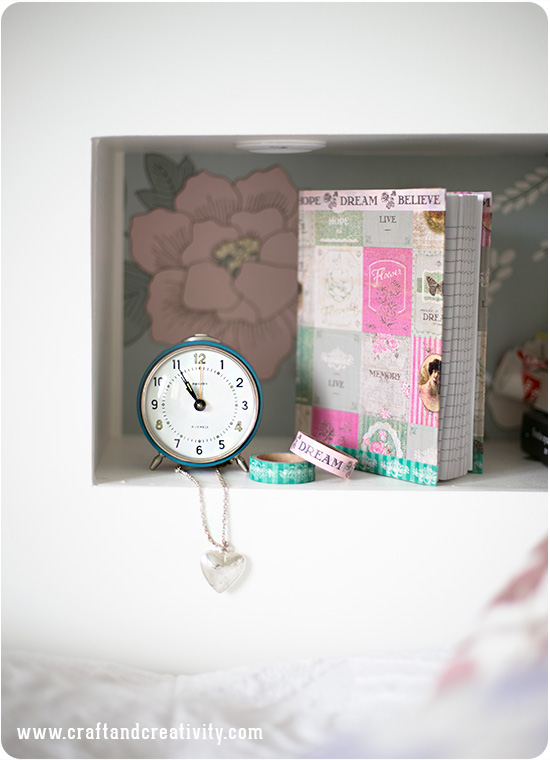
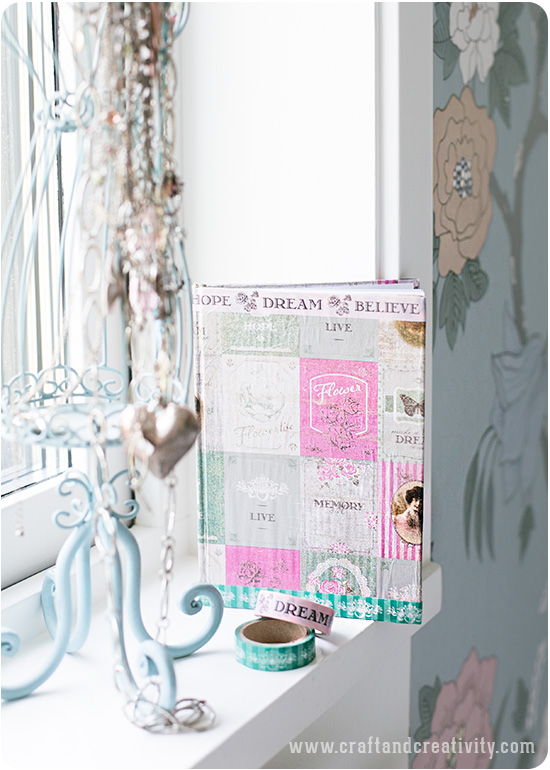
Bokens mönster & färger passar fint in i vårt sovrum. Här i en nisch i sänggaveln som min man & jag byggde för några år sedan. Jag tänker mig att jag ska använda boken till att skriva ner små kom-i-håg saker, idéer som jag kommer på precis vid läggdags och som är så lätta att glömma till dagen efter…
———
The book’s patterns & colors fit nicely in the setting of our bedroom. Here, in a niche in the headboard of our bed, which my husband & I built a few years ago. I plan to use the book to write down quick notes, ideas that pop into my head right before bedtime and that are so easy to forget until next day …

Husformade presentpåsar –
House shaped favor bags

House shaped favor bags - by Craft & Creativity

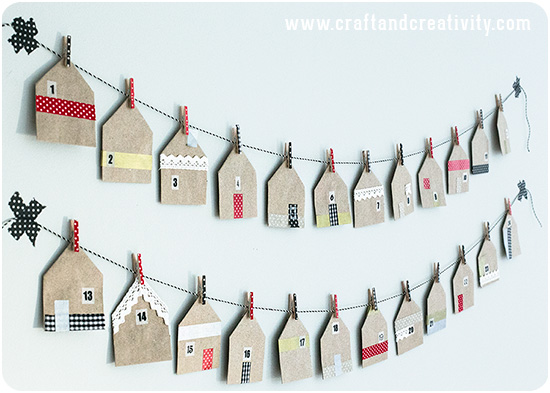
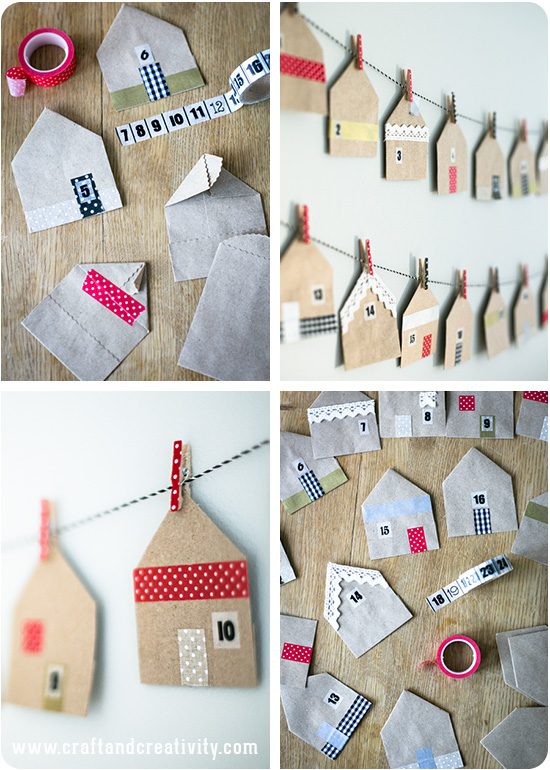
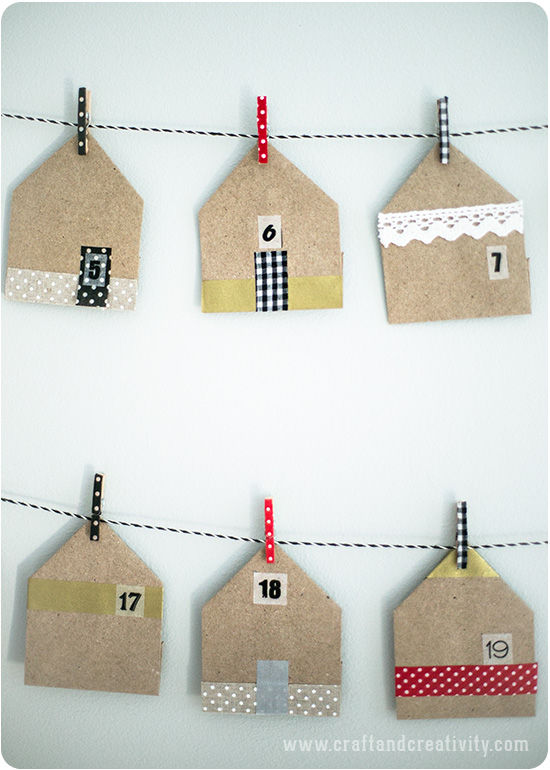
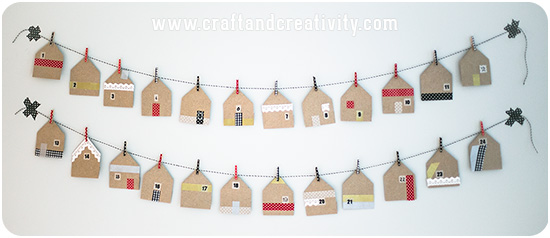
Apropå adventskalendrar så tänkte jag visa er en annan variant som man enkelt kan göra själv. Inspiration till denna hittade jag hos den franska bloggen MonkeyChoo. Jag har vikt små papperspåsar till formen av hus som jag sedan dekorerat, alla på olika sätt.
————-
Speaking of Christmas calendars I thought I’d show you another version that you can easily make yourself. I found inspiration for these house shaped favor bags over at the French blog MonkeyChoo. I used small paper bags, folded them in the shape of houses and decorated each one of them differently. 
House shaped favor bags - by Craft & Creativity

Jag tejpade dörrar, fönster m m med bitar av washitejp, tygtejp och spetstejp. Siffrorna är också bitar av en washitejp som är mönstrad med siffrorna 1-24. Även miniklädnyporna är dekorerade med olika sorters tejp och hänger på en lina av svart/vit tvinnat bomullssnöre, s k “Bakers twine”.
—————
I taped the doors, windows etc. with pieces of washi tape, adhesive fabric tape and lace tape. The numbers are also pieces of a washi tape with printed numbers 1-24. Even the mini clothespins are decorated with washi tape and pinned on black and white bakers twine.

House shaped favor bags - by Craft & Creativity

Påsarna är inte stora men passar bra för en liten peng, en kärlekshälsning, en skattkarta eller en liten adventspresent som pärlor, hårspännen eller sudd.
———-
The bags are quite small but well suited for a coin, a love note, a treasure map or small gifts like beads, hair clips or erasers.

House shaped favor bags - by Craft & Creativity

Vill man inte göra en adventskalender så kan man göra små huspåsar för slå in presentkort, biokort eller en födelsedagspeng. Eller varför inte använda dem som kuvert till årets julkort? Det får bli små julkort i så fall men man kan ju använda större påsar. 🙂
————
If you don’t want to make a Christmas calendar you can use the house shaped favor bags to wrap gift cards or birthday money. Or why not use them as Christmas card envelopes? The cards need to be quite small, but you could always use bigger bags. 🙂 
Adventskalender – Christmas Calendar

Christmas Calendar - by Craft & Creativity

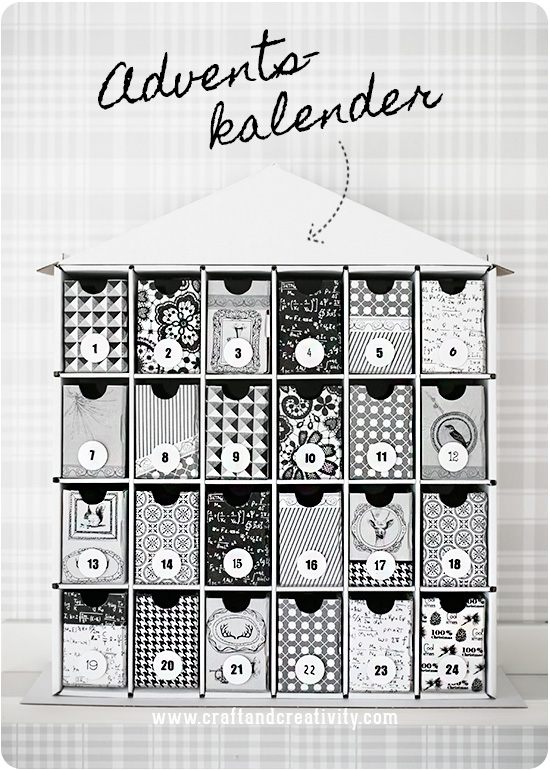
Den här husformade adventskalendern är gjord i kraftig kartong och är 47,5 cm hög, 38,5 cm bred och 9,5 cm djup och innermåttet på lådorna är 8,5x5x8 cm. Kalendern kan minst lika gärna användas som hylla och förvara småsaker eller pysselmaterial i.
————-
his house-shaped christmas calendar is made of heavy cardboard can also be used to store craft supplies or other little things. 

Christmas Calendar - by Craft & Creativity

Christmas Calendar - by Craft & Creativity

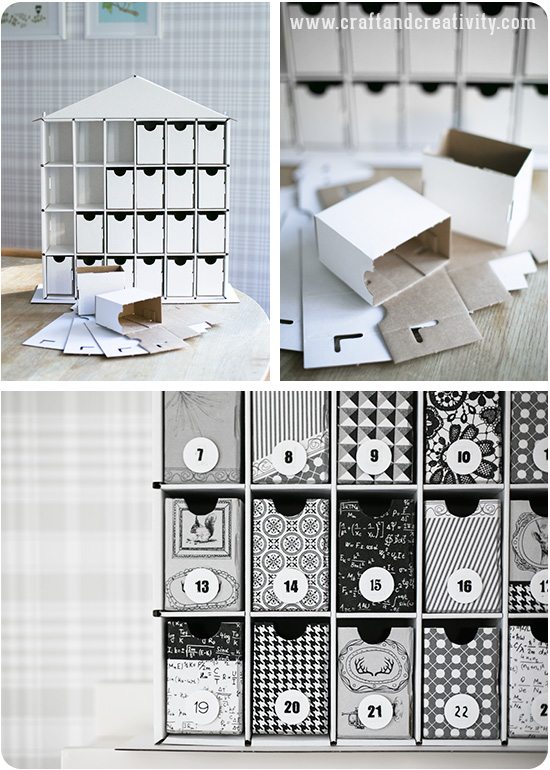
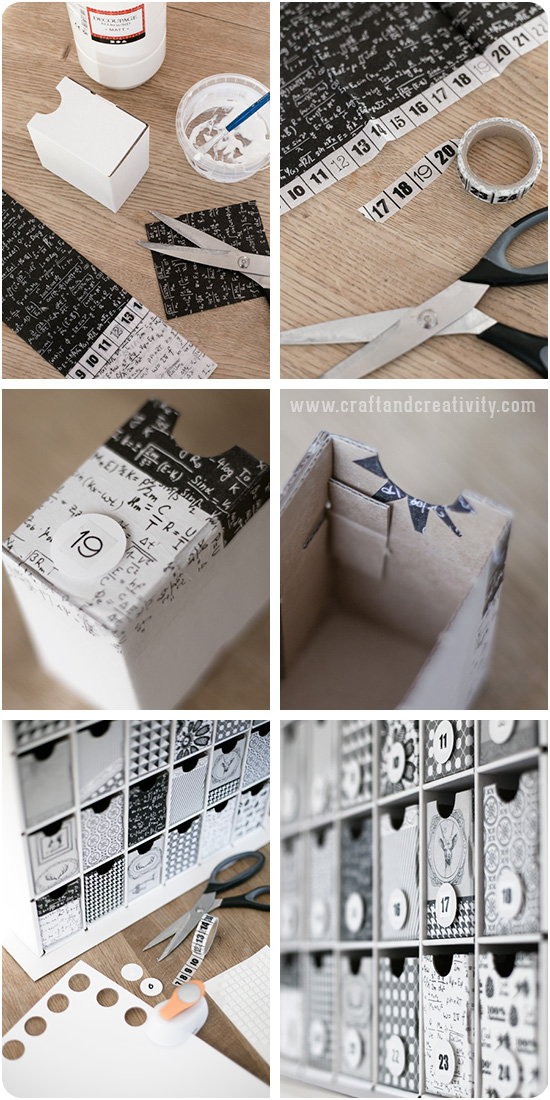
Jag valde att dekorera framsidan av varje låda med decoupagepapper. Jag penslade decoupagelack på lådan, placerade papperet ovanpå och penslade ett lager decoupagelack över. För att få en snygg kant runt den halvmåneformade öppningen klippte jag små jack i papperet innan jag vek över det till insidan av lådan, se mittenbilderna ovan.
————-
I chose to decorate the front of each box with decoupage paper. I brushed a layer of decoupage lacquer on the box, placed the paper on top and added another layer of decoupage. In order to get a neat edge around the crescent-shaped opening, I cut the paper in small strips before I flipped it over to the inside of the box, as shown in the pictures above.

Christmas Calendar - by Craft & Creativity

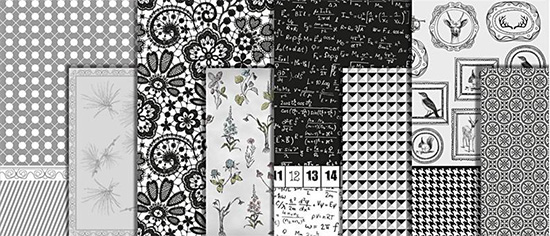
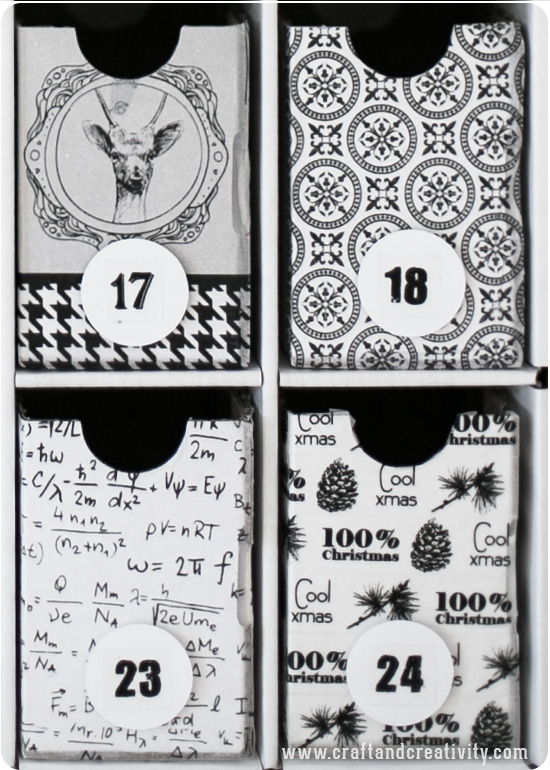
Med en figurstans stansade jag ut cirklar ur lite tjockare vitt papper som jag numrerade med en bit washitejp mönstrad med siffrorna 1-24. I serien “Paris” är ett av decoupagepapperen också mönstrat med siffror om man vill klippa ut och använda dem istället för washitejpen. Sifferskyltarna fäste jag på lådorna med en dubbelhäftande skumkuddar för att få en 3D-effekt.
———-
I punched circles of white paper with a lever punch and numbered them with pieces of washi tape with the numbers 1-24. I placed the number plates on the boxes using double-sided adhesive foam pads to create a 3D effect. 

Christmas Calendar - by Craft & Creativity

Låda nr 24 är också tejpad med washitejp. Jag tyckte mönstret 100% Christmas passade bra på själva julafton. 🙂 Mina barn har beställt var sin kalender till jul och jag kommer blogga om hur den andra varianten blev en annan dag.
———–
The box No. 24 is covered with washi tape. I thought the 100% Christmas pattern was fitting for Christmas Eve. 🙂 My girls want one Christmas calendar each and I will show you another way to decorate them in another blog post.

Monsterpåsar – Monster bags

Monster bags - by Craft & Creativity

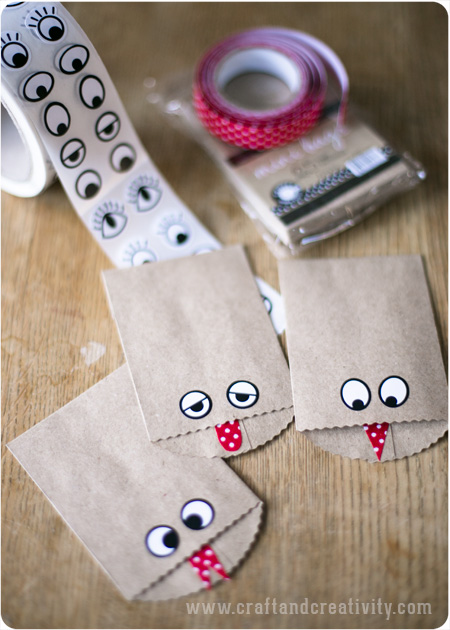
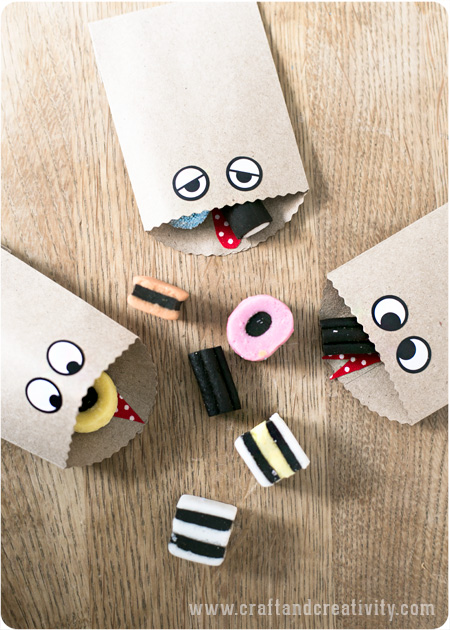
Jag hittade så söta spökpåsar på Pinterest och länken ledde mig till Craft-O-Maniac. Deras påsar inspirerade oss här hemma att göra egna små monsterpåsar. Vi tänkte dela ut dem till de busiga utklädda monstren som brukar komma och knacka på dörren till Halloween. Det skulle också vara en rolig idé att använda dem till fiskdammen på ett kalas, fast då kanske välja lite större påsar.
———-
At Pinterest I spotted a picture of cute paper ghost favor bags which led me to Craft-O-Maniac. Their bags inspired me and the girls to make our own little monsters bags. We are planning to hand them out to the neighborhood kids coming to our house trick-or-treating on Halloween. It could also be a fun idea to use them as favor bags at a birthday party.

Monster bags - by Craft & Creativity

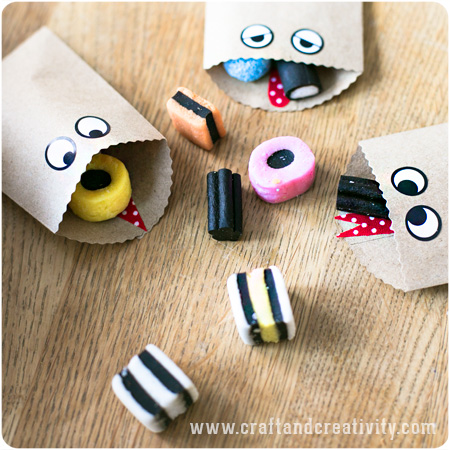
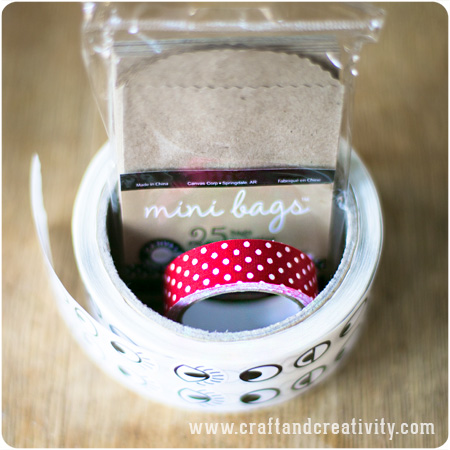
Jag använde småpåsar (6×4 cm), satte på ögonstickers och klippte bitar av tygtejp för att göra tungor till monstren. Washitejp eller vanligt rött papper funkar också bra och det går förstås att använda vilka påsar som helst.
———-
I used small paper bags, added sticker eyes and cut pieces of fabric tape to make the monster tongues. You could also use washi tape as well as ordinary colored paper. 

Monster bags - by Craft & Creativity

Ni som aktiva på Instagram har väl inte missat Halloweentävlingen som jag ordnar tillsammans med Pysselbolaget & Willowday? Fredag är sista dagen ni kan delta med bilder på läskiga/roliga/fina Halloween-kostym-bilder. Sedan utser vi en vinnare som får fina priser! 🙂
——–
I would like to remind those of you active on Instagram – don’t miss out on our Halloween contest, arranged by myself together with Pysselbolaget and Willowday. Friday is the last day to participate with pictures of scary/funny/pretty Halloween costumes. After that a winner will be selected and he/she will get a nice price. 🙂

Monster bags - by Craft & Creativity