Monsterpåsar – Monster bags

Monster bags - by Craft & Creativity

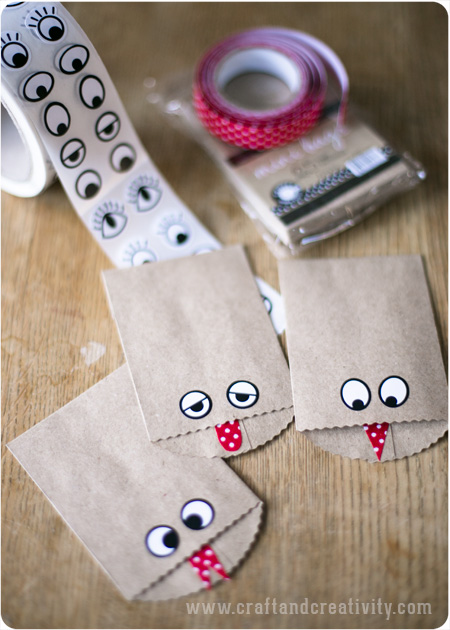
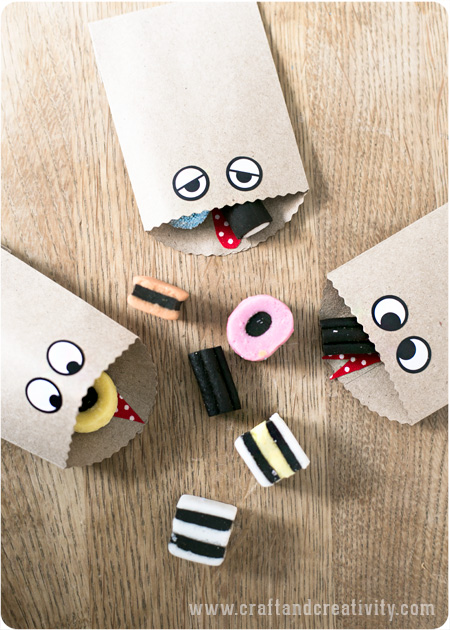
Jag hittade så söta spökpåsar på Pinterest och länken ledde mig till Craft-O-Maniac. Deras påsar inspirerade oss här hemma att göra egna små monsterpåsar. Vi tänkte dela ut dem till de busiga utklädda monstren som brukar komma och knacka på dörren till Halloween. Det skulle också vara en rolig idé att använda dem till fiskdammen på ett kalas, fast då kanske välja lite större påsar.
———-
At Pinterest I spotted a picture of cute paper ghost favor bags which led me to Craft-O-Maniac. Their bags inspired me and the girls to make our own little monsters bags. We are planning to hand them out to the neighborhood kids coming to our house trick-or-treating on Halloween. It could also be a fun idea to use them as favor bags at a birthday party.

Monster bags - by Craft & Creativity

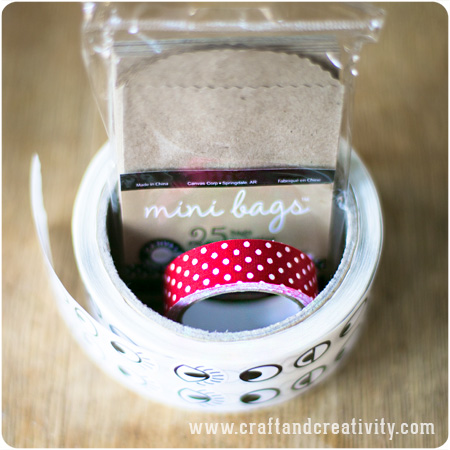
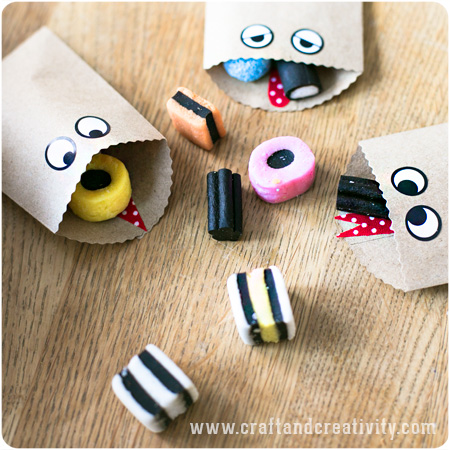
Jag använde småpåsar (6×4 cm), satte på ögonstickers och klippte bitar av tygtejp för att göra tungor till monstren. Washitejp eller vanligt rött papper funkar också bra och det går förstås att använda vilka påsar som helst.
———-
I used small paper bags, added sticker eyes and cut pieces of fabric tape to make the monster tongues. You could also use washi tape as well as ordinary colored paper. 

Monster bags - by Craft & Creativity

Ni som aktiva på Instagram har väl inte missat Halloweentävlingen som jag ordnar tillsammans med Pysselbolaget & Willowday? Fredag är sista dagen ni kan delta med bilder på läskiga/roliga/fina Halloween-kostym-bilder. Sedan utser vi en vinnare som får fina priser! 🙂
——–
I would like to remind those of you active on Instagram – don’t miss out on our Halloween contest, arranged by myself together with Pysselbolaget and Willowday. Friday is the last day to participate with pictures of scary/funny/pretty Halloween costumes. After that a winner will be selected and he/she will get a nice price. 🙂

Monster bags - by Craft & Creativity

Romantiska askar – Romantic boxes

DIY Romantic boxes - by Craft & Creativity

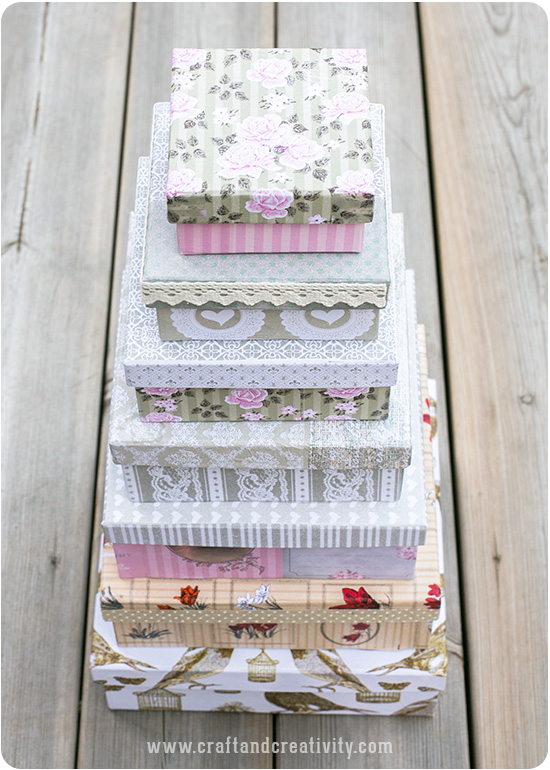
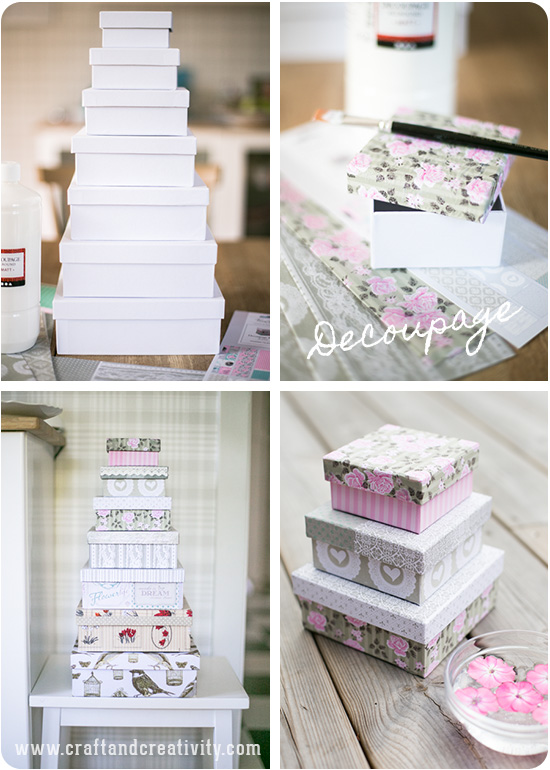
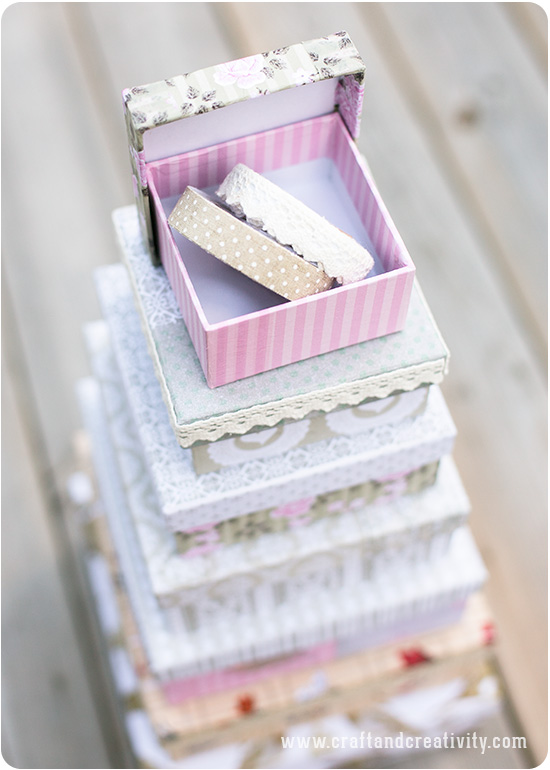
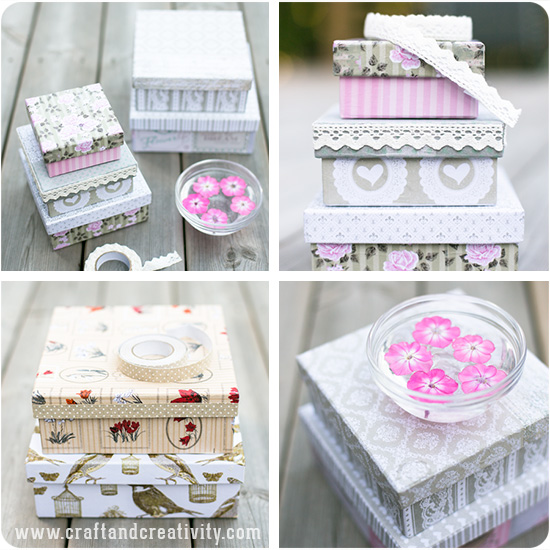
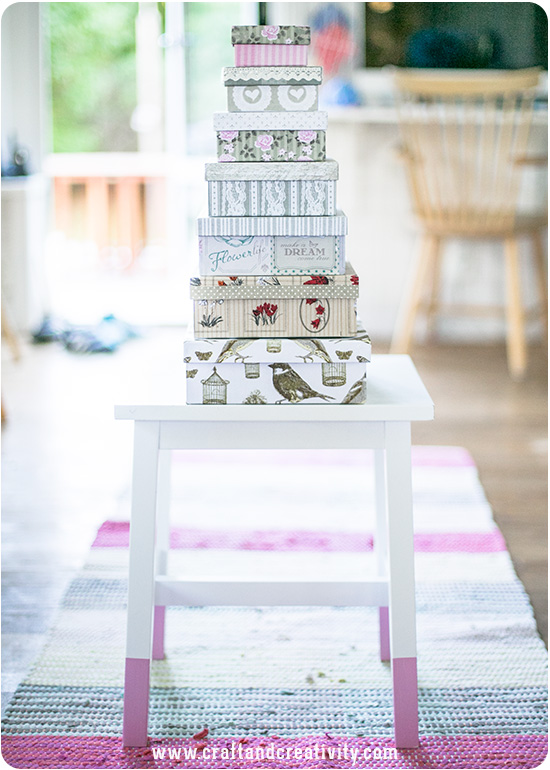
Jag tänkte visa er ett annat sätt att klä askar. Den här gången med decoupagepapper och tygtejp. Askarna är perfekta för förvaring, som presentaskar eller bara som dekoration.
—–
I thought I’d show you another way to dress up boxes. This time with decoupage paper and fabric tape. The boxes are great to use for storage, as gift boxes or just for decoration.

DIY Romantic boxes - by Craft & Creativity

Gör så här: Stryk ett tunt lager decoupagelack (matt eller blank lack beroende på vilket du föredrar) runt hela asken. Jag valde vita askar eftersom decoupagepapper är tunt och halvtransparent. Placera papperet ovanpå och stryk ut det försiktigt med fingrarna. Vik papperet runt kanterna för att få snygga hörn. För tips på detta läs mitt tidigare blogginlägg som förklarar tekniken jag brukar använda. Välj om du vill vika över pappret till insidan av asken eller trimma kanten med en sax. När asken är täckt stryker du på ytterligare ett lager decoupagelack ovanpå papperet. Låt torka ca 1 timme.
———–
Here’s how: Apply a thin layer of decoupage glue/lacquer (matt or gloss, whichever you prefer) around the box. I chose white boxes as decoupage paper is very light and semi-transparent. Place the decoupage paper on top and smooth it gently with your fingers. Fold the paper around the edges to get nice corners. For tips on how to, please take a look at a previous blog post that explains the technique I use. Fold the paper over to the inside of the box or trim the edge with scissors. When the box is covered, apply another layer of decoupage lacquer on top of the paper. Let dry for about 1 hour.

DIY Romantic boxes - by Craft & Creativity

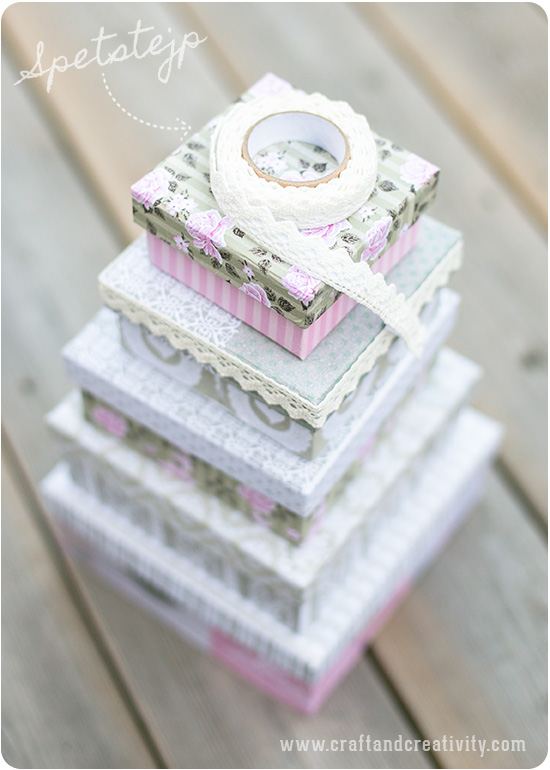
Jag dekorerade ett par av mina askar med linnetejp och spetstejp eftersom jag ville förstärka den romantisk känslan. Tejpen fungerar på samma sätt som washitejp men har ett skyddspapper på baksidan som man drar bort innan man använder tejpen.
———–
I decorated a couple of my boxes with adhesive fabric tape (linen and lace), because I wanted to enhance the romantic touch. The fabric tape works the same way as washi tape, but has protective paper on the back to be removed before using the tape.

DIY Romantic boxes - by Craft & Creativity

DIY Romantic boxes - by Craft & Creativity

DIY Romantic boxes - by Craft & Creativity

Klä böcker med tyg –
Fabric covered books

Fabric covered books - by Craft & Creativity

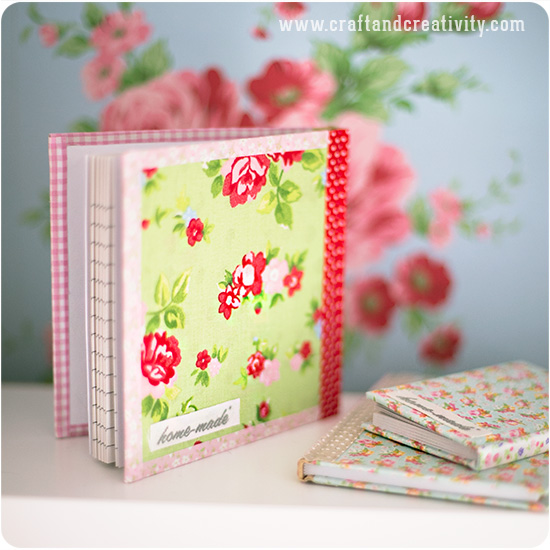
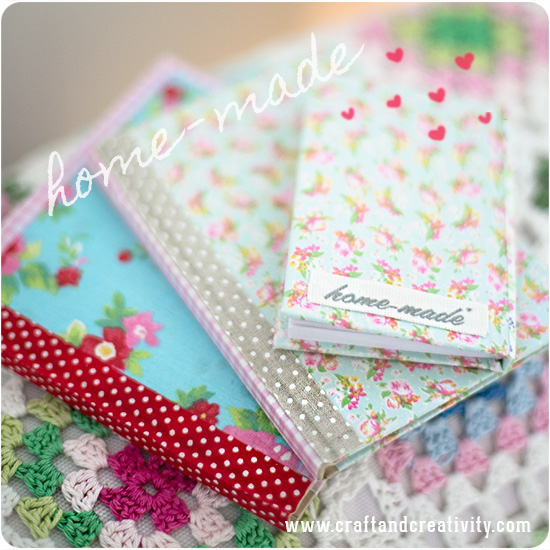
Det är förstås inte bara lådor och askar man kan klä om utan även böcker. Här har jag valt att dekorera s k “Kinaböcker” med tyg. Med självhäftande tyg och lite tygtejp är det verkligen lätt som en plätt och roligast av allt – det går att göra dem väldigt personliga.
———–
It’s not only boxes that you can cover and make pretty, but also books. Here I’ve chosen so decorate notebooks with fabric. With self-adhesive fabric and fabric tape this is a really quick craft, and most fun of all – you can make your notebooks very unique and personal. 

Fabric covered books - by Craft & Creativity

Fabric covered books - by Craft & Creativity

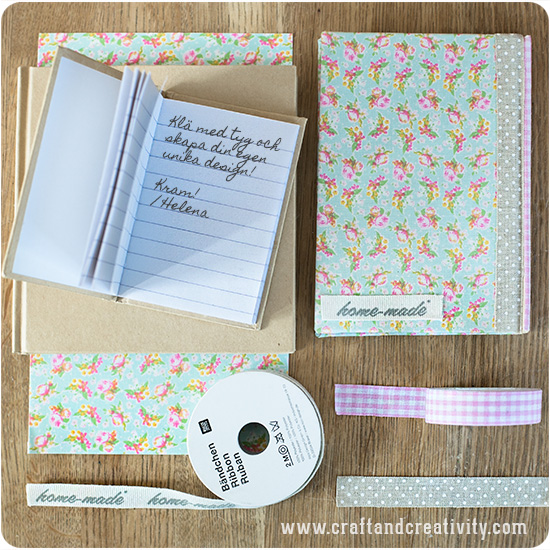
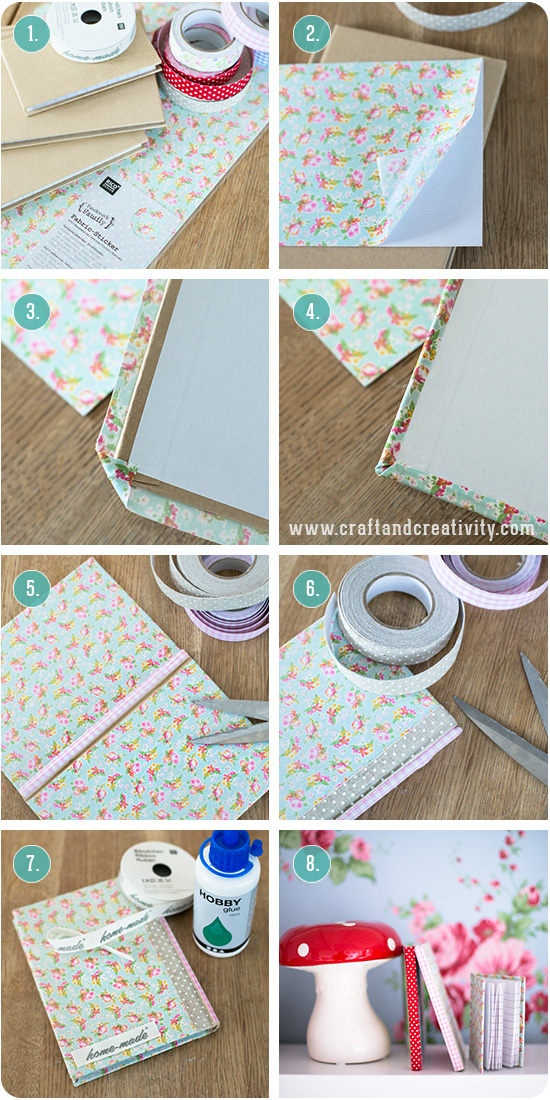
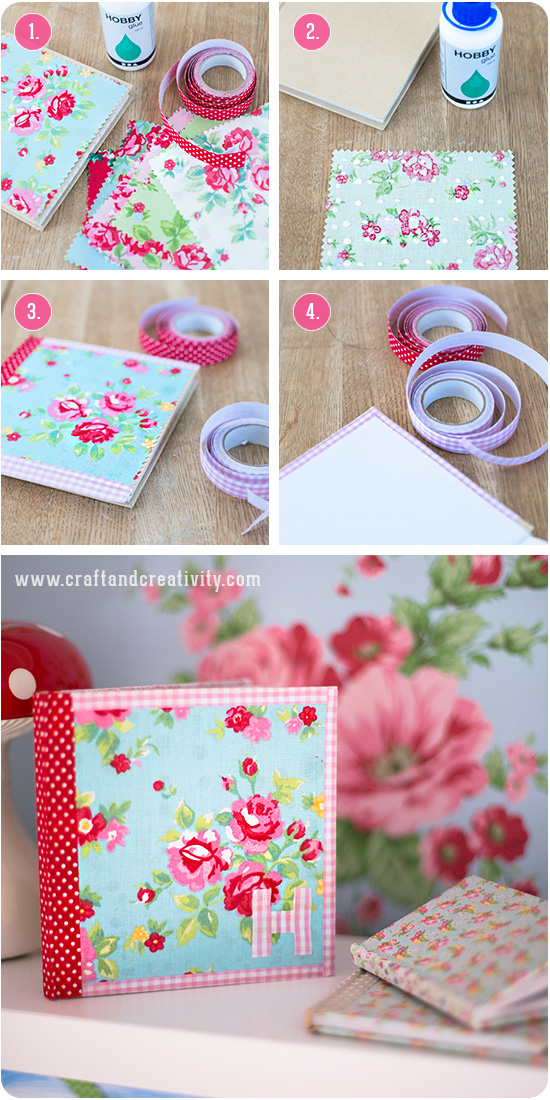
  1. Du behöver: Anteckningsböcker, självhäftande tyg, tygtejp, sax och om så önskas: band till dekoration, t ex band med text. I så fall behöver du även lite lim.
  2. Gör så här: Mät din bok och klipp till två bitar självhäftande tyg som är 1-2 cm större än själva anteckningsboken. En bit till framsidan och en till baksidan. Tag bort skyddspapperet på tyget och fäst tyget på boken med den självhäftande sidan ned.
  3. För att få snygga hörn är det enklast att vika in hörnen först.
  4. Sedan viker du in långsidor och kortsidor.
  5. Klipp till tygtejp i lagom längd, tag bort skyddspapperet och täck bokens rygg.
  6. Dekorera längst med ryggen med mer tejp om du vill.
  7. Det sista jag gjorde var att dekorera mina böcker med en liten bit tygband med texten home-made som jag limmade fast på baksidan av böckerna.
  8. Använd böckerna som dagböcker, till recept eller till att föra små anteckningar. Eller varför inte ge bort en bok som present?

—–

  1. You will need: Notebooks, self adhesive fabric, fabric tape, scissors, and if you like – some decorative ribbons. In this case you also need some glue. 
  2. Here’s how: Measure your book and cut two pieces of adhesive fabric that are a bit bigger than the notebook. One piece for the front and one for the back of the book. Remove the protective paper and place the fabric on top of the book, the sticky side down.
  3. To get pretty corners is easiest to fold the corners first.
  4. Proceed to fold along the sides. 
  5. Cut fabric tape in proper length, remove the backing paper and cover the spine.
  6. If you like you can decorate with additional tape along the spine.
  7. I finished off by decorating my books with a small piece of fabric ribbon with the text home-made, which I glued to the back of the book.
  8. Use your books as diaries, for recipes or as notebooks. Or why not give away a book as a gift?

Fabric covered books - by Craft & Creativity

För visst är det roligt att både ge och få hemmagjorda presenter?
——
Because isn’t it nice to both give and receive homemade gifts? 

Fabric covered books - by Craft & Creativity

Det behöver förstås inte vara självhäftande tyg utan man kan även använda vanligt tyg och limma fast det. Den sista lilla biten täcker du sedan med tygtejp som viks över på insidan av pärmen. Tejpa även ryggen med tygtejp. H:et har jag klippt ut från en bit självhäftande tyg.
———
Of course it doesn’t have to be self-adhesive fabric, you could use plain fabric and glue as well. Above I’ve used pre-cut fabric squares which fitted my 5.5 inch notebook perfectly. I dressed the edges and the spine with fabric tape and cut out the letter H from a piece of adhesive fabric.  

Fabric covered books - by Craft & Creativity

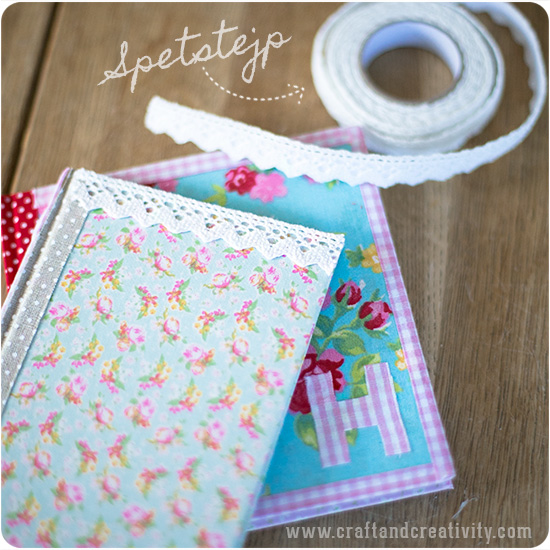
Tygtejp finns även som spets. Den är söt att använda för att dekorera ljuslyktor, glas, hyllkanter eller askar.
—–
Fabric tape is also available as lace. It’s pretty to use to decorate votives, glass, boxes or shelves.

Amors pilar – Love arrows

Love Arrows - by Craft & Creativity

Pyssel med pappersugrör - Craft & Creativity

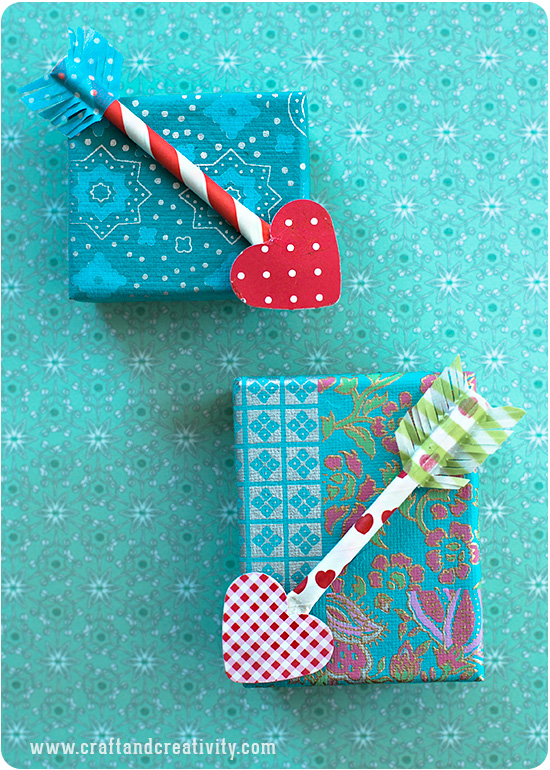
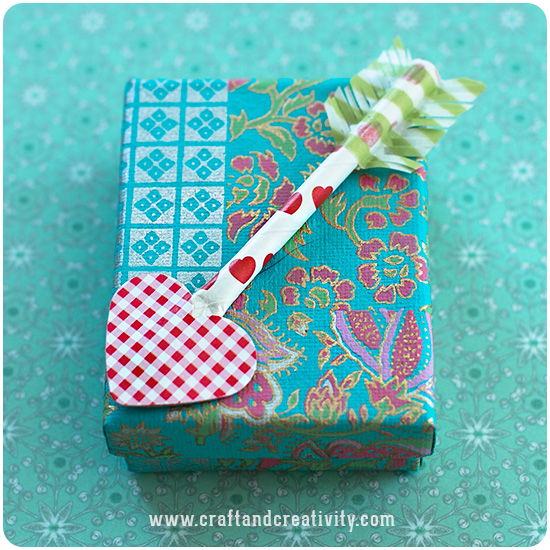
Jag såg så söta sugrörspilar hos Honey we’re home som jag ville testa göra själv. Pilarna kan användas som dekoration på ett paket, på ett kort, i ett bakverk eller att leka med.
——
I spotted these cute paper straw arrows over at Honey we’re home and got inspired to make some myself. The paper arrows can be used as decoration on a gift, a card, on a cupcake or to play with.

Love Arrows - by Craft & Creativity

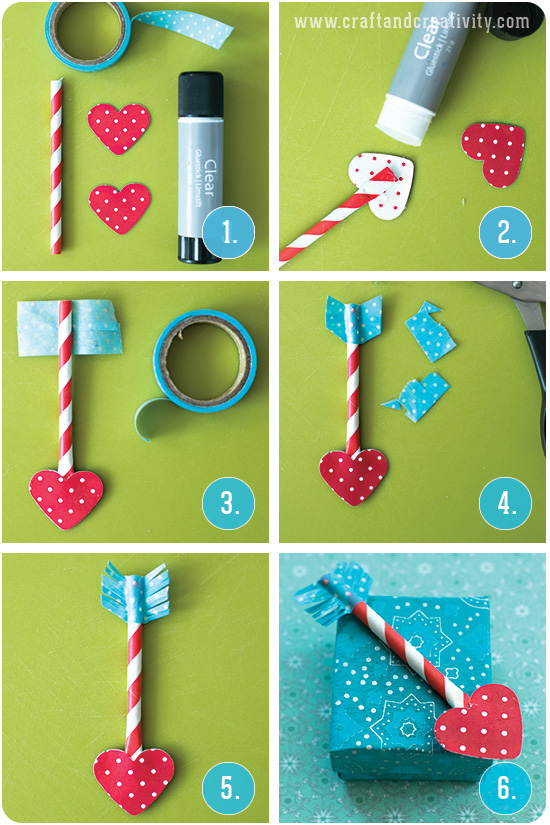
  1. Du behöver: Papperssugrör, två hjärtformade pappersbitar (klipp ut själv eller använd en figurstans/handpunch), washitejp, papperslim och en sax.
  2. Gör så här: Klipp av sugröret till önskad längd. Platta till ena änden, där hjärtat/pilspetsen ska sitta. Limma den undre och övre delen mot varandra med sugröret mellan.
  3. Tejpa två bitar washitejp på undersidan av pilen och två bitar washitejp på ovansidan.
  4. Snygga till och forma “fjädrarna” med en sax.
  5. Klipp jack i tejpen för att efterlikna riktiga fjädrar.
  6. Pilen är klar!

—————–

  1. You will need: Paper straws, two heart-shaped pieces of paper (cut them yourself, or use a paper punch), washi tape, paper glue and a pair of scissors.
  2. Here’s how: Cut the straw in the length you desire. Flatten one end of the straw, where the arrow tip/heart will sit. Glue the upper and lower part of the heart together with the paper straw between.
  3. Tape the two pieces of washi tape to the back of the arrow and two pieces of tape on top.
  4. Trim and shape the “feathers” with a pair of scissors.
  5. Cut the tape in strips to mimic real feathers.
  6. Your arrow is done! 

Love Arrows - by Craft & Creativity

Asken är klädd med handgjort papper och en beskrivning på hur jag gjorde den finns här.
——
The box is covered with handmade paper and you can find a tutorial if you click here

Sugrörsflaggor – Paper straw flags

Paper Straw Flags - by Craft & Creativity

Pyssel med pappersugrör - Craft & Creativity

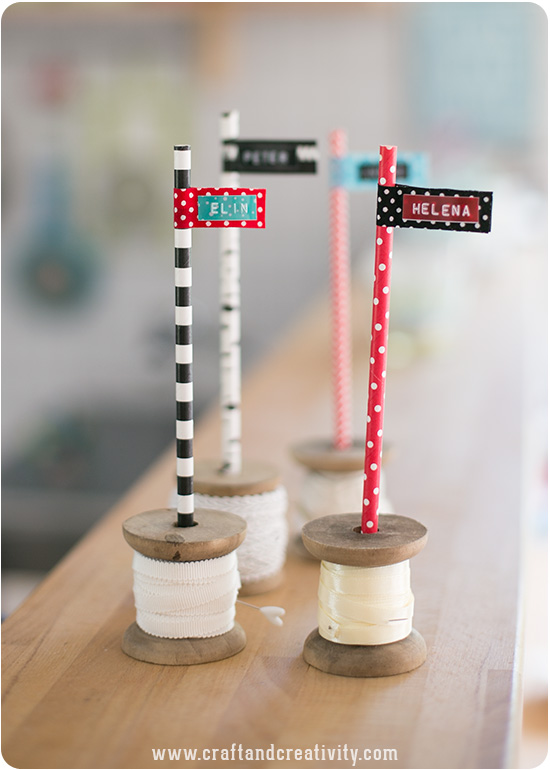
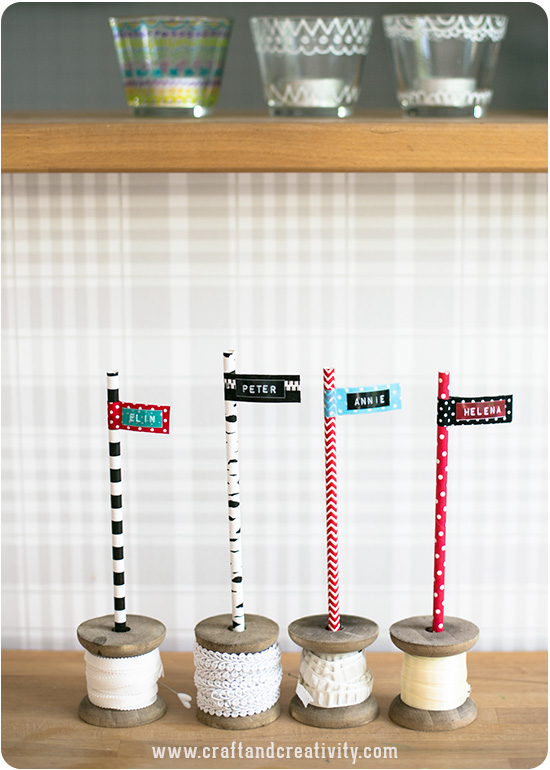
Idén att göra namnflaggor av sugrör och placera dem i trådrullar kommer från en kund på Make & Create som hörde av sig till mig och frågade om jag trodde att sugrören kunde passa i hålen på våra trådrullar. Hon hade en idé om att göra namnflaggor och använda som bordsplacering på en fest. Jag testade och sugrören passade! Idén var så bra att jag var tvungen att testa detta själv.
————
The idea to make paper straw flags and place them in thread spools came from a customer at Make & Create who asked me if I thought the straws could possibly fit into the holes of our wooden spools. She had an idea to make paper straw name flags and use as place cards at a party. I tried it out and and the straws did fit indeed! I thought this idea was so great that I had to try this myself.

Paper Straw Flags - by Craft & Creativity

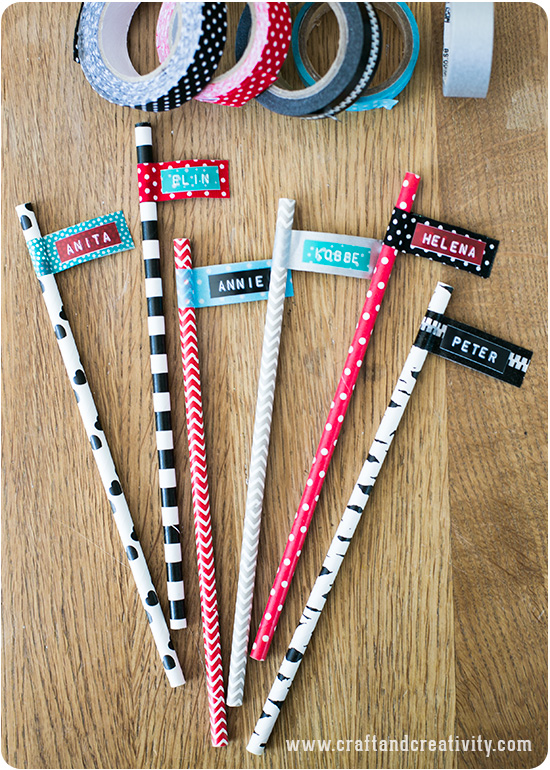
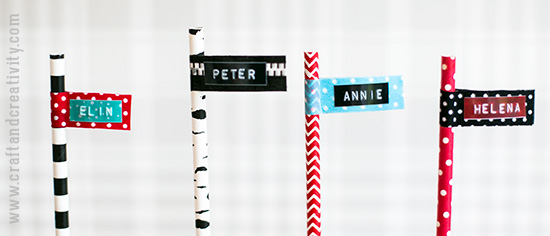
Jag gjorde så att jag vek en bit washitejp/tygtejp över ett sugrör, skrev namn med min märkapparat (9 mm refilltejp finns i många olika färger) och satte etiketterna på flaggan.
——-
I folded a piece of washi tape / fabric tape over a paper straw, used my label maker to write the name and placed the name label on the flag. 

Paper Straw Flags - by Craft & Creativity

Antingen rullar man fina band på rullarna eller så låter man de vara tomma. Den som är lite händig kan såga till klossar och borra hål och använda istället för trådrullar. Papperssugrören är 7 mm i diameter och hålet bör då vara ca 1 cm.
——
Either you roll pretty ribbons on the spools or you leave them blank. If you have the right tools at hand you can saw your own wooden blocks, drill holes and use instead of thread spools. The diameter of the paper straw is approx 7 mm and your hole should be about 1 cm. 

Paper Straw Flags - by Craft & Creativity

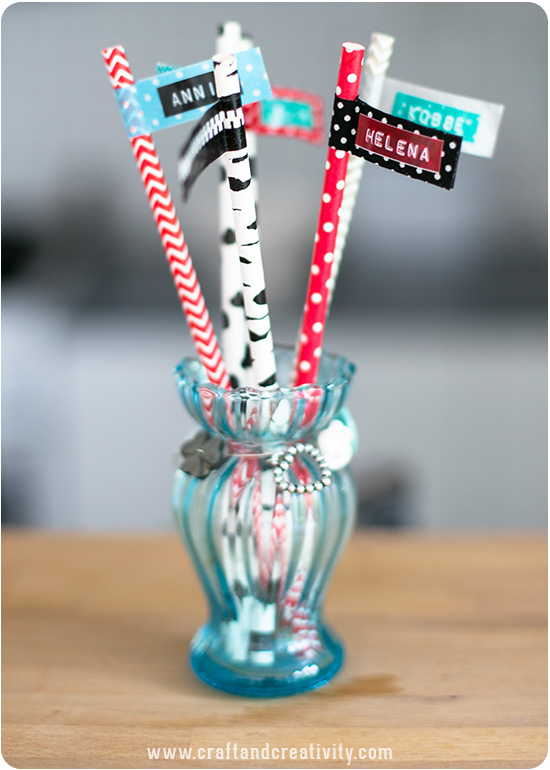
Eller så sätter man helt enkelt sugrörsflaggorna i gästernas glas!
———
Or, simply place the straw flags in the guests’ glasses!

Paper Straw Flags - by Craft & Creativity

Mer pyssel med tygtejp –
More fabric Tape Crafts

Fabric Tape Crafts - by Craft & Creativity

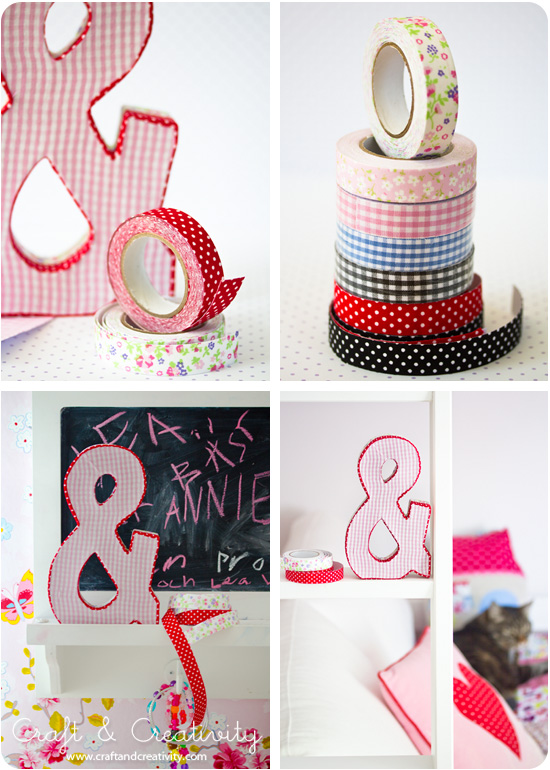
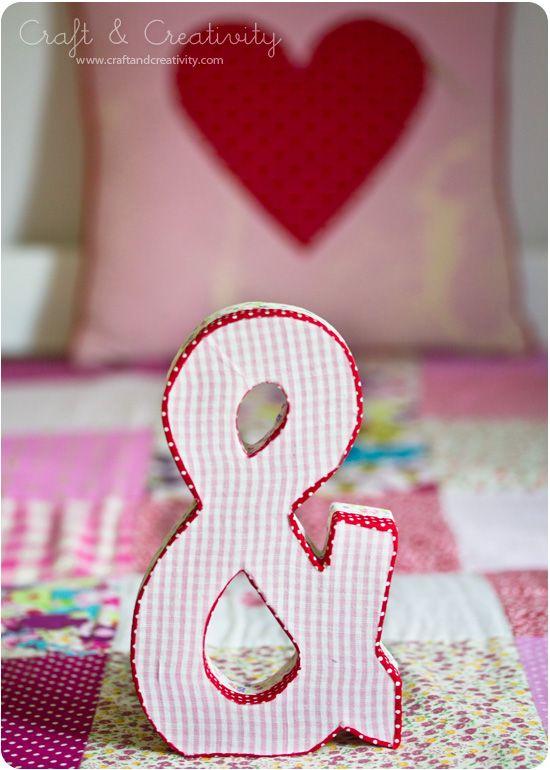
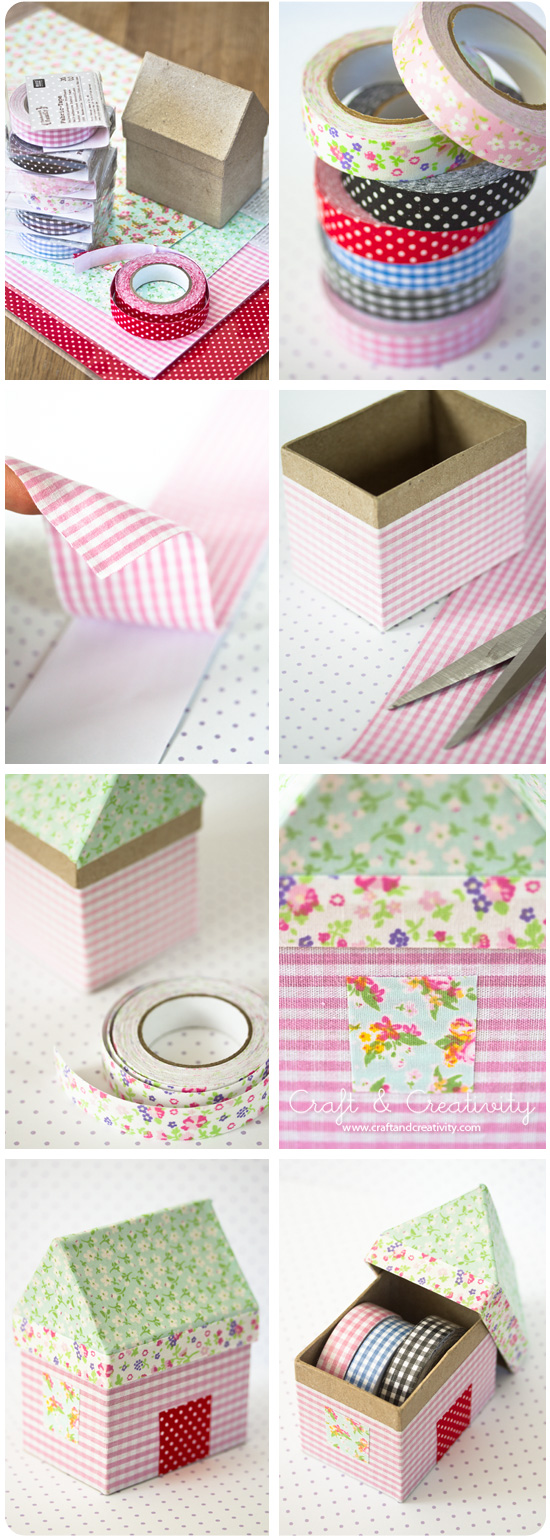
De tygklädda husaskarna jag gjorde härom dagen gav mersmak. Jag bestämde mig för att använda en del av resterna från mitt självhäftande tyg och min tygtejp till att täcka lite fler saker. Bland annat ett &-tecken i papier-maché som nu får pryda dotterns rum.
———
After making those fabric covered house boxes, I decided to use some of the remains of my self-adhesive fabric and fabric tape to cover some more stuff. For example, a papier-mâché ampersand which now resides in my daughter’s room.

Fabric Tape Crafts - by Craft & Creativity

&-tecknet passar fint tillsammans med överkastet från Rice (inköpt för några år sedan). Kudden med hjärtat minns jag inte riktigt var den kommer ifrån. Den har blivit lite blekt på sina ställen men jag har inte hjärta (haha!) att slänga den.
———–
The ampersand fits nicely together with the bedspread from Rice (purchased some years ago). I don’t remember where I got the heart pillow from. It’s become a bit bleached in places, but I haven’t got the heart (no pun intended ;-)) to throw it out. 

Fabric Tape Crafts - by Craft & Creativity

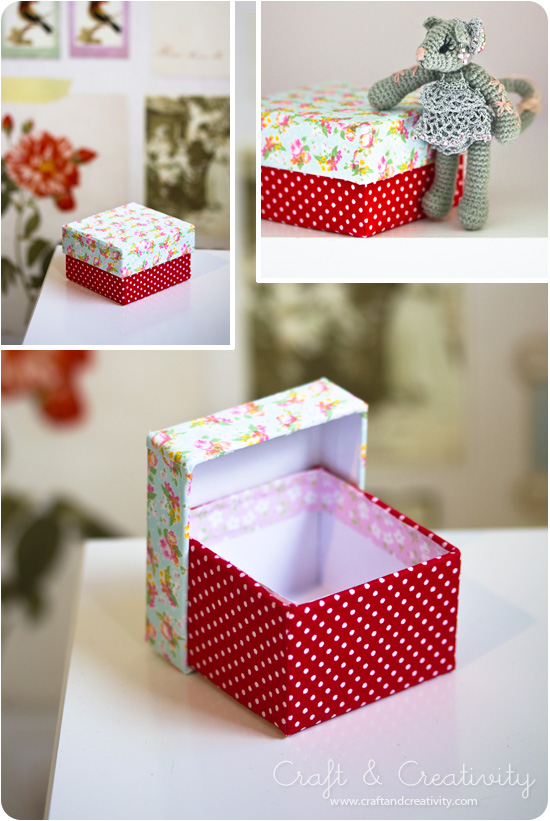
Ovan har jag täckt en gammal ask med självhäftande tyg och tygtejp. Vill du ha tips om hur du får snygga hörn när du klär om askar? I så fall, klicka här. Den virkade lilla sötnosen på bilen högst upp har min duktiga mamma gjort.
———
Above you can see an old box that I covered with adhesive fabric and fabric tape. Would you like some tips on how to get pretty corners when covering boxes? If so, please click here. The crocheted little cutie in the top photo was made by my talented mum.

Fabric Tape Crafts - by Craft & Creativity

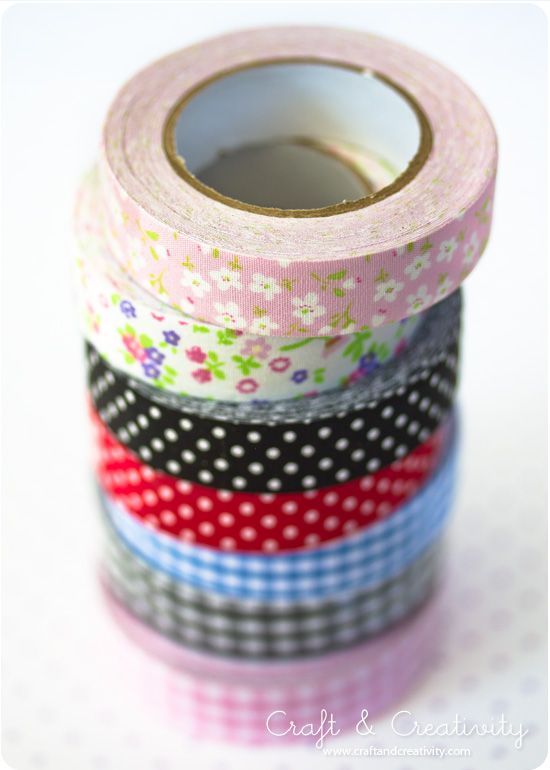
Jag som älskar prickar, blommor och rutiga mönster får ju lust att tejpa hela huset med denna tygtejp (fast jag tror familjen skulle protestera)! 😉 Tygtejpen fungerar på samma sätt som washitejp, den fäster på de flesta underlag och går att flytta på om man vill.
———
Being a big fan of polka dots, flowers and plaid patterns I could probably cover the hole house with fabric tape (although I suspect my family would protest)! 😉 Fabric tape works much in the same way as washi tape. It adheres to most surfaces and is removable if you change your mind. 

Tygklädda husaskar –
Fabric House Boxes

Fabric House Boxes - by Craft & Creativity

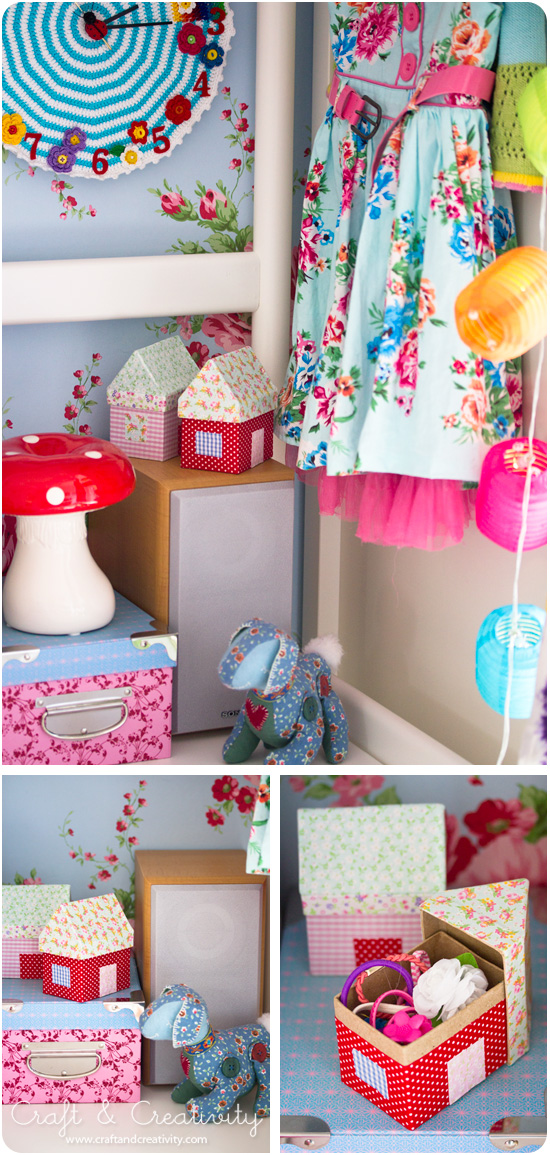
Barnen behövde förvaring för alla sina hårsnoddar och spännen och jag passade på att använda mina små husaskar i papp och täckte dem med självhäftande tyg och tygtejp. Inspirationen kommer från danska Rice som brukar sälja söta askar och korgar formade som hus och klädda med tyg.
———-
The girls needed a pretty way to store all their hair clips and accessories. I took the opportunity to make use my papier-mâché house boxes and covered them with self-adhesive fabric and fabric tape. I was inspired by the Danish design company Rice and their cute fabric boxes and baskets shaped like houses.

Fabric House Boxes - by Craft & Creativity

Du behöver: Askar, självhäftande tyg (eller vanligt tyg + textillim), tygtejp och en sax.
Gör så här: Måtta asken och klipp till tyget i lagom storlek. Dra bort skyddspapperet placera på asken med den självhäftande sidan ner. Klipp till dörrar och fönster och dekorera med tygtejp i olika mönster.
———
You will need: Boxes, self-adhesive fabric (or plain fabric + fabric glue), fabric tape and a pair of scissors.
Here’s how: Measure the box and cut the fabric to fit. Remove the backing paper and place the fabric on the box with the adhesive side down. Make doors and windows and decorate with fabric tape in different designs.

Fler kalasidéer – Birthday Party DIYs

Birthday party DIYs - by Craft & Creativity

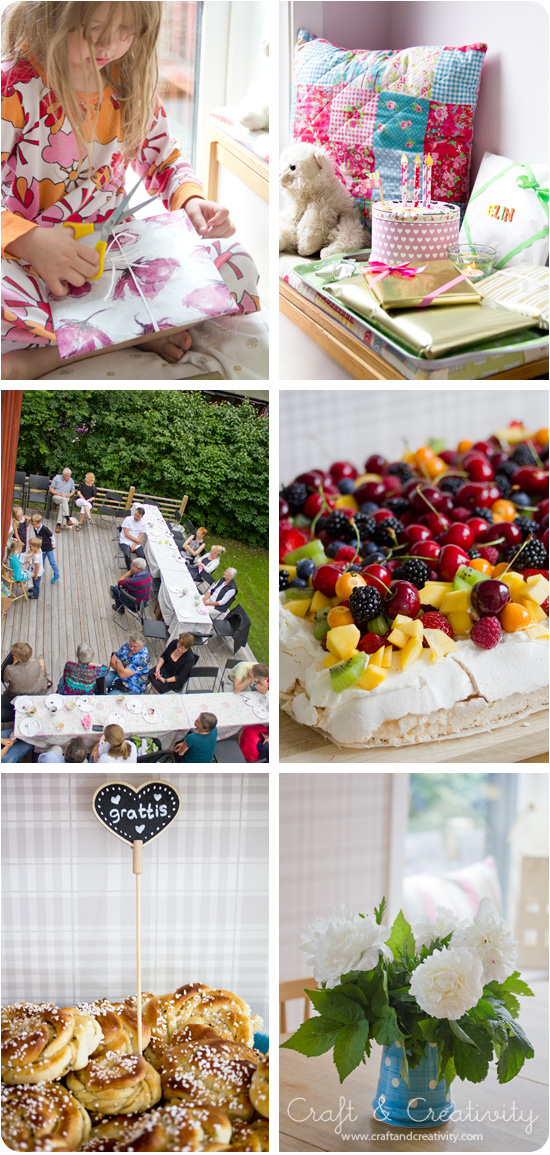
Vår yngsta dotter fyllde 6 år i söndags och vi bjöd in till kalas för släkt & vänner. Det blev en rolig dag och lilla E blev verkligen ordentligt firad. Förutom kalasgirlangen som jag visade i förra inlägget pysslade vi ihop lite annat smått & gott dagen till ära. Jag tänkte visa er ett smakprov. 🙂

Ovan: Tårtan med alla frukter & bär är en pavlova och receptet kommer från bakboken Smilla bakar glutenfritt. Den blev otroligt god! Grattispinnen ovan är egentligen en blompinne men jag tyckte den passade fint i bullarna.
———-
Our youngest daughter turned six last Sunday and we had a party for family & friends. We had a great time and little E was celebrated all day long. Besides the party garland that I wrote about the other day, we made some other party decorations in honor of her day. I thought I’d show you some of them. 🙂
Above: The birthday cake with all the fruits and berries is a pavlova and the recipe comes from a Swedish cookbook called Smilla bakes gluten-free. It turned out yummy! The heart-shaped is actually ment for flowers but I thought it looked cute among the cinnamon buns.

Birthday party DIYs - by Craft & Creativity

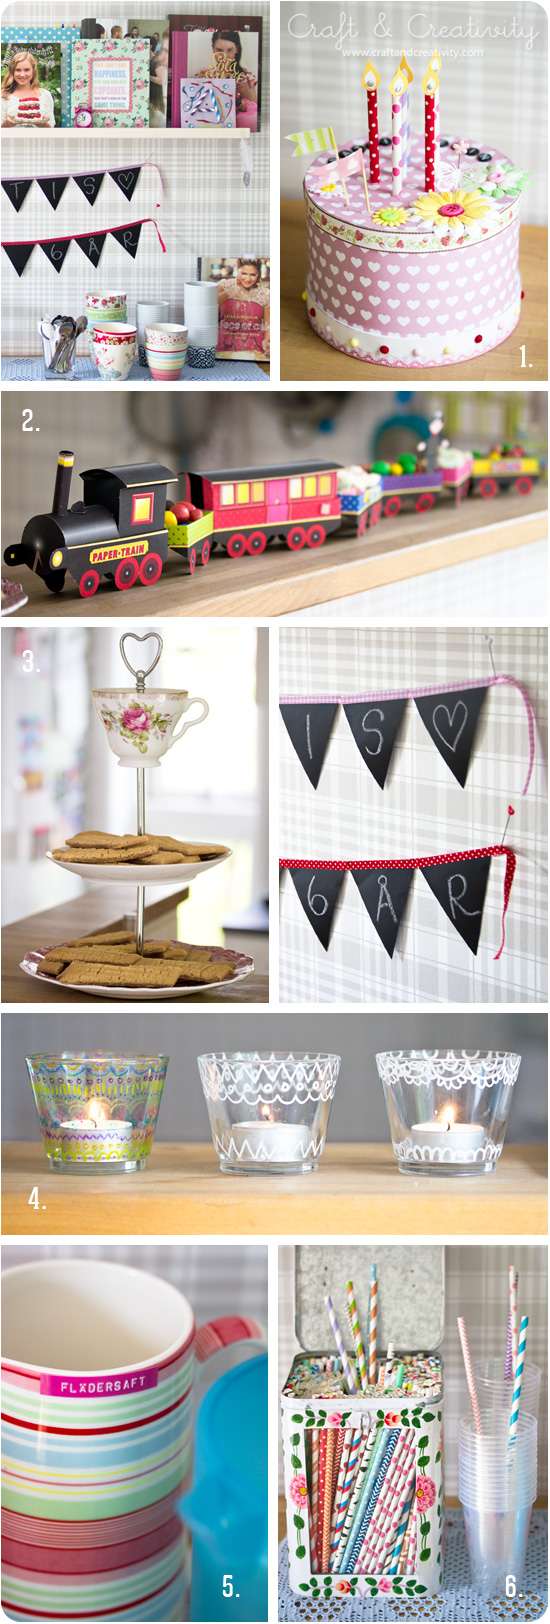
  1. Papperstårta med present inuti (dottern fick ett gosedjur som stack ut tassarna när hon öppnade tårtan). Beskrivning för tårtan finns i ett tidigare inlägg.
  2. Papperståg som tjejerna byggt tillsammans och som vi fyllde med godis till kalaset.
  3. Mitt kakfat av gammalt porslin och kakfatsdelar.
  4. Ljushållare målade med glas- & porslinspennor.
  5. Dotterns hemmagjorda lemonad och min & svägerskans flädersaft märkte vi upp med vår Label Maker.
  6. Alla mina papperssugrör har fått fin förvaring i en loppisfyndad burk. Perfekt för kalas!

Och om en månad är det storasysters tur att fylla år. Vi får väl se vad det blir för kalaspyssel då…

—-

  1. A paper cake with a gift inside (our daughter got a stuffed animal that surprised her when she opened the cake). A tutorial on the paper cake can be found in a previous post
  2. The girls build the paper train together and we filled it with candy for the party.
  3. My cake stand made of old porcelain and a cake stand kit.
  4. Candle holders painted with glass & porcelain pens. The one to the left painted with semi-transparent colored pens and the two to the right with a solid white one.
  5. Our oldest daughter’s homemade lemonade and my & my sister-in-law’s elderberry juice marked with our label maker.
  6. All my paper straw nicely stored in a tin can I found at the flee market. Perfect for a party! 

A month from now it’s big sister’s turn to get a year older. Let’s see what we’ll come up with for her party…  

Suddbar kalasgirlang –
Erasable party garland

Erasable no-sew party garland - by Craft & Creativity

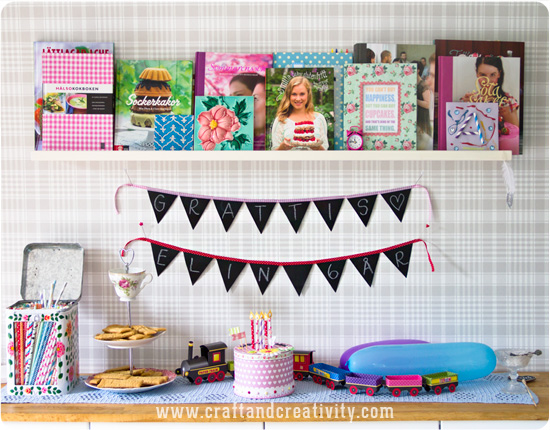
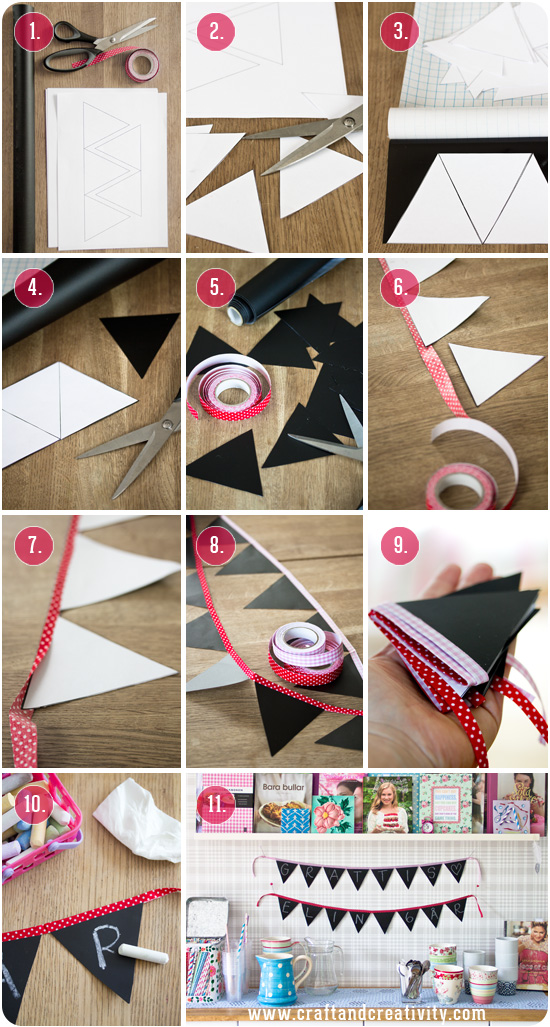
Allt du behöver för att göra den här suddbara kalasgirlangen är självhäftande tavelfolie
(d v s matt svart dekorplast), tygtejp, sax och vanligt skrivarpapper. Du behöver inte sy ett stygn. Det tar bara några minuter och du kan använda den till många födelsedagar och kalas framöver! Skriv texten med tavelkrita och du kan sudda bort med en fuktig bit papper och skriva ny.
——–
All you need to make this erasable no-sew garland is adhesive blackboard foil, fabric tape, a pair of scissors and ordinary print paper. It only takes a few minutes and you can use it for many birthdays and parties to come! Write on it with chalk crayons and you can erase the text with damp paper and write new letters.

Craft & Creativity - Download

Erasable no-sew party garland - by Craft & Creativity

  1. Skriv ut min mall för vimplar eller klipp ut egna om du önskar annan form/storlek. Jag använde vanligt 80 g skrivarpapper. Använd tjockare papper om du vill. Det är fem mallar på en sida, skriv ut fler ex av sidan beroende på hur många vimplar du vill ha. Mina mallar är ca 9 cm breda och ca 9 cm höga.
  2. Klipp ut mallarna.
  3. Tag bort skyddspapperet på tavelfolien och placera mallarna en och en på den självhäftande sidan av tavelfolien. Det fungerar bättre än att lägga hela papperet oklippt för då kan plasten bubbla sig.
  4. Klipp ut vimplarna. De har nu vit pappersbaksida och svart tavelfolie på framsidan.
  5. För att slippa sy använde jag självhäftande tygtejp. Den fungerar som washitejp fast det är tyg istället för papper.
  6. Tag bort skyddspapperet på tejpen och placera ut vimplarna jämnt fördelat på tejpen, men täck bara halva tejpen – som på bilden.
  7. Vik över tejpen på andra sidan av vimplarna.
  8. Fortsätt och gör likadant med alla vimplar. Spara en bit tejp på varje sida om girlangen för upphängning. Vik den också på mitten (klister mot klister) så blir det som ett band. Gör en eller flera girlanger.
  9. När girlangen är klar kan du vika ihop den och den tar minimalt med plats.
  10. Skriv på vimplarna med krita. Sudda bort med en bit fuktigt papper om du vill ändra texten. Precis som med en griffeltavla!
  11. Fäst din girlang på väggen med nålar eller tejp. Eller knyt upp den på önskat ställe.

———

  1. Print my pennant template or cut your own if you desire other shape or size. I used standard print paper. Use heavier paper if you like. There are five templates on one page, print more copies depending on how many pennants you want to make. My pennants are approximately 9 cm (3,5 in) wide and 9 cm high.
  2. Cut out the templates.
  3. Remove the protective sheet from the blackboard foil and place the templates one by one on the adhesive side of the foil. This works better than placing the whole uncut paper, which can cause the foil to wrinkle. 
  4. Cut out the pennants. They will turn out with white paper backing and blackboard foil on the front.
  5. To avoid having to sew, I used adhesive fabric tape. Much like washi tape but with fabric instead of paper.
  6. Remove the protective paper from the tape and place the pennants evenly on the tape, but cover only half the tape – as shown in the picture above.
  7. Fold the tape over on the other side of the pennants.
  8. Continue to do the same with all the pennants. Save a piece of tape on each side of the garland for hanging. Make one or more garlands.
  9. When your garland is done, you can fold it together and it takes up minimal space.
  10. Write on the pennants with chalk crayons. Erase the chalk with a piece of damp paper if you want to change the text. 
  11. Hang your garland on the wall with pins or washi tape or tie it to a shelf.

Hållare för washitejp –
Washi tape dispenser

Washi tape dispenser - by Craft & Creativity

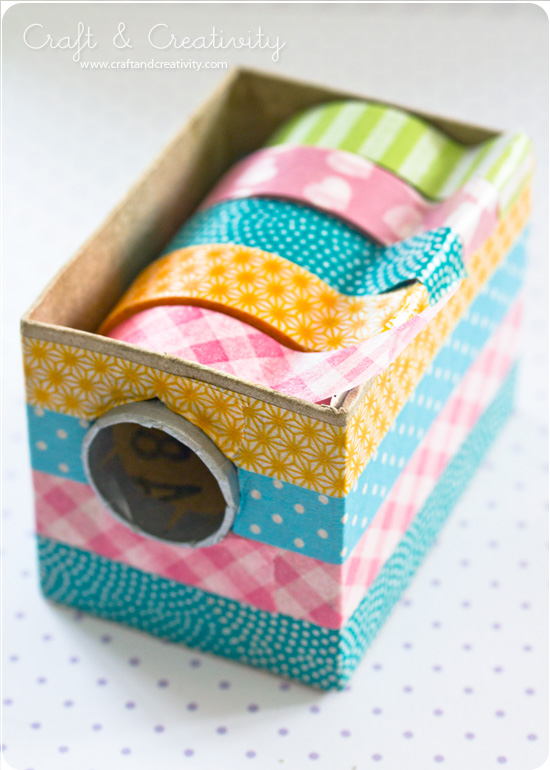
Min vän Karin tipsade mig om Esther på Crafts Unleashed som pysslat ihop en hållare för washitejp av en husformad ask. Eftersom jag gillar både washitejp och husformer kändes det här som en himla kul kombination. Hållare och förvaring i ett! Små husaskar hade jag redan hemma.
———–
My friend Karin told me about Esther at Crafts Unleashed who made a dispenser for washi tape out of a house-shaped box. Since I’m a fan of both washi tape and house shapes, this felt like a really great combination. Holder and storage in one! I already had small house boxes at home.

Washi tape dispenser - by Craft & Creativity

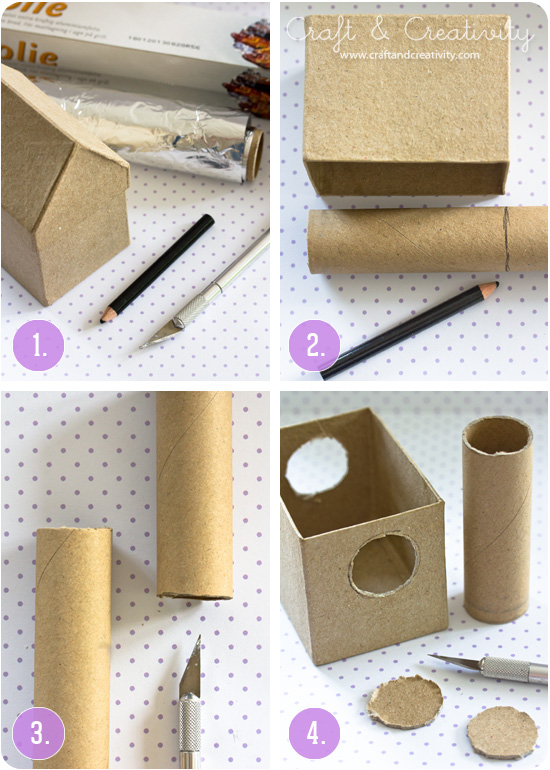
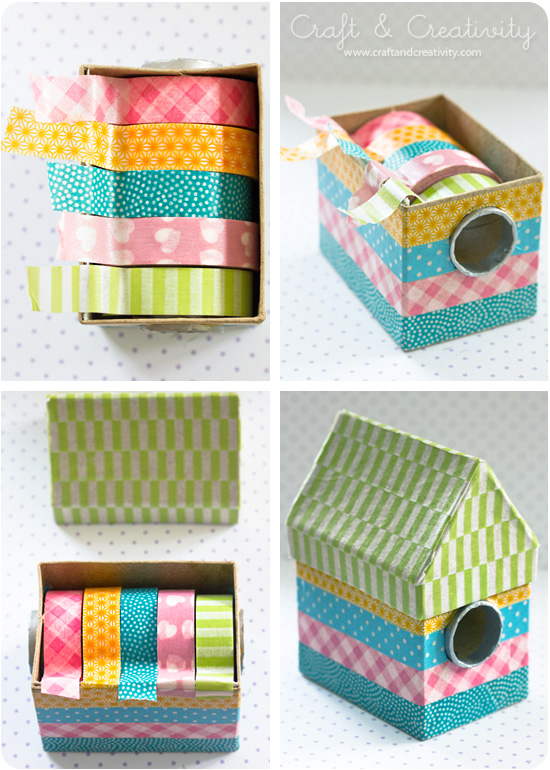
  • Esther använde rundstav till sin ask men någon sådan hade jag inte hemma. Efter att ha rotat runt i lådorna hittade jag istället en rulle ugnsfolie som det bara var lite folie kvar på. Perfekt diameter och den var dessutom lättare att kapa än en rundstav i trä.
  • Jag måttade rullen mot asken och ritade ett streck ca 6 mm bredare än långsidan, eftersom rullen ska sticka ut en liten bit på båda sidor.
  • För att kapa rullen använde jag en hobbykniv. Akta fingarna!
  • Med rullen måttade jag fram de två runda hålen på askens kortsidor. Tänk på att tejpen ska få plats på rullen också. Se till så att det finns drygt 1 cm plats från utkanten av hålet till hörnet av asken och ca 1 cm plats upp till överkanten (måtta själv så det blir rätt för just dina tejprullar). Jag skar ut hålen med min hobbykniv.
  • Esther used a round wooden rod for her box but I didn’t have one at hand. Having rummaged through my drawers, I found an almost empty roll of tinfoil instead. It had the perfect diameter and was easier to cut than wood.
  • I measured the roll with the length of the box and drew a line about 6 mm wider then the box, since the roller should stick out a little bit on both sides.
  • To cut the roll, I used a hobby knife. Be careful!
  • With the roll I traced two round holes on opposite sides of the box. Remember to leave space for the tape. Make sure there’s a little bit more then 1 cm space from the edge of the hole to the corner of the box and about 1 cm space to the top. I cut out the holes with my hobby knife. 

Washi tape dispenser - by Craft & Creativity

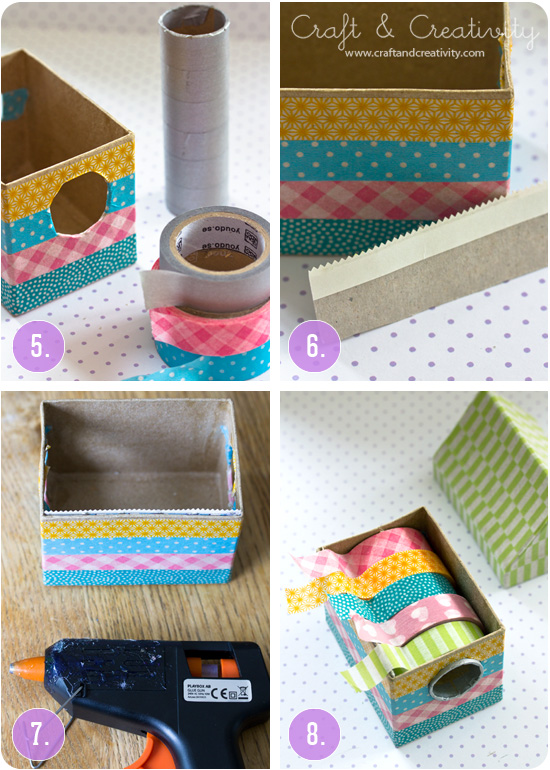
  • Hur ska man dekorera en hållare för washitejp om inte med… washitejp. 😉
  • Förpackningar för ugns- och plastfolie har ofta en taggig kant för att riva av folien. Jag återanvände en liten bit av en sådan. Här snackar vi återvinning!
  • Den taggiga kanten limmade jag fast på asken med en limpistol.
  • I med tejpen på rullen och in med allt i asken. Så var min washitejphållare klar!
  • What better way to decorate a washi tape dispenser if not with … washi tape. 😉
  • Tinfoil and plastic film boxes often comes with a cutting strip for tearing the foil. I used a piece of cutting strip from my box. Talk about recycling! 
  • I glued the cutting strip onto the box with a glue gun.
  • Time to put the tape on the reel and put the reel in place in the box. Now my washi tape holder is ready to use! 

Washi tape dispenser - by Craft & Creativity

Nu råkar jag ha liiite mer tejp än så här men den här får innehålla mina favoritmönster! 🙂 Besök gärna Crafts Unleashed för att se Esthers fina washitejphållare och många andra roliga DIY-projekt.
———-
I happen to have a bit more tape than this, but here I can store my favorite patterns! 🙂 Be sure to pay a visit to Crafts Unleashed for a look at Esther’s pretty washi tape dispenser and many other fun DIY projects.