Påskägg “make-over” –
Easter egg make-over

Påskägg "make-over" - Craft & Creativity

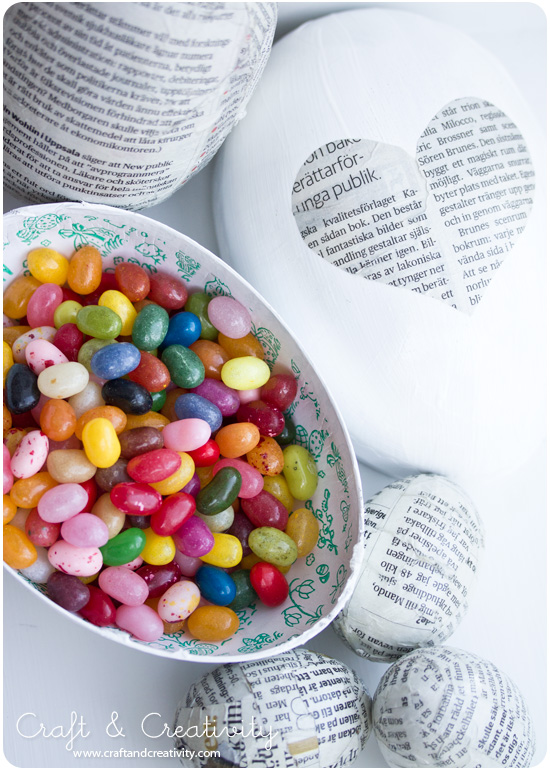
Påskägg är en viktig del i vår familjs påskfirande och det är inte bara barnen som förväntar sig ett ägg fyllt med godsaker under kudden på påskaftons morgon. 😉 Istället för att köpa nya ägg år för år fick jag idén att återvinna gamla påskägg men ge dem ett nytt utseende.
————-
Candy filled easter eggs are an important part of our family’s Easter celebration and it’s not just the kids who expect an egg filled with sweets under their pillow on Easter Eve morning. 😉 Instead of buying new eggs every year, I got the idea to recycle old Easter eggs but give them a new look.

Påskägg "make-over" - Craft & Creativity

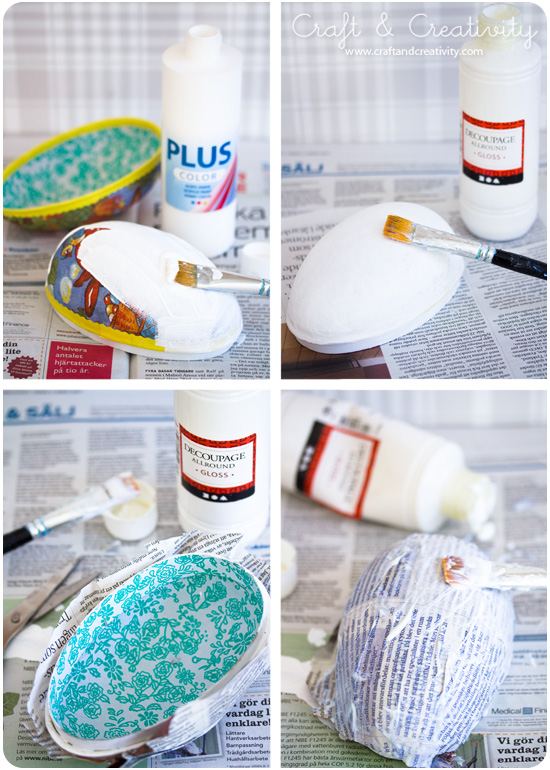
I förrådet har vi en hel plastback full med påskägg från många påskar tillbaka. Jag valde ut ett par av dem och gav dem en riktig make-over. Först och främst målade jag dem med vit hobbyfärg, i mitt fall Plus Color hobbyfärg eftersom den täcker bra och torkar fort. Två lager färg blev lagom. När färgen torkat penslade jag på ett lager decoupagelack. Jag klippte ut en stor bit tidningspapper och klädde ägghalvorna var för sig (remsor eller småbitar av papper fungerar också). Sedan penslade jag ytterligare ett lager decoupagelack på ytan. För att släta till papperet drog jag med fingrarna över ytan. Kladdigt men effektivt! Jag avslutade med att klippa bort överflödigt papper.
——————
In our basement we have a whole box filled with Easter eggs from many Easters past. I picked out a couple of them and gave them a real make-over. First, I painted them with white hobby paint. Two coats did the trick. When the paint had dried, I brushed on a layer of decoupage glue/lacquer (you could also use Mod Podge). I cut out a big piece of newspaper and dressed each half of the eggs separately with the paper (you could also try strips or small pieces of newspaper). When I was done with that, I used the brush to add another coat of decoupage on top. To smooth the paper out, I drew with my fingers over the surface. Messy, but effective! I finished off by cutting away the excess paper.

Påskägg "make-over" - Craft & Creativity

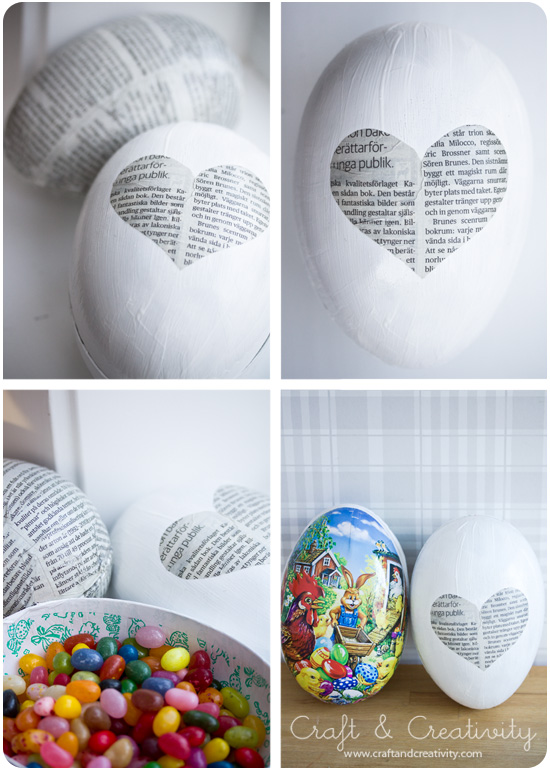
Ett av äggen täckte jag bara delvis med tidningspapper. Jag klippte ut ett hjärta, penslade på decoupagelack på mitten av ägget, placerade dit hjärtat och lackade ovanpå. En annan idé som jag inte hann testa nu var att dekorera de vitmålade äggen med vattenfärg eller tuschpennor t ex. Kan bli hur fint som helst! Något för det traditionsenliga familjepysslandet på påskafton, eller vad säger du mamma? 🙂
————
I chose to cover one of the eggs only partially with newspaper. I cut out a heart, brushed decoupage on the center of the egg, place the heart there and added a coat of decoupage on top. Another idea I had (but didn’t have time to try) was to decorate the white painted eggs with watercolor or markers, for example. Could look very nice! Something for our Easter Eve traditional family crafting, don’t you think mom?  🙂

Bygg ditt eget kakfat –
Make your own cake stand

Bygg ditt eget kakfat - Craft & Creativity

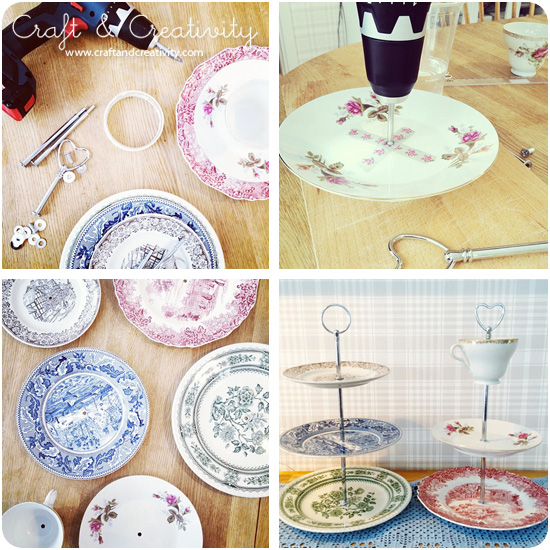
I lördags roade jag mig med att bygga kakfat. Hur kul som helst! Dock glömde jag kameran på kontoret så steg-för-steg bilderna nedan är tagna med mobilen. Ni som följer mig på Instagram kanske såg dem redan i lördags.
——-
Last Saturday, I amused myself by building cake stands. For those of you non-Scandinavian, Etsy is probably the right place to look for cake stand parts. It was so much fun! However, I forgot my camera at the office so I hade to take the step-by-step photos with my mobile phone. Those of you who follow me on Instagram might already have seen them.

Bygg ditt eget kakfat - Craft & Creativity

Från det att jag började diska porslinet tills det att mina båda kakfat var klara tog det inte ens 45 min. Det tycker jag var snabbt! Det var verkligen mycket enklare än jag trodde. Instruktioner för att bygga ett eget kakfat följer ofta med när man beställer kakfatsdelar. För att borra i porslin behöver man en kakelborr som man sätter i sin vanliga borrmaskin. Om man vill ha ett extra runt och fint hål så byter man kakelborren mot en diamantborr mot slutet av borrningen.
——–
From the moment I started washing the china, until my two cakes stands was ready, it took less then 45 minutes. It felt quick and it was much easier then I thought. Instructions for building a cake stand is included when you buy your kit. To drill holes through porcelain you need a tile drill bit that you use in your regular drill machine. If you want extra round and fine holes you can replace the tile drill bit with a diamond drill bit towards the end of the drilling. 

Bygg ditt eget kakfat - Craft & Creativity

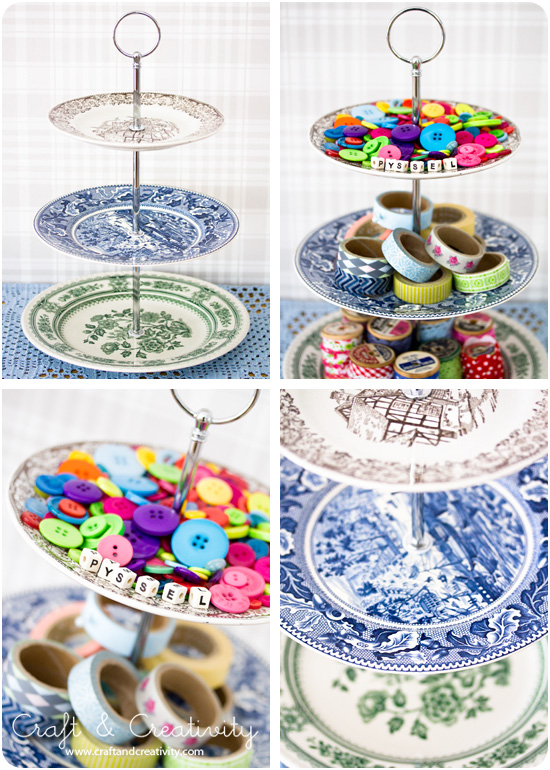
Det roliga med att bygga egna kakfat är att man kan mixa och matcha porslin lite som man vill. Du kanske har fat, skålar eller koppar hemma som du vill använda? Annars är det lätt att hitta gammat fint porslin på loppis, för en billig slant.
———-
The great thing about building your own cake stands is that you can mix and match the china as you want. Perhaps you have plates, bowls or cups at home that you could use? Otherwise, it’s easy to find pretty porcelain at a flea market for a small sum.

Bygg ditt eget kakfat - Craft & Creativity

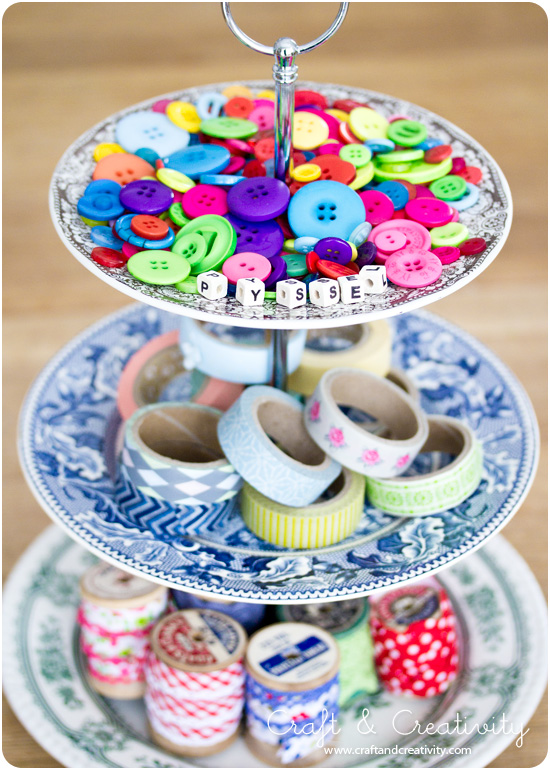
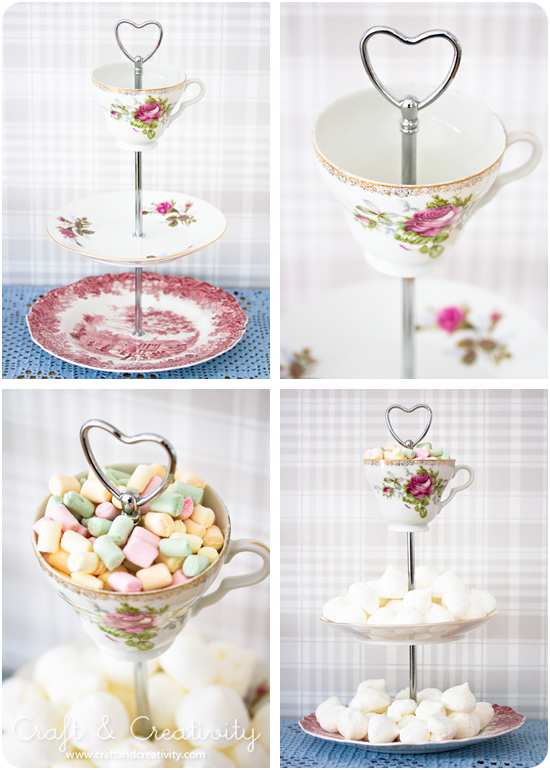
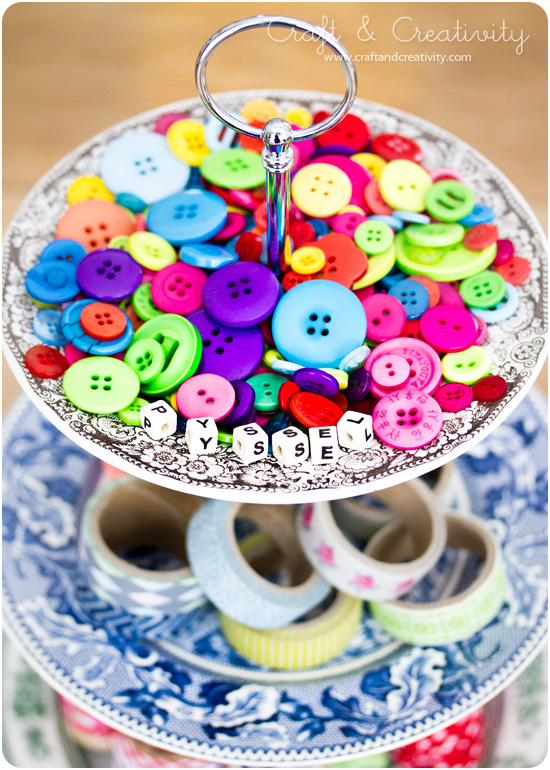
Kakfaten kan man använda till allt möjligt. I lördags fyllde vi ett fat med smågodis som vi mumsade i oss till Melodifestivalen. Faten fungerar säkert toppen till uppläggning av snittar till en fest, kakor (förstås) och cupcakes. Eller så gör man som jag och använder sitt fat till något helt annat – pysselmaterial! 🙂
———-
The cake stands can be used for many things. On Saturday night we filled it with candy. The plates should also be perfect for afternoon tea sandwiches, cakes (of course) or cupcakes. Or do like me and use a cake stand to store something completely different – craft material! 🙂

Bygg ditt eget kakfat - Craft & Creativity  Bygg ditt eget kakfat - Craft & Creativity

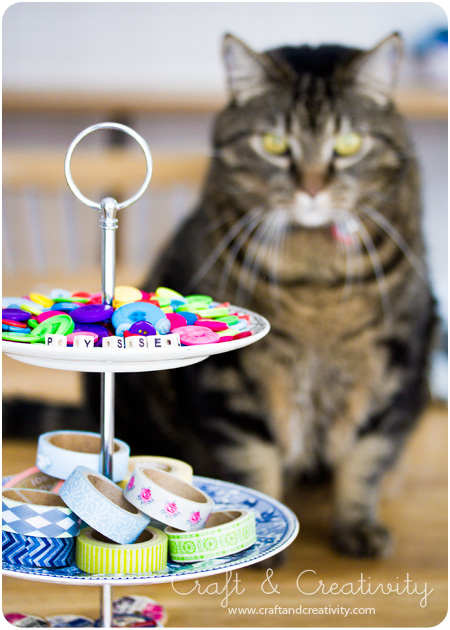
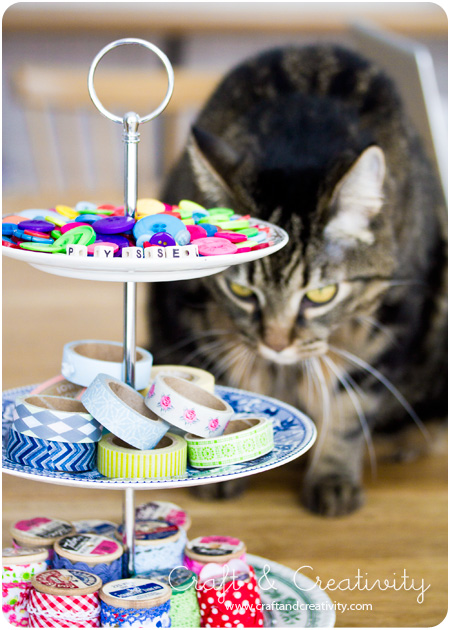
Minus undrar vad det är för konstiga kakor som ligger på fatet… /
Minus is curios about those weird looking cookies … 

Bygg ditt eget kakfat - Craft & Creativity

Loppisfynd – Flea market find

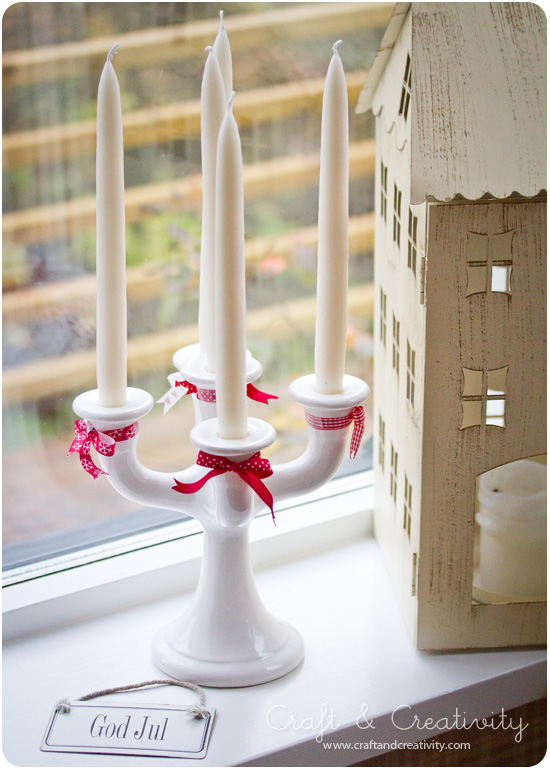
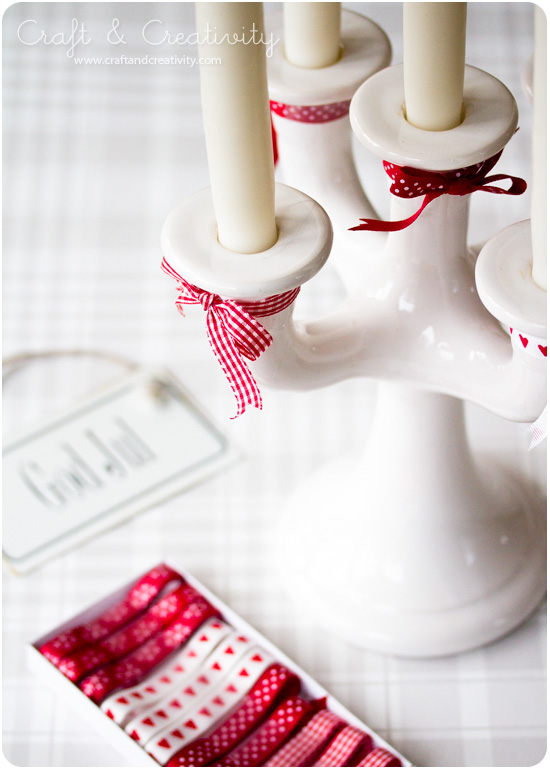
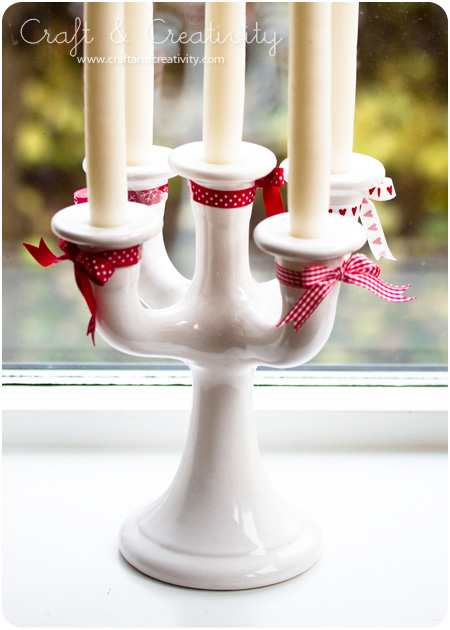
Jag vet inte om ni lade märke till porslinsljusstaken i förra inlägget. För mig har den blivit en ny favorit och nu är ju den perfekta tiden på året att tända ljus, så ofta som möjligt. Det är visserligen ingen adventsstake, men tål kanske att visas idag ändå. 😉
—-
I don’t know if you noticed the porcelain candle holder in my last post. It’s become a new favorite of mine, and this is the perfect season to light candles, as often as possible.

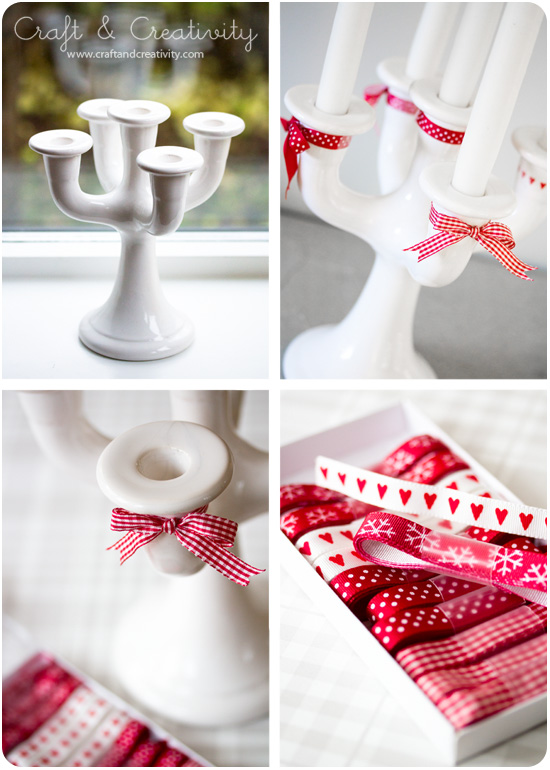
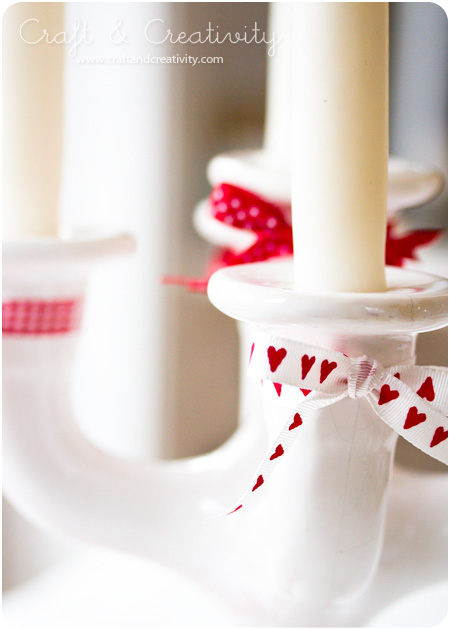
Jag köpte ljusstaken på loppis, för ynka tjugolappen och pyntade till den med dekorationsband från egna butiken. /
I bought the candle holder at a flea market for 20 SEK (2 Euro / 3 USD) and decorated it with ribbons from my own web shop.


Ps. Det syns att dessa bilder är tagna tidigare i veckan, då inte snön hunnit göra trädgården vit och vintrig. 😉 /
Ps. It’s obvious that these pictures were taken earlier in the week, before the snow made the garden all white and wintry. 😉 

Adventsstjärnor i ny skrud –
Advent star makeover

Förra fredagen fick vi fint besök av Karin och hennes dotter Freja från Pysselbolaget. Vi pysslade och bollade idéer tillsammans en hel eftermiddag och kreativiteten sprutade, både bland vuxna & barn. Så roligt! Dessa omgjorda adventsstjärnor är ett av många resultat av denna dag. Idén var att pynta färdiga adventsstjärnor på olika sätt. Antingen köper man nya eller så gör man om gamla som man har hemma.
—–
Last Friday we got a nice visit from Karin and her daughter Freja from Pysselbolaget. We crafted together and exchanged ideas an entire afternoon. There was a flow of creativity in the air, both among us adults and the children. We had so much fun! These pimped Advent stars are one of many result of this day. The idea was to decorate pre-made Advent stars in different ways. You could either buy new ones or use old ones from your stash. 

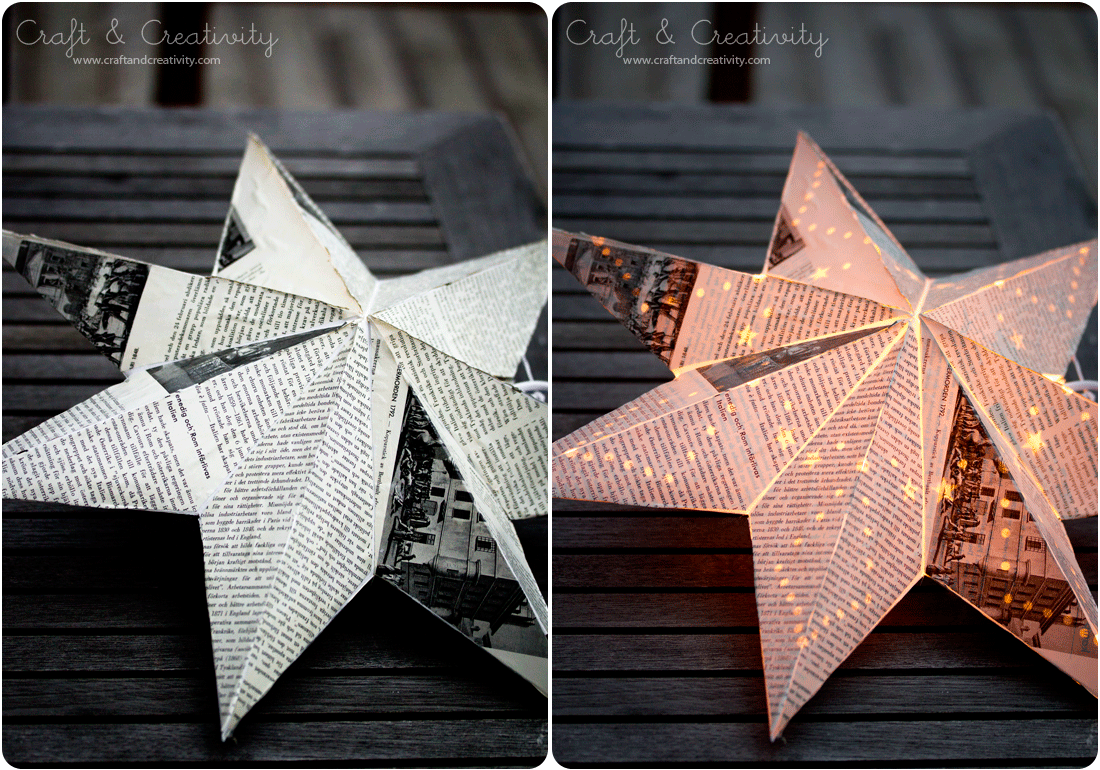
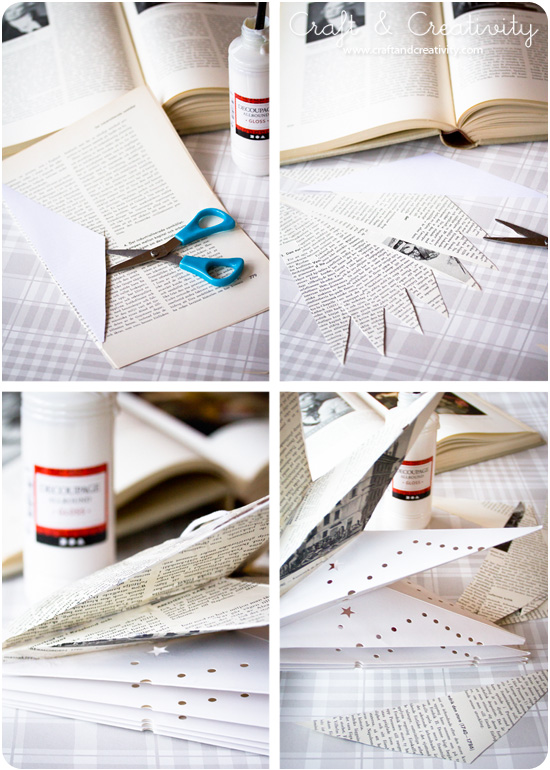
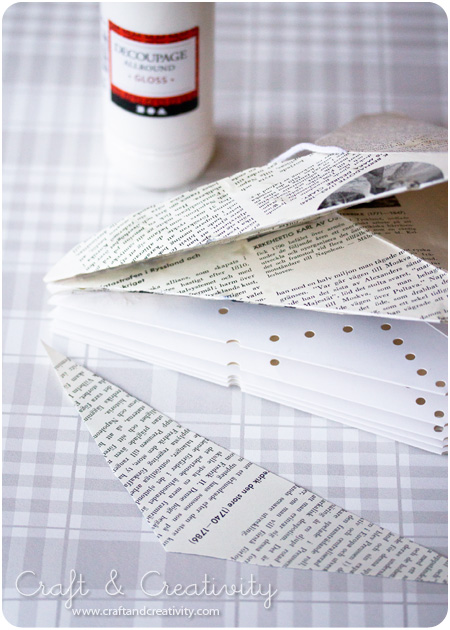
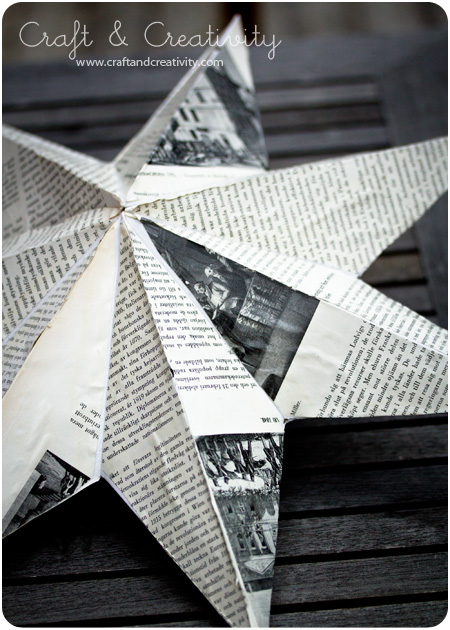
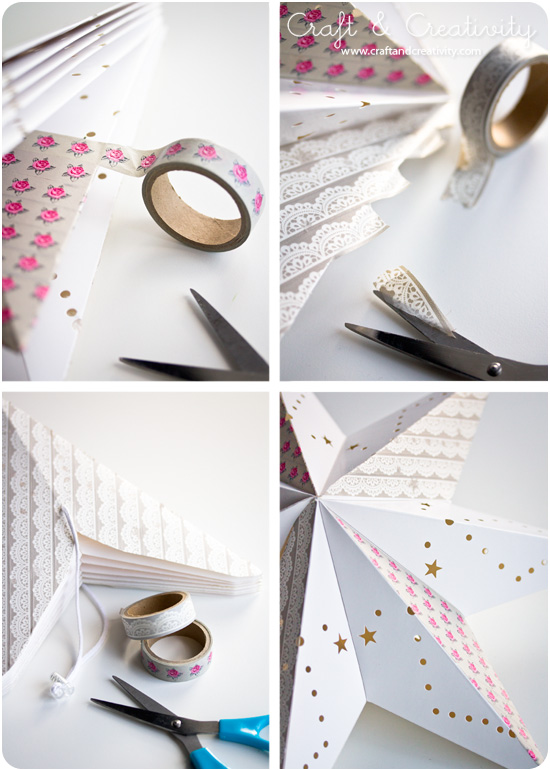
Jag valde att täckte en stjärna med boksidor från en gammal uppslagsbok och limmade och lackade med decoupagelack. Enklast är att börja med att klippa ut en trekantig mall som passar formen av stjärnans udd. Använd sedan mallen för att få rätt form på papperet. Se bilderna ovan. Pensla limmet på stjärnan, lägg papperet på plats och släta ut eventuella ojämnheter med fingrarna. Täck en udd i taget och vänd sedan på stjärnan och ta andra sidan. Blir kanterna ojämna kan du putsa dem med en sax. När stjärnan är helt täckt, lacka ytan med samma decaupagelack som du använde för att limma med. Jag använde blank lack men så här i efterhand hade jag hellre använt den matta varianten. Men det är ju en smaksak.
—–
I chose to cover one star with book pages from an old encyclopedia and used decoupage lacquer (i.e. Mod Podge) for glue and finish. I found that the easiest way is to start by cutting out a triangular template that fit the shape of the points of the star. Then use the template to get the correct shape when cutting the book pages. See the pictures for guidance. Brush decoupage laquer on the star, put the paper in place and smooth out any irregularities with your fingers. Cover one point at a time and then turn the star around and do the other side. If the edges get uneven, you can trim them with a pair of scissors. When the star is completely covered, paint the surface with the same decoupage laquer you used to glue with. I chose the glossy kind, but in retrospect, I would rather have used the matte one. But that’s just a matter of taste. 


A comment for you non-Swedish readers: In Sweden it’s very common to hang these Advent stars in the windows on the first Advent before Christmas. 

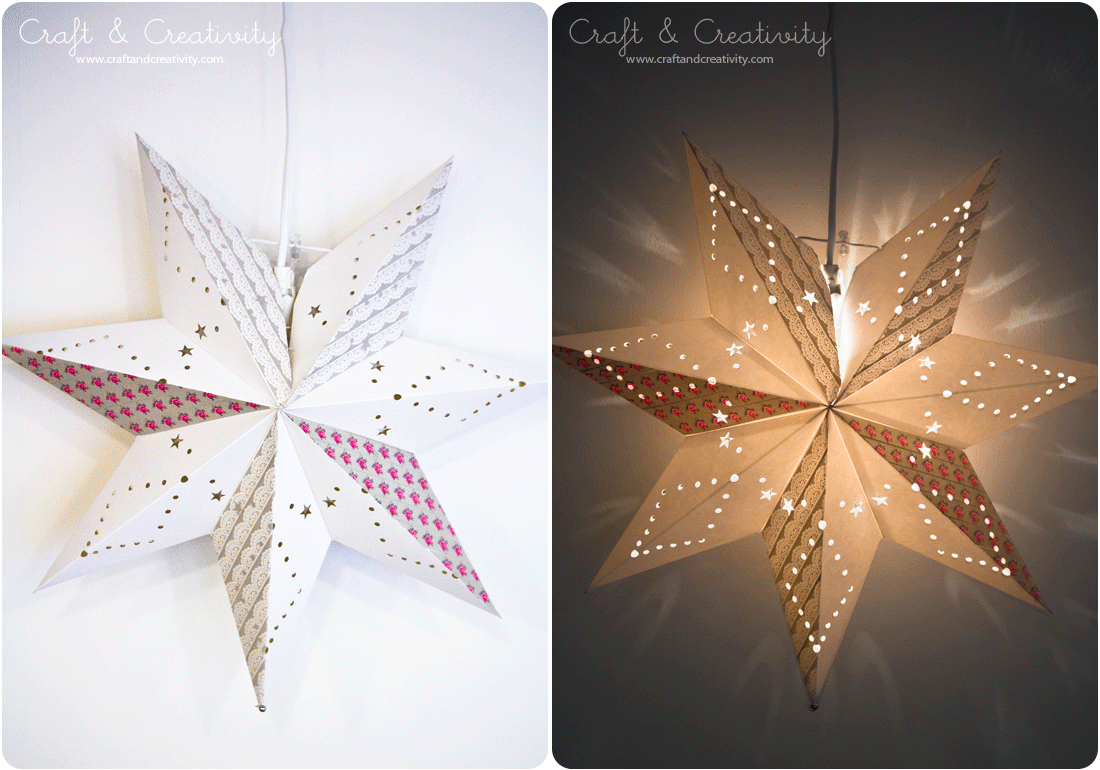
Blinka lilla stjärna. Vår andra stjärna tejpade vi med papperstejp, s k washitejp. Ganska effektfullt det också och mindre kladdigt att jobba med än lim/lack. /
Twinkle twinkle little star. We decorated our second star with paper tape, so called washi tape. Pretty effect-full, and less messy to work with compared to glue/laquer. 

Tejpa hela eller delar av stjärnan. Trimma bort överflödig tejp med en sax och du är klar! Tips: Ta även en titt hos Pysselbolaget och se vad Karin & Freja gjorde med sina stjärnor!
——
Tape the whole or parts of the star. Trim off excess tape with scissors and you’re done! Tip: Take a look at Pysselbolaget and see what Karin & Freya made with their stars!

Julgranskulor i papper –
3D paper ball ornaments

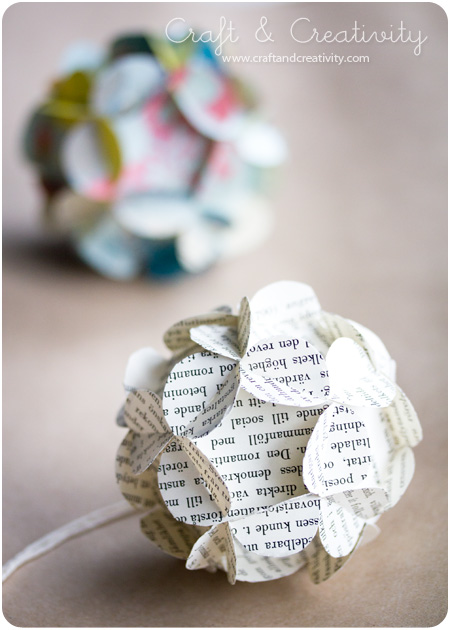
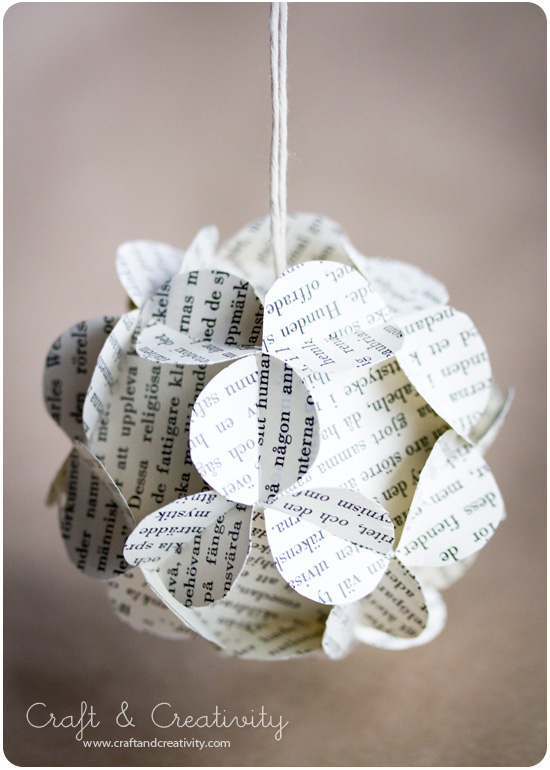
För ett år sedan såg jag en sådan fiffig beskrivning på flätade pappersbollar hos How About Orange. De dyker upp då och då på Pinterest och påmint mig om att de finns där på min mentala vill-pyssla-lista. I helgen skred jag till verket och så här blev resultatet.
——
One year ago, I spotted a clever tutorial on how to make these braided paper balls at How About Orange. These 3D paper balls pop up now and then on various Pinterest boards, and have reminded me that they are on my mental to-craft-list. This weekend I actualized my plan and here’s the result. 


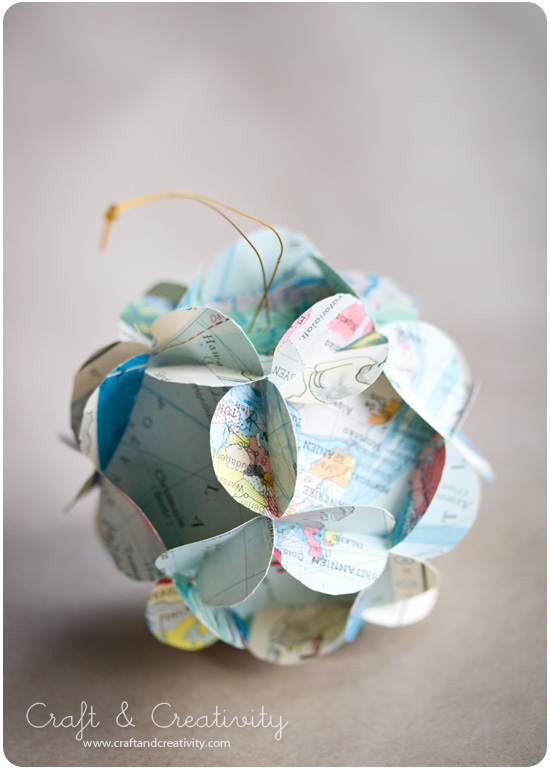
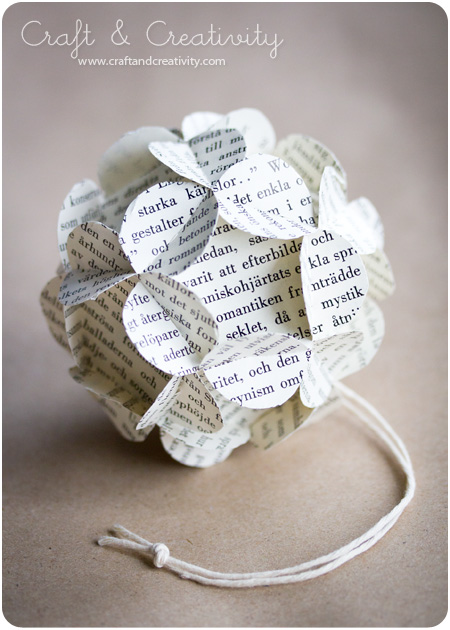
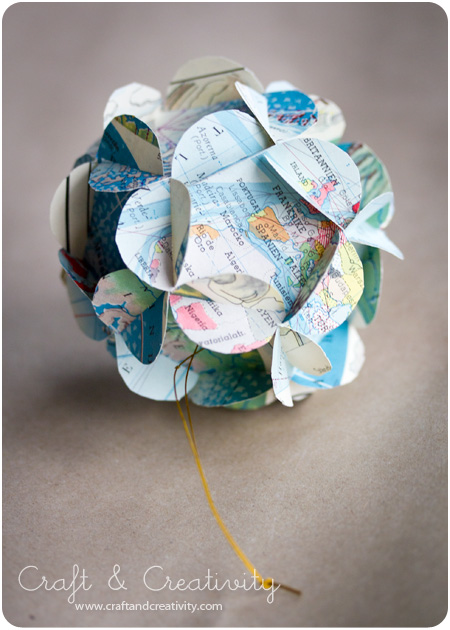
Kulan till vänster är saxad ur en gammal loppisfyndad uppslagsbok och den till höger ur en gammal kartbok. Återvinning till 100%. Jag tänkte att de kan vara fina att hänga i granen. /
The ball on the left is cut out from an old encyclopedia I found at the flee market and the one on the right from a vintage atlas. 100% recycling. I thought they might look nice hanging in the Christmas tree.


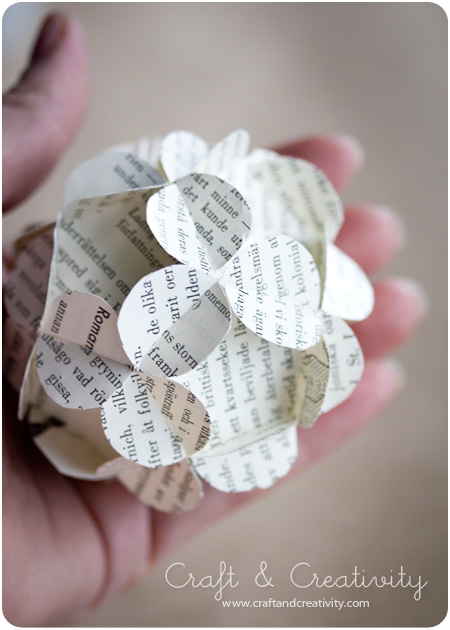
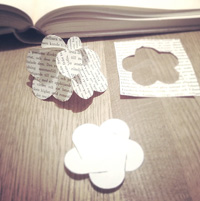
Mallarna ser ut som blommor Jag skrev ut mallen för den minsta pappersbollen och då blev min boll ca 8 cm i diameter. Det finns två större mallar också om man vill göra lite maffigare bollar. De var inte alls svåra att göra. För att göra en boll behöver man tolv “blommor” och för att effektivisera så lade jag mallen på boksidorna och klippte två i taget.  Det finns tydliga och bra instruktioner på How About Orange där du även laddar ner mallarna i pdf-format.
——–
The templates look kind of like flowers. I printed the templates for the smallest paper ball and mine turned out to be about 3 inches (8 cm) in diameter. There are two larger sizes of templates available to print if you want to make lager ones. Thea are not at all difficult to make. You will find excellent instructions over at How About Orange, where you also can download the templates. 

Julkulor i ny skrud –
Christmas bauble makeover

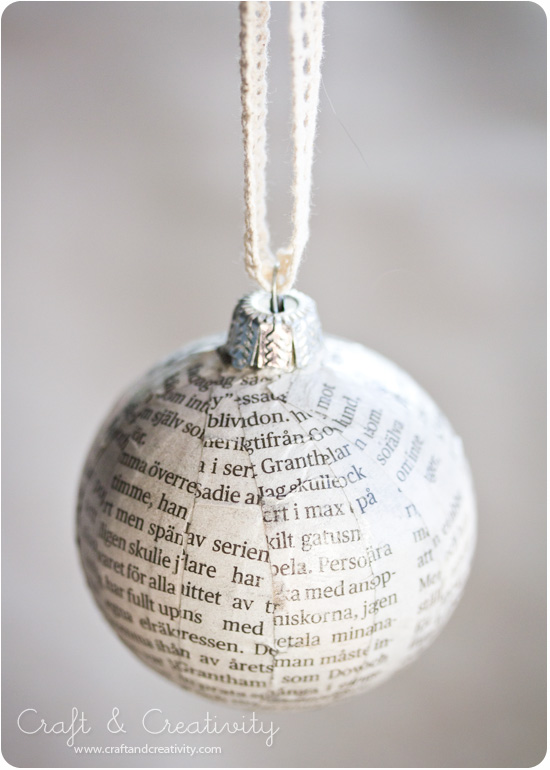
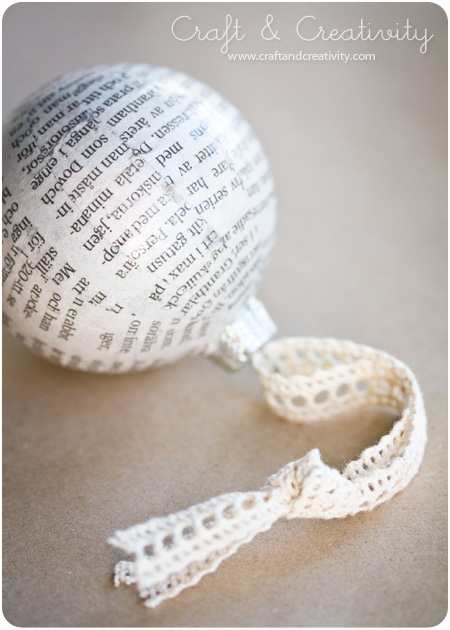
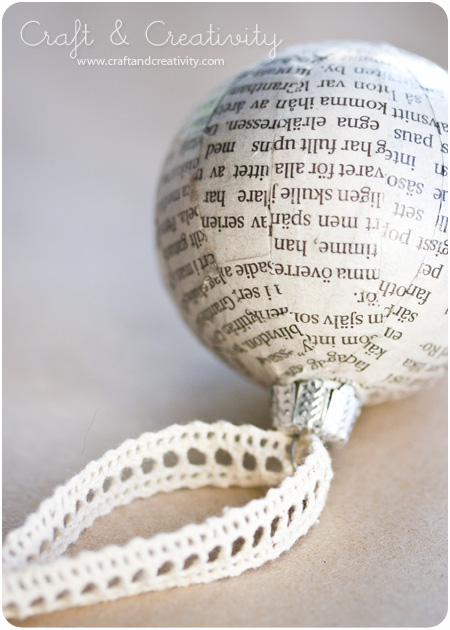
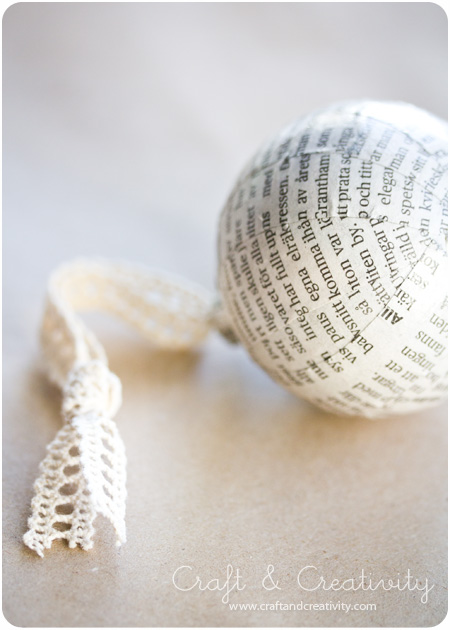
Vem har inte ett gäng gamla och lite halvtråkiga julgranskulor liggande i en låda? Täck dem med remsor av tidningspapper och de får ett helt nytt utseende! 🙂
—-
Who doesn’t have a bunch of old and boring christmas baubles lying around? Cover them with newspaper strips and give them a whole new look! 🙂


Börja med att klippa ca 1 cm breda remsor av tidningspapper. Pensla på decoupagelack på en pappersremsa i taget och täck julgranskulan från toppen till botten. När kulan är helt täckt penslar du på ett extra lager lack ovanpå alltsammans. Jag använde blank decoupagelack. Fäst ett fint band i kulan och häng för att torka.
—-
Start by cutting strips of newspaper, approximately 1 cm (0.4 inch) wide. Brush decoupage lacquer (or Mod Podge) on a strip of paper at a time and cover your Christmas bauble from top to bottom. When the ball is completely covered, apply an extra layer of decoupage lacquer on top. I used glossy decoupage lacquer. Attach a pretty ribbon and hang to dry.


Juliga burkar – Christmas glass jars


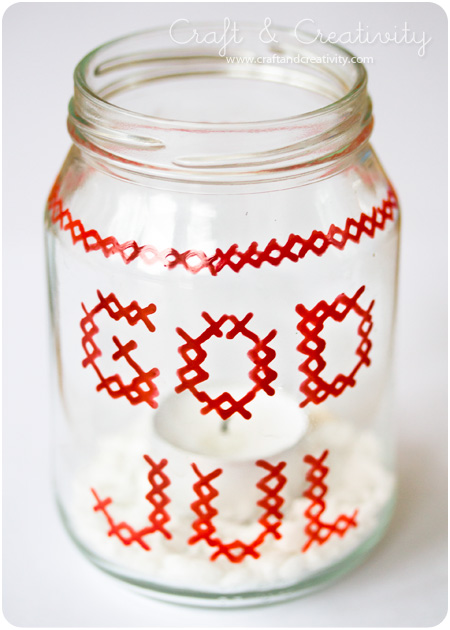
Jag såg några burkar med målat korsstygsmönster i en affär och fick idén att göra det själv och dessutom passa på och återvinna några av de gamla glasburkar som jag har liggande hemma i skåpen. /
I saw some cross stitch decorated jars at a local shop and decided to make my own and at the same way recycle some of those old glass jars I have in my cabinets. 

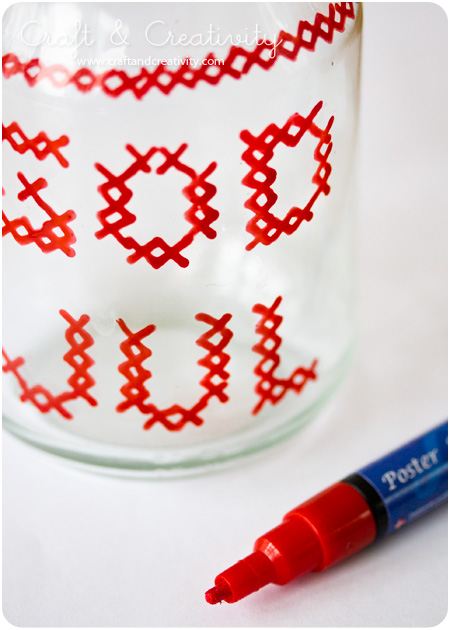
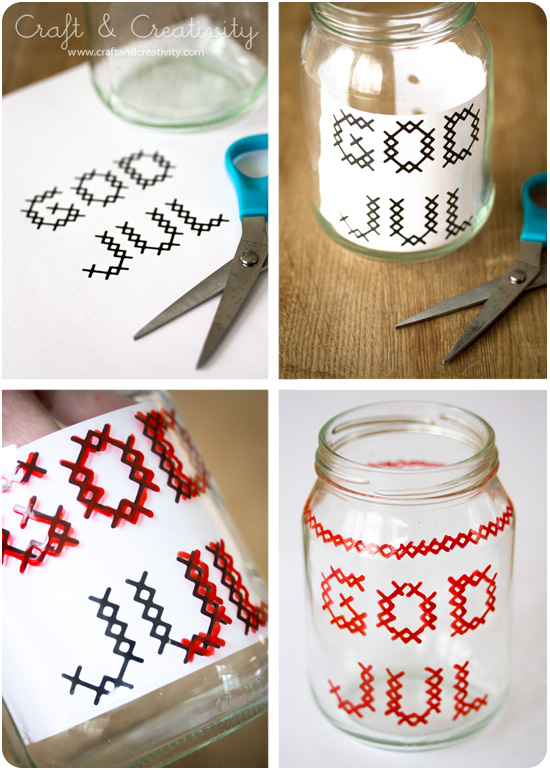
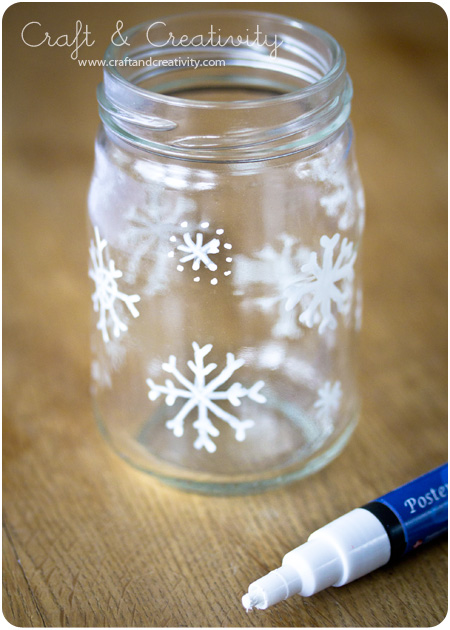
Jag skrev GOD JUL i datorn, skrev ut på skrivaren och klippte till pappersarket så det passade inuti burken. Sedan kalkerade jag med en röd tusch på utsidan av glaset. Typsnittet heter Costura och går att ladda ner gratis på Font Squirrel. Man kan använda glastuschpennor men jag använde Poster Hobby Marker som fäste väldigt bra. Bör dock inte diskas i maskin.
—-
I wrote GOD JUL (Swedish for Merry Christmas) on my computer, printed and trimmed the paper to fit inside the jar. I then traced the text with a red marker on the glass. The font is called Costura and can be downloaded for free at Font Squirrel. You can use regular glass & porcelain markers, but I used Poster Hobby Markers and they worked very well on glass. Not dishwasher-safe though. 


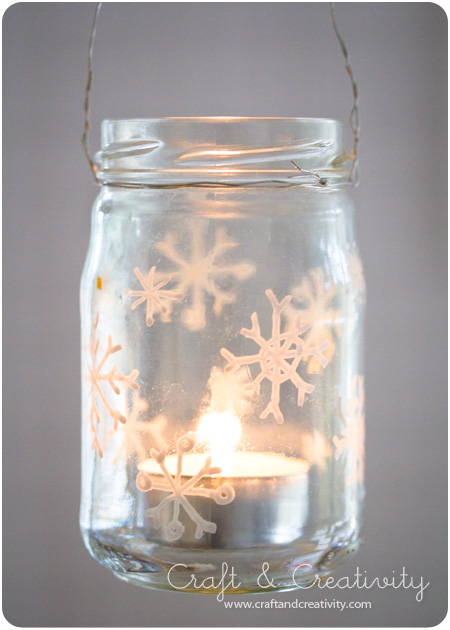
På några burkar ritade jag snöflingor med vit Hobby Marker. För att göra en lykta, virade jag ståltråd runt toppen av burken och gjorde en båge för upphängning. /
On some of the jars I drew snowflakes with a white Hobby Marker. To make a lantern, I twisted wire around the top and made a loop for hanging. 

Mer bokåtervinning –
More bookrecycling

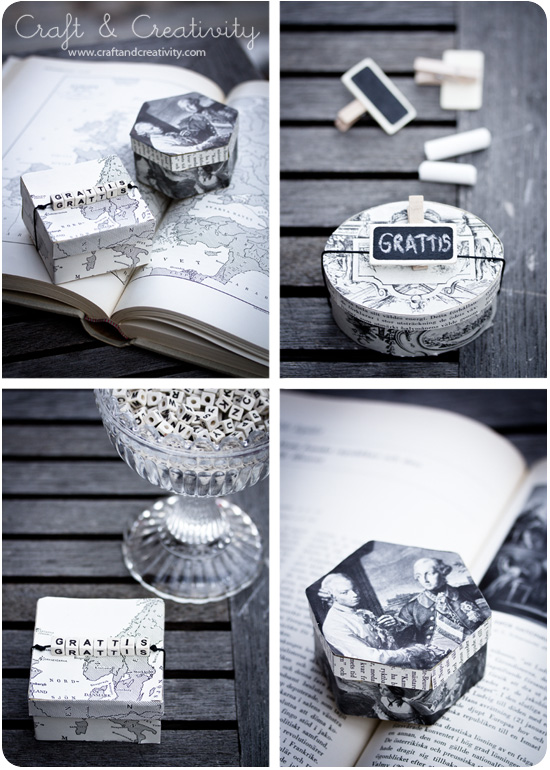
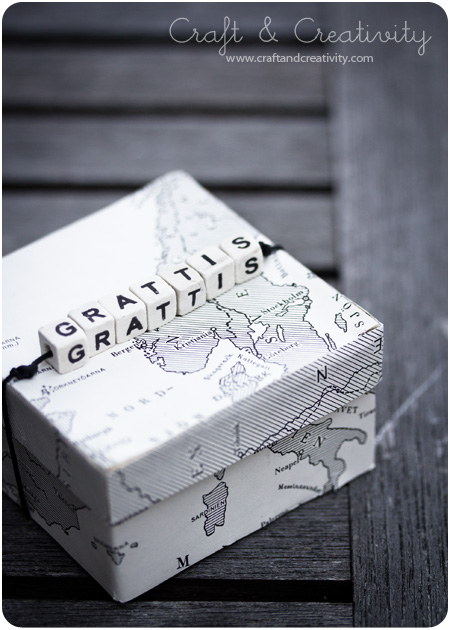
Jag pysslar vidare med mina loppisfyndade böcker. Här har jag gjort presentaskar av pappersaskar som jag täckt med boksidor. Istället för gratulationskort eller presentetiketter använde jag söta minigraffeltavlor med klämma och på några askar trädde jag träpärlor med bokstäver på svart läderband och virade runt. I askarna kan man lägga en liten hälsning från avsändaren.
—-
I’ve been doing some further crafting with my flea market bargain books. Here I’ve made gift boxes out of paper boxes covered with book pages. Instead of greeting cards or tags, I used cute miniature chalkboards with clips and with some of the boxes I threaded wooden letter beads on leather cord and wrapped around. Inside the boxes you can place your greetings. 

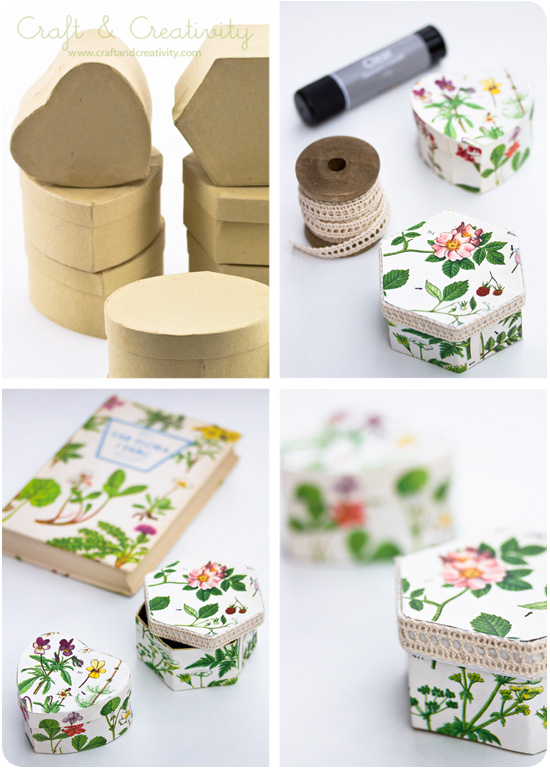
En gammal florabok fick också bidra till med ett par sidor till askarna. Jag experimenterade dessutom med att limma fast ett textilband runt ena locket. /
An old botanical book was also turned into box covers. I chose to experiment with some fabric ribbon glued around the lid.

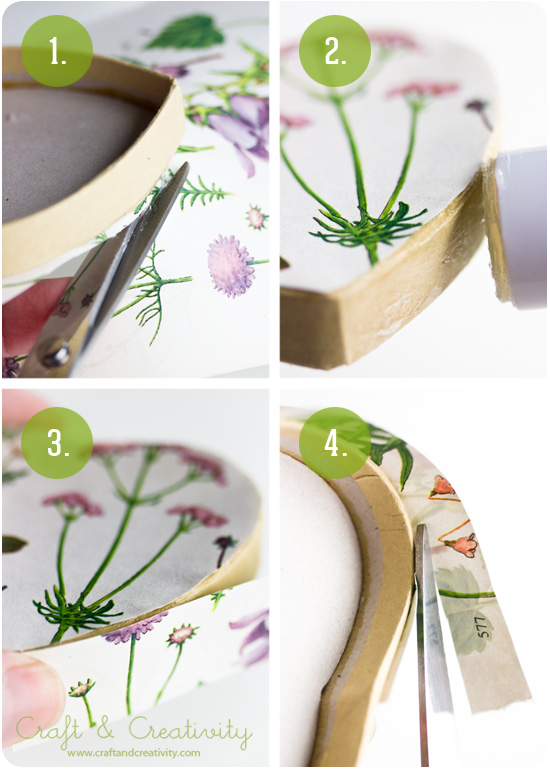
Gör så här: 
1. Täck ovansidan av locket med papperslim, sätt papperet på plats och klipp rent.
2. Limma lockets sidor.
3. Klipp remsor av papperet och täck lockets sidor runt om.
4. Klipp rent. Gör likadant med askens sidor. Dekorera eventuellt med tygband.
—–
Do like this: 
1. Start by covering the top of the lid with paper glue, place your paper on top and trim.
2. Glue the sides of the lid.
3. Cut strips of paper and cover the sides of the lid, all around.
4. Trim. Repeat the same procedure with the box. Add a ribbon, if you like. 

Ska du ge bort bidrag till en resa? Lägg slanten eller resechecken i en ask och täck utsidan med en gammal karta. Vill man inte köpa pappersaskar kan man använda skokartonger eller vika sin egen ask. /
Are you planning to give away a travel check? Put in in a box and cover the box with an old map. If you don’t want to buy paper boxes, you can use shoe boxes or fold your own.

Bokåtervinning – Recycling old books

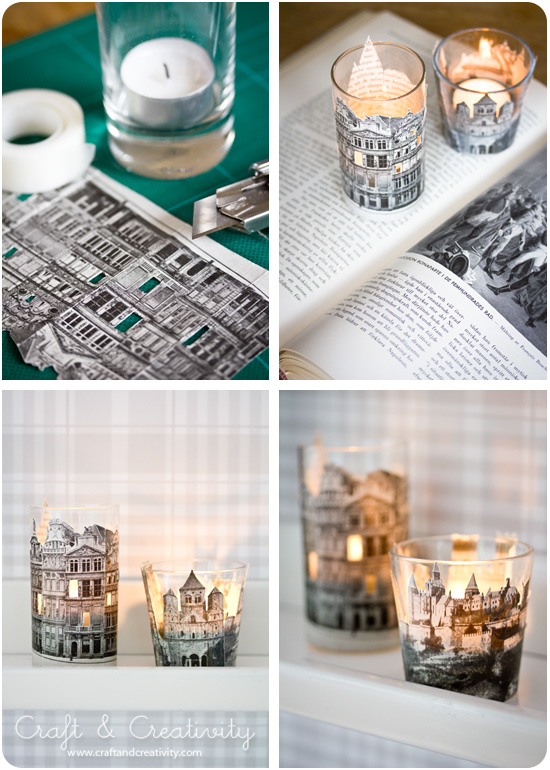
Efter pärlträffen förra helgen var jag och mamma på loppis. Jag var på jakt efter gamla böcker och fick med mig sju tunga, tjocka uppslagsböcker hem. Jag ville testa en pyssel med utklippta pappershus runt ljushållare, som jag sett bland annat hos Sweet Paul.

After the bead meet last weekend, my mom and I went to a flea market. I was on the search for old books and I brought seven heavy encyclopedias with me home. The plan was to make paper house candle holders, like those I’ve seen at Sweet Paul’s.   

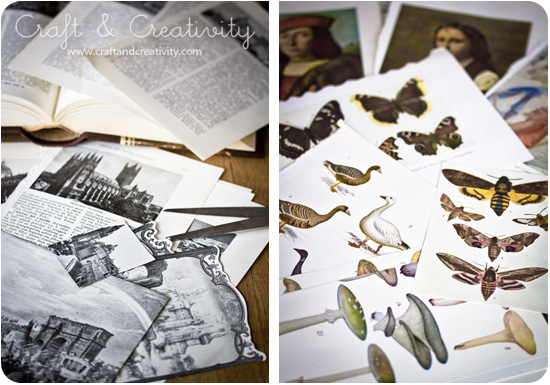
Det var egentligen fotografier på hus jag var ute efter men de lexikon och historieböcker jag fick med mig hem innehöll även vackra bilder på växter, djur, målningar och kartor. Massor med pysselmaterial för framtiden! Som den bokälskare jag är gjorde det lite ont i hjärtat att riva sönder böckerna men jag tröstade mig själv med att de var slitna och att de bara kostade 1 krona styck. Plus att de antagligen kommer sprida mer glädje som inredningsdetaljer än som dammiga gamla böcker på en loppis.
—–
It was originally looking for pictures of old houses, but the dictionaries and history books I came home with also contained beautiful illustrations of flowers, animals, paintings and maps. Lots of material for future crafting! Being the bookwork I am, it was with a little sadness in my heart that I tore the books apart. I consoled myself with the fact that the books were worn and only cost me 1 SEK (10 cent) each. Plus, they are likely to spread more joy as interior accents than dusty old books at a flea shop. 

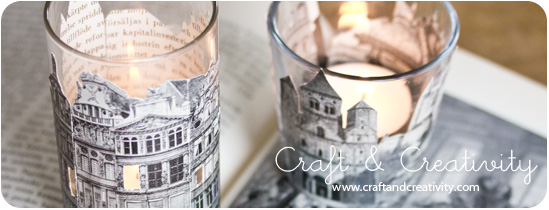
Jag klippte ut husen med en sax och skar ut några av fönstren med en hobbykniv, för att skapa en genomlysningseffekt. Sedan satte jag papperet runt dricksglas och tejpade ihop på baksidan. Slutligen klippte bort överflödigt papper för att passa glasets form. En annan idé för återvinning kan vara att använda gammal glasburkar.
—-
I cut out the houses with a pair of scissors and cut out a couple of the windows with an exacto knife to create a transparency effect. I wrapped the paper around small drinking glasses and and secured with tape at the back. Finally, I cut away any access paper. Another idea for recycling could be to use old jars instead of glasses. 

   
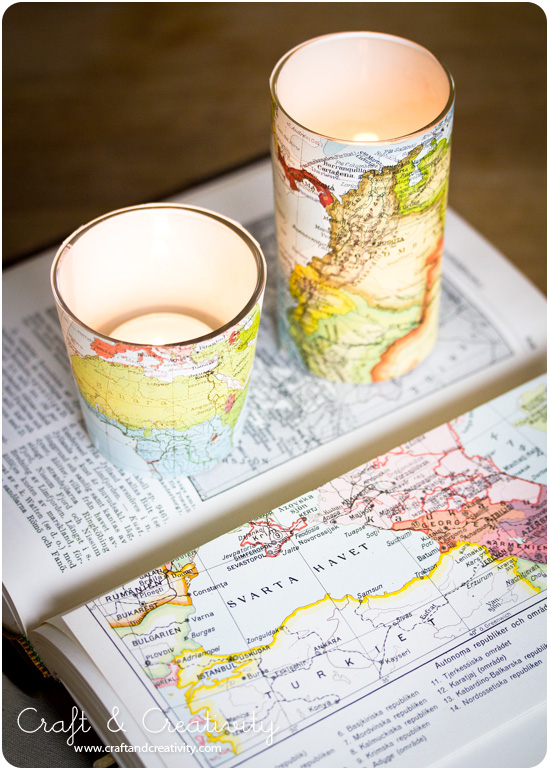
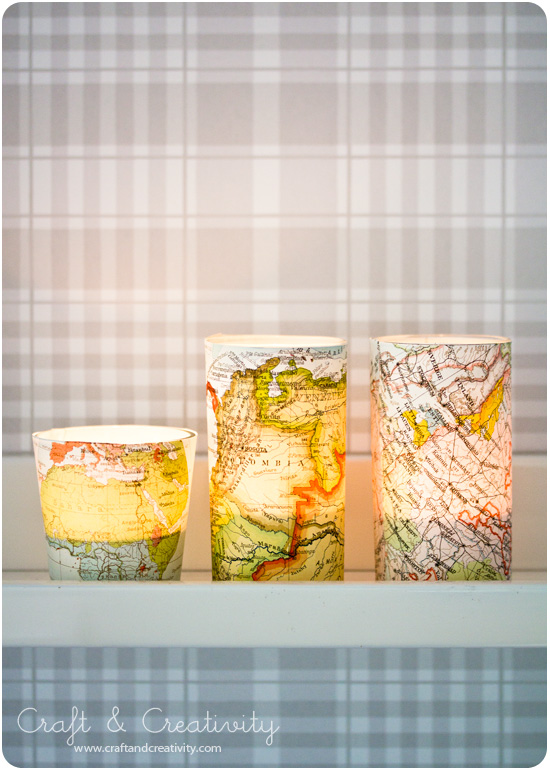
När jag väl var varm i kläderna fortsatte jag med kartorna och gjorde likadant med dem. /
While I was on a roll, I did the same with the maps. 


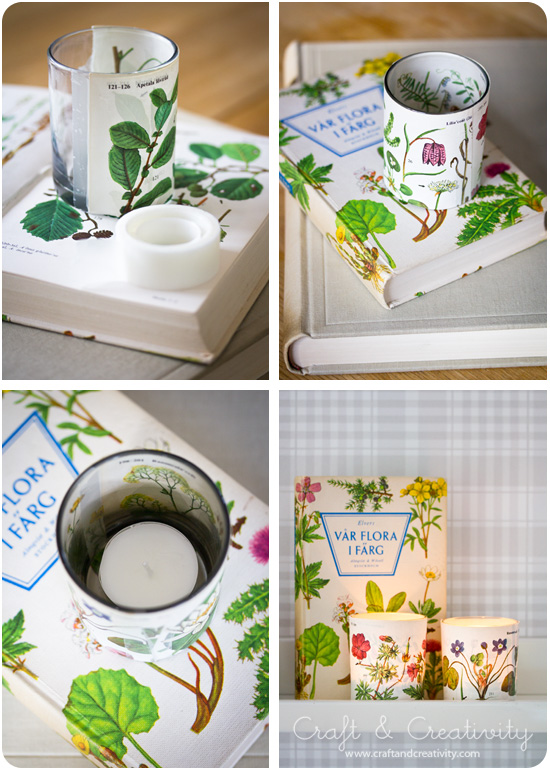
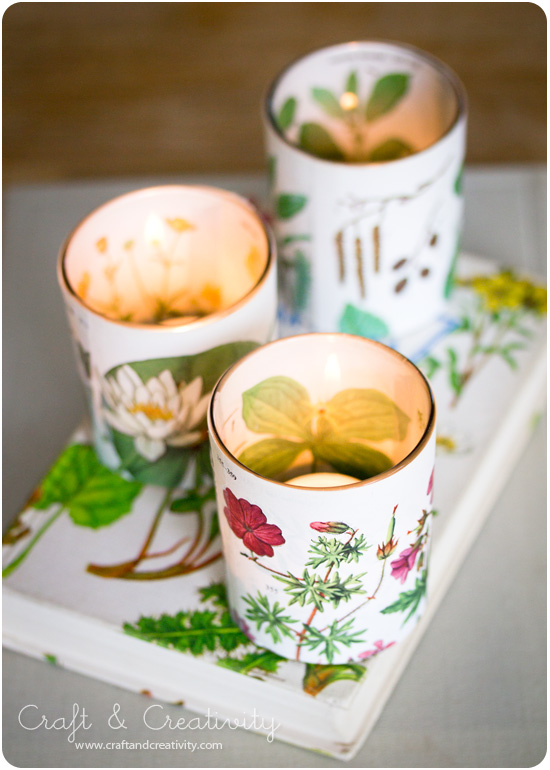
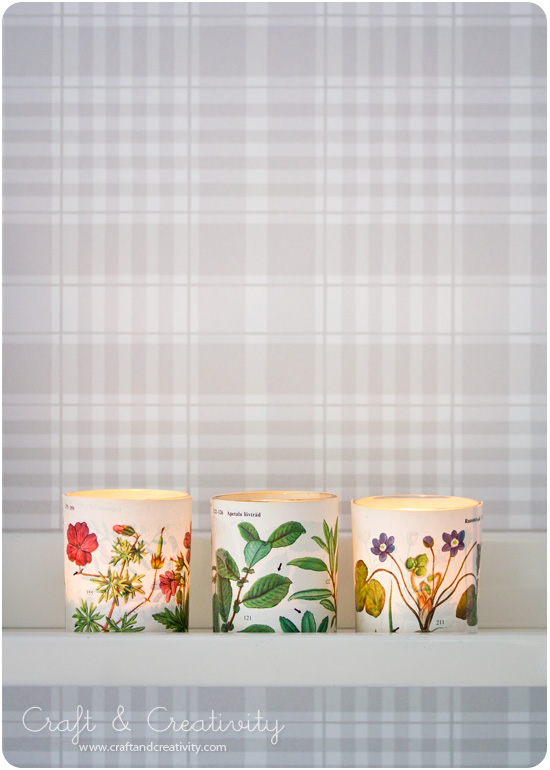
En gammal florabok som jag loppisfyndat tidigare fick också vara med och bidra till samlingen av ljuslyktor. De blev nästan finast av alla, tycker jag. Florabilder har jag använt förut när jag tejpade upp dem i hallen på övervåningen. /
An old botanical book from a previous flea market bargain-hunt also contributed to my collection of votives. I think they turned out to be the prettiest of them all. I’ve used botanical pictures before when I taped them to a wall in our upstairs hallway. 

Höstlyktor – Autumn Lanterns

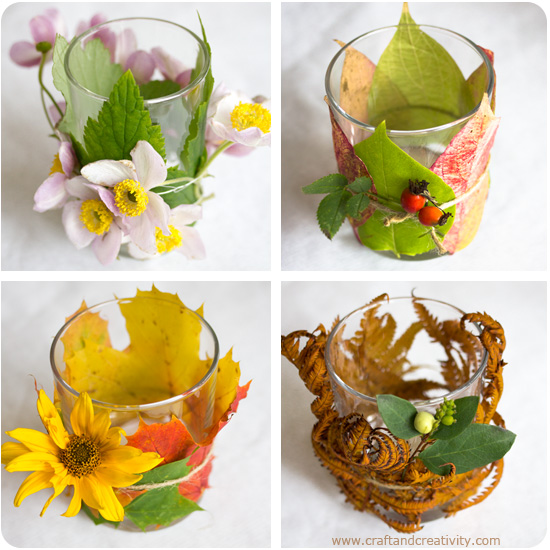
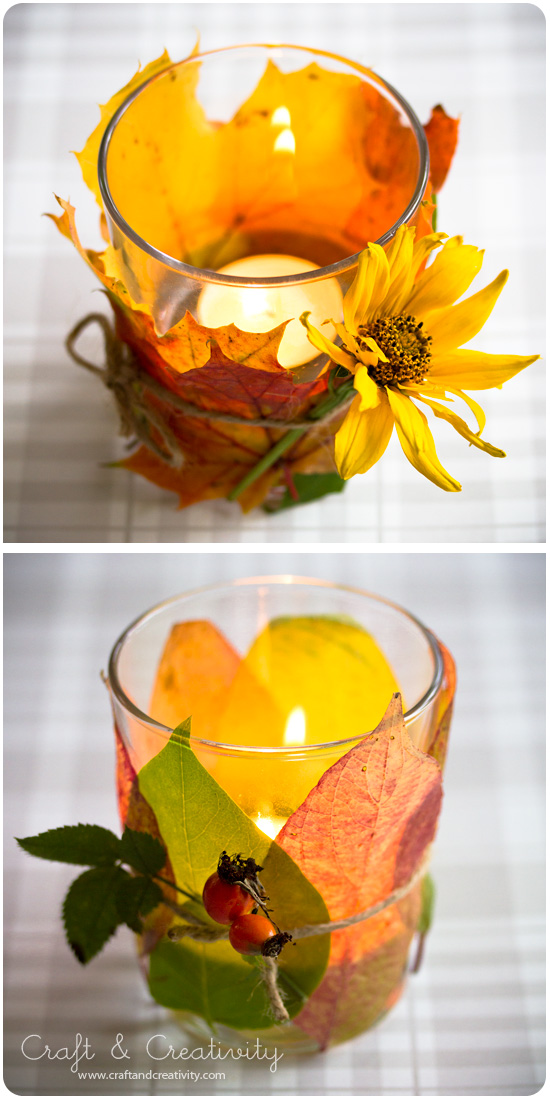
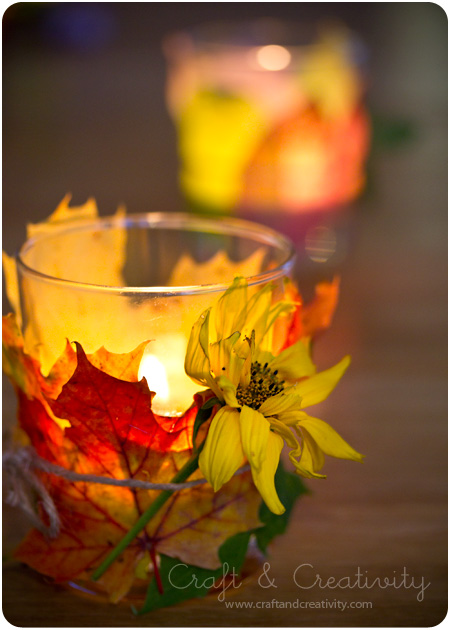
Blad & blomster i varma färger virade runt ett dricksglas med ett värmeljus i. Enkelt, billigt och mysigt i höstmörkret. Barnen och jag lekte skattjakt när vi letade efter de vackraste löven i trädgården.
—-
Leafs and flowers in warm colors wrapped around drinking glasses with a tea light inside. Easy, cheap and cozy for those ever darker autumn evenings. The kids and I played treasure hunt when searching for the most beautiful leaves in the garden.

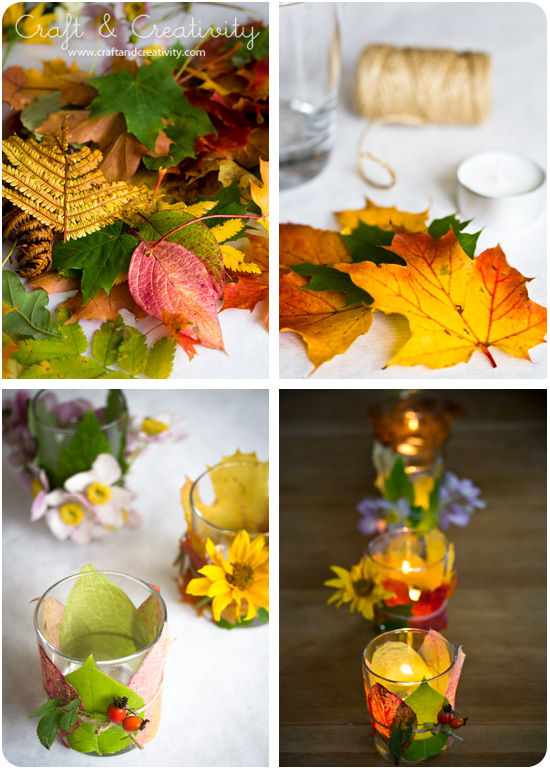
Du behöver: Dricksglas, värmeljus, hampasnöre eller garn, löv och höstblommor.
Gör så här: Placera dina höstlöv och blommor runt glaset och vira ett snöre runt. Knyt en knut. Lägg i värmeljuset, tänd det och njut.
OBS! Se till så att löven inte sticker upp för långt över glaskanten och framför allt –
lämna aldrig ett brinnande ljus utan övervakning!
—-
You will need: Drinking glasses, tea lights, hemp string or yarn, leaves and autumn flowers.
Do like this: Place your leaves and flowers around the glass and wrap a string around. Tie a knot. Add a tea light, lit it and enjoy.
NOTE! Make sure the leaves don’t stick up too far over the edge of the glass, and above all – never ever leave a burning candle unattended!

Löven torkar snabbt av värmen och rullar ihop sig lite, men det bidrar till charmen. /
The leaves will dry quickly because of the heat from the glass, and curl up bit. But this just adds to the charm.