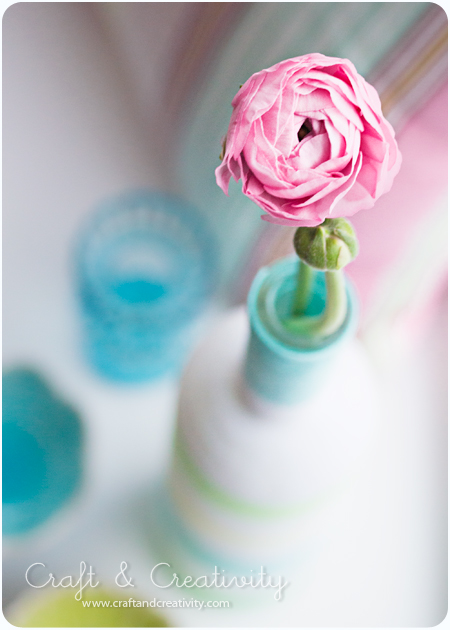
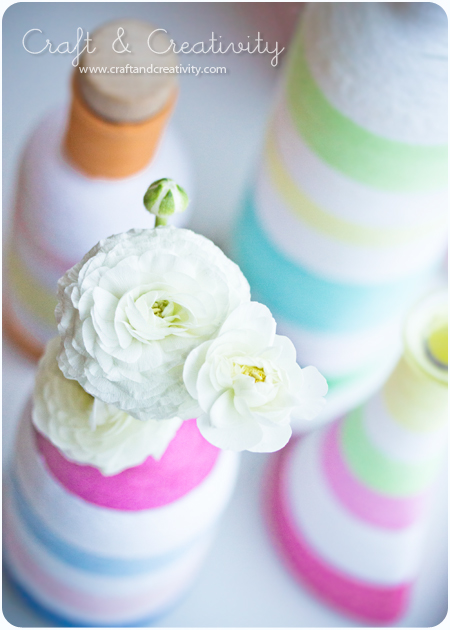
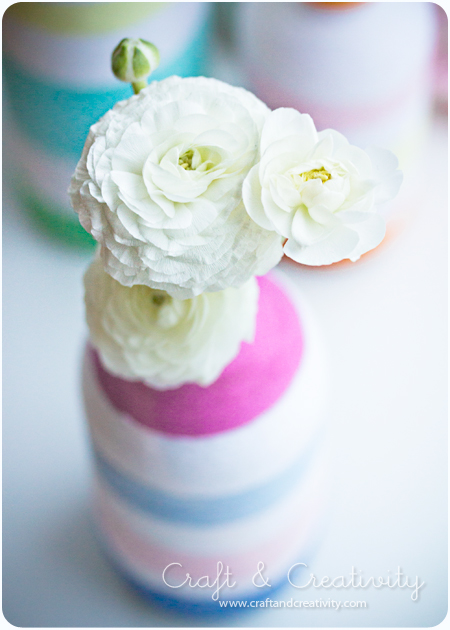
Garnlindade flaskor –
Yarn wrapped recycled bottles

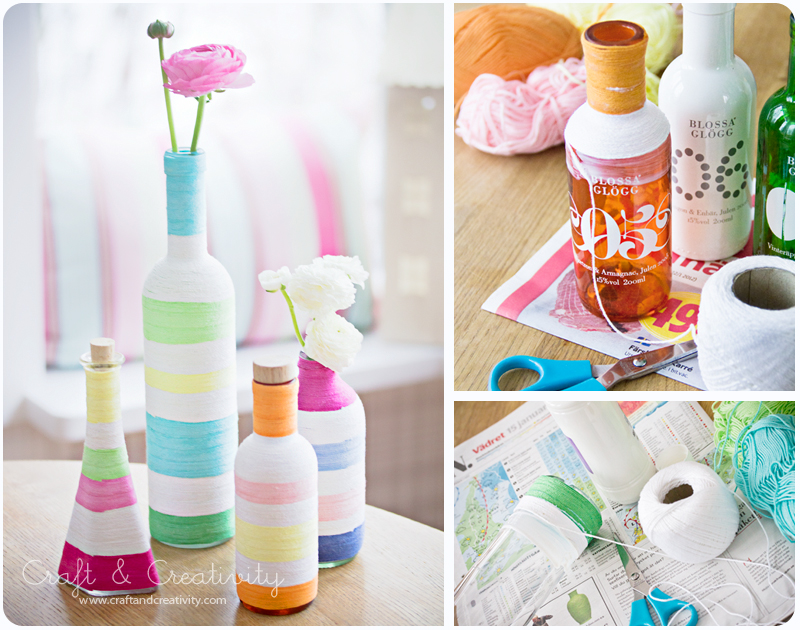
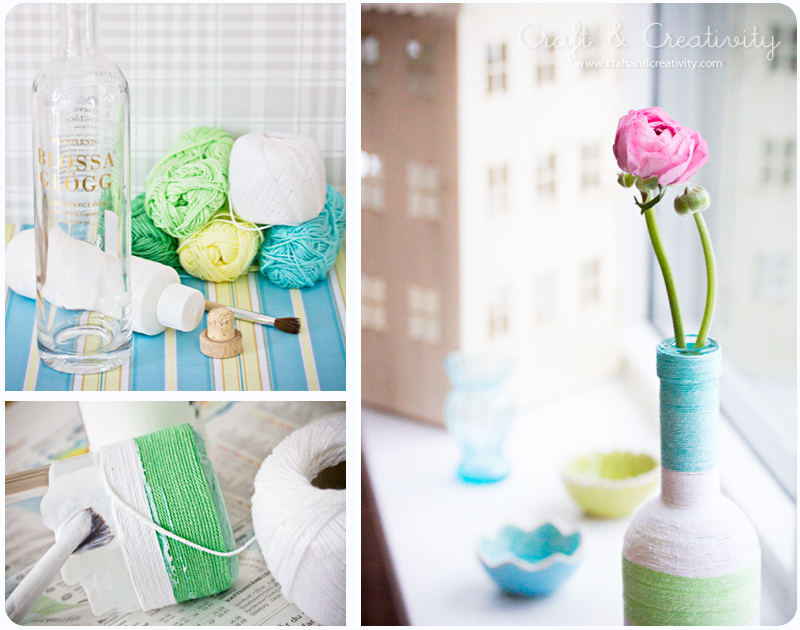
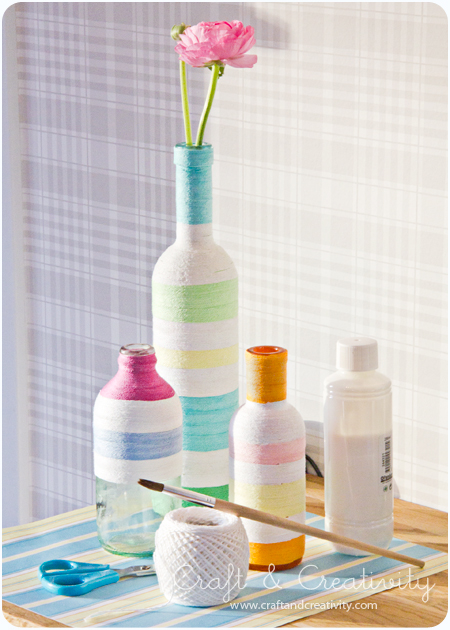
Allt du behöver är flaskor (gamla glöggflaskor är t ex perfekta!), garn, klister (t ex decoupagelim eller Mod Podge) och en sax. Det blir lite kladdigt men det är det värt!

Idén har jag inte hittat på själv utan jag fann inspiration på några olika ställen, t ex Style Me Pretty. Sedan gjorde jag lite som jag själv tyckte, som vanligt. 🙂 Detta pyssel gav mersmak och jag kunde nästan inte sluta. Började fundera på om man kan göra likadant med skokartonger, gamla konservburkar, krukor… Varför inte?

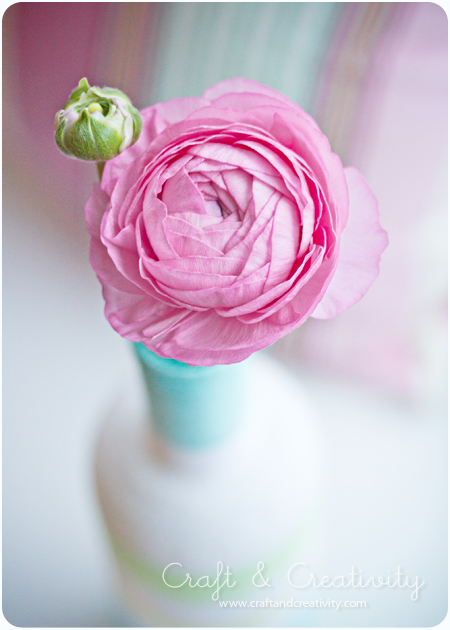
Och visst är det vackert med ranunkler? Den mest vårliga blomman av dem alla, i min mening. Faktum är att det känns som lite vår inne nu, trots snön som faller ute.
——-
All you need is some old bottles, yarn, glue (for example Mod Podge or decoupage glue) and a pair of scissors. It’s gets a bit messy, but it’s worth it! 

I didn’t come up with this idea all by myself. The inspiration comes Style me Pretty. I also improvised a bit, as usual. 🙂 I had so much fun making these, I could hardly stop. I began to wonder if it would work to do the same thing with shoe boxes, old tin cans, pots … Why not? 

And aren’t ranunculuses beautiful? It’s the most spring like flower of them all, in my opinion. In fact, it now feels a little bit like spring in the house, despite the snow falling outside.


Några användbara tips: 

  • Börja från toppen av flaskan och arbeta dig neråt, från den smalare delen till den tjockare. Det är enklast, märkte jag efter mitt första försök då jag gjorde tvärtom.
  • Vid byte av färg på garnet, se till att byta på samma ställe hela tiden och använd den sidan som “baksida”.
  • Pensla på lite klister i taget, det torkar ganska snabbt. Plus att du slipper bli kladdig i onödan.
  • Ju tjockare garn desto snabbare går det att täcka flaskorna. Men jag tycker samtidigt att det gav en fin effekt med mitt ganska tunna garn (för stickor nr 3). En smaksak, helt enkelt.
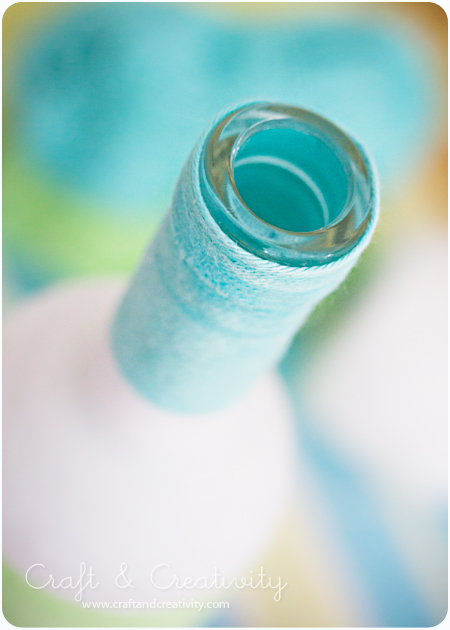
  • Om du vill använda flaskorna som vaser kan det vara en god idé att pensla lite genomskinlig lack eller vattenbeständigt klister högst upp på flaskhalsen när du virat klart, så att inte garnet lossnar när det kommer vatten på.

Some useful advice: 

  • Start from the top of the bottle and work your way down to the bottom. It the easiest way, I discovered after my first bottle when I did it the “hard” way. 
  • When changing the color of the yarn, make sure to change it in the same place all the time and use that side as the “back” of the vase.
  • Put on a little bit of glue at a time, it dries fairly quickly. Plus you won’t get your fingers too sticky. 
  • The thicker the yarn, the faster you will cover the bottles. But at the same time, I think my thin yarn turned out to give a pretty nice effect. It’s just a matter of taste, which ever you prefer. 
  • If you want to use the bottles as vases it can be a good idea to brush a little bit of transparent lacquer or water-resistant adhesive on top of the bottle neck when you finished wrapping, so that the yarn doesn’t comes off when exposed to water.


Kuddhus – House pillows

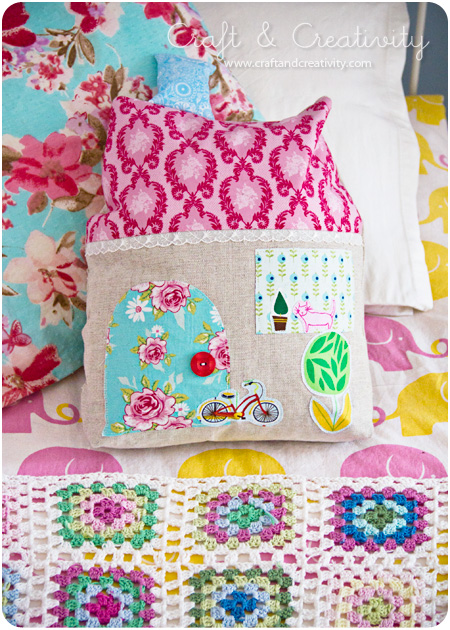
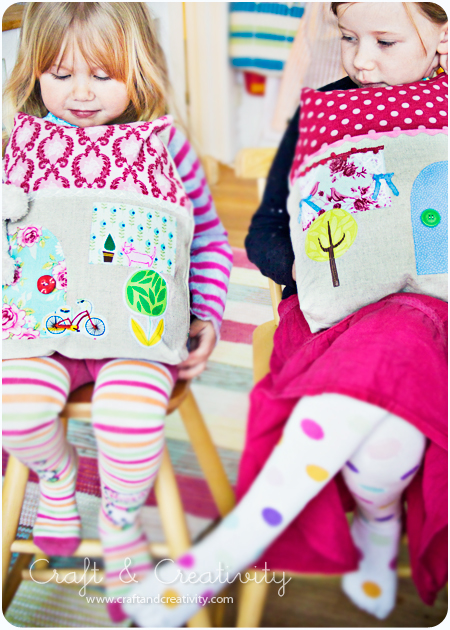
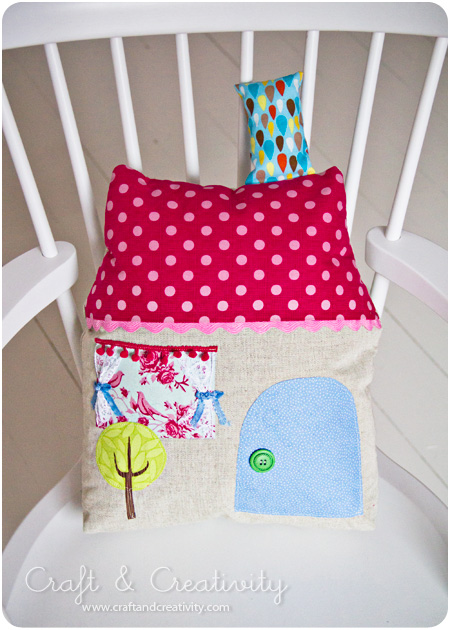
Innan jul sydde jag ett gäng miniatyrhus i tyg som vi gav bort till nära och kära. Mönstret hittade jag hos Retro Mama. Mina döttrar blev väldigt förtjusa i husen och ville ha sina egna hus, “-Men stora som kuddar, mamma!”. Tjejerna fick själva välja alla tyger och hjälpte mig klippa ut mönsterdelarna. Jag förstorade det ursprungliga mönstret 3 ggr.
———
A couple of months ago I made a bunch of small fabric house ornaments as Christmas gifts for friends and family. I found the pattern at Retro Mama. My daughters got very fond of the houses and wanted their one ones, “-But shaped like big pillows, Mom!” The girls chose the fabric for themselves and helped me to cut out pattern pieces. I enlarged the original pattern three times.


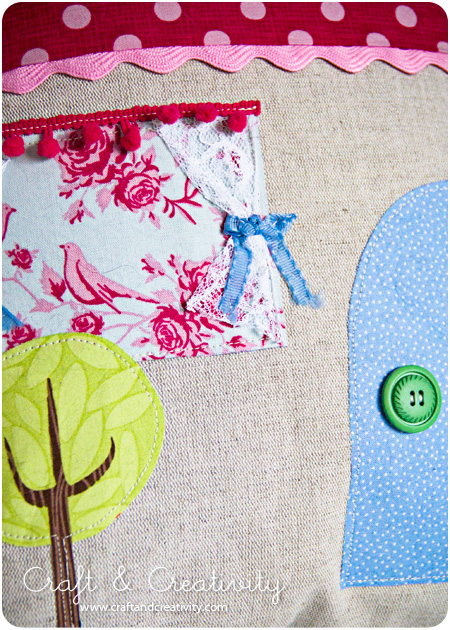
Jag använde mig av linnetyg och blommiga bomullstyger. Applikationerna har jag klippt ut från ett tyg som heter Spring Street in Blue. /
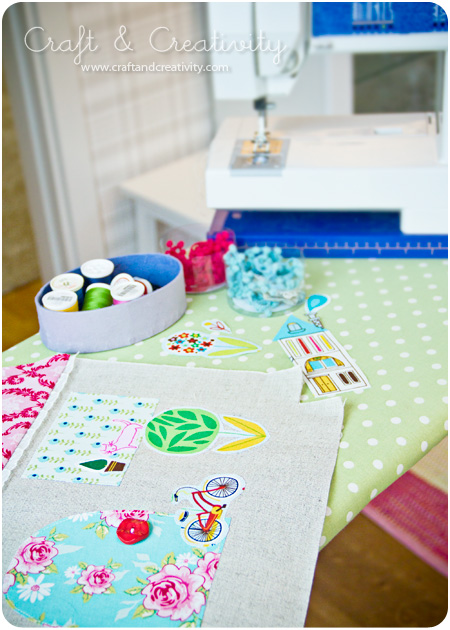
I used linen and flower patterned cotton fabric. The applications are cutouts from a fabric called Spring Street in Blue. 


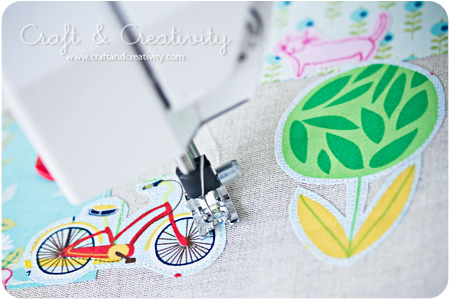
Jag använde Vlieseline på applikationerna, strök fast dem och sydde slutligen med raksöm runt. /
I used fusible interfacing on my applications and sewed around the edges with a straight stitch.

  
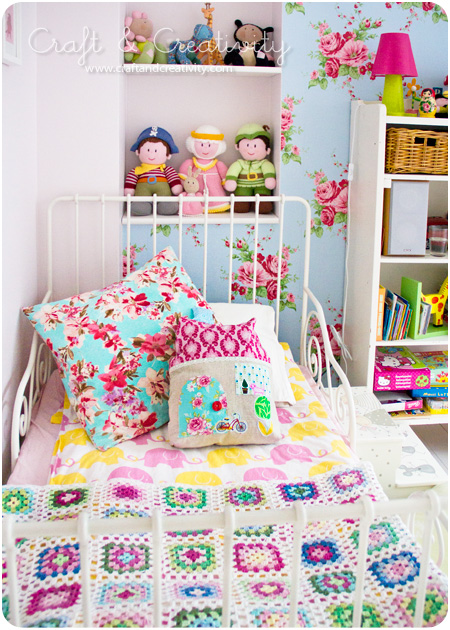
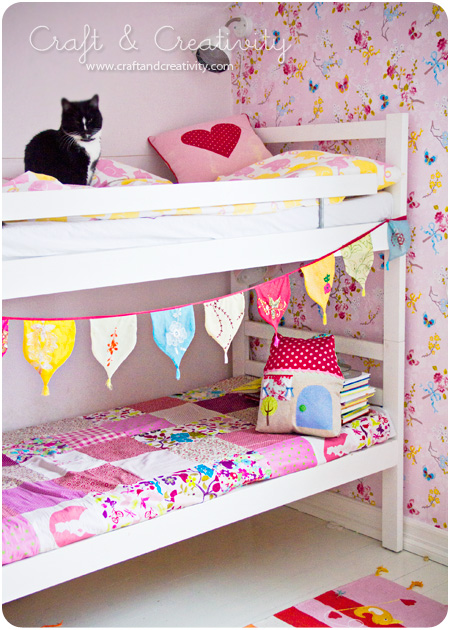
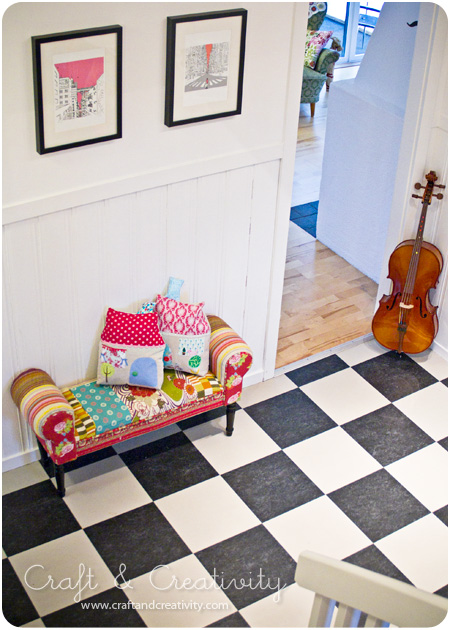
Kuddarna på plats i döttrarnas rum, till vänster lillasysters rum och till höger storasysters. Katten Matisse nyvaken i A:s säng, hans favoritplats i huset. /
The pillows in place in the girls’ room, the left one is baby sister’s room and the right one big sister’s. Matisse the cat newly awoken on top of A’s bed, his favorite place in the house.

  
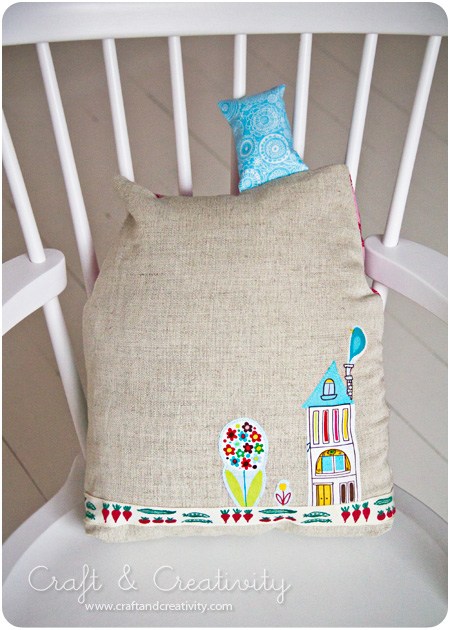
A fick gardiner på sitt fönster, som önskat. På baksidan av kuddarna sydde jag fast fler applikationer och ett gammalt tygband från min mammas gömmor. /
A got curtains on her window, as desired. On the back of the pillows I sewed some more applications and an old fabric trim originally from my mom’s stash. 


Vår hall. Bänken kommer från Åhléns. Golvet är från Ikea men finns inte i lager längre. Trycken på väggen är köpta på Etsy. /
Our hallway. The bench comes from a Swedish store called Åhléns. The floor tiles are Ikea, but is not in stock anymore. The prints on the wall are purchased on Etsy.

Jag fick ett mail… – A got a mail …

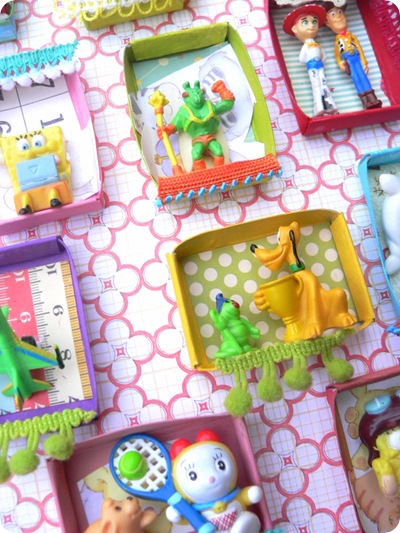
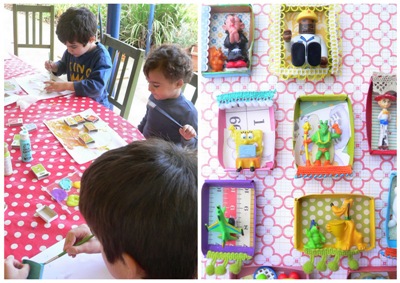
Jag fick precis ett mail som gjorde mig så glad. Ilis, en läsare från Israel och mamma till tre pojkar, har inspirerats av vår tändsticksaskkonst och gjort sina egna mini-tavlor. Titta vad fint:
———–
I just got an email that made me oh so happy. Ilis, a reader from Israel and mother of three boys, was inspired by our matchbox creations and she and the boys made ​​their own miniature art. Look how pretty: 

Gå gärna in på hennes blogg och kika. Hon gör många fina saker! Texten är på hebreiska men det går ju alltid att använda Google Translate eller helt enkelt bara njuta av bilderna. Vilken härlig känsla det är att ha kunnat inspirera någon! Nu kommer jag ha ett stort leende på mina läppar hela kvällen! 🙂
——-
Please visit her blog and have a peek. She makes many nice things! The text is in Hebrew, but you can always use Google Translate or simply just enjoy the pictures. What a great feeling it is to have been able to inspire someone! Now I’ll have a big smile on my face all evening! 🙂

Sminkhållare – Make-up holder

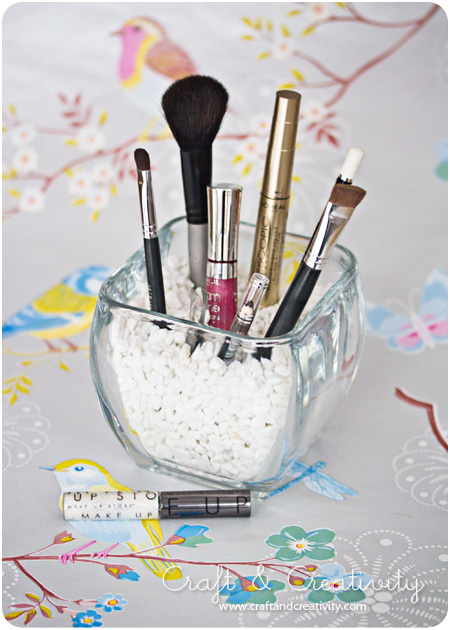
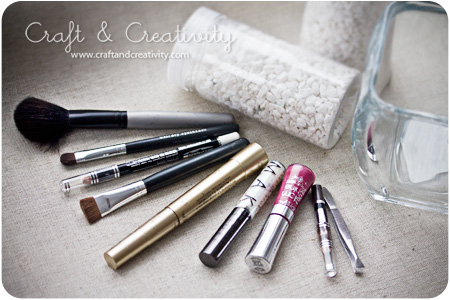
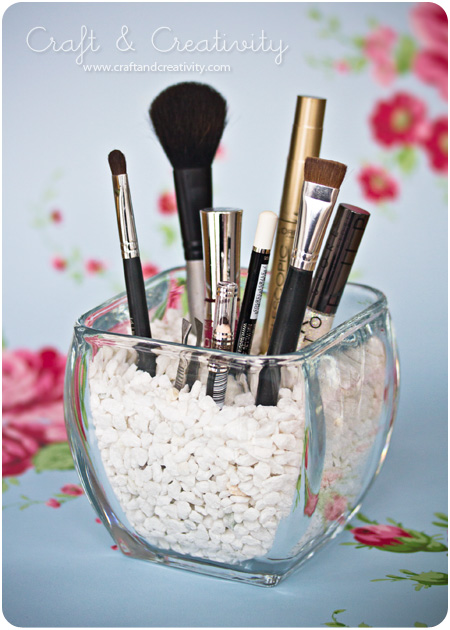
Det började med att jag ledsnade totalt på röran i mitt badrumsskåp. Sminkborstar låg huller om buller med mascaror, läppglans och kajaler. Först och främst var det dags att rensa. Bort med allt det gamla, det uttorkade och det som jag inte använder. Sedan tog jag en gammal kruka i glas som jag hade hemma, köpte två burkar vit sten på Åhléns och fyllde glaskrukan med det. Nu var det bara att sticka ner sminket i min nya sminkhållare. Det står stadigt och är tillräckligt snyggt för att stå framme i badrummet. Lätt att komma åt. Ordning & reda. Jag känner mig nöjd!
——–
It all started when I got tired of the utter mess in my bathroom cabinet. Make-up brushes lay mixed with mascaras, lip glosses and eyeliners. First of all, it was time to tidy up a bit. Away with everything old, dried up and the stuff I don’t use anymore. Then I took an old glass pot that I had at home. I bought two cans of white stones and filled the pot with it. Now I could easily place my make-up upright in my new make-up holder. It stands steady and is attractive enough to be displayed in the bathroom. Easy to access. Organized. I’m happy! 

Det finns förstås otaliga variationer på samma tema. Det går lika bra att använda en bred glasvas till exempel. Och som fyllning kan man ha kaffebönor som man spraymålar eller småsten i blandade färger (finns säkert att köpa på akvarieaffären) eller pärlor kanske?
——–
There must be an infinite number of variations on this theme. For example it should work just as well to use a wide glass vase. And as filling, you can use coffee beans that you spray paint or pebbles in assorted colors (you could probably get that at the zoo store) or beads perhaps? 

Trä-gaffel-dockor – wooden fork dolls

För ett par månader sedan snubblade jag över en bild på så söta dockor gjorda av engångsgafflar i trä. Det var på Pinterest jag hittade bilden och källan uppgavs vara MotherBabyEarth som i sin tur hittat bilden på Amy Powers’ Inspire co. Där hittade jag massor med inspiration på fina pyssel men ingen bild eller beskrivning på just dessa dockor och mitt detektivarbete gav alltså ingen ledtråd till hur dockorna var tillverkade.

När jag en tid senare, av en slump, hittade trägafflar på PUB för 1 kr styck så bestämde jag mig för att försöka göra mina egna dockor. Och vad roligt det var! Kul när man kan låta fantasin flöda och använda många olika material. Barnen blev dessutom glada för sina nya handdockor!

Här följer en beskrivning på hur jag gjorde mina trä-gaffel-dockor. Det går också precis lika bra att improvisera! Använd de material som du har hemma. 🙂
———–
A few months ago I stumbled across a photo of some adorable dolls made from disposable wooden forks. I found the image through Pinterest and the followed the link to  MotherBabyEarth, where the image in turn was reported to origin from Amy Powers’ Inspire co. There I found lots of inspiration on great crafts but no picture or description on these specific dolls. In other words, my detective work gave no clue to how exactly the dolls were made. 

When I by chance, some time later, found some wooden forks at a store in Stockholm for 1 SEK each (about 10 cent), I decided to try making my own dolls using my imagination. And it was so much fun! It’s great when you can let your imagination run wild using a variety of materials. Besides, the kids were very excited for their new hand puppets!  

Here is a description of how I made ​​my wooden fork dolls. Or just simply improvise and use the materials available for you at home. 🙂

  
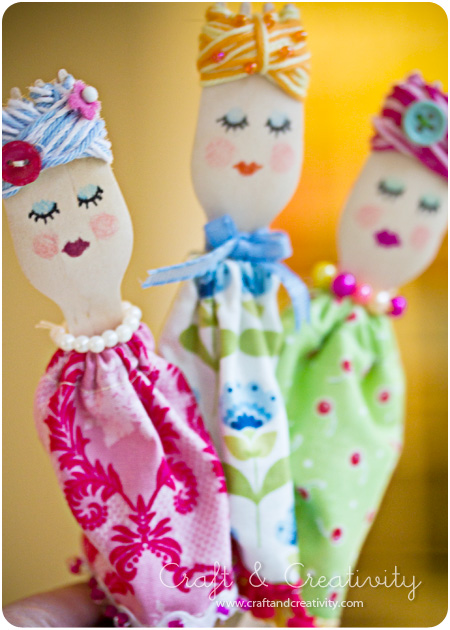
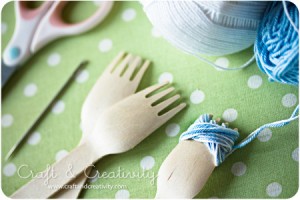
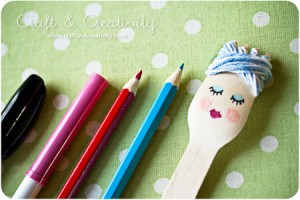
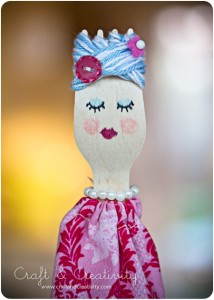
Vira garn runt gaffelns tänder. Jag använde mig av två olika färger samtidigt. Måla mun och ögon med smala tuschpennor och lägg på lite rouge och ögonskugga med färgpennor eller kritor. /
Wrap the yarn around the tines of the fork. I used two different colors of yarn. Paint the mouth and eyes with thin felt pens and put on a little bit of blush and eye shadow with color pencils or crayons. 

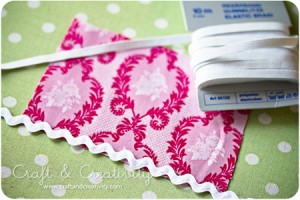
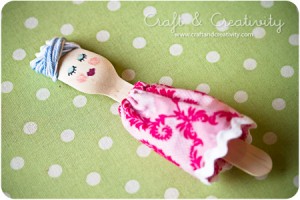
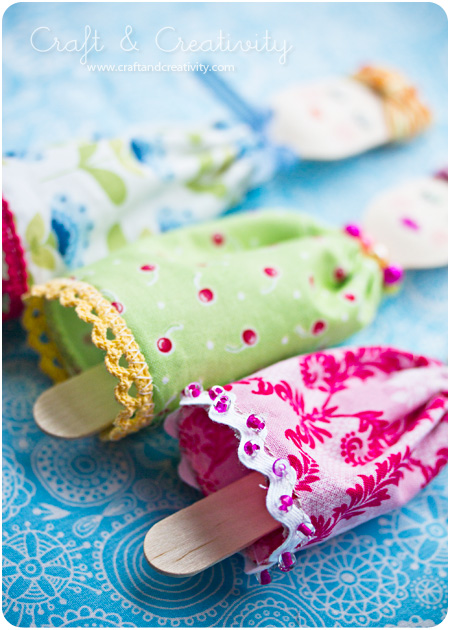
  Klipp ut en bit tyg, ca 13 cm bred och 10 cm hög (beroende på storlek på gaffel). Sicksacka runt hela tygstycket. Sy fast ett fint band längst ner och fålla högst upp. Trä ett resårband i fållen, spänn åt resåren ordentligt och sy ihop kjolen. Trä kjolen på dockan. /
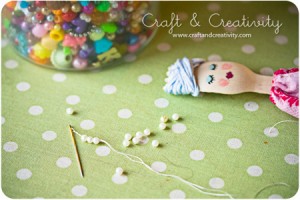
Cut a piece of fabric, about 13 cm (5″) wide and 10 cm (4″) high (depending on the size of the fork). Zigzag around the edges. Attach a pretty ribbon at the bottom and hem the top edge. Thread an elastic through the hem, securely tighten the elastic and sew the skirt together at the back. Place the skirt on the doll.

  
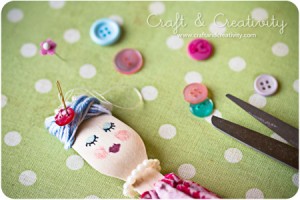
Gör ett litet halsband av pärlor eller knyt ett fint band runt halsen. Pynta håret med knappar, filtblommor och/eller små pärlor. /
Make a miniature necklace out of small beads or tie a pretty ribbon around the neck. Decorate her hair with buttons, felt flowers and / or small beads.

  
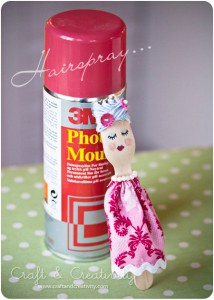
Klart en fin dam ska ha hårspray i håret… Jag sprayade “håret” med lite sprayklister för att garnet inte skulle åka av gaffeln i första taget. /
Needless to say, I nice lady must have some hairspray to hold her pretty hairdo … I sprayed the “hair” with a little bit of spray adhesive so that the yarn wouldn’t so easily slip off the fork. 


Fast dockan var “klar” kunde jag inte låta bli att pynta lite till… Pärlor kan man aldrig ha för mycket av. /
Even thought the doll were “ready”, I couldn’t stop myself from decorating her a bit more… A girl can never have to much jewelry. 


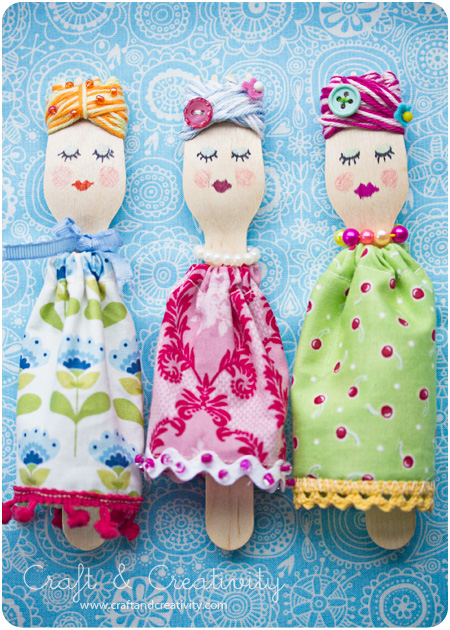
Möt tre fina damer, redo att gå på te-kalas. “-Mamma!” utbrast fyraåringen när hon såg dem. “-Sover de hela tiden?“… /
Meet three posh ladies, ready for their Afternoon Tea. “-Mom!” exclaimed my four-year-old when she saw them.”-Do they sleep all the time?” … 

Blogg-inspiration – Blog inspiration

Jag måste bara ta en paus från jobbet och tipsa er om Messy Jesse’s blogg som jag hittade tidigare idag. Kolla in hennes pysselrum till exempel: /
I just have to take a break from work and tell you about Messy Jesse’s blog that I found earlier today. Check out her craft room for example: 


Alla bilder i detta inlägg tillhör Messy Jesse. /
All pictures in this post belong to Messy Jesse

Nu fick jag lust att göra om mitt eget pysselrum. 🙂 /
Now I got a sudden urge to redecorate my own craft studio. 🙂 

Piffad klänning med virkad blomma –
Crochet embellished dress

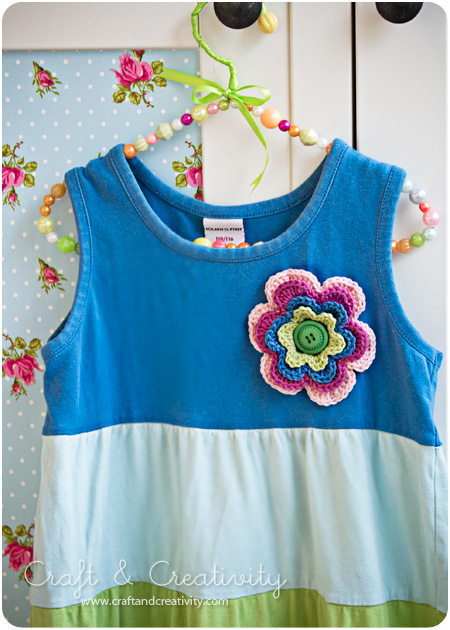
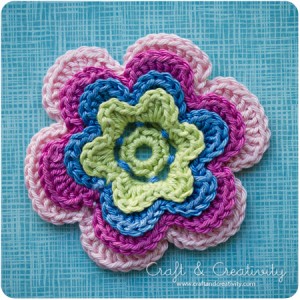
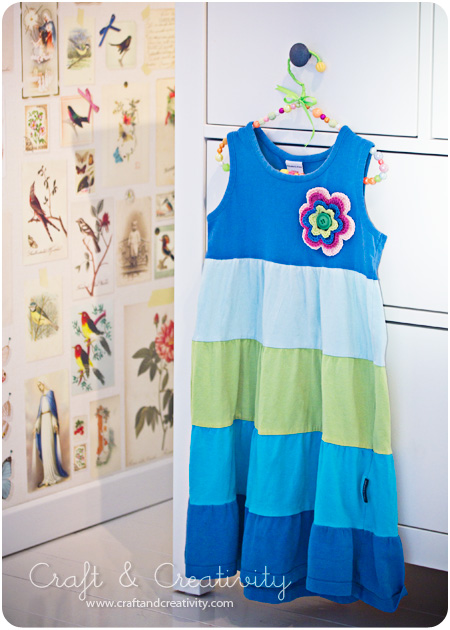
Min yngsta dotter har ärvt en klänning av storasyster och för att den skulle kännas lite mer som “ny” piffade jag till den med en virkad blomma. Det var populärt och klänningen skulle absolut bäras på dagis och visas upp för kompisarna.
———–
My youngest daughter has shared a dress from her older sister and to make it feel a bit more “new” I embellished it with a crocheted flower. It turned out to be a success and she insisted to wear the dress to day care and show it to her friends. 


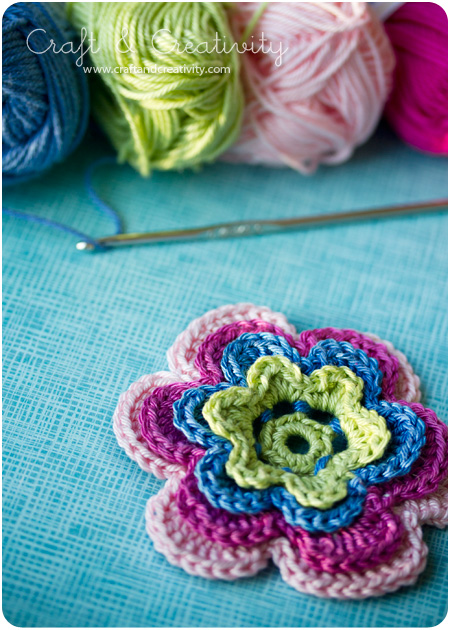
Mönstret kommer från Sols(tr)icke och är på norska och engelska. /
The pattern comes from Sols(tr)icke and is available in Norwegian and English. 

  
Baksidan och framsidan av blomman. Båda är fina, tycker jag. /
The back and the front of the flower. I think they both look pretty. 


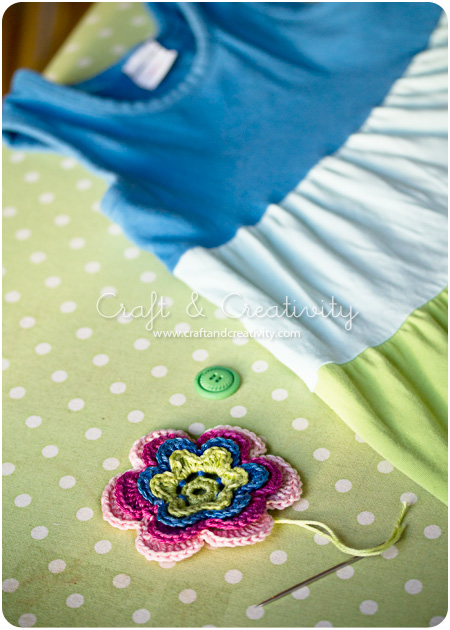
Jag sydde fast blomman på klänningen och fäste en knapp i mitten. /
I attached the flower to the dress and placed a button in the middle. 


Galgen är ett gammalt pyssel (se beskrivning här), byrån kommer från Ikea (“Hemnes”) och tapeten i bakgrunden är från Pip Studio. /
The kid’s hanger is an old project of mine (see description here), the chest of drawers is from Ikea (“Hemnes”) and the wallpaper in the background is from Pip Studio.

Tygelefanter – Fabric Elephants

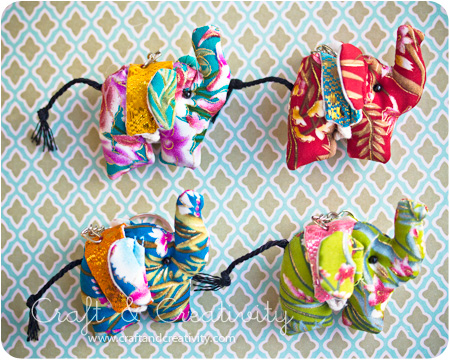
Jag köpte dessa små sötnosar i Thailand. Som jag skrivit om tidigare så gillar jag verkligen elefanter. 🙂 Jag tror jag ska ge mig på att sy något liknande själv. Borde inte vara alltför komplicerat, eller vad tror ni?
——–
I bought these little sweethearts in Thailand. I really like elephants, as I’ve told you about before. 🙂 I think I’ll try to sew something similar myself. Should’t be too difficult, or what do you think?

Regntavla – Rain painting

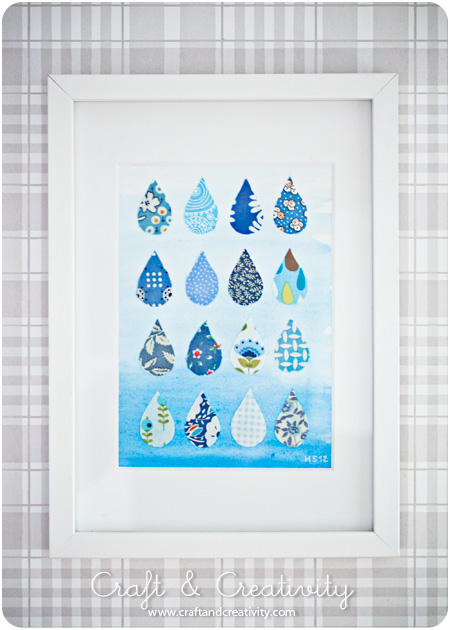
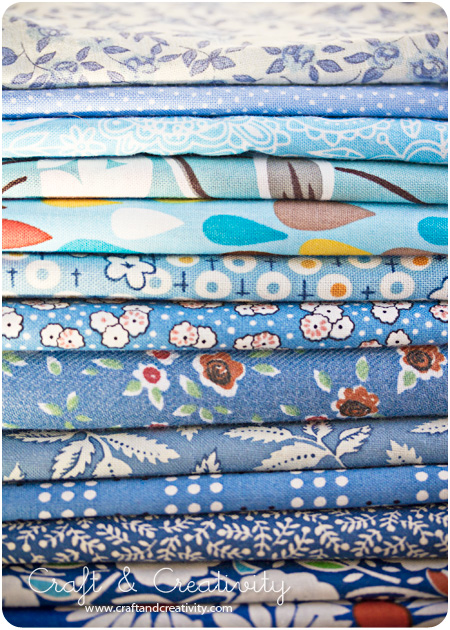
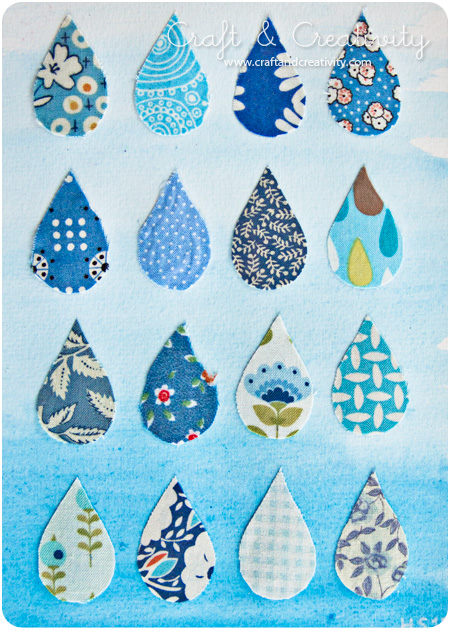
Jag är en samlare. Av pysselmaterial. Det kanske ni redan har märkt… 🙂 Bland annat har jag en hel del tyger i olika mönster som jag samlat på mig genom åren. Härom dagen fick jag en idé om att göra en regntavla med droppar av tyg i olika blåa nyanser. Nu är den klar och jag tror faktiskt den ska bli en present till en fin vän (hoppas hon inte ser det här).

Om du vill göra en liknande tavla så behöver du: Ram, (passepartout), akvarellpapper, pensel, akvarellfärg, tyger i olika mönster och nyanser, sax och klister.

Man kan ju även tänka göra ett kollage med röda hjärtan t ex. Eller fjärilar och då kan man använda massor med olika färger. Det är bara fantasin som sätter gränser, som vanligt.
———-
I’m a collector. Of craft materials. Perhaps you’ve already noticed … 🙂 For example, I’ve got a bunch of fabrics in different patterns that I’ve collected over the years. I got an idea the other day to make a rain painting with drops of fabrics in various shades of blue. Now it’s ready and I think it’s gonna be a gift for a good friend of mine (hope she doesn’t see this). 

If you want to make a similar painting, you will need: A frame, (a mat/mount), watercolor paper, a brush, watercolor paint, fabrics in various patterns and shades, scissors and glue.

One can also imagine making a collage with red hearts for example. Or butterflies, and then you can use lots of different colors. It’s all up to your imagination. 


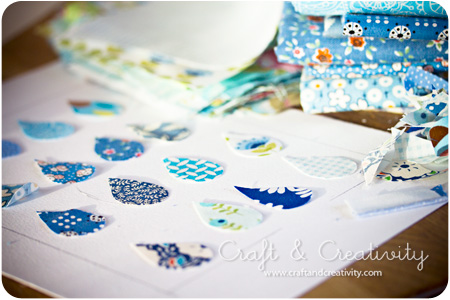
Börja med att klippa ut en mall av en droppe som du känner dig nöjd med. Måtta hur många droppar som får plats på ditt papper (jag ritade ut en stödlinje för att se var passepartouten skulle hamna). Använd mallen och klipp ut önskat antal droppar från dina utvalda tyger. /
Start by cutting out a template of a drop form you like. Measure how many drops will fit on to your paper (I sketched a fine line to see the edges of the mat/mount). Use the template to cut out the desired number of drops from your chosen fabrics.  


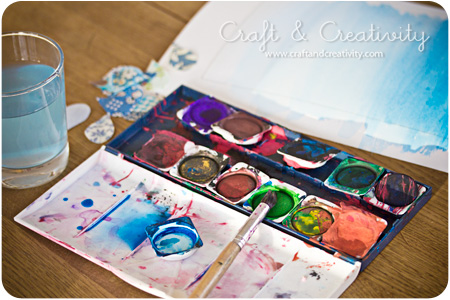
Måla en bakgrund på ditt akvarellpapper. Jag gjorde min lite tonad, större andel vatten högst upp på papperet och större andel färg längst ner. Låt papperet torka. /
Paint a background on your watercolor paper. I did mine a bit toned, using a larger proportion of water at the top of the paper and more color at the bottom. Allow the paper to dry.


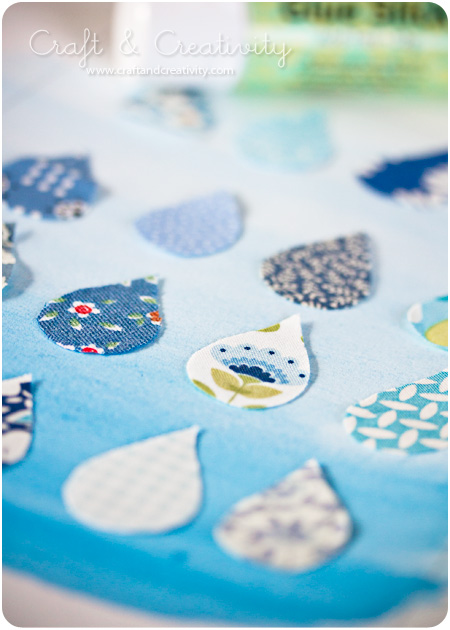
Använd limstift eller annat lämpligt lim och klistra fast dina droppar, jämnt fördelade på papperet. /
Use a glue stick or another suitable adhesive to distribute your drops evenly on the paper.  

  
Från ax till limpa på ett kick. Nu är det bara att rama in. /
From start to finish in a snap. The only thing left is the framing.

Fotoramar av kapsyler –
Bottle cap photo frames

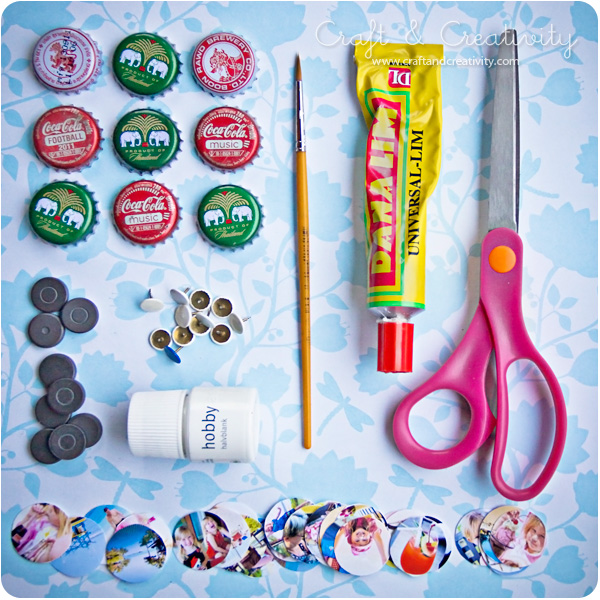
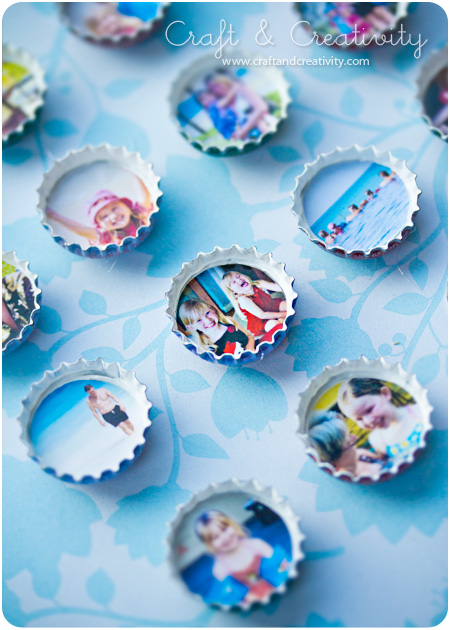
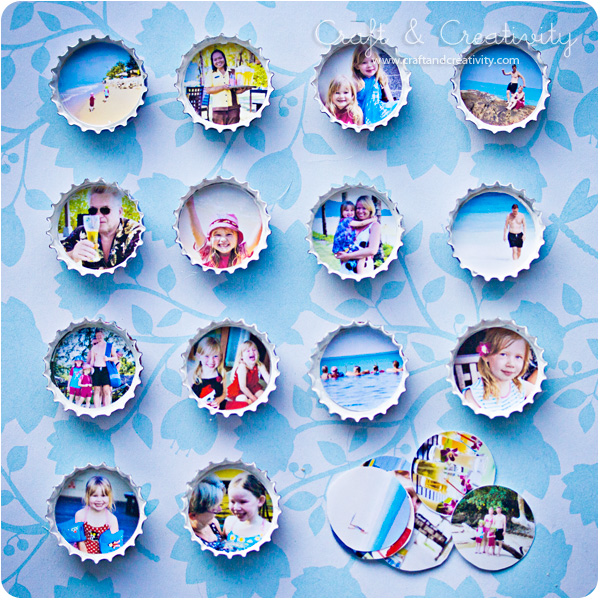
Jag fick med mig lite kapsyler hem från vår Thailand-resa i julas. Inspirerad av ett Martha Stewart-pyssel så fick jag för mig att jag skulle göra miniatyrramar för några av våra Thailands-bilder. Så här gick jag till väga:
—–
I brought some bottle caps back with me from our trip to Thailand. Inspired by a Martha Stewart craft, I decided to make some miniature picture frames for our holiday photos. This is how I went about making them:  


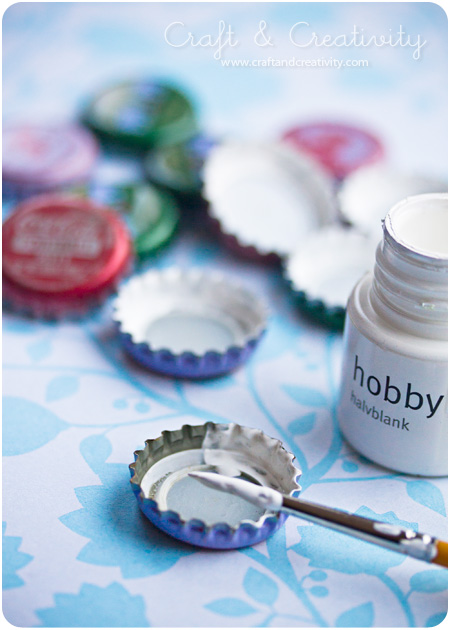
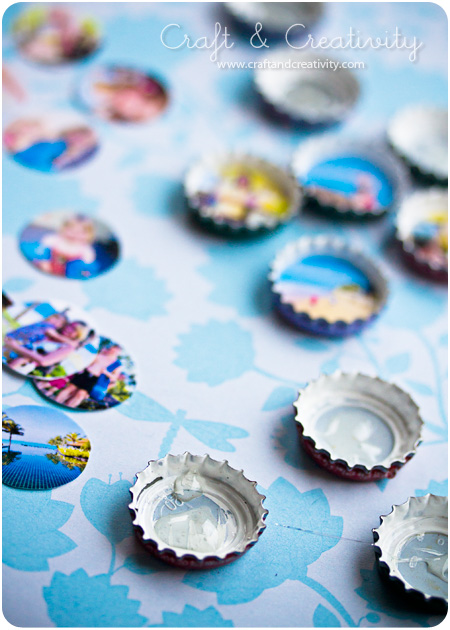
Först och främst målade jag insidan av kapsylerna med två lager vit hobbyfärg. /
First of all, I painted the inside of the caps with two coatings of white hobby paint. 


Jag mätte insidan av kapsylen till 2,5 cm i diameter. Därefter klippte jag mina utskrivna fotografier i rundlar av samma mått. När färgen på kapsylerna torkat droppade jag lite klister i mitten och limmade fast mina foton. /
I measured the inside of the cap to be 2.5 cm (1 inch) in diameter. Then I cut my printed photos in circles with the same dimensions. When the color inside the caps had dried I dripped a little bit of glue in the middle and glued my photos in place. /


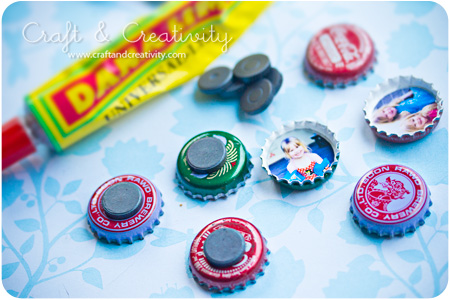
Jag vände på kapsylerna och limmade fast magneter på baksidan. /
I turned the caps around and glued magnets to the back. 


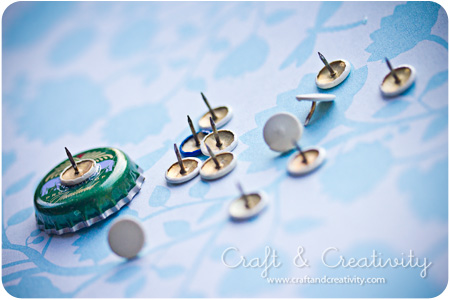
Ett alternativ till magneter är att limma fast häftstift om man vill kunna sätta fotoramarna på en anslagstavla t ex. /
An alternative to magnets is to glue thumbtacks to the back if you want to place your photo frames on a bulletin board for example. /